Do you want to create personalized gifts, home decor, or unique fashion pieces? How To Print Photos On Material opens a world of creative possibilities, and dfphoto.net is here to guide you through every step. Discover the art of image transfer, learn about suitable materials, and explore advanced techniques for professional-looking results, adding visual storytelling, photographic prints, and visual artistry to your skill set.
1. What Materials Can You Print Photos On?
You can print photos on various materials, each offering a unique aesthetic and practical application. Selecting the right material will significantly impact the final product’s look, feel, and durability.
- Cotton: Favored for its softness, breathability, and ability to absorb ink well, making it ideal for apparel, quilts, and home decor.
- Linen: Valued for its durability, texture, and natural look, providing a rustic feel ideal for wall hangings, tea towels, and decorative items.
- Silk: Admired for its luxurious feel and vibrant color reproduction, suitable for scarves, pillowcases, and high-end fashion pieces.
- Polyester: Known for its durability, wrinkle resistance, and excellent colorfastness, perfect for outdoor banners, sportswear, and items needing frequent washing.
- Canvas: Chosen for its robust texture and ability to mimic traditional art, making it great for framed prints, tote bags, and durable home decor.
Understanding the properties of each material ensures your chosen photo printing method achieves the best results, tailored to the intended use of the final product.
2. What Are The Best Methods For Printing Photos On Fabric?
Printing photos on fabric involves several methods, each with unique benefits and considerations.
2.1. Iron-On Transfers
Iron-on transfers are a popular, simple method for transferring images to fabric.
How It Works
- Print your chosen image onto transfer paper using an inkjet printer.
- Cut out the image, leaving a small border.
- Place the transfer paper face down on the fabric.
- Use a hot iron to apply pressure and heat evenly across the paper for the recommended time.
- Allow the paper to cool, then peel it off to reveal the transferred image.
Pros
- Easy to Use: Requires minimal equipment.
- Quick Results: Provides immediate image transfer.
- Affordable: Transfer paper and an iron are relatively inexpensive.
Cons
- Durability: Images may fade or crack over time with washing.
- Feel: The transfer can leave a slightly stiff texture on the fabric.
- Color Limitations: Best suited for bold, simple designs as fine details may be lost.
2.2. Direct-To-Garment (DTG) Printing
DTG printing involves directly printing an image onto fabric using specialized inkjet technology.
How It Works
- Prepare the fabric by pre-treating it to help the ink adhere better.
- Load the fabric into the DTG printer.
- The printer sprays the ink directly onto the fabric, creating a detailed image.
- Heat-set the print to cure the ink, ensuring it bonds with the fabric.
Pros
- High Detail: Capable of printing intricate designs and photographs with excellent clarity.
- Soft Feel: The ink integrates well with the fabric, leaving a soft, natural feel.
- Color Accuracy: Delivers vibrant and accurate color reproduction.
Cons
- Cost: DTG printers are expensive, making it a more costly option.
- Fabric Limitations: Works best on 100% cotton or high-cotton blends.
- Pre-Treatment: Requires pre-treatment of the fabric, adding an extra step to the process.
2.3. Sublimation Printing
Sublimation printing uses heat to transfer dye onto synthetic fabrics.
How It Works
- Print your image onto sublimation paper using sublimation inks.
- Place the printed paper onto the fabric.
- Use a heat press to apply heat and pressure. The ink turns into a gas and bonds with the fabric fibers.
- Remove the paper to reveal the permanent, vibrant image.
Pros
- Durability: Images are highly durable and resistant to fading, cracking, and peeling.
- Vibrant Colors: Produces bright, vivid colors that are embedded into the fabric.
- Soft Feel: Leaves the fabric soft to the touch as the dye becomes part of the material.
Cons
- Fabric Limitations: Primarily works with polyester or high-polyester blends.
- Color Restrictions: Only works on light-colored fabrics as the dye is transparent.
- Equipment Cost: Requires specialized equipment, including a sublimation printer and heat press.
2.4. Screen Printing
Screen printing involves pressing ink through a stenciled mesh screen onto the fabric.
How It Works
- Create a stencil of your design on a mesh screen.
- Place the screen onto the fabric.
- Apply ink to the screen and use a squeegee to press the ink through the stencil onto the fabric.
- Remove the screen and heat-set the ink to cure it.
Pros
- Durability: Produces long-lasting prints that withstand washing and wear.
- Versatility: Suitable for various fabrics, including cotton, polyester, and blends.
- Cost-Effective for Large Runs: Economical for printing large quantities of the same design.
Cons
- Setup Costs: Requires a significant upfront investment in equipment and supplies.
- Complexity: More complex process that requires practice and skill.
- Limited Detail: Not ideal for highly detailed or photographic images.
2.5. Fabric Markers and Paint
Fabric markers and paints allow you to directly draw or paint images onto fabric.
How It Works
- Sketch your design onto the fabric with a pencil.
- Use fabric markers or paints to fill in the design.
- Allow the paint to dry completely.
- Heat-set the design with an iron to make it permanent.
Pros
- Creative Control: Offers complete creative control over the design.
- Simple and Accessible: Requires minimal supplies and equipment.
- Ideal for Small Projects: Perfect for personalizing small items like patches, bags, and clothing.
Cons
- Durability: May fade or crack over time with washing.
- Detail Limitations: Not suitable for complex or highly detailed designs.
- Time-Consuming: Can be time-consuming, especially for larger designs.
Selecting the appropriate method depends on your budget, the complexity of the design, the type of fabric, and the desired durability of the final product. For high-quality results and a range of fabric options, dfphoto.net offers resources and guidance to help you choose the best printing method for your needs.
3. How To Prepare Your Fabric For Photo Printing?
Preparing your fabric properly is crucial for achieving the best possible results when printing photos on material. Proper preparation ensures the ink adheres well, the colors remain vibrant, and the final product looks professional.
3.1. Washing and Ironing
- Wash the Fabric: Always start by washing the fabric to remove any sizing, finishes, or dirt that could interfere with the printing process. Use a gentle detergent and wash in cold water to prevent shrinking or fading.
- Dry the Fabric: Tumble dry on low heat or hang to dry. Avoid using fabric softeners, as they can leave a residue that affects ink adhesion.
- Iron the Fabric: Iron the fabric to remove any wrinkles or creases. Use the appropriate heat setting for the fabric type to avoid scorching. A smooth surface is essential for even ink distribution.
3.2. Pre-Treating
Pre-treating the fabric can significantly improve the quality and durability of the printed image.
- Commercial Pre-Treatment Sprays: Available for various printing methods, such as DTG and sublimation. Follow the manufacturer’s instructions for application. Generally, spray the fabric evenly and allow it to dry.
- DIY Pre-Treatment: For some methods, such as iron-on transfers, a simple pre-treatment can be made using a mixture of water and vinegar (1:1 ratio). Spray lightly, let it dry, and then iron the fabric.
- Purpose of Pre-Treatment: Pre-treatment helps the ink bond better with the fabric fibers, resulting in more vibrant colors and a longer-lasting print.
3.3. Stabilizing
Stabilizing the fabric prevents it from shifting during the printing process.
- Spray Adhesive: Lightly spray the back of the fabric with a temporary fabric adhesive. This will help hold it in place on the printing surface.
- Interfacing: Iron-on interfacing can be applied to the back of thin or stretchy fabrics to provide extra stability.
- Hooping: When using embroidery machines or screen printing, secure the fabric in a hoop to keep it taut and prevent movement.
3.4. Testing
Before printing your final image, it’s always a good idea to test the printing process on a small scrap of the same fabric.
- Print a Test Swatch: Print a small test image to check the color accuracy, ink adhesion, and overall quality of the print.
- Wash the Test Swatch: After printing, wash the test swatch to see how well the image holds up. This will help you adjust your settings and methods for the final print.
By following these preparation steps, you can ensure that your fabric is ready for photo printing, resulting in a high-quality, durable, and visually appealing final product. For more detailed guidance and product recommendations, visit dfphoto.net.
4. How To Choose The Right Photo For Fabric Printing?
Choosing the right photo is essential to achieving stunning results when printing photos on material. The quality, resolution, and color palette of your chosen image will significantly impact the final product.
4.1. Resolution and Size
- High Resolution is Key: Always start with the highest resolution image possible. A minimum of 300 DPI (dots per inch) is recommended for fabric printing to ensure a sharp, clear image.
- Check Image Size: Ensure the image is large enough to fill the desired print area without becoming pixelated. Enlarge the image in a photo editing software to the size you want to print and check for any loss of detail.
- Avoid Low-Resolution Images: Images from social media or screenshots are often low resolution and will appear blurry or pixelated when printed on fabric.
4.2. Color and Contrast
- Vibrant Colors: Choose images with vibrant colors that will stand out on the fabric. Keep in mind that colors may appear slightly different on fabric than on a screen.
- Good Contrast: Ensure the image has good contrast between light and dark areas. This will help the details pop and prevent the image from looking washed out.
- Color Mode: Convert your image to the correct color mode for printing. RGB is typically used for digital printing, while CMYK is used for professional printing services.
4.3. Image Type
- Photographs: Work well for fabric printing, especially when high-quality and high-resolution.
- Graphics and Illustrations: Can also be printed on fabric, but make sure they are saved in a vector format (such as SVG or EPS) to maintain sharpness and detail.
- Avoid Watermarks and Copyrighted Images: Always use images that you have the right to print. Avoid using images with watermarks or copyrighted material.
4.4. Fabric Compatibility
- Light vs. Dark Fabrics: Consider the color of the fabric you will be printing on. Light fabrics work well with most images, while dark fabrics may require adjustments to the image to ensure the colors show up properly.
- Fabric Texture: Take into account the texture of the fabric. Highly textured fabrics may affect the sharpness of the printed image.
- Test Prints: Before printing your final image, do a test print on a scrap of the same fabric to see how the image looks and make any necessary adjustments.
4.5. Image Editing
- Adjust Brightness and Contrast: Use photo editing software to adjust the brightness and contrast of the image to ensure it looks good on fabric.
- Sharpen the Image: Sharpening the image can help bring out the details and make it look more crisp when printed.
- Remove Blemishes: Clean up any blemishes or imperfections in the image before printing.
By carefully selecting and preparing your photo, you can ensure that the final printed image on fabric is vibrant, clear, and visually appealing. For more tips and resources on photo editing and printing, visit dfphoto.net.
5. What Are Some Creative Project Ideas For Printing Photos On Material?
Printing photos on material opens up a world of creative possibilities, allowing you to personalize items, create unique gifts, and express your artistic vision.
5.1. Personalized Apparel
- T-Shirts: Design custom t-shirts with family photos, vacation memories, or artistic designs. Use iron-on transfers, DTG printing, or screen printing for professional results.
- Hats: Personalize hats with photos, logos, or monograms. Sublimation printing works well for polyester hats, while embroidery is a great option for adding texture and dimension.
- Bags: Create custom tote bags, backpacks, or purses with printed photos. Canvas bags are ideal for durability, and you can use iron-on transfers, DTG printing, or fabric markers for unique designs.
5.2. Home Decor
- Pillowcases: Design custom pillowcases with family photos, pet portraits, or artistic patterns. Cotton or linen pillowcases can be personalized using iron-on transfers, DTG printing, or fabric paints.
- Wall Hangings: Create unique wall art by printing photos on fabric and framing them or hanging them as tapestries. Canvas or linen are excellent choices for wall hangings, and you can use sublimation printing or fabric paints to create stunning visuals.
- Quilts: Make personalized quilts with fabric squares featuring family photos, vacation memories, or special occasions. Cotton fabric is ideal for quilting, and you can use iron-on transfers or DTG printing to add photos to the fabric squares.
5.3. Personalized Gifts
- Photo Albums and Scrapbooks: Create custom photo albums and scrapbooks with fabric covers featuring printed photos. Linen or cotton fabric can be used for the covers, and you can use iron-on transfers or fabric markers to add personalized details.
- Keychains: Design custom keychains with printed photos of loved ones, pets, or special places. Sublimation printing works well for polyester keychains, allowing you to create durable and vibrant designs.
- Coasters: Personalize coasters with printed photos to protect your furniture and add a personal touch to your home. Cork coasters with fabric tops can be customized using iron-on transfers or fabric paints.
5.4. Special Occasions
- Wedding Favors: Create personalized wedding favors with printed photos of the happy couple. Fabric pouches filled with treats or small gifts can be customized using iron-on transfers or fabric markers.
- Birthday Banners: Design custom birthday banners with photos of the birthday person. Polyester or canvas banners can be printed using sublimation printing or fabric paints for a festive touch.
- Holiday Decorations: Make personalized holiday decorations with printed photos of family and friends. Fabric ornaments, stockings, and table runners can be customized using iron-on transfers, DTG printing, or fabric paints.
5.5. Artistic Projects
- Mixed Media Art: Incorporate printed photos into mixed media art projects, combining fabric, paint, and other materials to create unique and textured artworks.
- Fabric Collages: Create fabric collages with printed photos, layering different fabrics and images to create visually stunning compositions.
- Wearable Art: Design wearable art pieces, such as fabric jewelry, scarves, and accessories, featuring printed photos and artistic embellishments.
These creative project ideas demonstrate the versatility of printing photos on material, allowing you to create personalized, unique, and meaningful items. For more inspiration, tutorials, and resources, visit dfphoto.net.
6. How To Care For Your Photo-Printed Fabric?
Proper care is essential to prolong the life and maintain the quality of your photo-printed fabric items. Following these guidelines will help ensure your creations look their best for years to come.
6.1. Washing Instructions
- Check the Printing Method: Different printing methods require different care instructions. Always check the manufacturer’s guidelines for the specific printing method used.
- Turn Inside Out: Before washing, turn the fabric item inside out to protect the printed image from direct abrasion.
- Use Cold Water: Wash in cold water to prevent fading and bleeding of colors. Hot water can cause the ink to break down and the image to deteriorate.
- Gentle Detergent: Use a mild, gentle detergent that is free of bleach and harsh chemicals. Avoid using fabric softeners, as they can leave a residue that affects the print quality.
- Gentle Cycle: Wash on a gentle cycle to minimize agitation and prevent damage to the printed image.
- Avoid Overloading: Do not overload the washing machine, as this can cause excessive friction and damage the print.
6.2. Drying Instructions
- Air Dry: The best way to dry photo-printed fabric is to air dry it. Hang the item to dry in a shaded area away from direct sunlight.
- Tumble Dry on Low: If you must use a dryer, tumble dry on low heat. High heat can cause the image to crack, fade, or peel.
- Remove Promptly: Remove the item from the dryer as soon as it is dry to prevent wrinkles and minimize heat exposure.
6.3. Ironing Instructions
- Iron Inside Out: Always iron the fabric item inside out to protect the printed image.
- Use a Low Heat Setting: Use a low heat setting and avoid direct contact with the printed area.
- Use a Pressing Cloth: Place a pressing cloth (such as a clean cotton cloth) between the iron and the fabric to protect the image from direct heat.
- Avoid Steam: Avoid using steam when ironing, as it can cause the ink to bleed or fade.
6.4. Storage Instructions
- Store in a Cool, Dry Place: Store photo-printed fabric items in a cool, dry place away from direct sunlight and humidity.
- Avoid Direct Sunlight: Direct sunlight can cause colors to fade over time.
- Fold or Hang Properly: Fold or hang the items properly to prevent wrinkles and creases.
6.5. Specific Care Tips for Different Printing Methods
- Iron-On Transfers: Avoid stretching or pulling the fabric in the area of the transfer. Do not iron directly on the transfer; always use a pressing cloth.
- DTG Printing: Wash inside out on a gentle cycle with cold water. Avoid using bleach or harsh detergents.
- Sublimation Printing: Sublimated prints are highly durable and resistant to fading. However, it is still best to wash inside out and avoid high heat.
- Screen Printing: Screen-printed images are very durable but can crack if stretched excessively. Avoid ironing directly on the print.
- Fabric Markers and Paint: Hand wash gently and avoid rubbing the painted area. Heat-setting the paint with an iron can help improve durability.
By following these care instructions, you can ensure that your photo-printed fabric items remain vibrant, beautiful, and long-lasting. For more detailed care tips and product recommendations, visit dfphoto.net.
7. What Are The Common Mistakes To Avoid When Printing Photos On Material?
Printing photos on material can be a rewarding creative endeavor, but it’s easy to make mistakes that can affect the final result. Knowing these common pitfalls and how to avoid them will help you achieve professional-looking prints every time.
7.1. Using Low-Resolution Images
- The Mistake: Using images with low resolution (less than 300 DPI) results in blurry, pixelated prints.
- The Solution: Always start with high-resolution images. Check the image size and resolution before printing. If the image looks blurry when zoomed in on your computer, it will look even worse when printed on fabric.
7.2. Not Preparing the Fabric Properly
- The Mistake: Failing to wash, iron, or pre-treat the fabric can lead to poor ink adhesion, uneven prints, and fading colors.
- The Solution: Always wash the fabric to remove sizing and finishes. Iron to create a smooth surface. Pre-treat the fabric with a commercial or DIY solution to improve ink bonding.
7.3. Choosing the Wrong Printing Method
- The Mistake: Selecting a printing method that is not suitable for the fabric type or design complexity can result in unsatisfactory prints.
- The Solution: Research different printing methods and choose the one that best matches your fabric, design, and budget. Consider factors such as durability, color vibrancy, and detail level.
7.4. Incorrect Color Settings
- The Mistake: Using the wrong color settings (e.g., RGB instead of CMYK) can lead to inaccurate color reproduction.
- The Solution: Ensure your image is in the correct color mode for printing. RGB is typically used for digital printing, while CMYK is used for professional printing services. Calibrate your monitor to ensure accurate color representation.
7.5. Overlooking Fabric Compatibility
- The Mistake: Ignoring the compatibility of the fabric with the printing method can result in poor ink adhesion, color bleeding, and image distortion.
- The Solution: Choose fabrics that are well-suited for the printing method you are using. For example, sublimation printing works best on polyester, while DTG printing is ideal for cotton.
7.6. Not Testing Before Printing
- The Mistake: Printing the final image without testing on a scrap of fabric can lead to wasted materials and disappointing results.
- The Solution: Always print a test swatch on a scrap of the same fabric to check color accuracy, ink adhesion, and overall print quality. Make any necessary adjustments before printing the final image.
7.7. Using Too Much Heat
- The Mistake: Applying too much heat when using iron-on transfers or heat presses can cause the image to scorch, crack, or peel.
- The Solution: Follow the manufacturer’s instructions for heat settings and pressing time. Use a pressing cloth to protect the image from direct heat.
7.8. Improper Care After Printing
- The Mistake: Washing and drying the fabric incorrectly can cause the image to fade, crack, or peel.
- The Solution: Follow the recommended care instructions for the printing method used. Wash inside out in cold water on a gentle cycle. Air dry or tumble dry on low heat.
By avoiding these common mistakes, you can ensure that your photo-printed fabric projects turn out beautifully and last for years to come. For more tips and resources, visit dfphoto.net.
8. How Can I Ensure My Printed Photos On Fabric Are Colorfast?
Ensuring that your printed photos on fabric are colorfast is crucial for maintaining their vibrancy and preventing fading or bleeding over time. Several factors contribute to colorfastness, from the choice of printing method and inks to the fabric preparation and post-printing care.
8.1. Choosing the Right Printing Method
- Sublimation Printing: Known for its excellent colorfastness, sublimation printing infuses the ink directly into the fabric fibers, creating a permanent bond that resists fading and washing.
- DTG Printing with High-Quality Inks: DTG printing can produce colorfast results when using high-quality, water-based pigment inks that are specifically designed for fabric.
- Screen Printing with Plastisol Inks: Screen printing with plastisol inks creates a durable, colorfast print that withstands washing and wear.
8.2. Using High-Quality Inks
- Water-Based Pigment Inks: These inks are designed to bond well with fabric fibers, providing excellent colorfastness and washability.
- Reactive Dyes: Reactive dyes chemically bond with the fabric, creating a permanent color that is highly resistant to fading.
- Sublimation Inks: Sublimation inks turn into a gas and infuse into the fabric, creating a long-lasting, colorfast print.
8.3. Preparing the Fabric Properly
- Washing: Washing the fabric before printing removes any sizing, finishes, or dirt that can interfere with ink adhesion and colorfastness.
- Pre-Treating: Pre-treating the fabric helps the ink bond better with the fibers, resulting in more vibrant and colorfast prints. Use a commercial pre-treatment spray or a DIY solution of water and vinegar.
8.4. Heat Setting
- Proper Curing: Heat setting or curing the ink after printing is essential for ensuring colorfastness. Follow the manufacturer’s instructions for temperature and time to properly cure the ink.
- Heat Press: Use a heat press to apply even heat and pressure to the fabric, ensuring the ink bonds securely with the fibers.
8.5. Post-Printing Care
- Washing Inside Out: Wash the fabric item inside out to protect the printed image from direct abrasion.
- Cold Water: Wash in cold water to prevent fading and bleeding of colors.
- Gentle Detergent: Use a mild, gentle detergent that is free of bleach and harsh chemicals.
- Gentle Cycle: Wash on a gentle cycle to minimize agitation and prevent damage to the printed image.
- Air Drying: Air drying is the best way to dry photo-printed fabric. Avoid using a dryer, as high heat can cause the image to fade or crack.
8.6. UV Protection
- Avoid Direct Sunlight: Store photo-printed fabric items away from direct sunlight, as UV rays can cause colors to fade over time.
- UV Protectant Sprays: Apply a UV protectant spray to the fabric to help protect the colors from fading.
By following these steps, you can significantly improve the colorfastness of your printed photos on fabric, ensuring that they remain vibrant and beautiful for years to come. For more tips and product recommendations, visit dfphoto.net.
9. How To Scale Your Photo Printing On Material Business?
Scaling a photo printing on material business involves expanding your operations, increasing revenue, and reaching a broader customer base. Strategic planning, efficient processes, and effective marketing are essential for sustainable growth.
9.1. Identify Your Niche
- Specialization: Focus on a specific niche within the photo printing on material market, such as personalized apparel, home decor, or custom gifts.
- Target Audience: Identify your ideal customer and tailor your products and marketing efforts to meet their needs.
9.2. Optimize Your Production Process
- Efficiency: Streamline your production process to reduce costs and increase output. Invest in efficient equipment and software.
- Automation: Automate repetitive tasks, such as order processing, design creation, and customer communication.
- Quality Control: Implement strict quality control measures to ensure consistent product quality and customer satisfaction.
9.3. Expand Your Product Line
- New Products: Introduce new products and services to attract new customers and increase revenue.
- Customization Options: Offer a wide range of customization options to cater to individual customer preferences.
- Bundling: Create product bundles to increase sales and offer value to customers.
9.4. Build a Strong Online Presence
- Website: Create a professional website with an online store to showcase your products and services.
- SEO: Optimize your website for search engines to attract organic traffic.
- Social Media: Use social media platforms to promote your business, engage with customers, and drive sales.
- Email Marketing: Build an email list and send regular newsletters to promote new products, offer discounts, and stay top-of-mind with your customers.
9.5. Leverage Partnerships
- Collaborations: Partner with other businesses, such as photographers, designers, and retailers, to expand your reach and offer complementary products and services.
- Affiliate Marketing: Implement an affiliate marketing program to incentivize others to promote your products and services.
- Wholesale Opportunities: Offer wholesale pricing to retailers to increase sales volume.
9.6. Provide Excellent Customer Service
- Responsiveness: Respond promptly to customer inquiries and provide helpful, friendly service.
- Personalization: Personalize the customer experience to create a lasting impression.
- Feedback: Solicit customer feedback and use it to improve your products and services.
9.7. Invest in Marketing and Advertising
- Paid Advertising: Use paid advertising platforms, such as Google Ads and social media ads, to reach a wider audience.
- Content Marketing: Create valuable content, such as blog posts, tutorials, and videos, to attract and engage potential customers.
- Public Relations: Seek out opportunities to get your business featured in the media.
9.8. Monitor Your Performance
- Analytics: Track key metrics, such as website traffic, sales, and customer satisfaction, to monitor your business performance.
- Reporting: Generate regular reports to identify trends, strengths, and weaknesses.
- Adjustments: Make adjustments to your strategies and tactics based on your performance data.
By implementing these strategies, you can effectively scale your photo printing on material business and achieve sustainable growth. For more business tips and resources, visit dfphoto.net.
10. FAQ: Printing Photos On Material
10.1. What Type Of Printer Is Best For Printing Photos On Fabric?
For printing photos on fabric, DTG (Direct-to-Garment) printers and sublimation printers are generally considered the best. DTG printers work well for cotton and cotton blends, offering high detail and a soft feel. Sublimation printers are ideal for polyester and synthetic fabrics, providing vibrant, durable, and long-lasting prints.
10.2. Can I Use Regular Inkjet Ink For Printing On Fabric?
No, you cannot use regular inkjet ink for printing on fabric. Regular inkjet ink is not designed to bond with fabric fibers and will likely wash out or fade quickly. You need to use specialized inks, such as pigment inks for DTG printing or sublimation inks for sublimation printing, to achieve durable and colorfast results.
10.3. How Do I Make My Iron-On Transfers Last Longer?
To make your iron-on transfers last longer, use high-quality transfer paper, prepare the fabric properly by washing and ironing it, and follow the manufacturer’s instructions for heat setting. Wash the fabric inside out in cold water on a gentle cycle, and avoid using a dryer.
10.4. What Is The Best Fabric For Sublimation Printing?
The best fabric for sublimation printing is polyester or high-polyester blends. Sublimation ink bonds directly with the polyester fibers, creating a permanent, vibrant, and durable print. Other fabrics, such as cotton, do not work well with sublimation printing.
10.5. How Do I Prevent My Printed Photos From Fading?
To prevent your printed photos from fading, use colorfast printing methods like sublimation or DTG with high-quality inks, prepare the fabric properly, heat-set the ink correctly, and follow proper care instructions. Avoid direct sunlight and use UV protectant sprays to further protect the colors.
10.6. Can I Print Photos On Dark Fabrics?
Yes, you can print photos on dark fabrics, but it requires different techniques. DTG printing with white ink underlays can work on dark fabrics, but sublimation printing is not suitable as the dye is transparent. Screen printing with opaque inks is another option for printing on dark fabrics.
10.7. How Do I Prepare Fabric For Printing With Fabric Markers?
To prepare fabric for printing with fabric markers, wash and iron the fabric to remove any sizing and wrinkles. Stretch the fabric taut on a flat surface to prevent it from shifting while you draw. Use a pencil to lightly sketch your design before using the fabric markers.
10.8. What Is The Difference Between DTG And Screen Printing?
DTG (Direct-to-Garment) printing involves directly printing an image onto fabric using specialized inkjet technology. Screen printing involves pressing ink through a stenciled mesh screen onto the fabric. DTG is better for complex, detailed designs, while screen printing is more cost-effective for large runs of simple designs.
10.9. How Do I Heat-Set Fabric Paint?
To heat-set fabric paint, allow the paint to dry completely, then turn the fabric inside out and iron it on a low heat setting for 2-5 minutes. Use a pressing cloth between the iron and the painted area to protect the design.
10.10. Where Can I Find High-Quality Images For Fabric Printing?
You can find high-quality images for fabric printing on stock photo websites like Unsplash, Pexels, and Shutterstock. Ensure that you have the right to use the images for commercial purposes if you plan to sell your printed fabric products.
Ready to turn your favorite photos into unique fabric creations? Dive into the world of photo printing on material with dfphoto.net! Explore our comprehensive guides, discover inspiring project ideas, and connect with a vibrant community of photography enthusiasts. Whether you’re a beginner or a seasoned pro, dfphoto.net has everything you need to unleash your creativity. Visit our website today and start your photo printing journey!
Address: 1600 St Michael’s Dr, Santa Fe, NM 87505, United States. Phone: +1 (505) 471-6001.
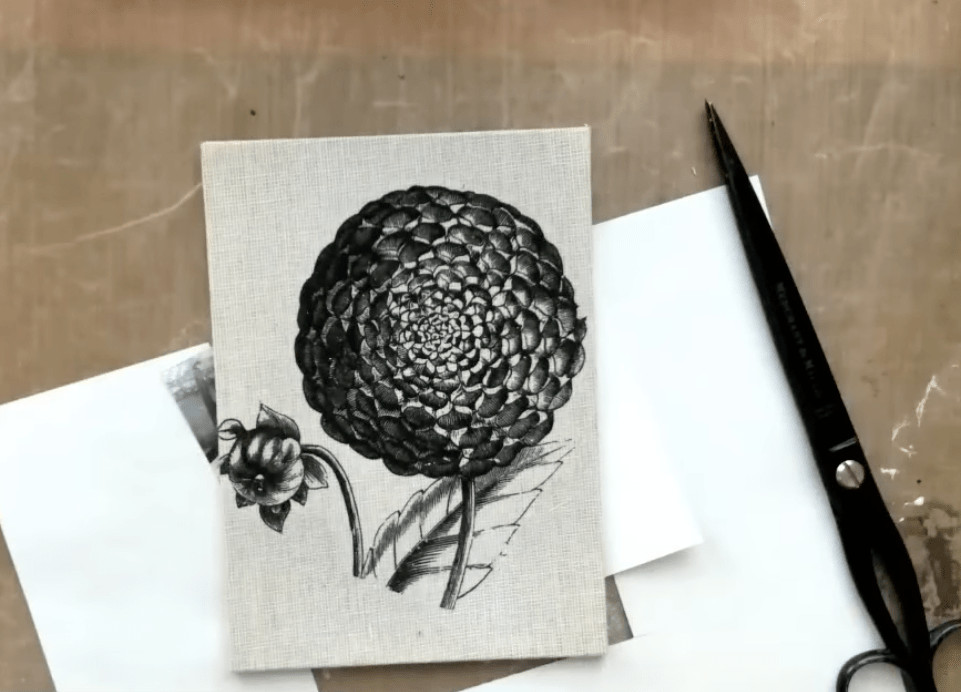 Image transfer process onto fabric showing the application of matte medium and smoothing of fabric.
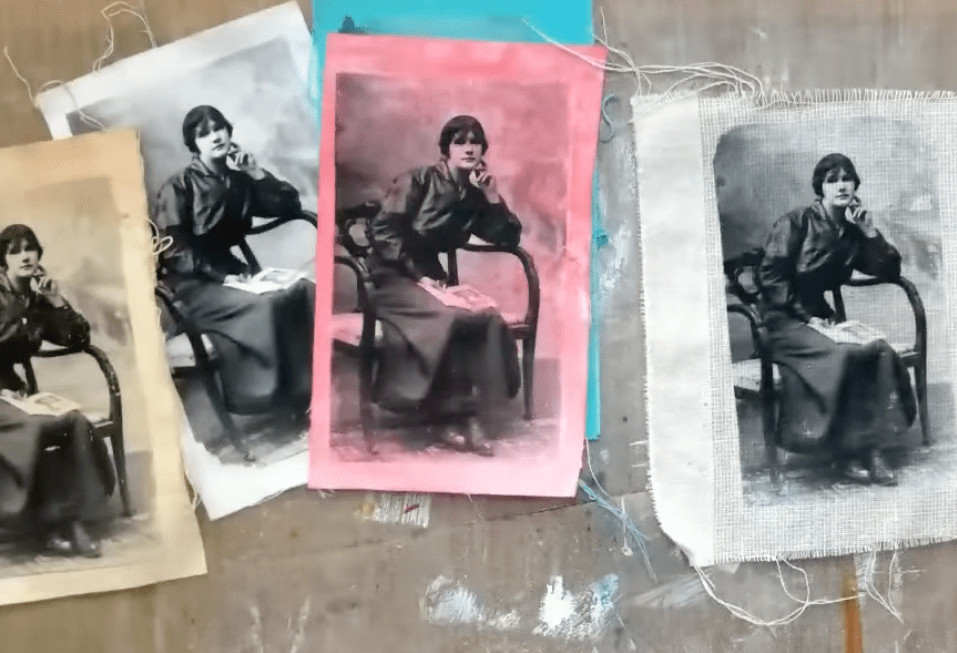 Detailed image transfer steps onto fabric involving soaking, rubbing, and heat drying for a clear and lasting design.