Thinking of gifting a locket to someone special and want to personalize it with a cherished photo? It’s easier than you might think to print photos perfectly sized for lockets. Lockets are timeless pieces of jewelry, beautiful necklaces that carry sentimental value, allowing you to keep loved ones close to your heart.
Pro Tip: If you already own a beautiful locket from Shane Co., or are planning to purchase one, take advantage of their partnership with OddPrints. This collaboration simplifies the process of creating the ideal keepsake. Simply choose your locket style in their photo tool, and you can skip the hassle of figuring out dimensions.
1. Accurately Measure Your Locket’s Photo Space
 Close-up of a woman measuring the photo space inside a heart-shaped gold locket with a ruler, emphasizing precision in measurement for photo fitting
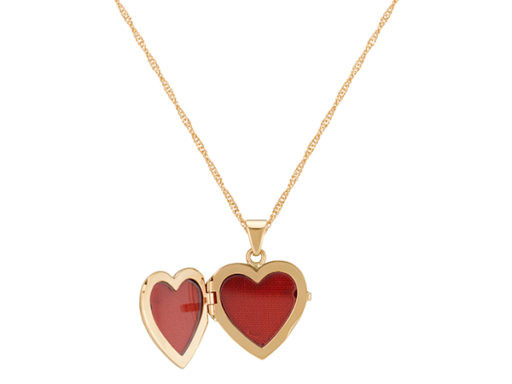 A hand holding a printed photo next to an open locket, showing the comparison between photo size and locket frame size, highlighting the need for correct dimensions
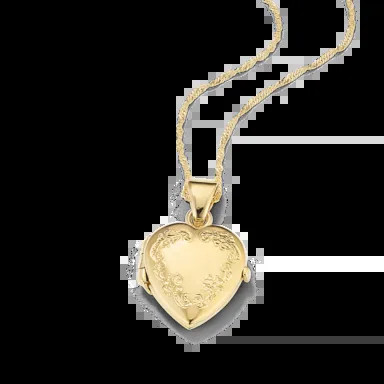 Detailed view of a vintage style heart locket in yellow gold, showcasing the intricate design and the photo compartment, suggesting the importance of precise photo size for vintage lockets
 An angled shot of a floral yellow gold heart locket, emphasizing the delicate floral details and the inner space for a photo, pointing out the need for photos that complement the locket's aesthetics
Most lockets are designed with a specific area to hold a photograph, often framed by a decorative border. To get the best fit for your picture, you’ll need to measure this inner photo space. Use a ruler or measuring tape to measure as accurately as possible, ideally to the nearest millimeter. While perfect precision isn’t essential—you can always adjust the image size later—a close measurement will simplify the process of fitting your photo perfectly.
Another convenient method is to check the product page of your locket on the Shane Co. website. Detailed size specifications are usually provided there. Alternatively, you can connect with Shane Co.’s jewelry consultants via online chat; they are always happy to assist and provide the dimensions you need.
Tip: When taking measurements, it’s always better to round up slightly. It’s much easier to trim a photo down to size than to try and enlarge it if it’s too small.
 Close-up of a floral engraved rose gold oval locket, highlighting the detailed craftsmanship and the photo compartment, suitable for showcasing delicate photo prints
2. Upload and Resize Your Chosen Image
When it comes to preparing your image for printing, you have a couple of user-friendly options:
-
Utilize OddPrints: For a streamlined approach, open a new browser window and navigate to OddPrints. Click on “Get Started,” upload the photo you want to use, and then select your frame size – this corresponds to the measurements you took of your locket. By selecting a Shane Co. locket, you can often skip manual dimension input. Afterward, click “Download” to get your resized image. You can then access the image in your computer’s downloads folder, ready for printing at home.
-
Manual Resizing with Photo Editing Software: If you prefer not to use OddPrints, you can use photo-editing websites, apps, or desktop programs like Photoshop or Microsoft Paint. Upload your chosen image to your selected software. Use the resizing or cropping tools to manually adjust the image’s dimensions. Match the width and height to the measurements of your locket’s photo space. Cropping can also help to focus on the most important part of the picture within the locket’s shape. Once you’re satisfied with the dimensions, save your photo as a JPEG or PNG file.
3. Print Your Perfectly Sized Photo
Now that you have your resized image, it’s time to print! You can easily use your home printer to print the image. Choose between black and white or color prints based on your preference and the locket’s style. For a more traditional photo feel and enhanced image quality, we recommend using high-gloss photo paper. However, feel free to experiment with different types of photo paper to achieve your desired look.
If you don’t have a printer at home, no worries! You can email your image file to a local photo printing service, like drugstores or specialized photo labs. Alternatively, use an online picture-delivery service; you can digitally submit your photo and have the printed photos mailed directly to you. Printing a few copies is always a good idea in case you need to make further adjustments or want to try different paper types.
 Close-up of a rose gold circle locket showcasing its polished finish and photo holding capability, ideal for crisp photo prints
 A square sterling silver floral locket, highlighting its unique shape and floral design, suggesting photos that complement the square frame
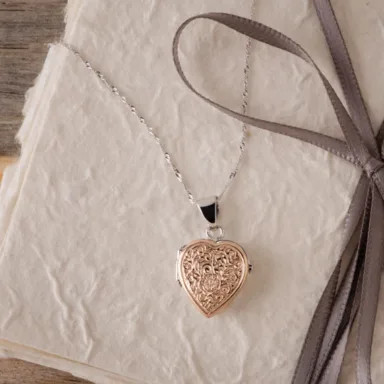 A heart-shaped locket in white and rose gold, presenting a romantic design and photo space, perfect for sentimental photo keepsakes
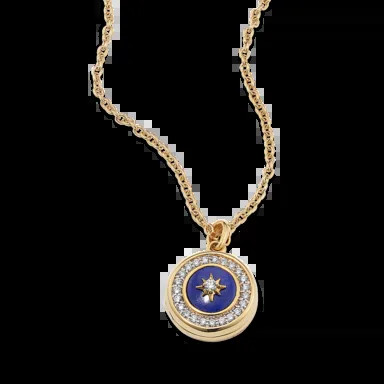 A blue lapis and diamond locket, emphasizing its luxurious materials and unique style, indicating photos that match the locket's elegance
4. Final Adjustments and Fitting
Once you have your printed photo, carefully cut it out. You might need to make minor adjustments to the size by trimming the edges until it fits snugly within the locket frame. If you opted for a print service instead of home printing, ordering a few prints in slightly different sizes is a smart move, just in case your initial measurements weren’t perfectly accurate.
After achieving the perfect size, gently place the photo inside the locket. Now you have a beautifully personalized gift, ready to be treasured!
Ready to begin? Explore Shane Co.’s extensive collection of exquisite lockets on their website. For any questions or guidance, their dedicated, non-commissioned sales team is available online to chat and assist you.
Editor’s Note: Originally published April 2021, this post has been updated to ensure accuracy and provide comprehensive instructions.