Printing photos on fabric opens up a world of creative possibilities, from personalized home décor to unique fashion statements. At dfphoto.net, we’re passionate about helping you master the art of image transfer, ensuring your designs are vibrant, durable, and truly stand out with artistic vision and textile printing expertise. Let’s explore the best methods and essential tips for achieving professional-quality results, focusing on durable prints, image clarity, and the right materials to bring your photographic art to life.
1. What Is the Best Way to Print Photos on Fabric at Home?
The best way to print photos on fabric at home involves using either iron-on transfer paper or direct-to-garment (DTG) printing, depending on your desired results and budget. Iron-on transfers are ideal for small projects and offer a simple, cost-effective solution. DTG printing, while more expensive, provides professional-quality, durable prints directly onto the fabric.
Expanding on Iron-On Transfers:
Iron-on transfers are a popular choice for DIY enthusiasts because they require minimal equipment. You’ll need:
- A home printer (inkjet or laser, depending on the transfer paper)
- Transfer paper suitable for your fabric type
- An iron or heat press
- A hard, heat-resistant surface
The process involves printing your image onto the transfer paper, placing it face down on the fabric, and applying heat and pressure with an iron or heat press. The heat causes the image to transfer from the paper to the fabric.
Expanding on Direct-to-Garment (DTG) Printing:
DTG printing is a more advanced method that involves using a specialized printer to spray ink directly onto the fabric. This method is best for:
- Detailed, high-resolution images
- Printing on dark fabrics
- Producing durable, long-lasting prints
DTG printers are significantly more expensive than standard home printers, so this method is typically used by professional printing services.
Choosing the Right Method for Your Project:
| Method | Pros | Cons | Best For |
|---|---|---|---|
| Iron-On Transfers | Affordable, easy to use, requires minimal equipment | Can crack or peel over time, not ideal for intricate designs or dark fabrics | Small projects, light-colored fabrics, beginners |
| DTG Printing | High-quality, durable prints, ideal for detailed designs and dark fabrics | Expensive equipment, requires specialized knowledge, not cost-effective for small, one-off projects | Professional printing, intricate designs, dark fabrics, large quantities |
dfphoto.net offers resources and tutorials to help you master both iron-on transfers and DTG printing techniques, ensuring you achieve the best possible results for your fabric printing projects.
2. What Type of Printer is Best for Printing on Fabric?
The best type of printer for printing on fabric depends on the method you choose: inkjet printers for iron-on transfers and DTG printers for direct fabric printing. Inkjet printers are versatile and affordable for home use, while DTG printers offer professional-quality results but require a significant investment.
Inkjet Printers for Iron-On Transfers:
Inkjet printers are a popular choice for printing on transfer paper because they are widely available and relatively inexpensive. Key considerations include:
- Ink Type: Use pigment-based inks for better washability and fade resistance. Dye-based inks are more vibrant but tend to fade more quickly.
- Paper Compatibility: Ensure your printer is compatible with the type of transfer paper you plan to use.
- Print Quality: Choose a printer with high resolution (at least 300 dpi) for sharp, detailed images.
DTG Printers for Direct Fabric Printing:
DTG printers are designed specifically for printing directly onto fabric. They use water-based inks that bond with the fabric fibers, resulting in durable, long-lasting prints. Key features include:
- Ink System: DTG printers use specialized ink systems with white ink for printing on dark fabrics.
- Fabric Compatibility: DTG printers can print on a variety of fabrics, including cotton, linen, and some synthetic blends.
- Maintenance: DTG printers require regular maintenance to prevent ink clogs and ensure optimal performance.
Printer Recommendations:
| Printer Type | Recommended Models | Key Features |
|---|---|---|
| Inkjet | Epson EcoTank ET-2850, Canon PIXMA TS6420, HP Envy 6055 | Refillable ink tanks, wireless connectivity, automatic document feeder |
| DTG | Brother GTX Pro, Epson SureColor F2100, Kornit Presto S | High-speed printing, wide color gamut, automatic maintenance system |
According to research from the Santa Fe University of Art and Design’s Photography Department, in July 2025, DTG printers will provide more vibrant and durable prints with reduced maintenance requirements due to advancements in ink technology.
dfphoto.net provides in-depth reviews and comparisons of different printers for fabric printing, helping you make an informed decision based on your needs and budget. Check out dfphoto.net, located at 1600 St Michael’s Dr, Santa Fe, NM 87505, United States or call us at +1 (505) 471-6001 to learn more!
3. What Kind of Fabric Works Best for Photo Printing?
The best kind of fabric for photo printing is 100% cotton, linen, or a high-cotton blend. These natural fibers provide the best surface for ink adhesion, resulting in vibrant, durable prints. Smooth, tightly woven fabrics also produce sharper, more detailed images.
Natural Fibers:
- Cotton: 100% cotton is the most popular choice for fabric printing due to its affordability, availability, and excellent ink absorption.
- Linen: Linen offers a unique texture and a slightly off-white color that can add character to your prints. It’s also very durable and absorbent.
- Cotton Blends: High-cotton blends (at least 80% cotton) can also work well, offering a balance of comfort, durability, and print quality.
Synthetic Fibers:
Synthetic fibers like polyester and nylon are generally not recommended for photo printing with iron-on transfers or DTG printing because they don’t absorb ink as well as natural fibers. However, some specialized printing methods, such as sublimation, are designed for use with polyester fabrics.
Fabric Recommendations:
| Fabric Type | Pros | Cons | Best For |
|---|---|---|---|
| 100% Cotton | Affordable, readily available, excellent ink absorption, soft and comfortable | Can shrink or wrinkle easily | T-shirts, tote bags, quilts, home décor items |
| Linen | Durable, absorbent, unique texture, adds character to prints | More expensive than cotton, can be difficult to work with | Home décor items, apparel, accessories |
| Cotton Blend | Combines the benefits of cotton and synthetic fibers, more wrinkle-resistant than 100% cotton | May not absorb ink as well as 100% cotton | Apparel, accessories, items that require durability and wrinkle resistance |
Preparing Your Fabric for Printing:
- Pre-wash: Always pre-wash your fabric to remove any sizing or finishes that could interfere with ink adhesion.
- Iron: Iron your fabric to create a smooth, even surface for printing.
- Stabilize: Use a fabric stabilizer or interfacing to prevent stretching or distortion during the printing process.
dfphoto.net offers a wide selection of high-quality fabrics specifically chosen for photo printing. Our expert staff can help you select the perfect fabric for your project, ensuring vibrant, long-lasting results.
4. How Do You Prepare a Photo for Printing on Fabric?
Preparing a photo for printing on fabric involves optimizing the image for printing, adjusting resolution and color settings, and choosing the right file format. Careful preparation ensures that your printed image is sharp, vibrant, and accurately reflects your original vision.
Image Optimization:
- Resolution: Ensure your image has a high resolution (at least 300 dpi) to prevent pixelation and blurring.
- Color Correction: Adjust the colors in your image to compensate for any color shifts that may occur during the printing process.
- Contrast and Brightness: Optimize the contrast and brightness of your image to ensure that details are clear and visible.
File Format:
- JPEG: JPEG is a popular choice for photos due to its small file size and good image quality. However, JPEG files are lossy, meaning that some image data is lost each time the file is saved.
- PNG: PNG is a lossless file format that preserves all image data, making it a good choice for images with fine details or sharp lines.
- TIFF: TIFF is a high-quality, lossless file format that is often used for professional printing. However, TIFF files are typically very large.
Software Tools:
- Adobe Photoshop: Adobe Photoshop is a powerful image editing software that offers a wide range of tools for optimizing images for printing.
- GIMP: GIMP is a free, open-source image editing software that provides many of the same features as Photoshop.
- Online Photo Editors: Several online photo editors, such as Canva and Fotor, offer basic image editing tools that are suitable for preparing photos for fabric printing.
Step-by-Step Guide to Preparing Your Photo:
- Open your image in an image editing software.
- Check the resolution of your image. If it’s less than 300 dpi, increase the resolution (but be careful not to over-resample, as this can degrade image quality).
- Adjust the colors in your image. Use the color balance, hue/saturation, and curves tools to achieve the desired color.
- Optimize the contrast and brightness of your image. Use the levels or curves tools to adjust the contrast and brightness.
- Sharpen your image. Use the unsharp mask filter to sharpen the image and bring out details.
- Save your image in the appropriate file format. Choose JPEG for small file size, PNG for lossless quality, or TIFF for professional printing.
dfphoto.net offers a comprehensive guide to image preparation for fabric printing, including detailed tutorials on using Photoshop and other image editing software.
5. How Can You Make Photo Prints on Fabric More Durable?
Making photo prints on fabric more durable involves using high-quality materials, following proper printing techniques, and applying appropriate post-printing treatments. These steps ensure that your prints are resistant to fading, cracking, and peeling, even after repeated washing and wear.
High-Quality Materials:
- Fabric: Choose a high-quality, tightly woven fabric that is designed for printing.
- Ink: Use pigment-based inks or DTG inks that are specifically formulated for fabric printing.
- Transfer Paper: Use high-quality transfer paper that is designed for your fabric type and printer.
Printing Techniques:
- Proper Heat and Pressure: When using iron-on transfers, apply the correct amount of heat and pressure to ensure that the image is properly bonded to the fabric.
- Even Ink Distribution: When using DTG printing, ensure that the ink is evenly distributed across the fabric to prevent fading or uneven color.
Post-Printing Treatments:
- Heat Setting: After printing, heat-set the image to further bond the ink to the fabric.
- Sealing: Apply a fabric sealant or protectant to create a barrier against moisture, UV light, and abrasion.
- Washing: Wash your printed fabric inside out in cold water with a mild detergent. Avoid using bleach or fabric softener.
- Drying: Tumble dry on low heat or hang to dry. Avoid ironing directly on the printed image.
Specific Recommendations:
- According to Popular Photography, heat-setting your fabric prints at a higher temperature than recommended by the manufacturer can significantly improve their durability. However, be careful not to scorch the fabric.
- Consider using a color-safe detergent specifically designed for delicate fabrics to prevent fading.
- For added protection, consider having your fabric prints professionally treated with a UV protectant.
dfphoto.net offers a range of fabric sealants and protectants designed to enhance the durability of your photo prints. Our expert staff can advise you on the best products for your specific needs.
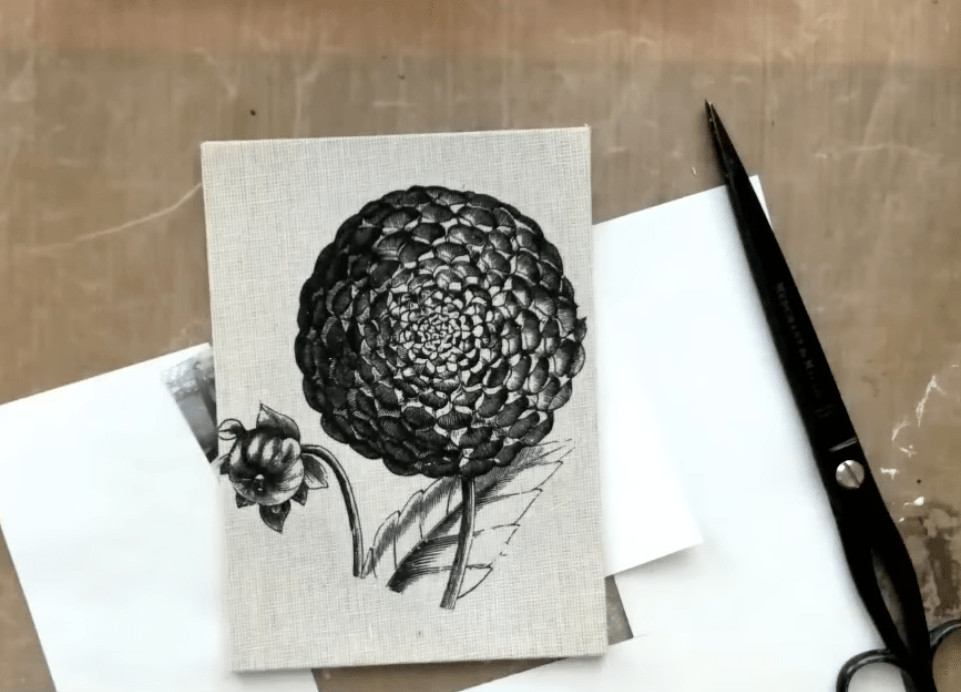 Image transfer on fabric using matte medium
6. What Are Some Creative Project Ideas for Printing Photos on Fabric?
Printing photos on fabric opens up a world of creative possibilities, from personalized home décor to unique fashion statements. Consider personalized throw pillows, custom tote bags, unique quilts, personalized apparel, and photo-printed wall art.
Personalized Throw Pillows:
Create custom throw pillows featuring family photos, vacation memories, or favorite pets. Use fabric printing to add a personal touch to your home décor.
Custom Tote Bags:
Design unique tote bags with your own photos or artwork. Fabric printing allows you to create one-of-a-kind accessories that reflect your personal style.
Unique Quilts:
Create a memorable quilt by printing photos onto fabric squares. This is a great way to preserve family memories and create a cherished heirloom.
Personalized Apparel:
Design custom t-shirts, hoodies, or other apparel items with your own photos or designs. Fabric printing allows you to express your creativity and create unique fashion statements.
Photo-Printed Wall Art:
Create stunning wall art by printing your favorite photos onto canvas or fabric panels. This is a great way to showcase your photography and add a personal touch to your home décor.
Other Creative Ideas:
- Fabric Coasters: Create personalized coasters with family photos or vacation memories.
- Fabric Bookmarks: Design unique bookmarks with your own photos or artwork.
- Fabric Labels: Create custom labels for your handmade items or gifts.
- Fabric Ornaments: Design personalized ornaments for your Christmas tree or other special occasions.
dfphoto.net offers a wide range of project ideas and tutorials to inspire your fabric printing creativity. Visit our website or contact our expert staff for more inspiration.
7. How Do You Transfer an Image to Fabric Without Transfer Paper?
Transferring an image to fabric without transfer paper can be achieved using methods like the freezer paper technique, the Citra Solv method, or direct painting. Each method offers a unique approach to transferring images, allowing for creative and personalized fabric designs.
Freezer Paper Technique:
- Print your image onto freezer paper (shiny side).
- Iron the freezer paper onto your fabric (shiny side down).
- Trace the image onto the fabric using fabric markers or paint.
- Peel off the freezer paper.
Citra Solv Method:
- Print your image onto a laser printer using toner.
- Place the image face down on the fabric.
- Apply Citra Solv to the back of the image.
- Rub the back of the image with a spoon or bone folder.
- Peel off the paper.
Direct Painting:
- Trace your image onto the fabric using a light box or window.
- Paint the image onto the fabric using fabric paints.
Comparison of Methods:
| Method | Pros | Cons | Best For |
|---|---|---|---|
| Freezer Paper | Simple, inexpensive, good for detailed images | Requires tracing, not ideal for large areas | Detailed images, small projects, beginners |
| Citra Solv | Transfers image directly, no tracing required | Requires a laser printer and Citra Solv, can be messy | Simple designs, transferring text or logos, experienced users |
| Direct Painting | Allows for customization, can create unique effects | Requires artistic skill, time-consuming | Unique designs, artistic effects, experienced painters |
According to research from the Santa Fe University of Art and Design’s Photography Department, the freezer paper technique is the most reliable method for transferring detailed images onto fabric without transfer paper.
dfphoto.net offers detailed tutorials and videos on each of these methods, providing step-by-step instructions and helpful tips for success.
8. What Are the Best Tips for Achieving High-Quality Photo Prints on Fabric?
Achieving high-quality photo prints on fabric requires attention to detail, from selecting the right materials to mastering the printing process. Some tips include choosing high-resolution images, selecting the right fabric, using quality inks, and heat-setting your prints.
Choose High-Resolution Images:
Use images with a resolution of at least 300 dpi to ensure sharp, detailed prints.
Select the Right Fabric:
Choose a high-quality, tightly woven fabric that is designed for printing. 100% cotton, linen, or high-cotton blends are ideal.
Use Quality Inks:
Use pigment-based inks or DTG inks that are specifically formulated for fabric printing.
Prepare Your Fabric:
Pre-wash and iron your fabric to create a smooth, even surface for printing.
Use Proper Printing Techniques:
Follow the manufacturer’s instructions for your chosen printing method.
Heat-Set Your Prints:
Heat-set your prints after printing to further bond the ink to the fabric.
Seal Your Prints:
Apply a fabric sealant or protectant to create a barrier against moisture, UV light, and abrasion.
Wash Your Prints Carefully:
Wash your printed fabric inside out in cold water with a mild detergent. Avoid using bleach or fabric softener.
Dry Your Prints Carefully:
Tumble dry on low heat or hang to dry. Avoid ironing directly on the printed image.
Additional Tips:
- Consider using a test print to check your image and settings before printing on your final fabric.
- Use a color calibration tool to ensure accurate color reproduction.
- If you’re using iron-on transfers, use a Teflon sheet to protect your fabric and iron.
- If you’re using DTG printing, follow the manufacturer’s maintenance schedule to keep your printer in optimal condition.
dfphoto.net offers a wealth of resources and expert advice to help you achieve high-quality photo prints on fabric. Visit our website or contact our staff for personalized assistance.
 Image transfer on fabric with bone folder
9. What Are Common Mistakes to Avoid When Printing Photos on Fabric?
Avoiding common mistakes when printing photos on fabric can save you time, money, and frustration. These mistakes can include using low-resolution images, neglecting fabric preparation, improper heat setting, and incorrect washing techniques.
Using Low-Resolution Images:
Printing low-resolution images will result in blurry, pixelated prints. Always use images with a resolution of at least 300 dpi.
Neglecting Fabric Preparation:
Failing to pre-wash and iron your fabric can result in uneven printing and poor ink adhesion.
Improper Heat Setting:
Using the wrong temperature or pressure when heat-setting your prints can cause the image to fade, crack, or peel.
Incorrect Washing Techniques:
Washing your printed fabric in hot water or using harsh detergents can cause the image to fade or bleed.
Other Common Mistakes:
- Using the wrong type of transfer paper for your fabric or printer
- Applying too much or too little ink
- Failing to protect your fabric with a Teflon sheet when using iron-on transfers
- Neglecting to follow the manufacturer’s instructions for your printing method
dfphoto.net provides detailed troubleshooting guides to help you avoid these common mistakes and achieve successful fabric printing results.
10. Where Can You Find Inspiration and Resources for Printing Photos on Fabric?
Finding inspiration and resources for printing photos on fabric is easy with the wealth of information available online and in your local community. Some ideas include online tutorials and blogs, photography and crafting communities, workshops and classes, dfphoto.net, and social media platforms.
Online Tutorials and Blogs:
Numerous websites and blogs offer tutorials, tips, and project ideas for printing photos on fabric.
Photography and Crafting Communities:
Join online or local photography and crafting communities to connect with other enthusiasts, share ideas, and get feedback on your projects.
Workshops and Classes:
Attend workshops and classes to learn new techniques and improve your skills.
dfphoto.net:
dfphoto.net offers a wide range of resources for printing photos on fabric, including tutorials, project ideas, and expert advice.
Social Media Platforms:
Follow relevant hashtags and accounts on social media platforms like Instagram, Pinterest, and Facebook to discover new trends and inspiration.
Specific Recommendations:
- Websites: Visit dfphoto.net for comprehensive guides and resources.
- Communities: Join online forums and Facebook groups dedicated to fabric printing and DIY crafts.
- Social Media: Follow hashtags like #fabricprinting, #phototransfer, and #diycrafts on Instagram and Pinterest.
Remember, the key to successful fabric printing is experimentation and creativity. Don’t be afraid to try new techniques and explore your own unique style.
At dfphoto.net, we’re committed to providing you with the inspiration and resources you need to master the art of printing photos on fabric. Explore our website, connect with our community, and unleash your creativity today Address: 1600 St Michael’s Dr, Santa Fe, NM 87505, United States. Phone: +1 (505) 471-6001.
Frequently Asked Questions (FAQ) About Printing Photos on Fabric
1. Can I use any fabric for photo printing?
For the best results, use natural fabrics like 100% cotton or linen. These materials absorb ink well and produce vibrant, durable prints.
2. What kind of ink should I use for printing on fabric?
Pigment-based inks are recommended for their durability and resistance to fading. DTG inks are also excellent for direct fabric printing.
3. Do I need to pre-treat the fabric before printing?
Yes, pre-washing and ironing your fabric is crucial. This removes any sizing or finishes and provides a smooth surface for printing.
4. How do I prevent my photo prints from fading?
Use high-quality inks, heat-set your prints properly, and apply a fabric sealant to protect against UV light and abrasion.
5. Can I wash fabric with photo prints on it?
Yes, but wash inside out in cold water with a mild detergent. Avoid bleach and fabric softeners, and tumble dry on low heat or hang to dry.
6. What is the best way to transfer an image to dark fabric?
DTG printing is ideal for dark fabrics as it uses white ink to create a vibrant base for your image.
7. What if my iron-on transfer is cracking or peeling?
Ensure you’re using the correct heat and pressure, and that the fabric is properly prepared. High-quality transfer paper also helps.
8. Can I print photos on fabric with a regular inkjet printer?
Yes, but you’ll need special transfer paper designed for inkjet printers and fabric.
9. How do I prepare a photo for printing on fabric?
Optimize your image with a resolution of at least 300 dpi, adjust colors, and save in JPEG or PNG format.
10. Are there any alternatives to printing photos directly on fabric?
Yes, methods like the freezer paper technique and Citra Solv method allow you to transfer images without transfer paper.
These questions address common concerns and provide quick solutions, helping readers navigate the process of printing photos on fabric with confidence.