Printing photos at home can seem daunting, but with the right approach, you can achieve beautiful, high-quality results. This guide provides clear, step-by-step instructions for printing photos using various methods, ensuring your cherished memories are preserved in physical form.
Method 1: Using an Image Editor for Precise Printing
This method involves leveraging an image editor like Photoshop Elements or Pages to gain precise control over the printing process, particularly for creating double-sided prints like greeting cards.
-
Print to PDF: Start by printing your desired photo or card design to a PDF file directly from your photo management software (e.g., Photos). This preserves the layout and quality of your design.
-
Convert PDF to JPEG: Use Preview or another suitable application to convert each page of the PDF file into separate JPEG images. This facilitates easier handling within the image editor.
-
Create a Blank Canvas: Open your image editor and create a new blank document with dimensions matching your paper size (e.g., 8.5 x 11 inches) and a resolution of 300 dpi (dots per inch) for optimal print quality. Ensure the document is set to borderless printing.
-
Position the Images: Import the JPEG images of your front and back design elements into the blank document. Arrange them precisely in the desired locations on the page. For example, place the front and back of a greeting card on the top half of the page and the inside spread on the bottom half.
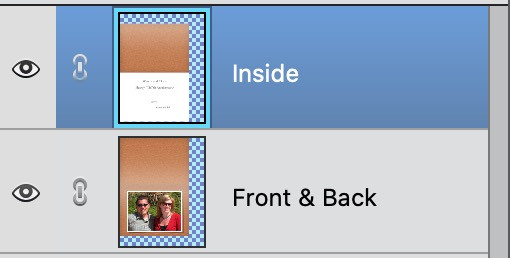 Positioning images for double-sided printing
- Print in Layers: Utilize the layer functionality of your image editor to print each side separately. Hide the layer for the second side, print the first side, then flip the paper over (end-to-end, not side-to-side), hide the first layer, unhide the second layer, and print the reverse side.
Method 2: Printing Side-by-Side with a Blank Image
This simpler method involves printing your photo alongside a blank white image of the same dimensions, allowing you to easily print on both sides of the paper.
-
Create a Blank Image: Create a blank white image in your photo editing software with the same dimensions and orientation (landscape or portrait) as your photo.
-
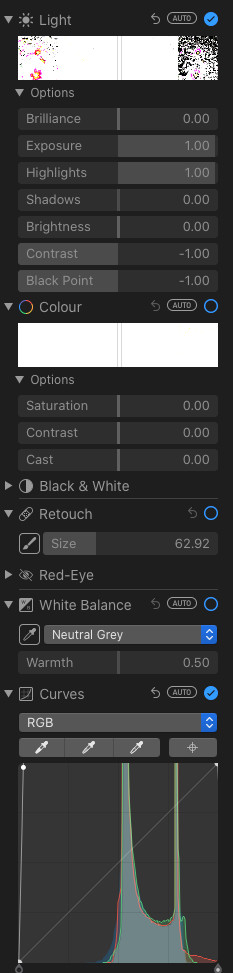
Adjust Exposure for a True White: To ensure a completely blank white image, maximize the exposure and highlights while minimizing contrast and black point. Adjust the curves to further enhance the whiteness.
 Adjusting image settings for a blank white image
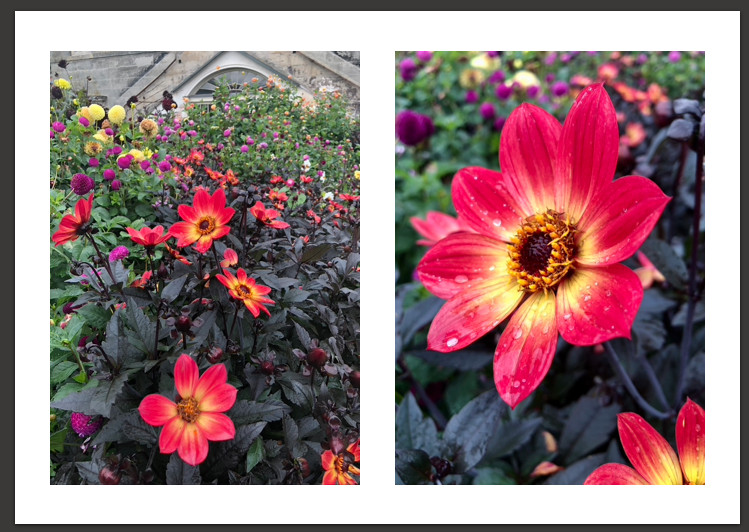
- Print Side-by-Side: Arrange your photo and the blank image side-by-side in your photo editing or printing software. Print this combined layout. Then flip the paper, and print your desired content on the other side.
 Example of side-by-side printing with a blank image
Method 3: Utilizing Office Software for Simple Printing
Leverage everyday office software like Word or PowerPoint for straightforward photo printing.
-
Import Image: Insert your photo into a new document in your chosen office software.
-
Position and Resize: Adjust the size and position of the image on the page to achieve your desired layout.
-
Print: Print the document, ensuring your printer settings are configured correctly for your paper type and desired print quality.
These various methods provide flexible options for How To Print Photos at home. Choose the approach that best suits your needs and technical skills to achieve high-quality prints of your cherished images.