Lockets are timeless pieces of jewelry, allowing you to carry cherished memories close to your heart. But getting the right photo to fit can be tricky. This guide provides a comprehensive walkthrough on How To Print Locket Photos perfectly, ensuring your treasured moments are displayed beautifully.
 Alt: Close up of hands measuring a small heart shaped locket with a ruler.
Choosing the Perfect Locket Photo
The photo inside your locket holds significant meaning. Consider these factors when selecting your image:
- Simplicity: Opt for a photo that isn’t overly detailed. Small details will be lost in the reduced size. A clear, focused subject is key.
- Lighting: Choose a well-lit photo. Dark images will appear even darker when miniaturized.
- Composition: Consider the locket’s shape. A heart-shaped locket will crop your photo differently than a round or oval one. Center your subject and leave enough background for potential trimming.
- Clarity: Ensure the image is recognizable at a small scale. Close-up shots of faces work best. Avoid large group photos.
- Resolution: High-resolution images are ideal, but most smartphones capture sufficient detail for locket-sized prints.
- Cropping: Keep important elements away from the edges to avoid losing them during trimming.
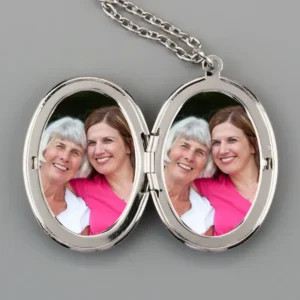 Alt: A woman wearing a silver oval locket containing a photo of a loved one.
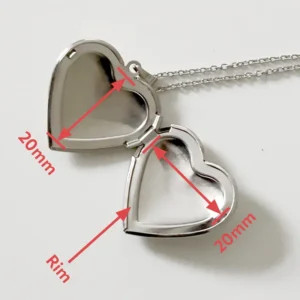
Measuring Your Locket for Accurate Printing
Lockets come in various sizes, so there’s no standard photo size. Accurate measurement is crucial:
- Use the Provided Template: If your locket came with a paper template, measure its widest and highest points in millimeters using a ruler.
- Create Your Own Template: If you don’t have a template, measure the locket’s photo area (adding half the rim width on each side) in millimeters. Trace the locket shape onto tracing paper, then transfer it to graph paper for a precise cutting guide.
You’ll need:
- Ruler (in millimeters)
- Pencil
- Tracing Paper
- Graph Paper
- Sharp Curved Scissors
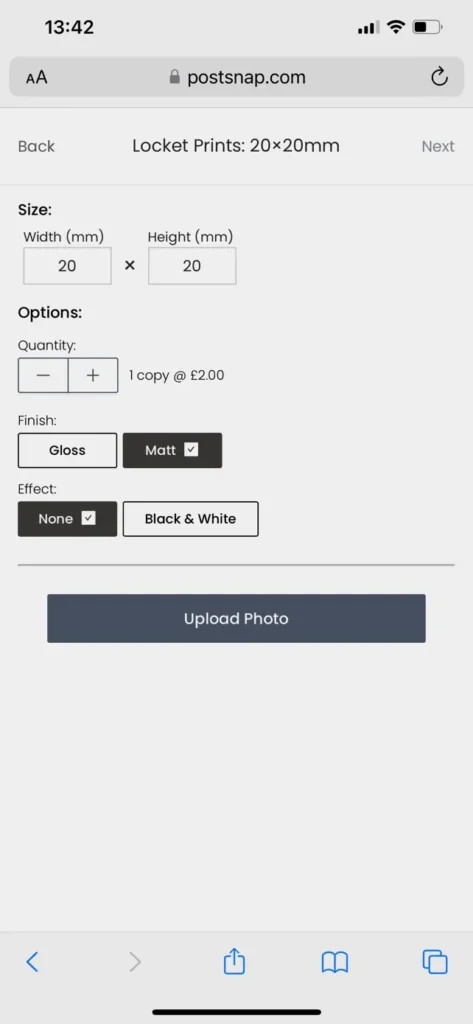 Alt: Screenshot of a website interface for ordering locket photos, showing input fields for width and height in millimeters.
Printing Your Locket Photos
Using a service like PostSnap simplifies the process:
- Enter Dimensions: Input your measured width and height (in millimeters) on the locket photo printing page.
- Choose Options: Select color or black and white, and a gloss or matte finish (matte often works better for lockets).
- Upload and Crop: Upload your chosen photo and use the cropping tool to perfectly frame your subject.
- Enable Tiling: Turn on the “tiling” option to create multiple copies of your cropped image on a single print, allowing for test fits and trimming.
- Review and Order: Approve your preview and complete your order.
 Alt: Screenshot of a phone displaying a tiled locket photo ready for printing.
Trimming and Inserting Your Locket Photo
- Trace and Cut: Place your template on one of the tiled photos and carefully trace around it with a pencil. Cut along the traced line using sharp, curved scissors.
- Insert and Adjust: Carefully insert the trimmed photo into your locket. Use tweezers to gently press the photo under the locket’s rim. If needed, use a tiny amount of photo glue for extra security.
 Alt: A finished heart shaped locket with a perfectly trimmed photo inside.
By following these steps, you can create perfectly sized photos for your locket, preserving your precious memories in a beautiful and lasting way.