Printing photos on your Mac is easier than ever. Follow these simple steps to print high-quality photos directly from your MacBook.
Choosing a Photo Printing Service
First, select a photo printing service. Online services like Squared.one offer a variety of print products, from classic prints and magnets to photo books and canvases. Using an online service allows you to print photos from anywhere with an internet connection.
Selecting Your Photos
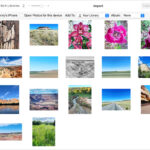
Before you begin, gather the photos you want to print in a dedicated folder. This will streamline the uploading process.
Uploading and Customizing Your Photos
-
Choose your product: Visit the website of your chosen printing service (e.g., Squared.one) and select the desired photo product. Consider options like classic prints, wallet-size photos, or more unique products like photo magnets or canvases.
-
Select print size and finish: Determine your preferred print size and choose between a matte or glossy finish for your photos. A matte finish reduces glare, while a glossy finish provides a vibrant, shiny look.
-
Upload your photos: Most online services have a user-friendly interface. Click “Create” or a similar button to access the online editor. Locate the “Select files” option to browse your computer and upload the photos from your designated folder.
-
Edit your photos: After uploading, you can typically crop, add borders (white or colored), and make other adjustments. Some services even allow you to add captions, especially for retro-style prints like Polaroids.
Ordering Your Prints
Once you’re satisfied with your customizations, add the product to your cart. You can then continue creating other photo products or proceed to checkout. Your photos will be printed and shipped directly to you.