Want to print your favorite photos directly from your iPad? It’s easier than you might think! This guide will walk you through the simple steps to get your digital memories into physical prints.
There are a couple of straightforward methods to print photos from your iPad. The most direct way is using the Share icon, which provides a quick route to printing if you have an AirPrint-compatible printer. Here’s how:
- Open the Photos App: Locate the Photos app on your iPad and tap to open it.
- Select Your Photo: Find the photo you wish to print and tap on it to view it in full screen.
- Tap the Share Icon: Look for the Share icon at the top right corner of your screen. It looks like a square with an arrow pointing upwards. Tap this icon.
- Scroll and Find “Print”: In the Share sheet that appears, scroll down the list of options. You should see the “Print” option. Tap on “Print”.
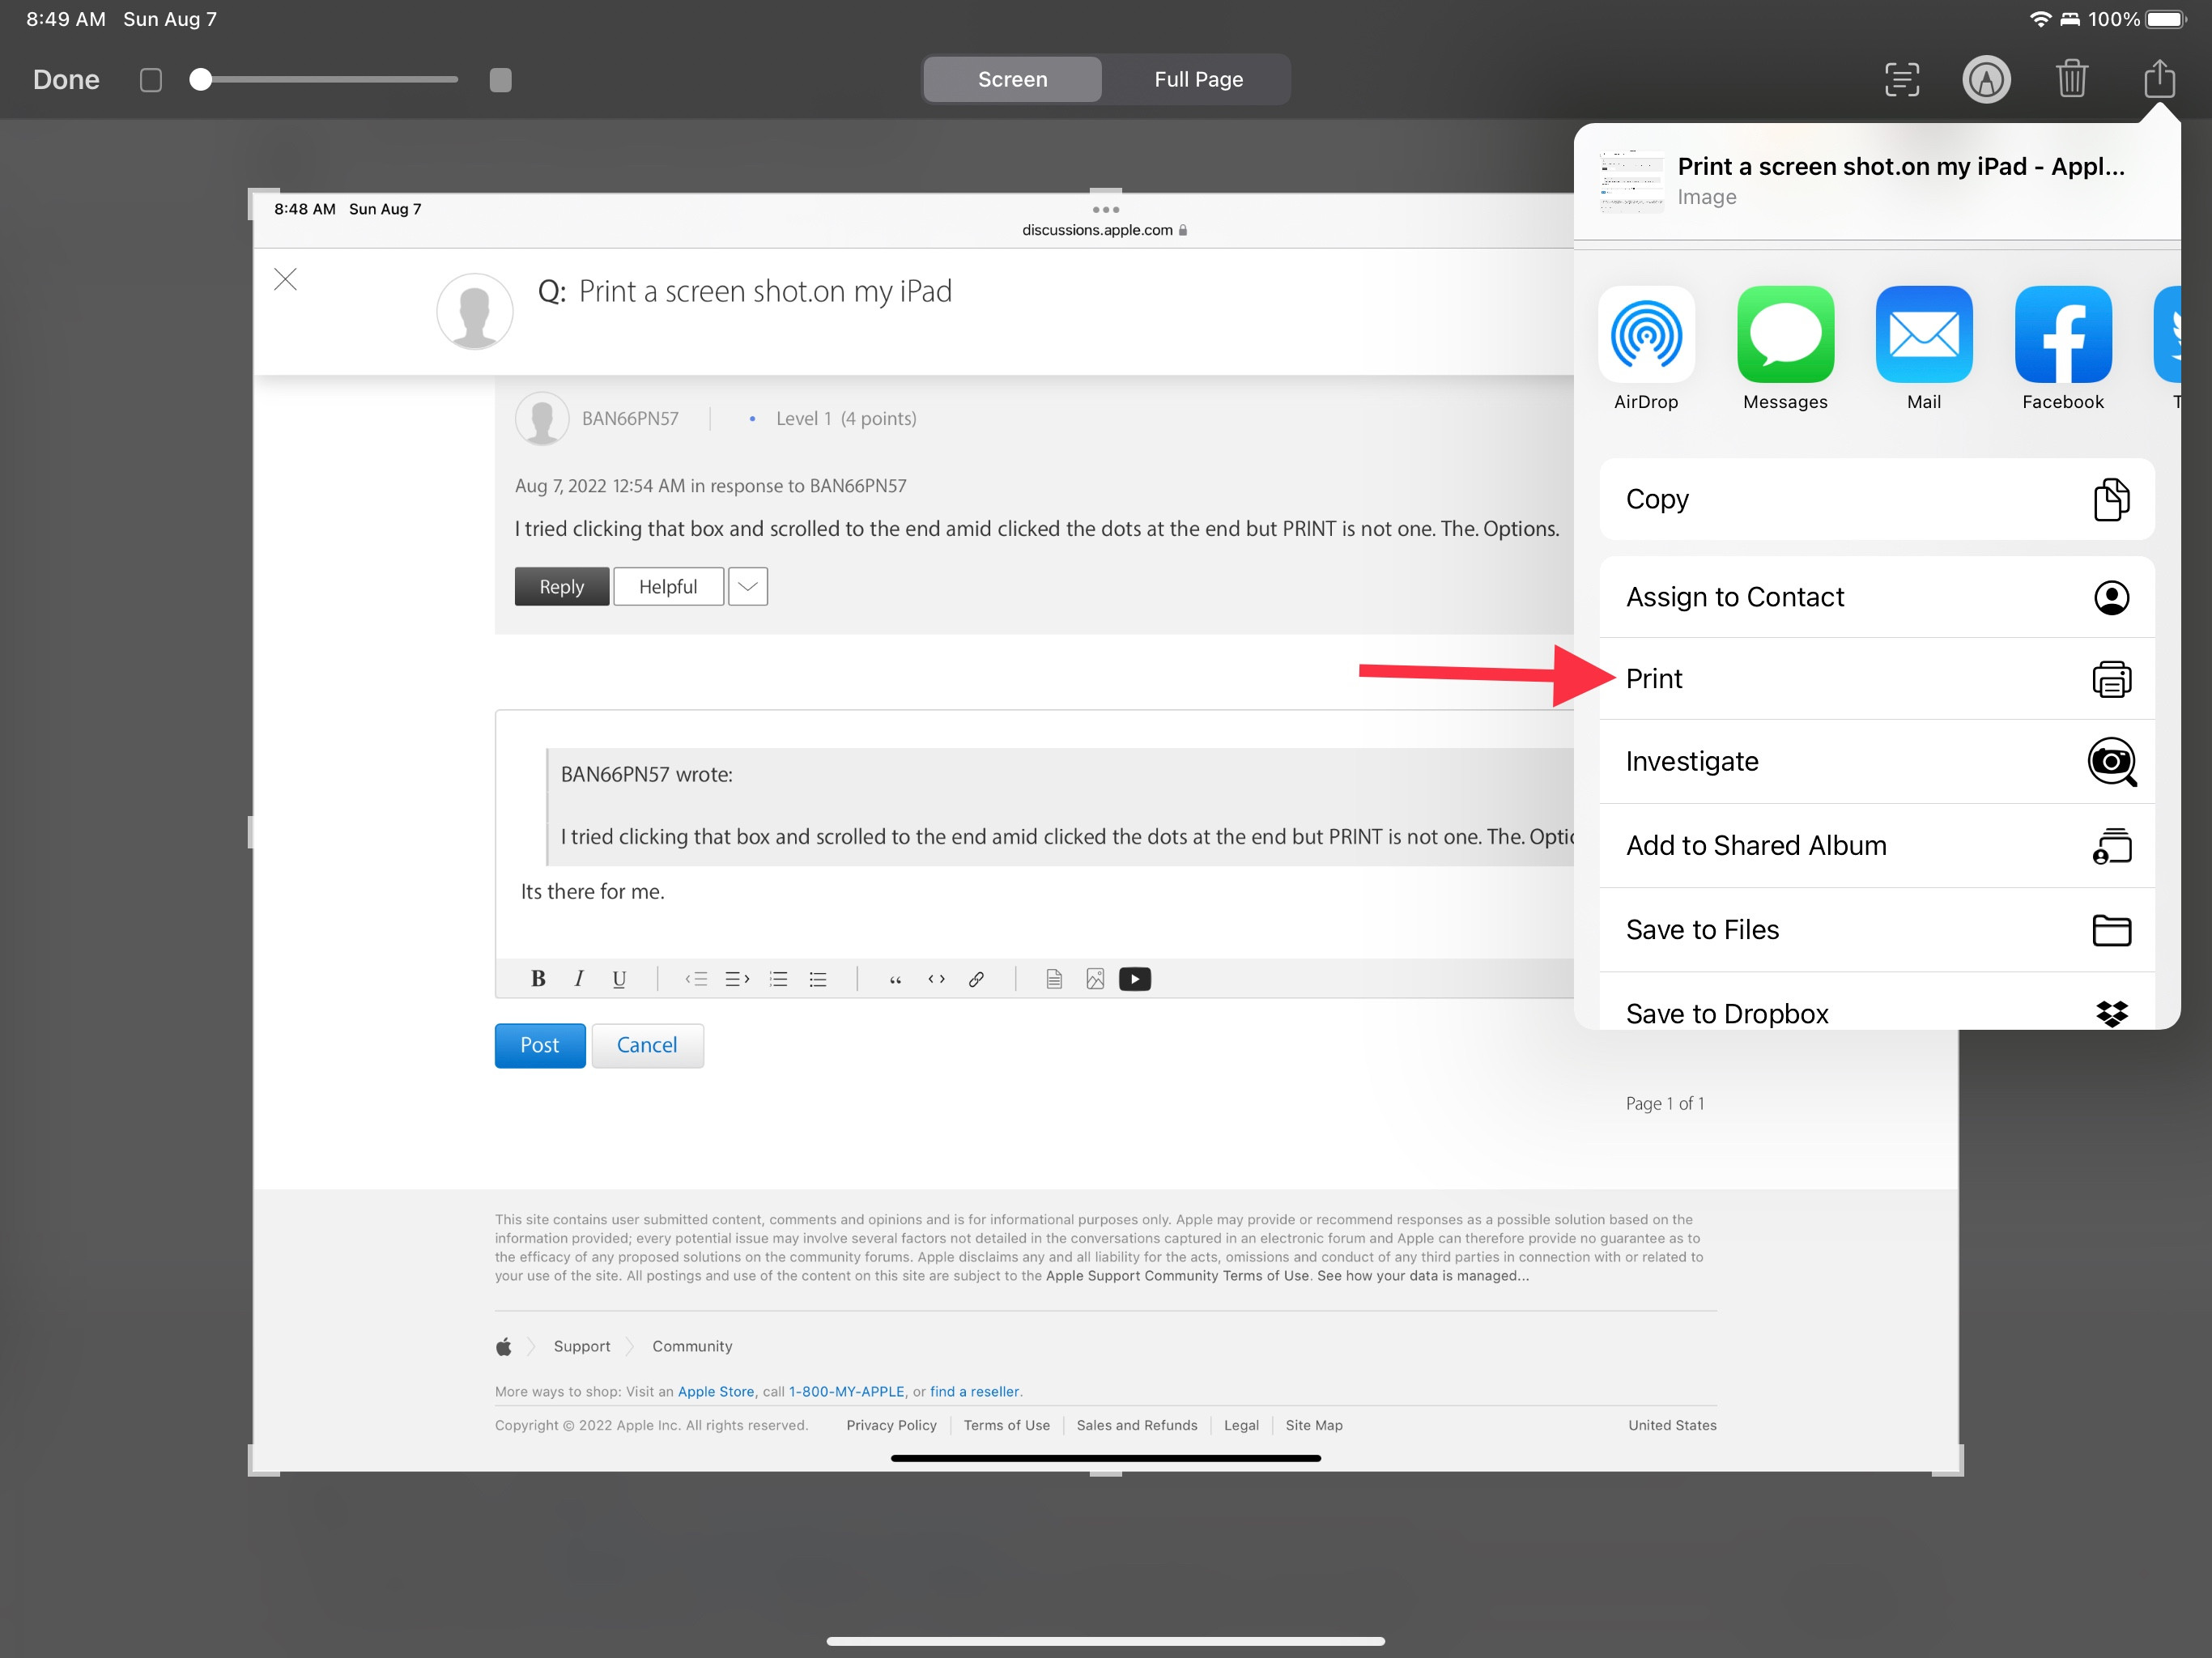 iPad Share Icon leading to the print option
- Printer Options: If you have AirPrint enabled and a compatible printer is nearby, your printer should appear as an option. Select your printer.
- Adjust Settings: You can adjust settings like the number of copies, paper size, and more in the Printer Options menu before printing.
- Print: Tap “Print” to send your photo to the printer.
If you are having trouble finding the “Print” option or don’t have an AirPrint printer handy, another useful method is to save your photo as a PDF and then print the PDF. This can be helpful for ensuring compatibility or if you want to print from a computer later.
- Follow steps 1-4 above to get to the Share Sheet.
- Choose “Save to Files”: Instead of “Print”, scroll through the apps in the Share Sheet and select “Save to Files”.
- Save as PDF: Choose a location to save your file, and ensure the format is PDF (this is usually the default when saving from the Share Sheet in this context). Tap “Save”.
- Open Files App: Locate and open the Files app on your iPad.
- Find Your PDF: Navigate to the location where you saved the PDF file.
- Share and Print from Files: Tap on the PDF file to open it. Then, tap the Share icon again (similar to the one in the Photos app). The “Print” option should be available in the Share Sheet, allowing you to print the PDF document.
Printing photos from your iPad doesn’t need to be complicated. Whether you use the direct “Print” option via the Share icon or utilize the PDF workaround, you can easily get your iPad photos into print. Enjoy bringing your digital photos to life!