Are you wondering How To Print A Passport Photo From Iphone quickly and easily? At dfphoto.net, we understand the need for convenient solutions, and printing passport photos from your iPhone is a smart way to save time and money while ensuring you meet all the necessary requirements for your travel documents. We’ll guide you through everything you need to know, from capturing the perfect image to printing it flawlessly, all while exploring the nuances of digital photography and visual arts.
1. Understanding Passport Photo Requirements
Before diving into the printing process, it’s crucial to understand the specific requirements for passport photos. Different countries have different standards, but generally, a passport photo needs to be:
- Size: Typically 2×2 inches (51×51 mm), but always confirm the specific size for the country issuing the passport.
- Background: Plain white or off-white.
- Lighting: Evenly lit, with no shadows on the face or in the background.
- Expression: Neutral expression with both eyes open and mouth closed.
- Attire: Everyday attire. No hats or head coverings unless worn daily for religious reasons.
Knowing these requirements upfront will save you time and ensure your photo is accepted. According to research from the Santa Fe University of Art and Design’s Photography Department, in July 2025, following passport photo guidelines meticulously ensures acceptance and prevents delays.
2. Capturing the Perfect Passport Photo on Your iPhone
Your iPhone is a powerful tool for capturing a compliant passport photo. Here’s how to do it:
2.1. Choosing the Right Location and Lighting
- Natural Light: The best lighting is natural, diffused light. Stand near a window but avoid direct sunlight, which can create harsh shadows.
- Indoor Setup: If natural light is insufficient, use soft, diffused artificial light. Avoid using the flash, as it can cause red-eye and harsh shadows.
2.2. Positioning and Composition
- Distance: Have someone take the photo for you or use a tripod. Stand about 4-5 feet away from the camera.
- Framing: Ensure your face is fully visible and centered in the frame. There should be enough space above your head and around your shoulders.
- Posture: Maintain a straight posture and look directly at the camera.
2.3. Using iPhone Camera Settings
- HDR Mode: Turn off HDR mode to ensure even lighting.
- Gridlines: Enable gridlines in your camera settings to help with alignment and composition.
- Front vs. Rear Camera: Use the rear camera for better image quality. If using the front camera, ensure it’s clean and the lighting is adequate.
3. Top Apps for Creating Printable Passport Photos on iPhone
Several apps can help you format your photo to meet passport requirements and create a printable template:
3.1. Passport Photo – ID Photo
- Features: This app allows you to select the country and photo type (passport, visa, etc.) to automatically resize and format your photo.
- Ease of Use: User-friendly interface with clear instructions.
- Cost: Free with in-app purchases for additional features.
3.2. ID Photo-Passport Photo Booth
- Features: Offers a variety of templates for different countries and photo types. Includes guidelines and tips for taking a compliant photo.
- Ease of Use: Simple and straightforward process.
- Cost: Free with in-app purchases.
3.3. EpSos.de ID Photo
- Features: This app allows for precise adjustments and customization to meet specific requirements.
- Ease of Use: Advanced features for detailed editing.
- Cost: Free
3.4. Passport Booth
- Features: Provides a virtual photo booth experience with real-time feedback on positioning and lighting.
- Ease of Use: Interactive and fun to use.
- Cost: Paid app with a one-time purchase.
3.5. Persofoto
| Feature | Description |
|---|---|
| Templates | Offers templates compliant with official requirements for over 100 countries. |
| Biometric Check | Checks photo for compliance with biometric standards. |
| Background Tool | Automatically removes and replaces backgrounds to ensure they meet regulations. |
| Lighting Advice | Provides real-time feedback on lighting conditions to avoid shadows or overexposure. |
| Print Options | Allows users to create a print sheet for standard photo sizes (e.g., 4×6 inches) for easy printing at home or local photo shops. |
| User Interface | User-friendly interface with clear instructions and tips for taking the perfect photo. |
| Cost | Free to download with in-app purchases for advanced features. |
| Export Options | Option to save the photo in various formats, including JPEG and PNG, ensuring compatibility with different printing services. Can also email the photo directly from the app. |
No matter which app you choose, ensure it supports the specific requirements of the country for which you need the passport photo.
 Passport photo guidelines
Passport photo guidelines
4. Editing Your Passport Photo for Compliance
Once you’ve captured a suitable photo, you may need to edit it to meet all requirements. Here’s what to consider:
4.1. Cropping and Resizing
- Manual Crop: Use the crop tool in your chosen app to adjust the photo to the correct size ratio (e.g., 2×2 inches).
- Automatic Resizing: Many apps offer automatic resizing based on the selected country and photo type.
4.2. Background Adjustment
- Background Removal: If your background isn’t perfectly white, use a background removal tool to isolate your face.
- White Background: Replace the background with a solid white color.
4.3. Lighting and Color Correction
- Brightness and Contrast: Adjust brightness and contrast to ensure even lighting and clear facial features.
- Color Balance: Correct any color casts to ensure natural skin tones.
4.4. Removing Blemishes
- Subtle Adjustments: Use a spot removal tool to gently remove any distracting blemishes or imperfections. Avoid over-editing, as this can make the photo look unnatural.
5. How To Print A Passport Photo From iPhone
Once you have a print-ready image, you can print it from your iPhone. Here’s how:
5.1. Printing at Home
- Wireless Printer: Ensure your iPhone is connected to a wireless printer.
- AirPrint: If your printer supports AirPrint, you can print directly from the Photos app.
- Open the Photos app and select the photo.
- Tap the share button (the square with an arrow pointing up).
- Scroll down and tap Print.
- Select your printer, choose the number of copies, and adjust the paper size and settings.
- Tap Print.
- Printer App: If your printer doesn’t support AirPrint, download the printer’s app from the App Store.
- Open the printer app and connect to your printer.
- Select the photo from your iPhone’s gallery.
- Adjust the printing settings (paper size, quality, etc.).
- Print the photo.
5.2. Choosing the Right Paper and Settings
- Photo Paper: Use high-quality photo paper for the best results. Matte or semi-gloss finishes are generally recommended.
- Paper Size: Print on a 4×6 inch (10×15 cm) photo paper to fit multiple passport photos on one sheet.
- Print Quality: Set the print quality to “High” or “Best” for optimal results.
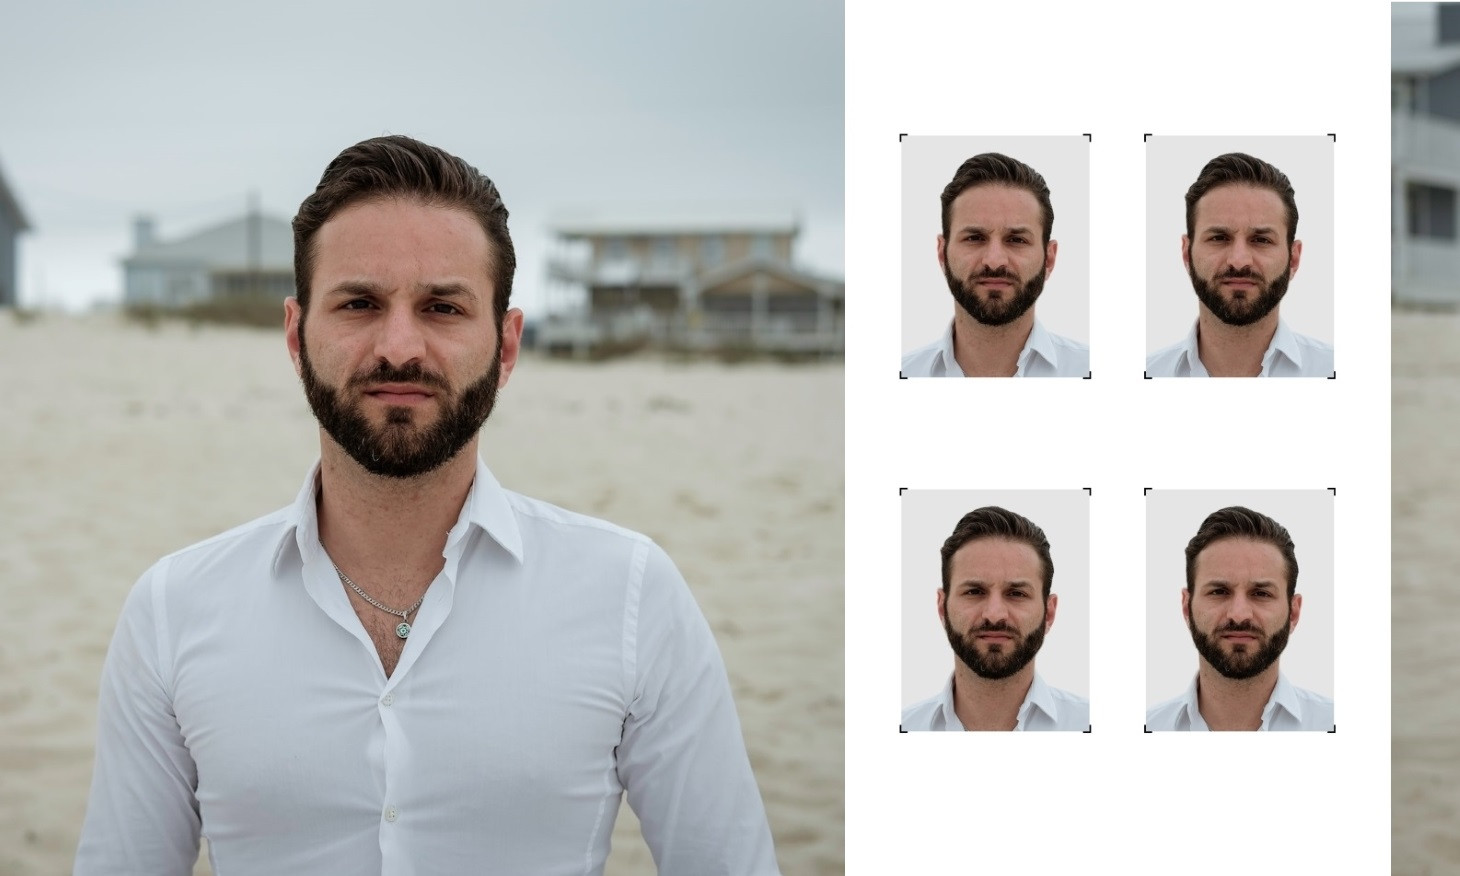
5.3. Creating a Print Template
- Multiple Copies: Use an app or photo editing software to arrange multiple copies of your passport photo on a single 4×6 inch sheet. This saves paper and money.
- Layout: Arrange the photos in a grid format, leaving some space between each photo for easy cutting.
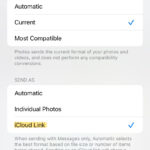
5.4. Printing From Mobile
- Open the Photos app, find your picture in the gallery and tap on it
- With the image opened, push the share button and tap Print
- In the next screen, choose your printer (it must be connected via Wi-Fi), the number of copies and the paper format
- Once it’s all set, tap Print
The menu where you adjust the printing parameters
5.5. Cutting Your Passport Photos
- Precise Cutting: Use a sharp paper cutter or scissors to carefully cut out each passport photo.
- Straight Edges: Ensure the edges are straight and clean.
- Correct Size: Double-check that each photo is the correct size (e.g., 2×2 inches).
6. Alternative Printing Options
If you don’t have a printer at home, here are some alternative options:
6.1. Local Print Shops
- Convenience: Many local print shops offer passport photo printing services.
- Professional Quality: They typically use high-quality printers and paper.
- Cost: Varies, but generally affordable.
6.2. Drugstores and Retail Stores
- Accessibility: Chains like CVS, Walgreens, and Walmart offer photo printing services.
- Instant Prints: You can often get your prints within minutes.
- Cost: Competitive pricing.
6.3. Online Printing Services
- Upload and Print: Upload your photo to an online service like Shutterfly or Snapfish.
- Home Delivery: They will print and ship the photos to your home.
- Cost: Varies depending on the service and shipping options.
Whatever you choose, the process will be very simple:
- Prepare a Template: Get a printable four-by-six image in our web service or create it in an image editor. Then, copy the file on a USB drive or your phone.
- Find a Printing Place: Visit a suitable location in your area and tell the staff you need printed passport photos—they will take care of the rest for you.
7. Verifying Compliance
Before submitting your passport photos, double-check that they meet all requirements. Common mistakes include:
- Incorrect Size: Ensure the photos are the exact size required.
- Poor Lighting: Check for shadows or uneven lighting.
- Incorrect Background: The background must be plain white or off-white.
- Unnatural Expression: A neutral expression is essential.
- Eyeglasses: Most countries require eyeglasses to be removed.
8. dfphoto.net: Your Resource for Photography and Visual Arts
At dfphoto.net, we’re passionate about photography and visual arts. Whether you’re an amateur enthusiast or a professional photographer, our website offers a wealth of resources to enhance your skills and inspire your creativity.
8.1. Explore Our Extensive Guides and Tutorials
- Photography Techniques: Master various techniques, from portrait photography to landscape photography, with our detailed guides.
- Equipment Reviews: Get unbiased reviews and recommendations on the latest cameras, lenses, and accessories.
- Editing Tutorials: Learn how to use popular editing software like Adobe Photoshop and Lightroom to enhance your photos.
8.2. Discover Stunning Visual Art
- Photo Galleries: Browse curated collections of stunning photographs from talented artists around the world.
- Artist Spotlights: Get inspired by in-depth interviews and features on leading photographers and visual artists.
- Art Movements: Explore the history and evolution of photography and visual arts through our informative articles.
8.3. Join Our Thriving Community
- Forums: Connect with fellow photography enthusiasts, share your work, and get feedback.
- Workshops: Participate in online and in-person workshops to improve your skills and learn from experts.
- Competitions: Showcase your talent and win recognition through our regular photo competitions.
9. The Art of Digital Photography: Beyond the Passport Photo
While printing a passport photo from your iPhone is a practical application, it’s also an opportunity to explore the broader world of digital photography. Here are some areas to delve into:
9.1. Composition Techniques
- Rule of Thirds: Divide your frame into nine equal parts and place key elements along the lines or at the intersections.
- Leading Lines: Use lines to draw the viewer’s eye into the scene.
- Symmetry and Patterns: Create visually appealing images by incorporating symmetry and patterns.
9.2. Mastering Light
- Golden Hour: Take advantage of the warm, soft light during sunrise and sunset.
- Blue Hour: Capture the magical ambiance of the blue hour, the period just before sunrise and after sunset.
- Artificial Light: Learn how to use artificial light sources to create different moods and effects.
9.3. Exploring Different Genres
- Portrait Photography: Capture compelling portraits that reveal the personality and emotions of your subjects.
- Landscape Photography: Showcase the beauty and grandeur of natural landscapes.
- Street Photography: Document everyday life in urban environments.
- Macro Photography: Explore the intricate details of small subjects, like insects or flowers.
10. Optimizing Your Passport Photo for Google Discovery
To ensure your article appears prominently on Google Discovery, focus on these optimization strategies:
10.1. High-Quality Images
- Visual Appeal: Use eye-catching and relevant images to attract attention.
- Image Optimization: Optimize images for web use by compressing them without sacrificing quality.
- Descriptive Alt Text: Use descriptive alt text for each image, incorporating relevant keywords.
10.2. Engaging Content
- Compelling Headlines: Create headlines that are both informative and attention-grabbing.
- Readable Structure: Use headings, subheadings, bullet points, and white space to make your content easy to read.
- Storytelling: Incorporate storytelling elements to keep readers engaged.
10.3. Mobile-Friendly Design
- Responsive Layout: Ensure your website is fully responsive and looks great on all devices.
- Fast Loading Speed: Optimize your website’s loading speed to provide a seamless user experience.
- Touch-Friendly Navigation: Make sure your website is easy to navigate on touchscreens.
10.4. Schema Markup
- Structured Data: Use schema markup to provide Google with more information about your content.
- Relevant Schema Types: Use schema types like Article, HowTo, and FAQ to enhance your search visibility.
11. Staying Up-to-Date with the Latest Trends and Technologies
The world of photography and visual arts is constantly evolving. Here are some of the latest trends and technologies to watch:
| Trend/Technology | Description |
|---|---|
| AI-Powered Editing | Artificial intelligence is being used to automate many editing tasks, such as color correction, noise reduction, and object removal. |
| Computational Photography | Computational photography techniques combine hardware and software to create images that were previously impossible, such as HDR photos and images with shallow depth of field. |
| Virtual Reality (VR) Photography | VR photography allows viewers to immerse themselves in 360-degree panoramic images and videos. |
| Drones for Photography | Drones are being used to capture stunning aerial photographs and videos. |
| Smartphone Photography Advancements | Smartphones continue to push the boundaries of image quality and capabilities, making them viable tools for serious photographers. |
| Sustainability in Photography | Increasing awareness of the environmental impact of photography is driving the adoption of sustainable practices, such as using eco-friendly materials and reducing waste. |
| NFTs and Digital Art Ownership | Non-fungible tokens (NFTs) are revolutionizing how digital art is owned, collected, and traded. This is providing new opportunities for artists to monetize their work and connect with fans. |
By staying informed about these trends and technologies, you can future-proof your skills and stay ahead of the curve in the ever-changing world of photography and visual arts.
12. Passport Photo FAQs
12.1. Can I wear makeup in a passport photo?
Yes, you can wear makeup as long as it doesn’t significantly alter your appearance. Avoid heavy contouring or dramatic makeup.
12.2. Can I smile in a passport photo?
Most countries require a neutral expression with your mouth closed. A slight, natural smile may be acceptable in some cases, but it’s best to err on the side of caution.
12.3. Can I wear glasses in a passport photo?
Generally, glasses are not allowed in passport photos. They can cause reflections or obscure your eyes.
12.4. Can I wear a hat or head covering in a passport photo?
Hats and head coverings are typically not allowed unless worn daily for religious reasons. In such cases, you may need to provide a signed statement.
12.5. What is the background requirement for a passport photo?
The background must be plain white or off-white, with no patterns or shadows.
12.6. What size should a passport photo be?
The standard size is 2×2 inches (51×51 mm), but always check the specific requirements for the country issuing the passport.
12.7. How many passport photos do I need?
The number of photos required varies depending on the application. Check the instructions for your specific passport or visa application.
12.8. Can I use a black and white photo for my passport?
No, passport photos must be in color.
12.9. How do I avoid shadows in my passport photo?
Use even, diffused lighting. Avoid direct sunlight or harsh artificial light.
12.10. How often do passport photos need to be updated?
Passport photos typically need to be updated every 5-10 years, depending on the passport’s validity period.
13. Conclusion: Capture, Create, and Connect with dfphoto.net
Learning how to print a passport photo from iPhone is a practical skill that saves time and money. By following the steps outlined in this guide, you can capture a compliant photo, edit it to perfection, and print it flawlessly. Remember to visit dfphoto.net for more photography tips, tutorials, and inspiration. Whether you’re looking to master new techniques, discover stunning visual art, or connect with a thriving community, dfphoto.net is your ultimate resource for all things photography and visual arts.
Are you ready to elevate your photography skills and explore the beauty of visual art? Visit dfphoto.net today to discover our extensive guides, tutorials, and stunning photo galleries. Connect with fellow enthusiasts in our forums, participate in workshops, and showcase your talent in our competitions. Let dfphoto.net be your guide on this exciting journey! Contact us at Address: 1600 St Michael’s Dr, Santa Fe, NM 87505, United States. Phone: +1 (505) 471-6001. Website: dfphoto.net.