With over a billion active users, Instagram stands out as a premier social media platform for individuals and businesses alike. Whether you aim to showcase your personal snapshots, market your brand, or connect with a wider audience, mastering the art of posting on Instagram is crucial. If you’re new to this visually-driven world or seeking to refine your posting process, this guide will walk you through each step to effectively share your photos and engage with the Instagram community.
Posting consistently and strategically on Instagram can significantly enhance your online presence. Here’s a detailed, step-by-step guide on how to post photos to your Instagram account, ensuring you make the most of every share.
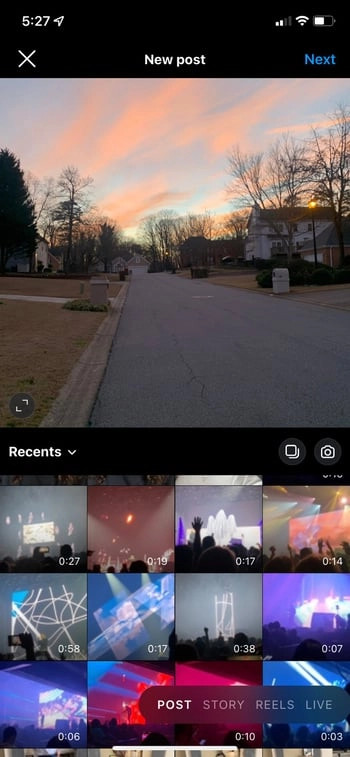
Step 1. Tap the + Icon to Begin Your Post
To start sharing your visual story, locate the plus icon [+], typically found at the top center or top right corner of your Instagram home screen. This icon is your gateway to creating new content. Tapping this will initiate the process of uploading a photo or video, opening up a world of creative possibilities right at your fingertips. This is the universal symbol for adding new content and is intuitively placed for easy access.
Step 2. Choose a Photo or Video from Your Library or Capture a New One
 choose photo from library to post on instagram
Once you tap the plus icon, Instagram will access your device’s photo and video library, displaying your recent media. Here, you have two main choices:
- Select from Your Library: Browse through your existing photos and videos. Choose the perfect image or video you’ve already captured and curated. Simply tap on the media you wish to post.
- Capture in-app: If you’re feeling spontaneous or want to capture something in the moment, you can use Instagram’s built-in camera. Look for the “Photo” or “Video” options usually located at the bottom of the screen, often next to “Library”. This allows you to take a new photo or record a video directly within the Instagram app.
After selecting your media, you’ll usually be prompted to crop or adjust it before proceeding to the next steps.
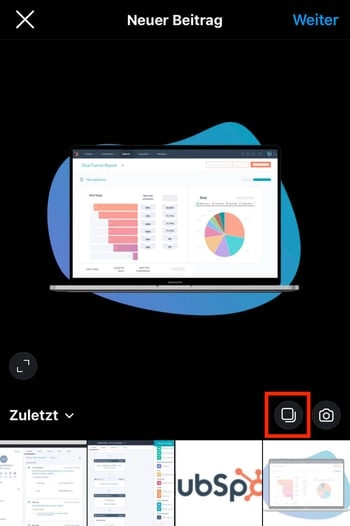
Step 3. Explore Posting Multiple Images as a Carousel
Instagram’s carousel feature is a fantastic way to share multiple photos or videos in a single post. This is ideal for storytelling, showcasing different angles of a product, or sharing a series of related images from an event.
 choose multiple photos for instagram carousel post
To create a carousel:
- When you are in your library selection screen, look for the “Select multiple” icon. This icon typically looks like stacked squares and is usually located above your photo grid, often on the right side.
- Tap this icon to activate the multiple selection mode.
- Now, you can select up to 10 photos and videos to include in your carousel. As you tap each image or video, a number will appear in the corner, indicating its order in the carousel sequence.
- Arrange the order by tapping and dragging the numbered circles if needed.
Carousels are highly engaging and can increase the time users spend interacting with your content, which is beneficial for visibility in Instagram’s algorithm.
Step 4. Crop and Adjust Image Dimensions for Optimal Display
While Instagram started with square images, it now supports various aspect ratios, including landscape and portrait. However, understanding cropping and dimensions is key to ensure your photos look their best.
- Default Square Crop: Instagram might initially crop your image into a square.
- Adjust Aspect Ratio: To use the original aspect ratio (e.g., vertical or horizontal), look for the crop icon (often represented by diagonal arrows or a crop box) usually located at the bottom left of the image preview. Tap this to toggle between square and original aspect ratios. You can then pinch to zoom in or out to adjust the framing within the chosen ratio.
While Instagram is flexible, it’s good to be aware of the recommended image sizes:
- Square: 1080px by 1080px (1:1 aspect ratio)
- Landscape: 1080px by 566px (1.91:1 aspect ratio)
- Portrait: 1080px by 1350px (4:5 aspect ratio)
Ensuring your images are high resolution and correctly cropped prevents unwanted cut-offs and maintains visual appeal.
Step 5. Enhance Your Photos with Filters
Instagram filters are pre-set effects that can quickly alter the mood and style of your photos. They can help create a consistent aesthetic for your feed or simply enhance the visual appeal of individual posts.
To use filters:
- After selecting and cropping your image, you will be taken to the filter screen.
- Scroll through the filter options displayed at the bottom of the screen. Tap on each filter to preview its effect on your photo in real-time.
- Adjust Filter Intensity: For a subtler effect, tap the selected filter again. This often brings up a slider that allows you to reduce the filter’s strength.
- Manage Filters: You can customize your filter tray by scrolling to the far right and tapping “Manage.” Here, you can hide or reorder filters to streamline your selection process.
Experiment with different filters to find styles that complement your photos and brand. Popular filters include Clarendon for brightening and intensifying colors, Gingham for a vintage look, and Juno for vibrant warmth.
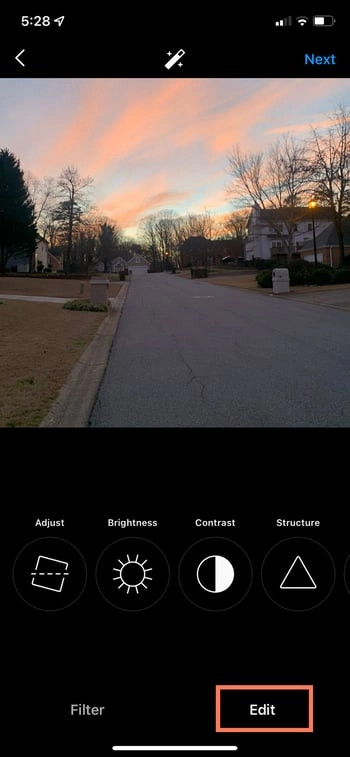
Step 6. Fine-Tune Your Image with Editing Tools
Beyond filters, Instagram provides a suite of editing tools to further refine your photos. To access these:
-
Tap “Edit” located at the bottom right of the filter screen.
-
Explore the various editing options, including:
- Adjust: Straighten or rotate your image.
- Brightness: Lighten or darken the photo.
- Contrast: Adjust the difference between light and dark areas.
- Structure: Enhance details and texture.
- Warmth: Change the color temperature (cooler or warmer tones).
- Saturation: Increase or decrease color intensity.
- Color: Add color tints to highlights or shadows.
- Fade: Create a vintage, washed-out effect.
- Highlights & Shadows: Adjust the brightness of highlights and shadows independently.
- Vignette: Darken the edges of the image to draw focus to the center.
- Tilt Shift: Blur parts of the image to create depth of field effects.
- Sharpen: Enhance the clarity of details.
Use these tools judiciously to enhance, not overwhelm, your photos. Subtle adjustments can often make a significant difference.
 edit photo options on instagram
Step 7. Write an Engaging Caption to Tell Your Story
A compelling Instagram caption adds context, personality, and encourages interaction. It’s your opportunity to connect with your audience beyond the visual.
- Craft a Narrative: Tell a story related to your photo. Share insights, ask questions, or express your thoughts and feelings.
- Keep it Concise but Informative: While Instagram allows longer captions, readability is key. Break up long text into shorter paragraphs.
- Include a Call to Action: Encourage engagement by asking questions (“What do you think?”, “Tag a friend who would love this!”), prompting comments, or directing users to a link in your bio (“Link in bio for more!”).
- Use Keywords (Naturally): If relevant, incorporate keywords related to your photo or topic, which can help with discoverability in Instagram’s search.
A well-written caption can significantly boost engagement and provide value to your followers.
Step 8. Optimize for Discoverability with Hashtags
Hashtags categorize your content and make it discoverable to users interested in specific topics. They are essential for expanding your reach beyond your immediate followers.
 add hashtags to instagram post
- Research Relevant Hashtags: Use hashtag research tools or Instagram’s search to find popular and relevant hashtags for your niche and content.
- Mix Broad and Niche Hashtags: Combine widely used hashtags (e.g., #photography) with more specific ones (e.g., #travelphotographyfrance) to balance reach and targeted audience.
- Use a Moderate Number: Instagram allows up to 30 hashtags, but aim for quality over quantity. 5-10 well-chosen hashtags are often more effective.
- Place Hashtags Strategically: You can include hashtags directly in your caption or add them as a separate first comment. Both methods work equally well.
Effective hashtag usage is crucial for increasing the visibility of your Instagram posts and attracting a relevant audience.
Step 9. Tag Relevant People to Share the Spotlight
Tagging other Instagram users in your photos or captions links their profiles to your post. This is a great way to give credit, collaborate, or increase visibility among shared audiences.
- Tag in Photo: Before posting, tap “Tag People” on the share screen. Tap on individuals in the photo to tag their profiles directly onto the image.
- Tag in Caption: You can also tag people in your caption by using the “@” symbol followed by their username (e.g., “@username”). They will be notified of the tag.
- Tag Responsibly: Only tag people who are actually in the photo or directly related to the content. Avoid excessive or irrelevant tagging.
Tagging can notify friends, collaborators, or featured individuals, encouraging them and their followers to view and engage with your post.
Step 10. Add Your Location to Connect Locally
Adding a location to your Instagram post tags it with a geographical place. This can help local users discover your content and is particularly useful for businesses or travel-related posts.
- Tap “Add Location” on the share screen.
- Search for a Place: Type in the name of the location (e.g., city, landmark, business name). Instagram will suggest locations based on your input and current GPS.
- Select the Correct Location: Choose the most accurate location from the suggestions.
Location tagging increases your post’s visibility to users browsing content from that specific area, enhancing local engagement.
Step 11. Enhance Your Caption with Emojis
Emojis are visual symbols that can add emotion, tone, and visual appeal to your captions. Use them to inject personality and make your text more engaging.
- Use Relevant Emojis: Choose emojis that complement the mood and message of your caption and photo.
- Don’t Overdo It: While emojis can be fun, too many can make your caption look cluttered or unprofessional. Use them sparingly and purposefully.
- Emojis for Emphasis: Use emojis to highlight key points, replace words visually, or add a touch of playfulness.
Emojis can break up text and make your captions more visually appealing and emotionally resonant.
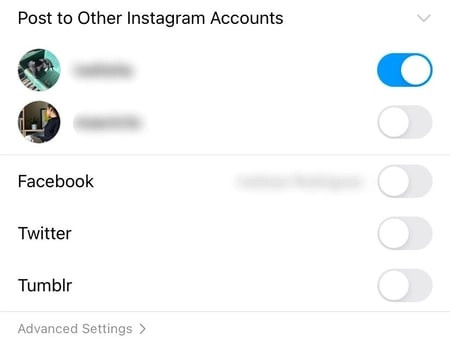
Step 12. Cross-Promote by Sharing to Other Social Media Platforms
Instagram offers seamless integration with other social media platforms like Facebook, Twitter, and more. This allows you to easily share your Instagram posts on these connected accounts, expanding your reach and saving time on cross-posting.
 share instagram post to other social media platforms
- Toggle Sharing Options: On the share screen, you’ll see options to share to connected platforms. Simply toggle the buttons next to the platforms where you want to share your post.
- Customize for Each Platform (Optional): While direct sharing is convenient, consider if you need to tailor the caption or content slightly for each platform’s audience and format best practices for maximum impact.
Cross-platform sharing amplifies your content’s reach and ensures consistency in your online presence across different social networks.
Step 13. Edit or Delete Your Post After Sharing
Mistakes happen! Instagram allows you to edit your posts even after they are live.
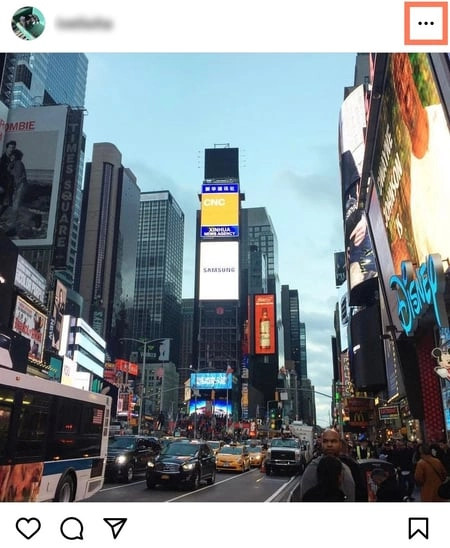
- Edit: To edit a post, tap the three dots “…” located at the top right corner of your post. Select “Edit” from the options. You can then change your caption, tag people, add location, etc.
- Delete: If needed, you can also delete your post via the same “…” menu. Choose “Delete.” Be aware that deleting is permanent.
 edit post options menu on instagram
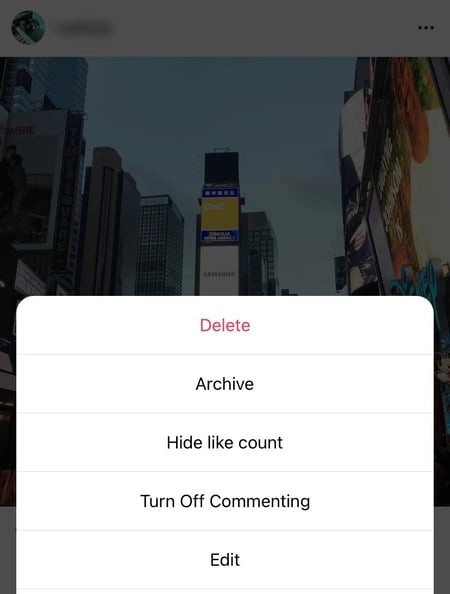 edit option in instagram post settings
Editing is useful for correcting typos or updating information. Deleting should be reserved for when a post is no longer relevant or contains significant errors.
Grow Your Instagram Presence Through Consistent Posting
Mastering how to post photos on Instagram is just the beginning. Consistent, strategic posting, combined with engaging content and audience interaction, is key to growing your presence. Start experimenting with these steps, refine your approach over time, and watch your Instagram community flourish. Remember to analyze what works best for your audience and adapt your strategy accordingly for continued success on this dynamic platform.
