Live Photos, Apple’s nifty feature that brings your still images to life, offer a unique way to capture moments with a touch of motion and sound. While not exactly videos, they add an extra layer of dynamism to your memories. If you’re wondering how to share these captivating snippets on Instagram, you’re in the right place. This guide will walk you through everything you need to know about How To Post A Live Photo On Instagram, ensuring your posts stand out and engage your audience.
 How to post photos on Instagram
Live Photos blur the lines between traditional photos and videos. They’re essentially 12-megapixel images that capture 1.5 seconds of motion and audio before and after you press the shutter button. This happens automatically on iPhones 6s and later, and iPad Pros, bringing a subtle animation to your photos when you press and hold them. For those familiar with the moving pictures in the Harry Potter universe, Live Photos are a real-world, user-friendly equivalent.
These animated photos have become increasingly popular, offering a glimpse beyond the static image. They’re perfect for adding personality and authenticity to your Instagram presence. Instead of just a posed picture, a Live Photo can reveal a fleeting expression, the rustle of leaves, or a burst of laughter, making your content more relatable and engaging.
Why Use Live Photos on Instagram? Authenticity and Engagement
Instagram has evolved beyond perfectly curated, overly filtered images. Users are increasingly seeking authenticity and genuine content. They crave a real connection, wanting to see the human side behind the polished facade. This shift towards authenticity makes Live Photos incredibly valuable for both personal profiles and brands.
Live Photos offer a window into the “behind the scenes” moments, adding depth and context to your posts. For brands, this translates to building stronger relationships with followers. Consumers connect more deeply with brands that show their human side, moving away from purely promotional content. Live Photos help achieve this by offering a more personal and engaging form of visual storytelling.
Instagram and Live Photos are a natural fit. However, Instagram doesn’t natively support uploading Live Photos directly as interactive images in your feed. But don’t worry, there are several effective workarounds to share your Live Photos on Instagram Stories and your main feed.
Different Ways to Post Live Photos on Instagram
While direct Live Photo uploads to the Instagram feed aren’t possible in their original animated format, you can easily share them using these methods:
- Instagram Stories: The simplest way to share Live Photos, leveraging Instagram’s built-in conversion to Boomerang.
- Converting to Boomerang: Transforming your Live Photo into a Boomerang allows you to post it on your feed as a looping video.
- Loop or Bounce Effects: Using iPhone’s native photo editing features to create looping or bouncing videos from Live Photos for feed posts.
- Converting to GIF: Turning your Live Photo into a GIF, a universally supported animated image format, for Instagram feed posts.
Let’s explore each of these methods in detail to help you master how to post a live photo on Instagram effectively.
How to Post a Live Photo to Your Instagram Story
Instagram Stories offer the most straightforward method to share your Live Photos. The platform automatically converts Live Photos into Boomerangs when uploaded from your camera roll (taken within the last 24 hours).
Here’s a step-by-step guide:
Step 1: Open Instagram and Access Stories.
Launch the Instagram app and tap the camera icon located in the top left corner of your screen. This will open the Instagram Stories interface.
Step 2: Select Your Live Photo.
Swipe up on the Stories screen or tap on the photo icon at the bottom left corner to access your camera roll. Choose the Live Photo you wish to share. Ensure the photo was taken within the last 24 hours for this method to work seamlessly.
Step 3: Convert to Boomerang.
Once you’ve selected your Live Photo, simply press and hold firmly on the screen. Instagram will automatically convert your Live Photo into a Boomerang, indicated by the Boomerang symbol appearing on the screen.
Step 4: Customize and Share.
You can now add text, stickers, filters, or drawings to your Story as usual. Once you’re happy with your creation, tap “Your Story” to share it with your followers.
This method is quick and easy for sharing spontaneous Live Photos in a fun, looping format on your Instagram Story.
3 Ways to Post a Live Photo in Your Instagram Feed
Posting Live Photos to your Instagram feed requires a few extra steps as Instagram feed videos need to be at least 3 seconds long, while Live Photos are inherently shorter. Here are three popular methods to overcome this limitation and share your Live Photos on your feed.
1. Convert Your Live Photo into a Boomerang for Feed Posts
This method leverages Instagram’s Boomerang conversion feature within Stories to create a feed-compatible video.
Step 1: Access Instagram Stories.
Tap the camera icon in the top left corner to open the Instagram Stories interface, just as you would for creating a Story.
Step 2: Choose Your Live Photo.
Access your camera roll by swiping up or tapping the photo icon and select the Live Photo you want to post to your feed. Again, ensure it’s taken within the last 24 hours for direct access within Stories.
Step 3: Convert to Boomerang within Stories.
Press and hold firmly in the middle of the screen until a white circle appears and the word “Boomerang” is displayed. This confirms your Live Photo has been converted into a Boomerang.
Step 4: Save the Boomerang.
Instead of posting to your Story, tap the “Save” button (downward arrow icon) usually located at the bottom of the screen. This saves the Boomerang as a video to your camera roll.
Step 5: Create a New Feed Post.
Navigate back to the Instagram homepage and tap the “+” icon at the bottom center to create a new post as you normally would.
Step 6: Select the Boomerang Video.
Choose the Boomerang video you just saved from your camera roll. It will now be a 6-second looping video, ready to be posted to your Instagram feed.
 Instagram live photo to gif
Step 7: Edit and Share Your Feed Post.
You can apply filters, write a caption, and tag people or locations as you would with any regular Instagram feed post. Tap “Share” to publish your Boomerang Live Photo to your feed.
For added creativity, consider using apps like Instasize to further enhance your Boomerang videos before posting. These apps offer features to add borders, text, filters, and adjust photo elements to make your Boomerangs even more engaging.
2. Use “Loop” or “Bounce” Effects for Feed-Friendly Live Photos
iPhone’s built-in Photos app offers “Loop” and “Bounce” effects that extend the duration of your Live Photos, making them suitable for Instagram feed posts without relying on the 24-hour Story limitation.
Step 1: Open the Photos App.
Exit Instagram and open the native “Photos” app on your iPhone.
Step 2: Find Your Live Photo.
Locate the Live Photo you want to share on Instagram feed. This method works for older Live Photos as well, not just those taken within 24 hours.
Step 3: Apply “Loop” or “Bounce” Effect.
Tap on the Live Photo to view it in full screen. Then, swipe up on the photo. This will reveal the “Effects” menu with options like “Live,” “Loop,” “Bounce,” and “Long Exposure.”
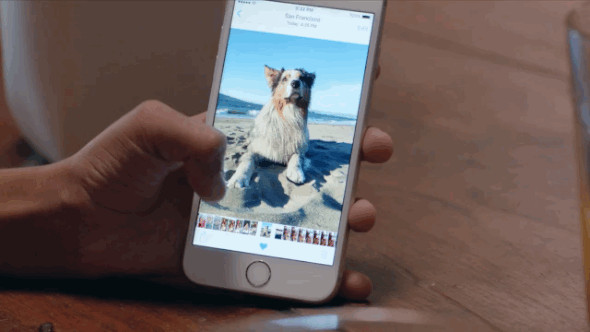
 Post a live photo on Instagram
Step 4: Choose “Loop” or “Bounce”.
Select either the “Loop” or the “Bounce” effect. “Loop” creates a continuous looping video, while “Bounce” plays the Live Photo forward and then in reverse repeatedly.
Step 5: Save the Effected Video.
The Photos app automatically saves the Live Photo with the chosen effect as a video in your camera roll.
Step 6: Post to Instagram Feed.
Open Instagram, create a new feed post, and select the looped or bounced video from your camera roll. You can then add filters, captions, and share it to your feed.
This method is excellent for sharing older Live Photos and creating longer, more visually interesting feed content directly from your iPhone’s native features.
3. Convert Live Photos to GIFs for Instagram Feed
Converting Live Photos to GIFs offers another versatile way to share them on your Instagram feed. GIFs are widely supported and can be easily uploaded as video content.
Step 1: Choose a GIF Converter App.
Download a third-party app that converts Live Photos to GIFs. Popular options include Motion Stills (Google), Lively, and Alive. These apps are generally free and available on the App Store.
Step 2: Convert Your Live Photo to GIF.
Open your chosen GIF converter app and select the Live Photo you want to convert. Follow the app’s instructions to convert the Live Photo into a GIF. Most apps offer customization options like loop style and speed.
Step 3: Save the GIF to Your Camera Roll.
Once the conversion is complete, save the GIF to your camera roll.
Step 4: Post the GIF to Instagram Feed.
Open Instagram, create a new feed post, and select the saved GIF from your camera roll. Instagram will recognize it as a video file, allowing you to post it to your feed.
Using GIFs can be particularly effective for sharing Live Photos with vibrant animations or when you want to ensure compatibility across different platforms.
Tips for Engaging Live Photos on Instagram
To maximize the impact of your Live Photos on Instagram, consider these tips:
- Capture Authentic Moments: Focus on capturing genuine, unscripted moments that showcase personality and real-life experiences.
- Highlight Subtle Motion: Live Photos excel at capturing subtle movements that add depth and interest to an image. Think of swaying trees, flickering candles, or a gentle smile.
- Use Sound Effectively: Remember Live Photos also capture sound. Ensure the audio enhances the moment rather than detracting from it.
- Experiment with Different Methods: Try out Boomerangs, Loops, Bounce effects, and GIFs to see which style resonates best with your content and audience.
- Engage with Captions: Use captions to provide context and encourage interaction. Ask questions related to the Live Photo or invite followers to share their own experiences.
Liven Up Your Instagram Presence with Live Photos
In today’s Instagram landscape, authenticity and genuine connection are key. Live Photos provide an excellent medium to showcase these qualities, moving beyond static perfection to share more dynamic and relatable content.
While Instagram doesn’t yet support direct interactive Live Photo uploads to the feed, the workarounds discussed – Boomerangs, Loops, Bounce effects, and GIFs – make it easy to incorporate these engaging visuals into both your Stories and feed posts.
By using these methods, you can effectively leverage Live Photos to enhance your Instagram presence, build deeper connections with your followers, and create a more vibrant and engaging online community. So go ahead, bring your photos to life and share those captivating moments on Instagram!