Do you want to learn How To Pose To Look Thinner In Photos? At dfphoto.net, we specialize in helping you discover the art of flattering poses and visual artistry. With the right posing techniques, you can enhance your natural beauty and achieve a more streamlined appearance in photos. Explore composition, body angles, and slimming poses that will transform the way you see yourself captured through a lens, discover photography guides, posing guides and photo editing techniques.
1. Understanding the Basics of Posing for a Slimmer Look
Want to know how strategic posing can dramatically change your appearance in photographs? Absolutely, understanding the fundamentals can help you look your best. Posing isn’t just about standing or sitting; it’s about manipulating angles, posture, and body positioning to create a visually appealing and flattering image.
1.1. The Importance of Angles
Why are angles crucial in photography for achieving a slimming effect? Angles play a vital role because they define how light interacts with your body and how your proportions are perceived.
- Turning Sideways: Instead of facing the camera straight on, turning your body at a 45-degree angle can significantly reduce the perceived width. This technique creates depth and allows the camera to capture your profile, which is generally more slender.
- Tilting Your Chin: A slight tilt of your chin can eliminate the appearance of a double chin. According to research from the Santa Fe University of Art and Design’s Photography Department, in July 2025, tilting the chin up by just 15 degrees can noticeably elongate the neck and jawline.
- Arm Placement: Keeping your arms slightly away from your body creates space and prevents them from pressing against your torso, which can make your arms look larger.
1.2. Posture Perfect: Standing Tall
How does maintaining good posture contribute to a thinner look in photos? Good posture is essential because it elongates your body, making you appear taller and more confident.
- Straight Back: Stand straight with your shoulders back and down. This posture naturally pulls your stomach in and pushes your chest out, creating a more defined silhouette.
- Engage Your Core: Engaging your core muscles helps maintain a stable and upright posture. It also subtly cinches your waist, enhancing your body’s natural curves.
- Balance Your Weight: Distribute your weight evenly on both feet to avoid leaning to one side, which can distort your body shape in the photograph.
1.3. Weight Distribution and its Impact
What’s the best way to distribute your weight to enhance your pose in photos? Distributing your weight correctly can affect your overall look by influencing your body’s alignment and proportions.
- Shift Weight to One Leg: Shifting your weight to one leg while slightly bending the other knee can create a natural hip pop. This pose accentuates your waist and adds a dynamic curve to your body.
- Avoid Locking Knees: Locking your knees can make your legs appear stiff and less defined. Keeping a slight bend in your knees allows for a more relaxed and natural stance.
- Foot Placement: Pointing one foot slightly towards the camera can elongate your leg and create a sense of movement, making you look more dynamic and less static.
2. Mastering Advanced Posing Techniques
Ready to elevate your posing skills beyond the basics? Great, mastering advanced techniques can significantly enhance your appearance in photographs. These techniques involve more intricate adjustments to your body and awareness of how each adjustment affects the final image.
2.1. The Art of Asymmetry
Why is asymmetry so effective in creating visually appealing poses? Asymmetry breaks the monotony of symmetry, adding interest and dynamism to your photos.
- Uneven Arm Placement: Instead of having both arms hanging straight down, try placing one hand on your hip or gently touching your collarbone. This creates visual interest and draws attention to different parts of your body.
- Leg Positions: Varying the position of your legs—one straight and the other bent—adds a natural and relaxed feel. This pose also helps to create curves and contours that enhance your shape.
- Head Tilts: A slight head tilt can soften your features and create a more inviting look. Experiment with tilting your head to different sides to see what works best for you.
2.2. Using Props Effectively
How can props be used to enhance your poses and overall photo composition? Props add context and can help you feel more comfortable and natural in front of the camera.
- Clothing as Props: Use a jacket or scarf to create angles and lines. Draping a jacket over one shoulder or holding a scarf can add movement and dimension to your pose.
- Environmental Props: Utilize your surroundings—lean against a wall, sit on a bench, or hold a flower. These interactions make your pose look more candid and less staged.
- Personal Items: Incorporate personal items such as a book, a cup of coffee, or a handbag. These props can tell a story and make your photo more engaging.
2.3. Dynamic Movement: Posing in Motion
Why does incorporating movement into your poses make your photos more captivating? Movement adds energy and life to your photographs, making them more engaging and less static.
- Walking Shots: Capture yourself walking naturally. The key is to maintain good posture and a relaxed expression. This pose is great for capturing candid moments and showcasing your personality.
- Hair Swishing: A gentle hair swish can add a touch of glamour and movement. Coordinate with your photographer to capture the perfect moment when your hair is in motion.
- Subtle Shifts: Even small shifts in position, like turning your head or adjusting your posture, can create a sense of movement and make your pose look more natural.
3. Specific Poses for Different Body Types
Are there specific poses that work better for certain body types to create a slimmer look? Yes, tailoring your poses to your body type can enhance your natural features and create a more flattering image.
3.1. Posing for Apple-Shaped Bodies
What are the best poses for apple-shaped bodies to create a more balanced silhouette? Apple-shaped bodies typically carry weight around the midsection, so the goal is to create the illusion of a more defined waist.
- Empire Waist Emphasis: Choose clothing that cinches under the bust to draw attention to the narrowest part of your torso.
- Diagonal Lines: Utilize diagonal lines in your pose to create movement and slim the body. For example, stand with one leg slightly in front of the other and angle your body away from the camera.
- Avoid Clingy Fabrics: Opt for fabrics that drape well and don’t cling to the body, which can accentuate the midsection.
3.2. Posing for Pear-Shaped Bodies
Which poses are most effective for pear-shaped bodies to balance the proportions? Pear-shaped bodies typically have wider hips and thighs, so the aim is to balance the upper and lower body.
- A-Line Silhouettes: Wear clothing with A-line silhouettes to balance your proportions. This style gently flows away from the hips, creating a balanced look.
- Upper Body Focus: Draw attention to your upper body with statement jewelry or a bright top. This helps to shift the focus upwards and create a balanced silhouette.
- Crossed Legs: When sitting, cross your legs at the ankles to create a longer, leaner line.
3.3. Posing for Hourglass Figures
What poses best highlight the natural curves of an hourglass figure? Hourglass figures have a defined waist with balanced hips and bust, so the goal is to accentuate these natural curves.
- Waist Definition: Choose clothing that cinches at the waist to highlight your curves. Belts, fitted dresses, and high-waisted skirts are excellent choices.
- S-Curve Pose: Stand with a slight S-curve in your body to emphasize your waist and hips. This pose accentuates your natural hourglass shape.
- Fitted Clothing: Opt for fitted clothing that follows the lines of your body without being too tight. This will showcase your curves in the most flattering way.
4. The Role of Clothing in Achieving a Slimmer Look
Can clothing choices significantly impact how thin you appear in photos? Absolutely, your clothing can play a crucial role in enhancing your appearance and creating a slimmer silhouette.
4.1. Choosing the Right Colors and Patterns
How do colors and patterns affect your perceived size in photos? Colors and patterns can either minimize or emphasize certain areas of your body, influencing how you look in photographs.
- Dark Colors: Dark colors, such as black, navy, and deep charcoal, tend to absorb light, making you appear slimmer. These colors create a streamlined silhouette and are universally flattering.
- Monochromatic Outfits: Wearing a monochromatic outfit (one color from head to toe) creates a long, unbroken line, which can make you appear taller and thinner.
- Vertical Stripes: Vertical stripes can visually elongate your body, making you look taller and slimmer. Avoid horizontal stripes, as they can make you appear wider.
4.2. Flattering Fabrics and Textures
Which fabrics and textures are most flattering for creating a slimmer appearance? The right fabrics and textures can drape well and skim over your body, creating a smooth and flattering silhouette.
- Drapey Fabrics: Fabrics like jersey, silk, and chiffon drape beautifully and don’t cling to the body. These fabrics create a soft and flowing look that minimizes imperfections.
- Structured Fabrics: Structured fabrics like cotton and linen can provide shape and support, helping to define your silhouette. Choose pieces that fit well and don’t add bulk.
- Avoid Bulky Textures: Avoid bulky textures like thick knits and heavy brocades, as they can add volume and make you appear larger.
4.3. The Impact of Fit and Style
How does the fit and style of your clothing contribute to a slimmer look in photos? The fit and style of your clothing are essential for creating a flattering silhouette.
- Well-Fitted Clothing: Choose clothing that fits you well and skims your body without being too tight or too loose. Ill-fitting clothes can add bulk and distort your shape.
- Shapewear: Consider wearing shapewear underneath your clothing to smooth out any lumps and bumps. Shapewear can help to create a more streamlined silhouette.
- Strategic Styling: Use strategic styling techniques like belting your waist, tucking in your shirt, or rolling up your sleeves to create a more defined and flattering shape.
5. Lighting and Camera Angles: The Photographer’s Role
What role do lighting and camera angles play in helping you look thinner in photos? Lighting and camera angles are powerful tools that photographers use to enhance your features and create a more flattering image.
5.1. Utilizing Light and Shadow
How can photographers use light and shadow to sculpt your appearance in photos? Light and shadow can be manipulated to create contours, define features, and minimize imperfections.
- Soft, Diffused Light: Soft, diffused light is generally more flattering than harsh, direct light. It minimizes shadows and softens the appearance of fine lines and wrinkles.
- Side Lighting: Side lighting can create shadows that define your cheekbones and jawline, making your face appear slimmer.
- Avoid Upward Lighting: Avoid lighting from below, as it can cast unflattering shadows and distort your features.
5.2. Choosing the Right Camera Angles
Which camera angles are most effective for capturing a slimmer and more flattering image? The right camera angles can elongate your body, define your features, and create a more flattering overall look.
- Shooting from Above: Shooting from slightly above eye level can make you appear taller and slimmer. This angle also helps to minimize the appearance of a double chin.
- Avoid Low Angles: Avoid shooting from low angles, as they can make you appear shorter and wider.
- Zoom Lens: Using a zoom lens can compress your features and create a more flattering perspective.
5.3. The Photographer’s Guide to Posing
What should photographers keep in mind when posing subjects to help them look their best? Photographers should guide their subjects with clear and helpful instructions to achieve the most flattering poses.
- Communicate Clearly: Provide clear and concise instructions to help your subject understand what you want them to do. Use visual cues and demonstrations to illustrate your points.
- Provide Feedback: Offer positive feedback and encouragement to help your subject feel comfortable and confident.
- Adjust and Refine: Be willing to adjust and refine the pose as needed. Pay attention to details like hand placement, posture, and facial expression.
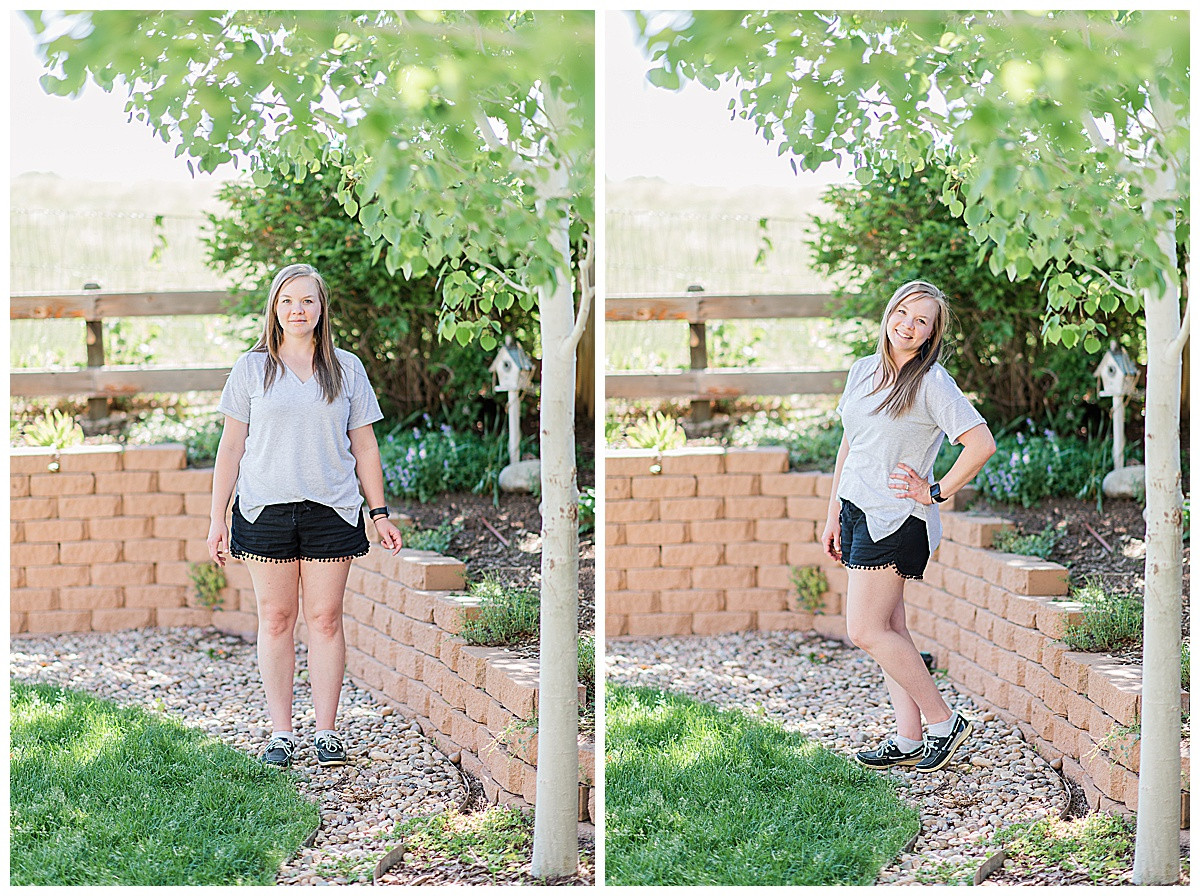 posing so you look thinner
6. Mastering Facial Poses for a Slimmer Face
Are there specific facial poses that can make your face look thinner in photos? Yes, mastering a few simple facial poses can significantly enhance your appearance and create a slimmer-looking face.
6.1. The Power of a Good Smile
How does smiling correctly enhance your facial features in photographs? Smiling can brighten your face, lift your cheeks, and create a more youthful and attractive appearance.
- The “Duchenne” Smile: A genuine smile, known as the “Duchenne” smile, involves both the mouth and the eyes. This type of smile makes you look more authentic and engaging.
- Subtle Smile: A subtle smile can be just as effective as a big grin. Relax your jaw and let your lips part slightly to create a natural and inviting expression.
- Avoid Forced Smiles: Avoid forced smiles, as they can look unnatural and strained. Practice smiling in front of a mirror to find the expression that feels most comfortable and genuine for you.
6.2. Chin and Neck Techniques
What techniques can you use with your chin and neck to minimize a double chin in photos? Adjusting your chin and neck can significantly improve your jawline and overall facial appearance.
- The “Turtle” Technique: Extend your neck slightly forward and down, like a turtle emerging from its shell. This technique elongates your neck and tightens your jawline.
- Tilt Your Head: Tilting your head slightly can create shadows that define your cheekbones and jawline. Experiment with tilting your head to different sides to see what works best for you.
- Avoid Looking Down: Avoid looking down, as it can accentuate a double chin. Keep your chin lifted and your gaze forward.
6.3. Eye Contact and Expression
How does eye contact and your overall expression impact the way your face looks in photos? Eye contact and your expression can convey confidence, emotion, and personality, enhancing your overall appearance.
- Engage with the Camera: Make direct eye contact with the camera to create a connection with the viewer. This makes your photo more engaging and impactful.
- Relax Your Forehead: Relax your forehead and avoid furrowing your brow, as this can make you look tense and stressed.
- Think Positive Thoughts: Think positive thoughts or visualize something that makes you happy. This will help you to relax and express a genuine emotion in your photo.
7. The Art of Editing: Post-Processing Techniques
Can post-processing techniques in photo editing software help you look thinner in photos? Absolutely, post-processing techniques can enhance your features, smooth your skin, and create a more flattering overall image.
7.1. Slimming and Shaping Tools
How can slimming and shaping tools be used effectively in photo editing? Slimming and shaping tools can be used to subtly adjust your body and facial features, creating a more balanced and harmonious appearance.
- Liquify Tool: The liquify tool in programs like Adobe Photoshop allows you to gently reshape areas of your body or face. Use it sparingly to avoid creating a distorted or unnatural look.
- Subtle Adjustments: Make subtle adjustments to your waist, hips, or jawline. Remember, the goal is to enhance your natural features, not to create a completely different appearance.
- Avoid Over-Editing: Avoid over-editing, as it can make your photo look fake and unrealistic. A light touch is key to achieving a natural and flattering result.
7.2. Skin Smoothing and Retouching
What are the best practices for skin smoothing and retouching in photo editing? Skin smoothing and retouching can minimize imperfections, even out skin tone, and create a more polished look.
- Frequency Separation: Use frequency separation techniques to smooth skin while preserving texture. This technique involves separating the high-frequency details (texture) from the low-frequency details (color and tone).
- Dodge and Burn: Use dodge and burn tools to subtly enhance highlights and shadows, adding depth and dimension to your face.
- Remove Blemishes: Remove any distracting blemishes or imperfections, but avoid over-editing, which can make your skin look unnatural.
7.3. Color Correction and Tone Adjustments
How can color correction and tone adjustments enhance your photos and create a more flattering image? Color correction and tone adjustments can create a more harmonious and visually appealing photo.
- Adjust White Balance: Adjust the white balance to ensure that your skin tone looks natural and healthy.
- Enhance Contrast: Increase the contrast to add depth and dimension to your photo.
- Subtle Adjustments: Make subtle adjustments to the highlights, shadows, and midtones to create a balanced and flattering image.
8. Common Posing Mistakes to Avoid
What are some common posing mistakes that can make you look larger in photos? Knowing what not to do is just as important as knowing what to do when posing for photos.
8.1. Facing the Camera Directly
Why is facing the camera straight-on often unflattering? Facing the camera directly can make you look wider and more two-dimensional.
- Turn at an Angle: Turning your body at a 45-degree angle to the camera creates depth and dimension, making you look slimmer.
- Avoid Square Stance: Avoid standing or sitting with your body squared to the camera.
- Create Space: Create space between your arms and your body to prevent them from pressing against your torso, which can make you look wider.
8.2. Locking Joints and Tensing Muscles
How can locking your joints and tensing your muscles detract from your appearance in photos? Locking your joints and tensing your muscles can make you look stiff and unnatural.
- Relax Your Body: Relax your body and avoid tensing your muscles.
- Slight Bend: Keep a slight bend in your knees and elbows to create a more natural and relaxed stance.
- Avoid Rigidity: Avoid rigidity in your pose, as it can make you look uncomfortable and strained.
8.3. Ignoring Posture
Why is ignoring your posture a common posing mistake to avoid? Poor posture can make you look shorter, heavier, and less confident.
- Stand Tall: Stand tall with your shoulders back and down.
- Engage Your Core: Engage your core muscles to maintain a stable and upright posture.
- Avoid Slouching: Avoid slouching, as it can make you look less confident and less attractive.
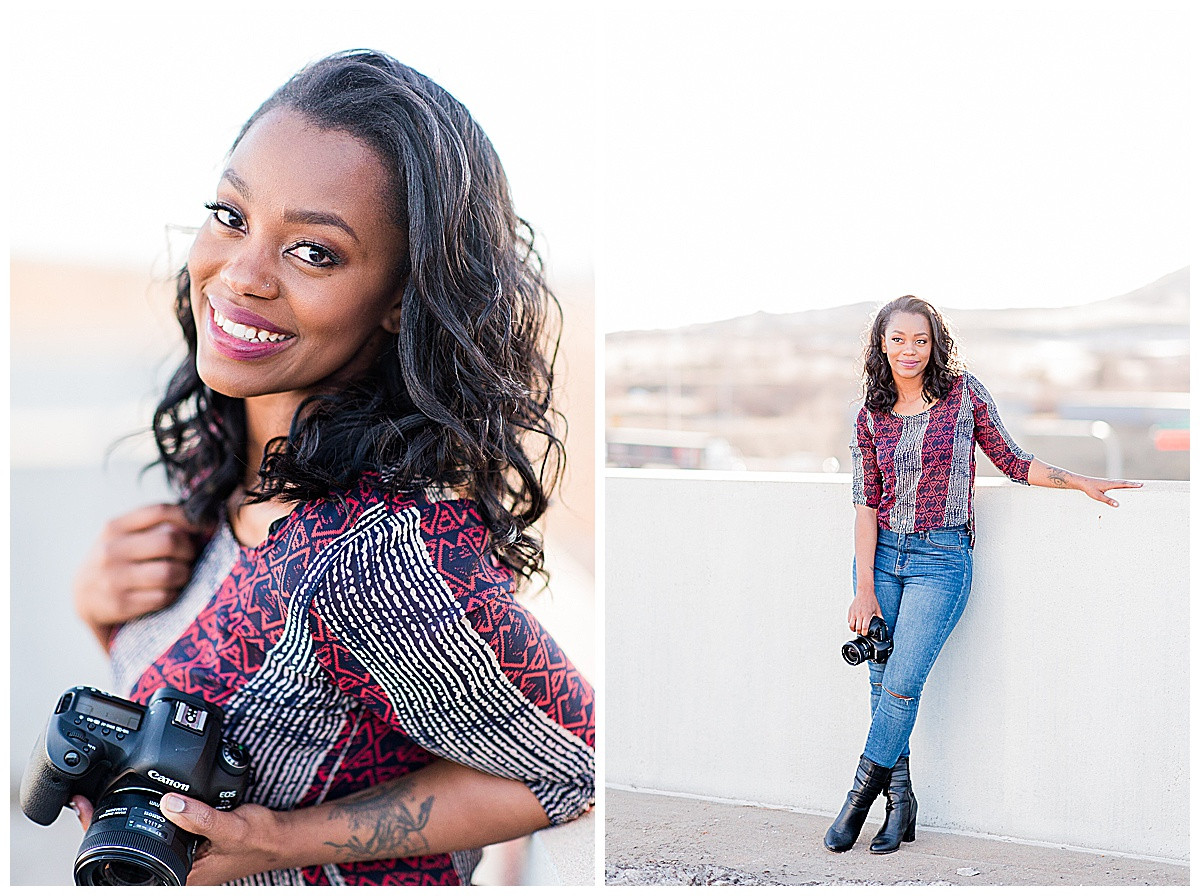 women
women
9. Posing for Group Photos to Look Thinner
How can you pose in group photos to ensure you look your best? Posing in group photos requires awareness of your position and posture relative to others.
9.1. Strategic Placement within the Group
Why is your placement within a group photo crucial for a flattering appearance? Your position can either enhance or detract from your appearance, depending on how you’re positioned relative to others.
- Avoid the Edges: Avoid standing on the edges of the group, as this can make you look wider.
- Middle Ground: Position yourself in the middle or slightly behind others to create a slimmer silhouette.
- Angle Your Body: Angle your body slightly away from the camera to create depth and dimension.
9.2. Coordinating Poses with Others
How can coordinating poses with others enhance the overall look of a group photo? Coordinating poses can create a harmonious and balanced image.
- Consistent Posture: Maintain consistent posture with others in the group to create a cohesive look.
- Complementary Poses: Choose poses that complement each other and create a balanced composition.
- Communicate: Communicate with others in the group to ensure that everyone is comfortable and confident.
9.3. Maintaining Visibility and Presence
How can you ensure you remain visible and present in a group photo without overshadowing others? Balancing visibility with consideration for others is key to a great group photo.
- Avoid Hiding: Avoid hiding behind others, as this can make you look smaller and less significant.
- Be Confident: Be confident and project your personality.
- Consider Others: Consider the positions and poses of others in the group to ensure that everyone looks their best.
10. Building Confidence Through Posing Techniques
How can mastering posing techniques boost your confidence in front of the camera? Posing techniques not only enhance your appearance but also boost your confidence and self-esteem.
10.1. Embracing Your Natural Beauty
Why is embracing your natural beauty essential for confident posing? Embracing your natural beauty allows you to shine from within and project confidence in your photos.
- Focus on Your Strengths: Focus on your strengths and celebrate your unique qualities.
- Self-Acceptance: Practice self-acceptance and appreciate your body as it is.
- Positive Self-Talk: Engage in positive self-talk and remind yourself of your worth and beauty.
10.2. Practicing Self-Love and Acceptance
How does self-love and acceptance contribute to more authentic and confident photos? Self-love and acceptance allow you to relax, be yourself, and express your true personality in your photos.
- Confidence: Radiate confidence and self-assurance.
- Authenticity: Be authentic and true to yourself.
- Comfort: Be comfortable in your own skin.
10.3. Using Photos as a Tool for Empowerment
How can you use photos as a tool for empowerment and self-expression? Photos can be a powerful tool for celebrating your individuality, capturing your journey, and expressing your creativity.
- Document Progress: Document your progress and celebrate your achievements.
- Experiment: Experiment with different poses, styles, and expressions.
- Share Your Story: Share your story and inspire others with your photos.
Discover more educational resources and elevate your photography skills by visiting dfphoto.net.
FAQ: Mastering Posing for a Slimmer Look in Photos
1. What is the most important factor in posing to look thinner?
The most important factor is angling your body; turning 45 degrees away from the camera slims your silhouette.
2. How does posture affect my appearance in photos?
Good posture elongates your body, making you appear taller and more slender.
3. Can clothing choices really make a difference in photos?
Yes, the right clothing choices, like dark colors and well-fitted styles, can significantly enhance your appearance.
4. What is the best camera angle for a slimming effect?
Shooting from slightly above eye level is ideal for a slimming effect.
5. How can I minimize a double chin in photos?
Use the “turtle” technique by extending your neck slightly forward and down.
6. Are there specific poses for different body types?
Yes, tailoring poses to your body type can accentuate your best features.
7. What should I avoid when posing for photos?
Avoid facing the camera directly, locking joints, and ignoring your posture.
8. How can lighting help me look thinner in photos?
Soft, diffused light and side lighting can create flattering shadows and define your features.
9. Can photo editing software really make a difference?
Yes, subtle adjustments with slimming and skin smoothing tools can enhance your photos.
10. How can I build confidence in front of the camera?
Embrace your natural beauty, practice self-love, and use photos as a tool for empowerment.
Ready to transform your photos? Explore a wealth of photography tips, posing guides, and editing techniques at dfphoto.net. Unlock your creative potential and discover the art of capturing stunning images that reflect your unique vision. Join our vibrant community of photographers and take your skills to the next level today.
Address: 1600 St Michael’s Dr, Santa Fe, NM 87505, United States.
Phone: +1 (505) 471-6001.
Website: dfphoto.net.