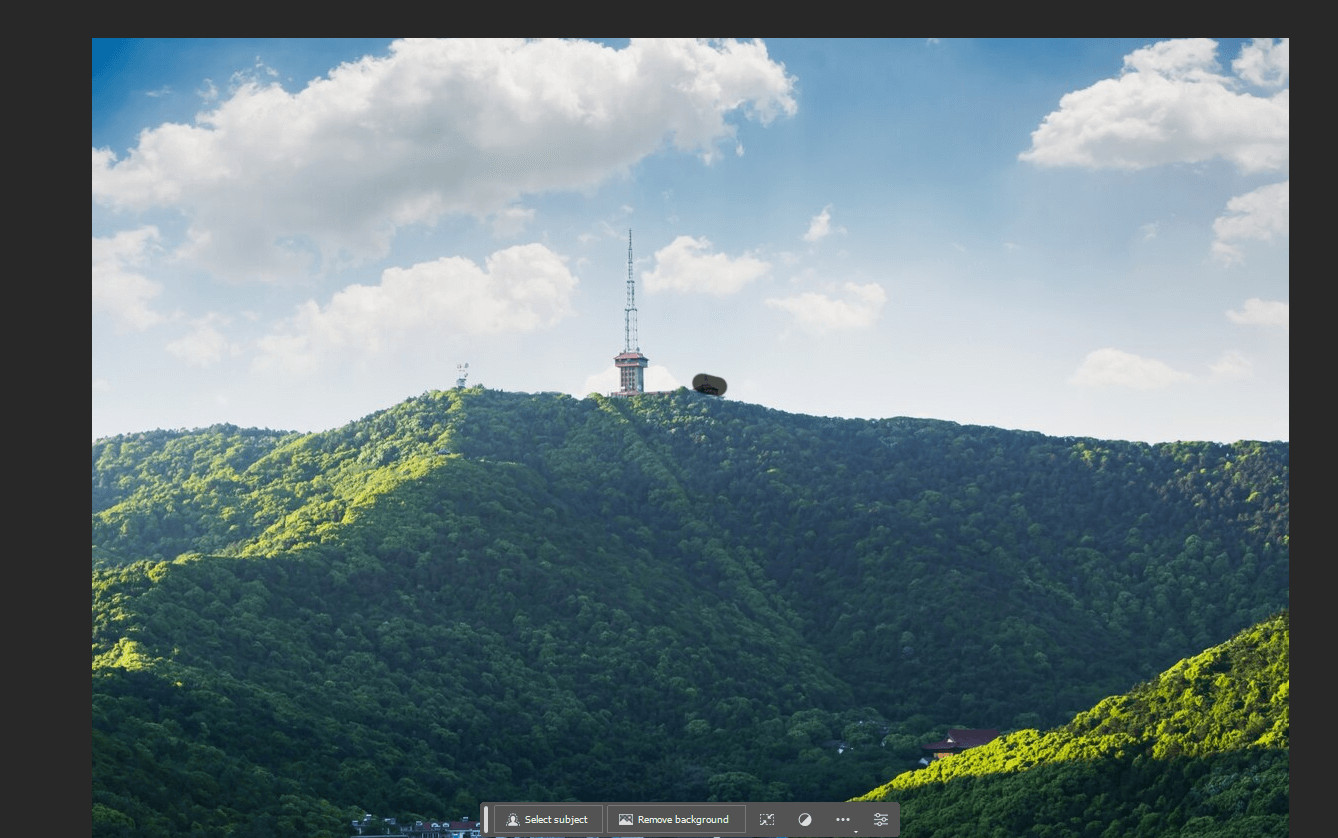
Photoshop stands as the industry-leading software for photo editing, offering a vast and powerful toolkit to transform your images. While its extensive capabilities can seem daunting to newcomers, mastering the basics of Photoshop is more accessible than you might think.
This guide breaks down the essential steps for editing photos in Photoshop, perfect for beginners eager to enhance their images. In just seven straightforward steps, you’ll learn how to perform fundamental edits and unlock the potential of your photography. Let’s dive in and make Photoshop editing easier than ever.
7 Simple Steps to Edit Photos in Photoshop
Step 1: Importing Your Image into Photoshop
The first step in any Photoshop project is to bring your chosen image into the workspace. This is a simple and crucial starting point.
 Importing an image into Photoshop using the Open command
To import your image, you have a couple of easy options:
-
Using Keyboard Shortcuts: The quickest way to open an image is by using keyboard shortcuts. Press Command+O on a Mac or Control+O on a PC. This will bring up a file explorer window where you can navigate to your image file, select it, and click “Open.”
-
Using the Photoshop Home Screen: When you launch Photoshop, you’ll often see a home screen. On this screen, you’ll find an “Open” button. Clicking this button will also open the file explorer, allowing you to browse and select the image you wish to edit.
Once you’ve chosen your image and clicked “Open,” your photo will be displayed in the Photoshop interface, ready for editing. This initial step sets the stage for all the exciting enhancements to come.
Step 2: Cropping and Straightening for Perfect Composition
After importing your image, refining its composition through cropping and straightening is often the next logical step. These adjustments can significantly improve the visual appeal and focus of your photograph.
Cropping Your Image:
The Crop Tool in Photoshop is essential for removing unwanted areas from your image, improving composition, or changing the aspect ratio.
-
Select the Crop Tool: Locate the “Crop Tool” in the Tools panel (it looks like two intersecting right angles). Click on it to activate the tool. You’ll notice a crop box immediately appear around your image.
-
Adjust the Crop Area:
- Freeform Cropping: Drag the corners or edges of the crop box to resize and reposition it. This allows for freeform cropping based on visual judgment.
- Preset Ratios and Dimensions: For more controlled cropping, look to the options bar at the top of the screen. Here, you can choose from preset aspect ratios (like 1:1 for square, or 16:9 for widescreen) from the dropdown menu. Alternatively, you can enter specific width and height dimensions in the boxes provided to the right of the menu if you have precise size requirements.
-
Commit the Crop: Once you’re satisfied with your crop selection, click the “checkmark” button in the control bar (directly below the options bar) or press Enter on your keyboard to finalize the crop. Photoshop will then trim the image to the cropped boundaries.
Straightening Your Image:
The Straighten tool is invaluable for correcting tilted horizons or vertical lines, ensuring your image looks balanced and professional.
-
Access the Straighten Tool: Within the Crop Tool options bar, you will see a “Straighten” icon (it often looks like a level). Click on this icon to activate the Straighten tool.
-
Draw a Straightening Line: Click and drag across the image to draw a line along an element that should be horizontally or vertically straight. For example, if your horizon is tilted, draw a line along the horizon. If a building appears slanted, draw a line along a vertical edge of the building.
-
Apply Straightening: Once you release the mouse button, Photoshop will automatically rotate the image to align the line you drew perfectly horizontally or vertically.
-
Finalize: Press the “enter” button or click the “checkmark” in the options bar to apply the straightening adjustment. Photoshop will rotate and, if necessary, slightly crop the edges to accommodate the rotation.
By mastering the Crop and Straighten tools, you gain fundamental control over the framing and alignment of your photos, setting a strong foundation for further edits.
Step 3: Mastering Color and Lighting Adjustments
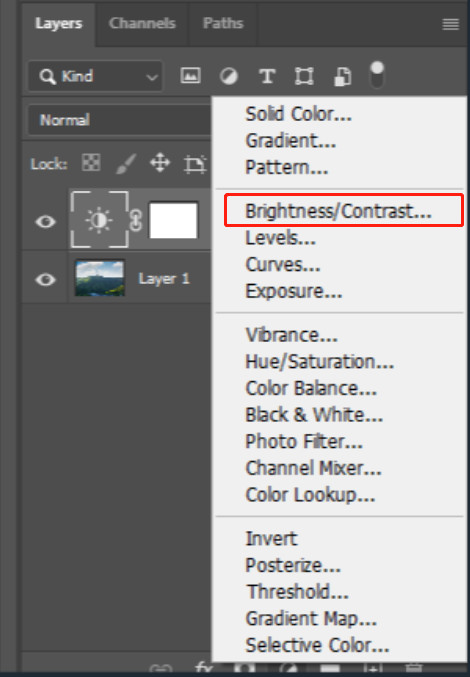 Adjusting brightness and contrast using adjustment layers in Photoshop
Adjusting color and lighting is crucial for enhancing the mood, clarity, and overall impact of your photos. Photoshop provides powerful adjustment layers that allow for non-destructive edits, meaning you can make changes without permanently altering your original image data.
-
Accessing Adjustment Layers: Locate the “Layers” panel (usually on the right side of your Photoshop interface). At the bottom of this panel, you’ll see a small icon that looks like a half-filled circle. Click on this icon to open the Adjustment Layer menu.
-
Brightness and Contrast Adjustment:
- From the Adjustment Layer menu, select “Brightness/Contrast.” This adds a Brightness/Contrast adjustment layer above your image layer.
- In the “Properties” panel (which should appear when you add an adjustment layer, often grouped with the Layers panel), you’ll find sliders for “Brightness” and “Contrast.”
- Automatic Adjustment (Auto): For a quick starting point, you can click the “Auto” button. Photoshop will analyze your image and automatically apply brightness and contrast adjustments.
- Manual Adjustment: For more precise control, drag the “Brightness” and “Contrast” sliders to the left or right. Moving the “Brightness” slider to the right will make the image lighter, and to the left darker. The “Contrast” slider increases or decreases the difference between the light and dark areas of your image.
- Before and After Preview: To see the effect of your adjustments, toggle the visibility icon (the eye icon) to the left of the Brightness/Contrast adjustment layer in the Layers panel. Clicking it once hides the adjustment, showing the “before,” and clicking again reveals the “after.”
-
Hue and Saturation Adjustment:
- Return to the Adjustment Layer menu and select “Hue/Saturation.” This adds a Hue/Saturation adjustment layer.
- In the Properties panel for Hue/Saturation:
- Saturation Slider: Drag the “Saturation” slider to the right to increase the intensity of the colors, making them more vibrant. Drag it to the left to decrease saturation, potentially leading to a black and white image if moved fully left. Adjust this slider until the colors in your photo look balanced and appealing.
- Hue Slider: The “Hue” slider shifts the colors in your image through the color spectrum. Subtle adjustments can create interesting color effects, but for natural corrections, it’s often best to leave Hue adjustments minimal unless you’re aiming for a specific creative effect.
-
Fine-tuning and Layer Masks: Adjustment layers are non-destructive and come with layer masks (the white box next to the adjustment layer in the Layers panel). Layer masks allow you to selectively apply adjustments to specific areas of your image. For example, you could brighten only the shadows or increase saturation in only the sky using masks (masking is a more advanced technique for later exploration).
Experiment with these brightness, contrast, hue, and saturation adjustments to bring out the best in your photos’ colors and tones.
Step 4: Removing Distractions with the Spot Healing Brush Tool
 Using the Spot Healing Brush Tool to remove unwanted objects in Photoshop
Often, photos contain small, unwanted objects that can detract from the main subject. The Spot Healing Brush Tool in Photoshop is remarkably effective for quickly and easily removing these distractions.
-
Zooming In for Precision: For detailed removal work, it’s helpful to zoom in on the area you’re editing. Press and hold Cmd + Plus key on a Mac or Ctrl + Plus key on Windows to zoom in. You can zoom out using Cmd/Ctrl + Minus key. Use the Hand Tool (activated by pressing the spacebar and dragging) to navigate around the zoomed-in image.
-
Selecting the Spot Healing Brush Tool: Find the “Spot Healing Brush Tool” in the Tools panel (it looks like a bandage). Select it. It might be grouped with other healing tools, so you might need to click and hold on the visible tool to reveal and choose the Spot Healing Brush.
-
Creating a New Layer for Healing: It’s best practice to perform healing on a new layer to keep your edits non-destructive.
- Go to the top menu and select “Layer” > “New” > “Layer.”
- In the “New Layer” dialog box, you can name the layer (e.g., “Spot Healing”) and click “OK.” This creates a transparent layer above your image layer.
-
Configuring the Spot Healing Brush: In the options bar at the top, ensure the settings are appropriate:
- Type: Set the “Type” dropdown menu to “Content-Aware.” This is the most effective mode for seamlessly removing objects as Photoshop intelligently fills in the removed area based on the surrounding content.
- Sample All Layers: Very importantly, check the box next to “Sample All Layers.” This ensures the Spot Healing Brush samples from all visible layers, including your image layer, even though you’re painting on the new empty layer. This is crucial for non-destructive editing.
-
Removing Objects:
- Adjust the brush size in the options bar if needed (usually, a brush slightly larger than the object you’re removing works best). You can also quickly adjust brush size using the bracket keys
[(smaller) and](larger). - Simply click directly on small objects like blemishes, dust spots, or power lines. For slightly larger objects, you can click and drag the brush over the object. Photoshop will instantly analyze the surrounding pixels and replace the selected area with content that blends in seamlessly.
- Adjust the brush size in the options bar if needed (usually, a brush slightly larger than the object you’re removing works best). You can also quickly adjust brush size using the bracket keys
-
Iterative Healing: Work your way around the image, clicking or dragging over any unwanted elements you want to remove. You can undo mistakes with Cmd/Ctrl + Z.
-
Review and Save: Once you’ve removed all the distractions, zoom out (Cmd/Ctrl + Minus key) to view the entire image and assess your work. Click “OK” (if applicable in any dialog box) or simply continue with other edits.
The Spot Healing Brush Tool is a powerful and user-friendly tool that makes cleaning up your photos incredibly efficient.
Step 5: Enhancing Mood with Filters
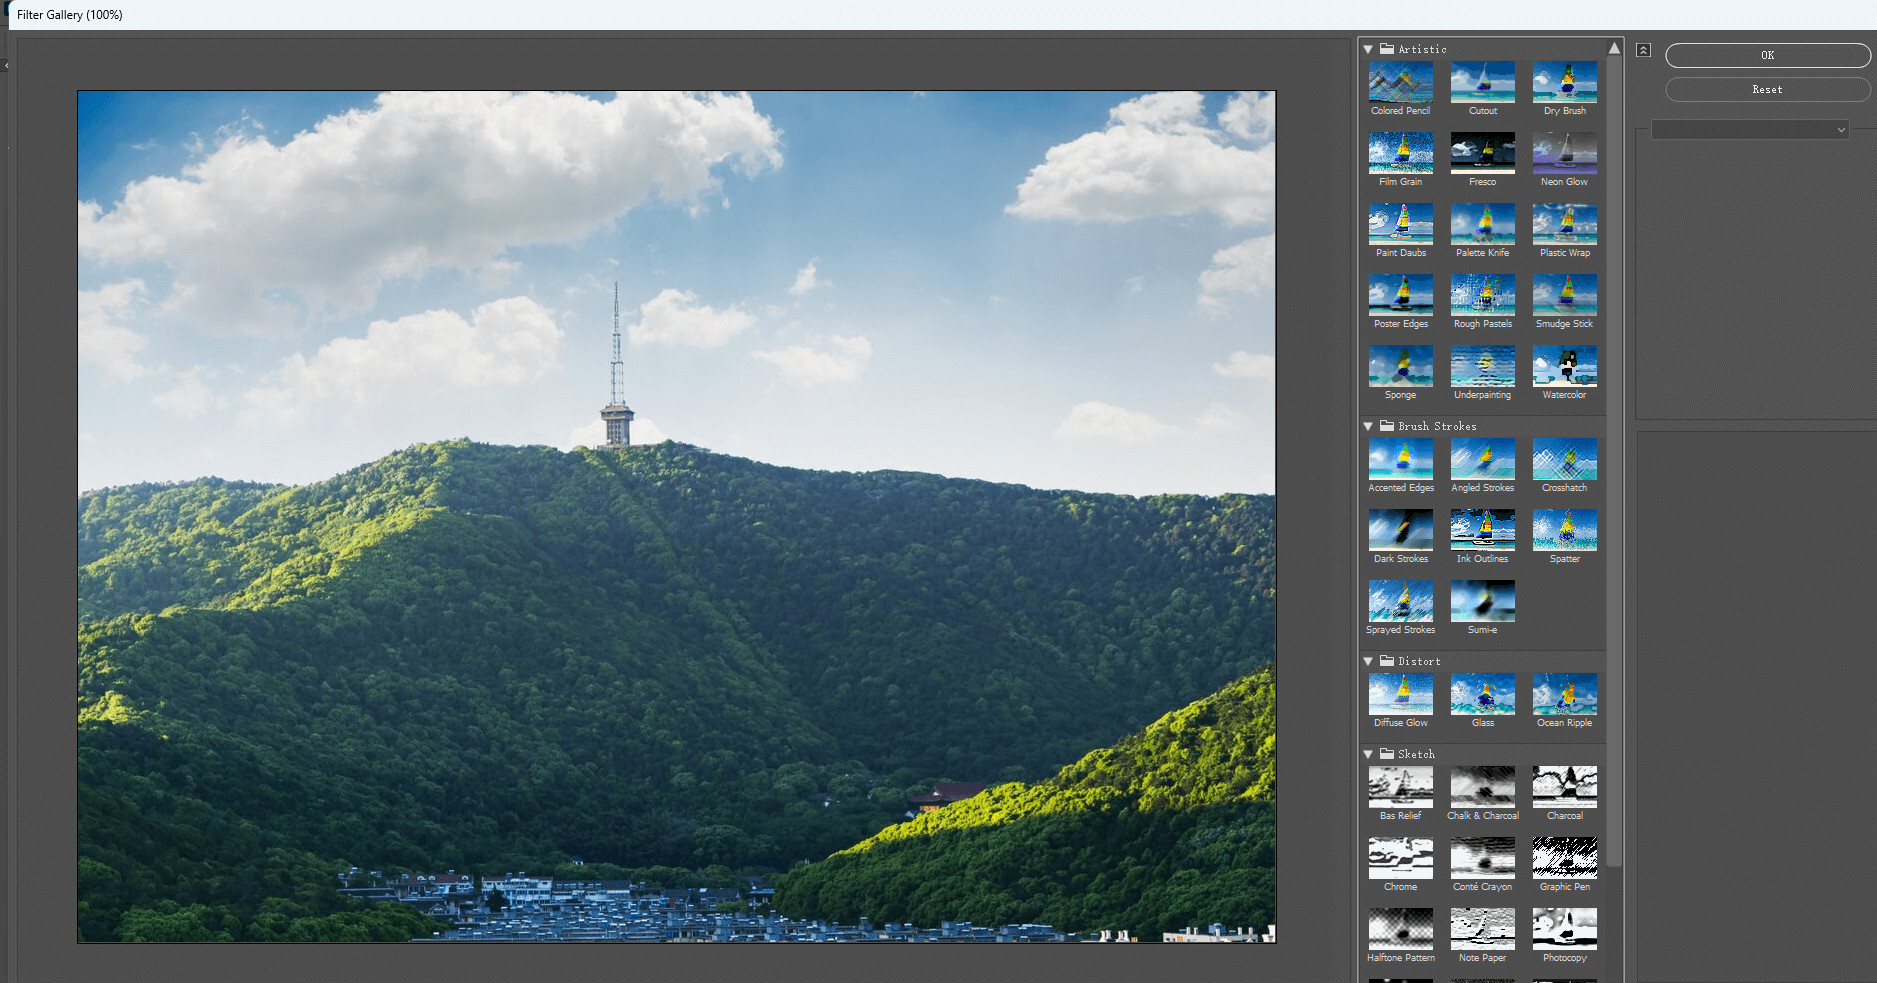 Adding a filter from the Filter Gallery in Photoshop to enhance image mood
Filters in Photoshop can quickly transform the look and feel of your photos, adding stylistic effects and enhancing the overall mood. The Filter Gallery provides a wide array of creative filters to experiment with.
-
Accessing the Filter Gallery: Go to the top menu bar and click on “Filter,” then select “Filter Gallery.” This will open the Filter Gallery dialog box, displaying a preview of your image and a list of filter categories.
-
Exploring Filter Categories: On the left side of the Filter Gallery, you’ll see categories of filters such as “Artistic,” “Brush Strokes,” “Distort,” “Sketch,” “Stylize,” and “Texture.” Click on a category to browse the filters within it.
-
Previewing and Selecting Filters: Click on a filter name within a category to apply it to your image preview in the Filter Gallery. You can try out different filters to see how they affect your photo.
-
Adjusting Filter Settings: Once you select a filter, the right side of the Filter Gallery window will display settings specific to that filter. Experiment with these sliders and options to customize the filter’s intensity, style, and other parameters to achieve the desired effect. Each filter offers unique adjustable controls.
-
Stacking Filters (Optional): You can even stack multiple filters for more complex and unique looks. At the bottom right of the Filter Gallery, click the “New effect layer” icon (it looks like a new layer icon) to add another filter layer on top of the current one. You can then choose and adjust a different filter for this new layer, blending the effects.
-
Applying the Filter: When you are satisfied with the filter effect and settings, click “OK” in the Filter Gallery dialog box to apply the filter to your image. The filter will be applied as a destructive edit directly to your current layer (to keep filters non-destructive, you could convert your layer to a Smart Object before applying filters, a more advanced technique).
Filters are a fantastic way to quickly add creative flair to your photos and achieve specific aesthetic styles. Experiment with different filter combinations to discover the unique looks you can create.
Step 6: Sharpening for Enhanced Detail
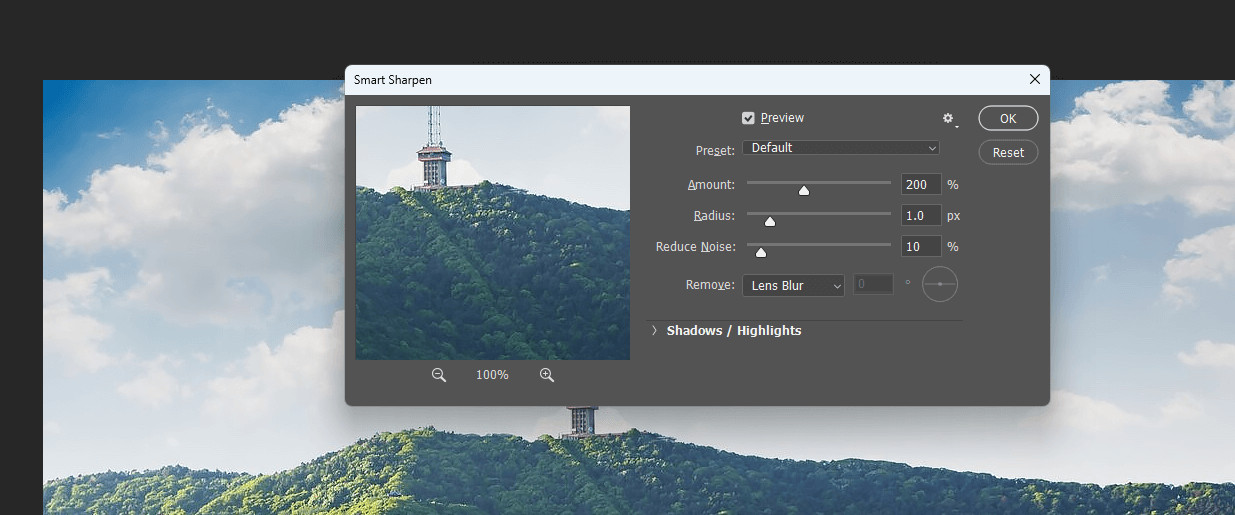 Using the Smart Sharpen filter to enhance image sharpness in Photoshop
Sharpening is a crucial final touch in photo editing. It enhances detail and clarity by increasing the contrast along edges in your image, making in-focus areas appear crisper. Photoshop’s “Smart Sharpen” filter is a powerful and versatile tool for achieving optimal sharpness.
-
Accessing the Smart Sharpen Filter: Go to the top menu bar, click “Filter,” then navigate to “Sharpen” and select “Smart Sharpen.” This will open the Smart Sharpen dialog box.
-
Understanding Smart Sharpen Settings: The Smart Sharpen dialog provides several controls for fine-tuning the sharpening effect.
-
Preset: The “Preset” menu allows you to choose from default sharpening settings. Starting with “Default” is usually a good approach.
-
Amount: This slider controls the strength of the sharpening effect. Dragging it to the right increases the sharpening intensity. Start with a low value and gradually increase it, observing the preview to avoid over-sharpening, which can create unwanted artifacts or halos.
-
Radius: The “Radius” slider determines the number of pixels around edges that are affected by sharpening. A smaller radius sharpens finer details, while a larger radius sharpens broader areas. For most photos, a low radius value (around 1 pixel or less) is recommended for best results and to avoid harsh sharpening.
-
Reduce Noise: The “Reduce Noise” slider helps to minimize noise that may be amplified by sharpening, especially luminance noise (graininess). If your image has noise, slightly increasing this slider can help maintain image quality while sharpening.
-
-
Previewing and Adjusting: The Smart Sharpen dialog box provides a preview window on the left, allowing you to see the sharpening effect in real-time as you adjust the sliders. Zoom in on a detailed area of your image within the preview to accurately judge the sharpening.
-
Applying Sharpening: Adjust the “Amount,” “Radius,” and “Reduce Noise” sliders until the image looks sharp and detailed without appearing artificial or introducing unwanted artifacts. It’s generally better to err on the side of slightly under-sharpening than over-sharpening.
-
Finalize: Once you’re satisfied with the sharpening, click “OK” to apply the Smart Sharpen filter.
Smart Sharpen is a refined tool that allows you to enhance the clarity and detail in your photos professionally, bringing out the crispness and sharpness for a polished final image.
Step 7: Exporting Your Edited Image
The final step is to save and export your beautifully edited photo in a format suitable for sharing or further use.
-
Accessing the Save As Dialog: Go to the top menu bar and click “File,” then select “Save As.” This will open the “Save As” dialog box.
-
Choosing a File Format: In the “Format” dropdown menu, you’ll see various file format options. For general use, sharing online, and most common purposes, JPEG (.JPG) is the recommended format. JPEG files offer a good balance between image quality and file size, making them ideal for web use and sharing.
- Other Formats: While JPEG is common, be aware of other formats:
- PSD (.PSD): Photoshop Document format. This saves your image with all layers, adjustments, and editing information intact. Use PSD if you need to keep a working file for future edits. PSD files are larger and not ideal for general sharing.
- PNG (.PNG): Portable Network Graphics format. PNG is excellent for web graphics, especially when transparency is needed. PNG is a lossless format, meaning it retains image quality, but file sizes can be larger than JPEGs.
- Other Formats: While JPEG is common, be aware of other formats:
-
Naming Your File: In the “File name” field, give your edited image a descriptive and relevant name.
-
Choosing a Save Location: Select a location on your computer where you want to save the exported image.
-
JPEG Quality Settings (If Saving as JPEG): When you choose JPEG format and click “Save,” a “JPEG Options” dialog box may appear. Here, you can adjust the “Quality” slider. Higher quality settings result in larger file sizes but better image quality. For web use, a quality setting of “Medium” to “High” (around 6-8 on a scale of 0-12) is often sufficient.
-
Saving: Click the “Save” button in the “Save As” dialog box (and “OK” in the JPEG Options dialog if it appears) to export your edited image.
Congratulations! You have now successfully edited your photo in Photoshop using these 7 fundamental steps. You’ve covered importing, cropping, straightening, adjusting color and lighting, removing objects, applying filters, sharpening, and exporting. These basic techniques provide a solid foundation for your photo editing journey in Photoshop.
Beyond Basic Photoshop: Exploring Further
While these 7 steps provide a great starting point, Photoshop offers a vast universe of editing possibilities. As you become more comfortable, consider exploring:
- Layer Masks: For selective and refined adjustments.
- Advanced Color Correction: Using Curves and Levels for precise tonal control.
- Selection Tools: For isolating specific areas for editing.
- Retouching Techniques: For professional-level portrait and image enhancement.
- Creative Effects: Experimenting with more advanced filters and blending modes.
Keep practicing and exploring, and you’ll continue to unlock the incredible potential of Photoshop for transforming your photos.
