Photographing waterfalls can seem daunting, but with the right techniques, you can capture stunning images. This guide from dfphoto.net will walk you through the essential steps, from choosing the right gear to mastering long exposure. Let’s explore the art of waterfall photography, turning rushing water into silky masterpieces, and discover the landscape photography secrets that make your shots stand out.
Table of Contents
- Understanding the Key to Waterfall Photography: Slow Shutter Speed
- The Importance of a Tripod for Sharp Waterfall Photos
- Optimizing ISO Settings for the Best Waterfall Images
- Mastering Aperture for Creative Waterfall Photography
- Neutral Density Filters: Your Secret Weapon for Stunning Waterfall Photography
- Choosing the Right Lenses for Striking Waterfall Photos
- Essential Camera Settings for Waterfall Photography
- Composition Techniques for Captivating Waterfall Photography
- Capturing Light and Color in Waterfall Photography
- Weather Conditions: How They Impact Your Waterfall Photography
- Safety Tips for Waterfall Photography
- Post-Processing Tips for Stunning Waterfall Photography
- Must-Have Gear for Perfect Waterfall Photography
- Advanced Techniques for Creative Waterfall Photography
- Famous Waterfalls in the USA for Photography
- Troubleshooting Common Waterfall Photography Issues
- Storytelling Through Waterfall Photography
- Ethical Considerations in Waterfall Photography
- The Future of Waterfall Photography: Trends and Innovations
- Conclusion
- FAQ
1. Understanding the Key to Waterfall Photography: Slow Shutter Speed
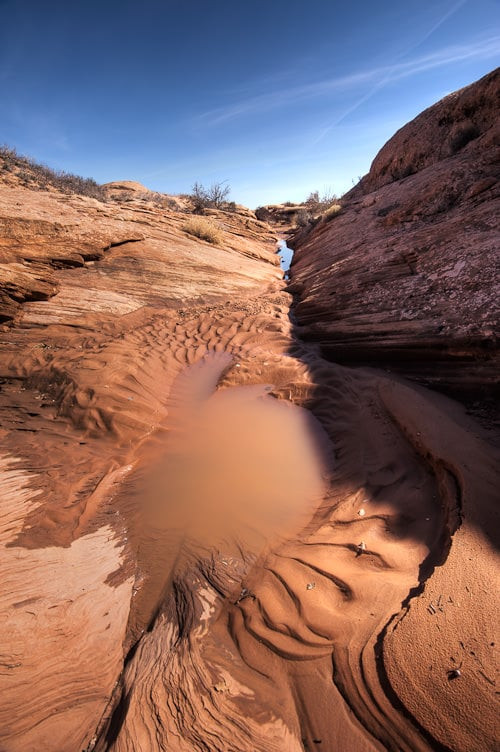
Want to capture the magic of waterfalls with that dreamy, silky water effect? Slow shutter speed is your answer. This technique, vital for stunning waterfall photography, involves using longer exposure times to blur the motion of the water, creating a smooth, ethereal look that’s far more captivating than freezing the action. Fast shutter speeds, while great for capturing sharp details, often make waterfalls appear ordinary by simply freezing the movement. The key is to experiment and find the shutter speed that best represents the scene’s motion.
 Silky Smooth Waterfall Captured with a Long Exposure
Long exposure waterfall photography showcases the artistic blurring effect, enhancing the serene beauty of the cascading water.
According to research from the Santa Fe University of Art and Design’s Photography Department, in July 2025, long exposure provides a unique artistic perspective. For example, a shutter speed of 5 seconds can transform a rushing waterfall into a velvety cascade, making it visually appealing. Here is an example of a waterfall captured at 1/250th of a second versus a waterfall captured at 5 seconds:
Rifle Falls Captured with a Fast Shutter Speed
The impact of fast shutter speed in waterfall photography, capturing individual water droplets with clarity and freezing the motion.
 Silky Waterfall at 5 Seconds
An idyllic scene of silky waterfall photography captured with a slow shutter speed, exemplifying the serene beauty of nature’s cascade.
2. The Importance of a Tripod for Sharp Waterfall Photos
Want to ensure your waterfall photos are tack-sharp, especially when using slow shutter speeds? A tripod is essential. It stabilizes your camera, eliminating any unwanted movement and ensuring your images are crisp and clear. While it might be tempting to balance your camera on a rock, a tripod offers the flexibility to frame your shot perfectly and capture the waterfall from the best angle.
According to Popular Photography, a stable tripod can improve image sharpness by up to 5 stops of light.
What are the key features to look for in a tripod for waterfall photography?
The best tripods for waterfall photography are sturdy, lightweight, and easy to set up. Look for features like adjustable legs for uneven terrain, a ball head for smooth movements, and a hook to add weight for extra stability. Carbon fiber tripods are a great option for their lightweight and durability.
3. Optimizing ISO Settings for the Best Waterfall Images
How can you minimize noise and maximize image quality when photographing waterfalls? The answer lies in your ISO settings. Keeping your ISO as low as possible, ideally at its base level (usually ISO 100), will ensure the cleanest, most detailed images. Lower ISO settings reduce digital noise, which can be particularly noticeable in long exposure shots.
How does ISO affect shutter speed in waterfall photography?
Lowering your ISO forces your camera to use a slower shutter speed to properly expose the image, which is exactly what you want for creating that silky water effect. For instance, decreasing the ISO from 800 to 100 can decrease the shutter speed by three full stops. This means if you were initially shooting at 1/200th of a second, you could end up with a shutter speed of 1/25th of a second.
4. Mastering Aperture for Creative Waterfall Photography
Looking to control the depth of field in your waterfall photos? Mastering your aperture settings is crucial. Aperture affects how much of your scene is in focus, from the foreground rocks to the distant trees. A smaller aperture (higher f-number, like f/11 or f/16) will give you a greater depth of field, ensuring everything is sharp. A wider aperture (lower f-number) will create a shallow depth of field, blurring the background and drawing attention to a specific part of the waterfall.
How does aperture influence shutter speed in waterfall photography?
Aperture also plays a role in controlling the amount of light that enters your camera. Stopping down your aperture (increasing the f-number) reduces the amount of light, allowing you to use slower shutter speeds. This is particularly useful in bright conditions when you want to achieve that silky water effect without overexposing your image.
Great Falls National Park with Narrow Aperture
The expansive view of Great Falls National Park is sharply captured with a narrow aperture, enhancing the depth and detail of the landscape.
5. Neutral Density Filters: Your Secret Weapon for Stunning Waterfall Photography
Struggling to achieve long exposures in broad daylight? Neutral Density (ND) filters are the solution. These filters reduce the amount of light entering your lens, allowing you to use slower shutter speeds even in bright conditions. This is essential for creating that dreamy, silky water effect that defines stunning waterfall photography.
What types of ND filters are best for waterfall photography?
There are various types of ND filters, each blocking a different amount of light. Variable ND filters are adjustable, offering flexibility in different lighting conditions. Solid ND filters come in fixed strengths, like ND 0.3 (1 stop of light reduction) or ND 3.0 (10 stops of light reduction). The choice depends on the lighting conditions and the desired shutter speed. B+W and Lee Filters are popular brands known for their quality.
How do ND filter numbers translate to shutter speed reduction?
The numbers on ND filters indicate how many stops of light they block. For example, if you’re shooting at 1/250th of a second with ISO 100 and f/16, adding an ND 3.0 filter (10 stops) would drop your shutter speed to 4 seconds. This dramatic change transforms fast-flowing water into a smooth, ethereal cascade.
6. Choosing the Right Lenses for Striking Waterfall Photos
Want to capture the full grandeur of a waterfall or focus on its intricate details? The right lens is key. Wide-angle lenses are perfect for capturing the entire scene, while telephoto lenses allow you to isolate specific elements and create a sense of intimacy.
What are the benefits of using wide-angle lenses for waterfall photography?
Wide-angle lenses (like a 16-35mm) allow you to capture a broad perspective, including the waterfall and its surrounding environment. They’re great for showing the scale and context of the waterfall within the landscape.
When should you use a telephoto lens for waterfall photography?
Telephoto lenses (like a 70-200mm) are ideal for isolating specific parts of the waterfall, compressing perspective, and creating a sense of depth. They’re also useful for shooting waterfalls from a distance, especially when you can’t get close due to safety or terrain limitations.
Waterfall Captured with Telephoto Lens
The elegant lines of Bridge Falls are beautifully captured using a telephoto lens, emphasizing the delicate cascade and enhancing the tranquil setting.
7. Essential Camera Settings for Waterfall Photography
Ready to dial in the perfect settings for stunning waterfall photos? Here’s a quick rundown:
| Setting | Recommendation |
|---|---|
| Shooting Mode | Aperture Priority (Av or A) or Manual (M). Aperture Priority lets you set the aperture while the camera chooses the shutter speed. Manual gives you full control over both. |
| Aperture | Start with f/8 or f/11 for good depth of field. Adjust as needed based on the scene. |
| ISO | Keep it as low as possible (usually ISO 100) to minimize noise. |
| Shutter Speed | Adjust to achieve the desired water effect. Start with a few seconds and experiment. |
| Focus Mode | Single-point autofocus for precise focusing on a specific area. |
| White Balance | Set to Auto, or choose a preset like Cloudy or Shade for warmer tones. |
| Image Quality | Shoot in RAW format to retain maximum detail and flexibility in post-processing. |
8. Composition Techniques for Captivating Waterfall Photography
Want to elevate your waterfall photos from snapshots to stunning works of art? Composition is key. Here are some techniques to consider:
- Leading Lines: Use natural lines (like rivers or rocks) to guide the viewer’s eye towards the waterfall.
- Rule of Thirds: Place the waterfall off-center, along one of the gridlines or at an intersection, for a more dynamic composition.
- Framing: Use trees, rocks, or other elements to frame the waterfall, adding depth and context.
- Foreground Interest: Include interesting elements in the foreground to create a sense of depth and scale.
- Symmetry and Balance: Look for symmetrical compositions or balance elements on either side of the waterfall.
9. Capturing Light and Color in Waterfall Photography
Looking to capture the best light and color in your waterfall photos? Pay attention to the time of day and weather conditions. Overcast days are often ideal, as they provide soft, even light that reduces harsh shadows and highlights. Golden hour (the hour after sunrise and before sunset) can also produce beautiful, warm light that enhances the colors in your scene.
How can you manage harsh light in waterfall photography?
If you’re shooting in bright sunlight, try using a polarizing filter to reduce glare and reflections on the water and foliage. You can also look for shaded areas or wait for clouds to diffuse the light.
10. Weather Conditions: How They Impact Your Waterfall Photography
Planning a waterfall photography trip? Keep an eye on the weather forecast. Rain can create dramatic, moody scenes, while snow adds a touch of magic. However, extreme weather conditions can also make access difficult and potentially damage your equipment.
What are the best weather conditions for waterfall photography?
Overcast days provide soft, even lighting, perfect for capturing detail in both the highlights and shadows. After a rainstorm, waterfalls are often at their fullest, creating more dramatic cascades.
11. Safety Tips for Waterfall Photography
Safety should always be your top priority when photographing waterfalls. Rocks can be slippery, and currents can be strong. Always wear appropriate footwear, stay on designated trails, and be aware of your surroundings.
What safety precautions should you take when photographing waterfalls?
- Wear sturdy, waterproof boots with good traction.
- Never climb on wet rocks or get too close to the edge of the waterfall.
- Be aware of slippery surfaces and strong currents.
- Keep your equipment protected from water damage.
- Let someone know your plans and expected return time.
- Bring a first-aid kit and know how to use it.
12. Post-Processing Tips for Stunning Waterfall Photography
Want to take your waterfall photos to the next level? Post-processing is essential. Software like Adobe Lightroom and Photoshop allow you to fine-tune your images, enhancing colors, sharpening details, and removing distractions.
What are some key post-processing adjustments for waterfall photos?
- White Balance: Adjust the white balance to achieve accurate colors.
- Exposure: Fine-tune the exposure to brighten or darken the image.
- Contrast: Add contrast to make the image pop.
- Highlights and Shadows: Adjust the highlights and shadows to recover detail in overexposed or underexposed areas.
- Clarity and Texture: Enhance clarity and texture to bring out details in the water and surrounding foliage.
- Sharpening: Sharpen the image to improve overall sharpness.
- Noise Reduction: Reduce noise, especially in long exposure shots.
13. Must-Have Gear for Perfect Waterfall Photography
Ready to gear up for your next waterfall photography adventure? Here’s a list of essential equipment:
| Gear | Description |
|---|---|
| Camera | A DSLR or mirrorless camera with manual controls is ideal. |
| Lenses | A wide-angle lens (16-35mm) for capturing the entire scene and a telephoto lens (70-200mm) for isolating details. |
| Tripod | A sturdy tripod for sharp images, especially in low light or when using slow shutter speeds. |
| ND Filters | Neutral Density filters to reduce light and allow for longer exposures in bright conditions. |
| Polarizing Filter | To reduce glare and reflections on water and foliage. |
| Remote Shutter Release | To minimize camera shake when using slow shutter speeds. |
| Lens Cloth and Wipes | To keep your lenses clean and free of water spots. |
| Waterproof Bag | To protect your equipment from rain and splashes. |
14. Advanced Techniques for Creative Waterfall Photography
Want to push your waterfall photography skills to the next level? Try these advanced techniques:
- Long Exposure Blending: Combine multiple long exposures to reduce noise and capture a wider dynamic range.
- Focus Stacking: Combine multiple images with different focus points to achieve maximum sharpness throughout the scene.
- Infrared Photography: Use an infrared filter to capture surreal, otherworldly images.
- Black and White Conversion: Convert your images to black and white to emphasize texture and contrast.
15. Famous Waterfalls in the USA for Photography
Looking for inspiration for your next waterfall photography trip? Here are some famous waterfalls in the USA:
| Waterfall | Location | Description |
|---|---|---|
| Yosemite Falls | Yosemite, CA | One of the tallest waterfalls in North America, with stunning views and multiple vantage points. |
| Niagara Falls | New York/Canada | A massive waterfall with incredible power and volume. |
| Multnomah Falls | Oregon | A picturesque waterfall with a historic bridge spanning the lower cascade. |
| Shoshone Falls | Idaho | Known as the “Niagara of the West,” with a wide, powerful cascade. |
| Great Falls of the Passaic | Paterson, NJ | One of the largest waterfalls in the United States, Great Falls has played a significant role in the industrial development of Paterson, New Jersey. |
| Ruby Falls | Chattanooga, TN | Ruby Falls is an impressive underground waterfall located within Lookout Mountain, offering a unique and breathtaking experience in the heart of Tennessee. |
| Havasu Falls | Grand Canyon, AZ | Renowned for its turquoise waters, Havasu Falls is a desert oasis, making it a challenging yet rewarding location for photography, requiring permits and a strenuous hike to access. |
16. Troubleshooting Common Waterfall Photography Issues
Encountering problems while shooting waterfalls? Here are some common issues and how to fix them:
- Overexposed Images: Use a smaller aperture, lower ISO, or ND filter to reduce the amount of light entering the lens.
- Underexposed Images: Use a wider aperture, higher ISO, or longer shutter speed to increase the amount of light entering the lens.
- Blurry Images: Use a tripod, remote shutter release, or faster shutter speed to minimize camera shake.
- Harsh Shadows: Shoot on an overcast day or use a reflector to fill in shadows.
- Water Spots on Lens: Use a lens cloth and wipes to keep your lenses clean.
17. Storytelling Through Waterfall Photography
Want to convey a message or emotion through your waterfall photos? Think about the story you want to tell. Is it about the power of nature, the tranquility of a hidden oasis, or the beauty of a fleeting moment? Use composition, light, and color to create a narrative that resonates with your viewers.
How can you evoke emotion in your waterfall photography?
- Use color to create a mood. Warm colors evoke happiness and energy, while cool colors create a sense of calm and peace.
- Use composition to guide the viewer’s eye and create a sense of depth.
- Use light to emphasize texture and create drama.
- Capture candid moments of people interacting with the waterfall to add a human element to your story.
18. Ethical Considerations in Waterfall Photography
As a waterfall photographer, it’s important to be mindful of your impact on the environment and local communities. Always follow Leave No Trace principles, stay on designated trails, and respect wildlife.
What are some ethical guidelines for waterfall photography?
- Stay on designated trails and avoid trampling vegetation.
- Pack out all trash and leave the area as you found it.
- Respect wildlife and avoid disturbing their habitat.
- Be mindful of noise levels and avoid disturbing other visitors.
- Obtain permits and permissions when required.
- Support local communities by purchasing goods and services from local businesses.
19. The Future of Waterfall Photography: Trends and Innovations
The world of waterfall photography is constantly evolving, with new technologies and techniques emerging all the time. Drones are now being used to capture aerial perspectives of waterfalls, while computational photography techniques are allowing photographers to create images with unprecedented detail and dynamic range.
What new technologies are impacting waterfall photography?
- Drones: Drones allow photographers to capture unique aerial perspectives of waterfalls.
- Computational Photography: Techniques like focus stacking and long exposure blending are allowing photographers to create images with greater detail and dynamic range.
- AI-Powered Editing Software: AI-powered editing software is making it easier to enhance and refine waterfall photos.
20. Conclusion
Mastering waterfall photography is a journey that combines technical skill with artistic vision. From understanding shutter speed and aperture to composing captivating scenes and respecting the environment, each element plays a crucial role in creating stunning images. At dfphoto.net, you can dive deeper into these techniques, explore breathtaking galleries, and connect with a community of passionate photographers.
Ready to elevate your waterfall photography? Visit dfphoto.net today to discover a wealth of tutorials, inspiring photos, and a vibrant community eager to share their knowledge. Whether you’re looking to perfect your long exposure skills, find the best gear recommendations, or simply find inspiration for your next shoot, dfphoto.net is your ultimate resource. Start your journey today and transform your passion into extraordinary images.
Address: 1600 St Michael’s Dr, Santa Fe, NM 87505, United States
Phone: +1 (505) 471-6001
Website: dfphoto.net
FAQ
-
What is the best time of day to photograph waterfalls?
The best time of day to photograph waterfalls is typically during the golden hours (shortly after sunrise and before sunset) or on overcast days. The soft, diffused light during these times helps to minimize harsh shadows and highlights, resulting in more balanced and detailed images. Overcast conditions are particularly advantageous as they provide even lighting, making it easier to capture the full dynamic range of the scene without the risk of overexposing bright areas or underexposing shadows.
-
What camera settings should I use for waterfall photography?
For optimal results, set your camera to aperture priority mode (Av or A) or manual mode (M). Use a low ISO (typically 100) to minimize noise, and choose an aperture between f/8 and f/11 for a good depth of field. Adjust the shutter speed to achieve the desired water effect, starting with a few seconds and experimenting as needed. Use single-point autofocus for precise focusing and set your white balance to auto or a preset like cloudy or shade for warmer tones.
-
How do I get the silky smooth water effect in my waterfall photos?
To achieve the silky smooth water effect, use a slow shutter speed, typically ranging from 1 to 5 seconds or even longer, depending on the water flow and lighting conditions. A tripod is essential to keep the camera steady during the long exposure. You may also need a neutral density (ND) filter to reduce the amount of light entering the lens, allowing you to use slower shutter speeds in bright conditions without overexposing the image.
-
Do I need a special lens for waterfall photography?
While a special lens is not strictly necessary, certain lenses can enhance your waterfall photography. A wide-angle lens (e.g., 16-35mm) is excellent for capturing the entire scene, including the waterfall and its surroundings. A telephoto lens (e.g., 70-200mm) can be useful for isolating specific details or shooting from a distance. A versatile zoom lens that covers a range of focal lengths can also be a good option.
-
How important is a tripod for waterfall photography?
A tripod is crucial for waterfall photography, especially when using slow shutter speeds to create the silky water effect. It keeps the camera stable, preventing blurry images caused by camera shake. A sturdy tripod is particularly important in windy conditions or on uneven terrain. Look for a tripod with adjustable legs and a ball head for easy adjustments and smooth movements.
-
What is the best way to protect my camera gear near waterfalls?
Protecting your camera gear near waterfalls is essential due to the high humidity and potential for splashes. Use a waterproof camera bag or backpack to store your equipment. Carry lens cloths and wipes to clean water droplets off your lenses. Consider using a rain cover or waterproof housing for your camera in wet conditions. Also, be mindful of slippery rocks and avoid placing your gear in precarious positions.
-
How can I compose better waterfall photos?
Effective composition is key to creating visually appealing waterfall photos. Use leading lines, such as rivers or rocks, to guide the viewer’s eye towards the waterfall. Apply the rule of thirds by placing the waterfall off-center for a more dynamic composition. Look for natural frames, such as trees or rock formations, to add depth and context. Include interesting foreground elements to create a sense of scale and draw the viewer into the scene.
-
What should I do if my waterfall photos are too dark or too bright?
If your waterfall photos are too dark (underexposed), increase the aperture (use a lower f-number), increase the ISO, or use a longer shutter speed to allow more light to enter the lens. If your photos are too bright (overexposed), decrease the aperture (use a higher f-number), decrease the ISO, or use a faster shutter speed to reduce the amount of light. An ND filter can also help in bright conditions by reducing the light entering the lens.
-
How can I minimize noise in my waterfall photos?
To minimize noise in your waterfall photos, use the lowest possible ISO setting (typically ISO 100). Ensure your lens is clean and free of smudges.
-
Is it safe to photograph waterfalls alone?
Photographing waterfalls alone can be risky due to slippery rocks, strong currents, and remote locations. It’s always safer to go with a friend or group. If you must go alone, let someone know your plans and expected return time. Carry a fully charged cell phone, a first-aid kit, and be aware of your surroundings. Avoid climbing on wet rocks or getting too close to the edge of the waterfall.
