 A guide to focus stacking for tack-sharp images
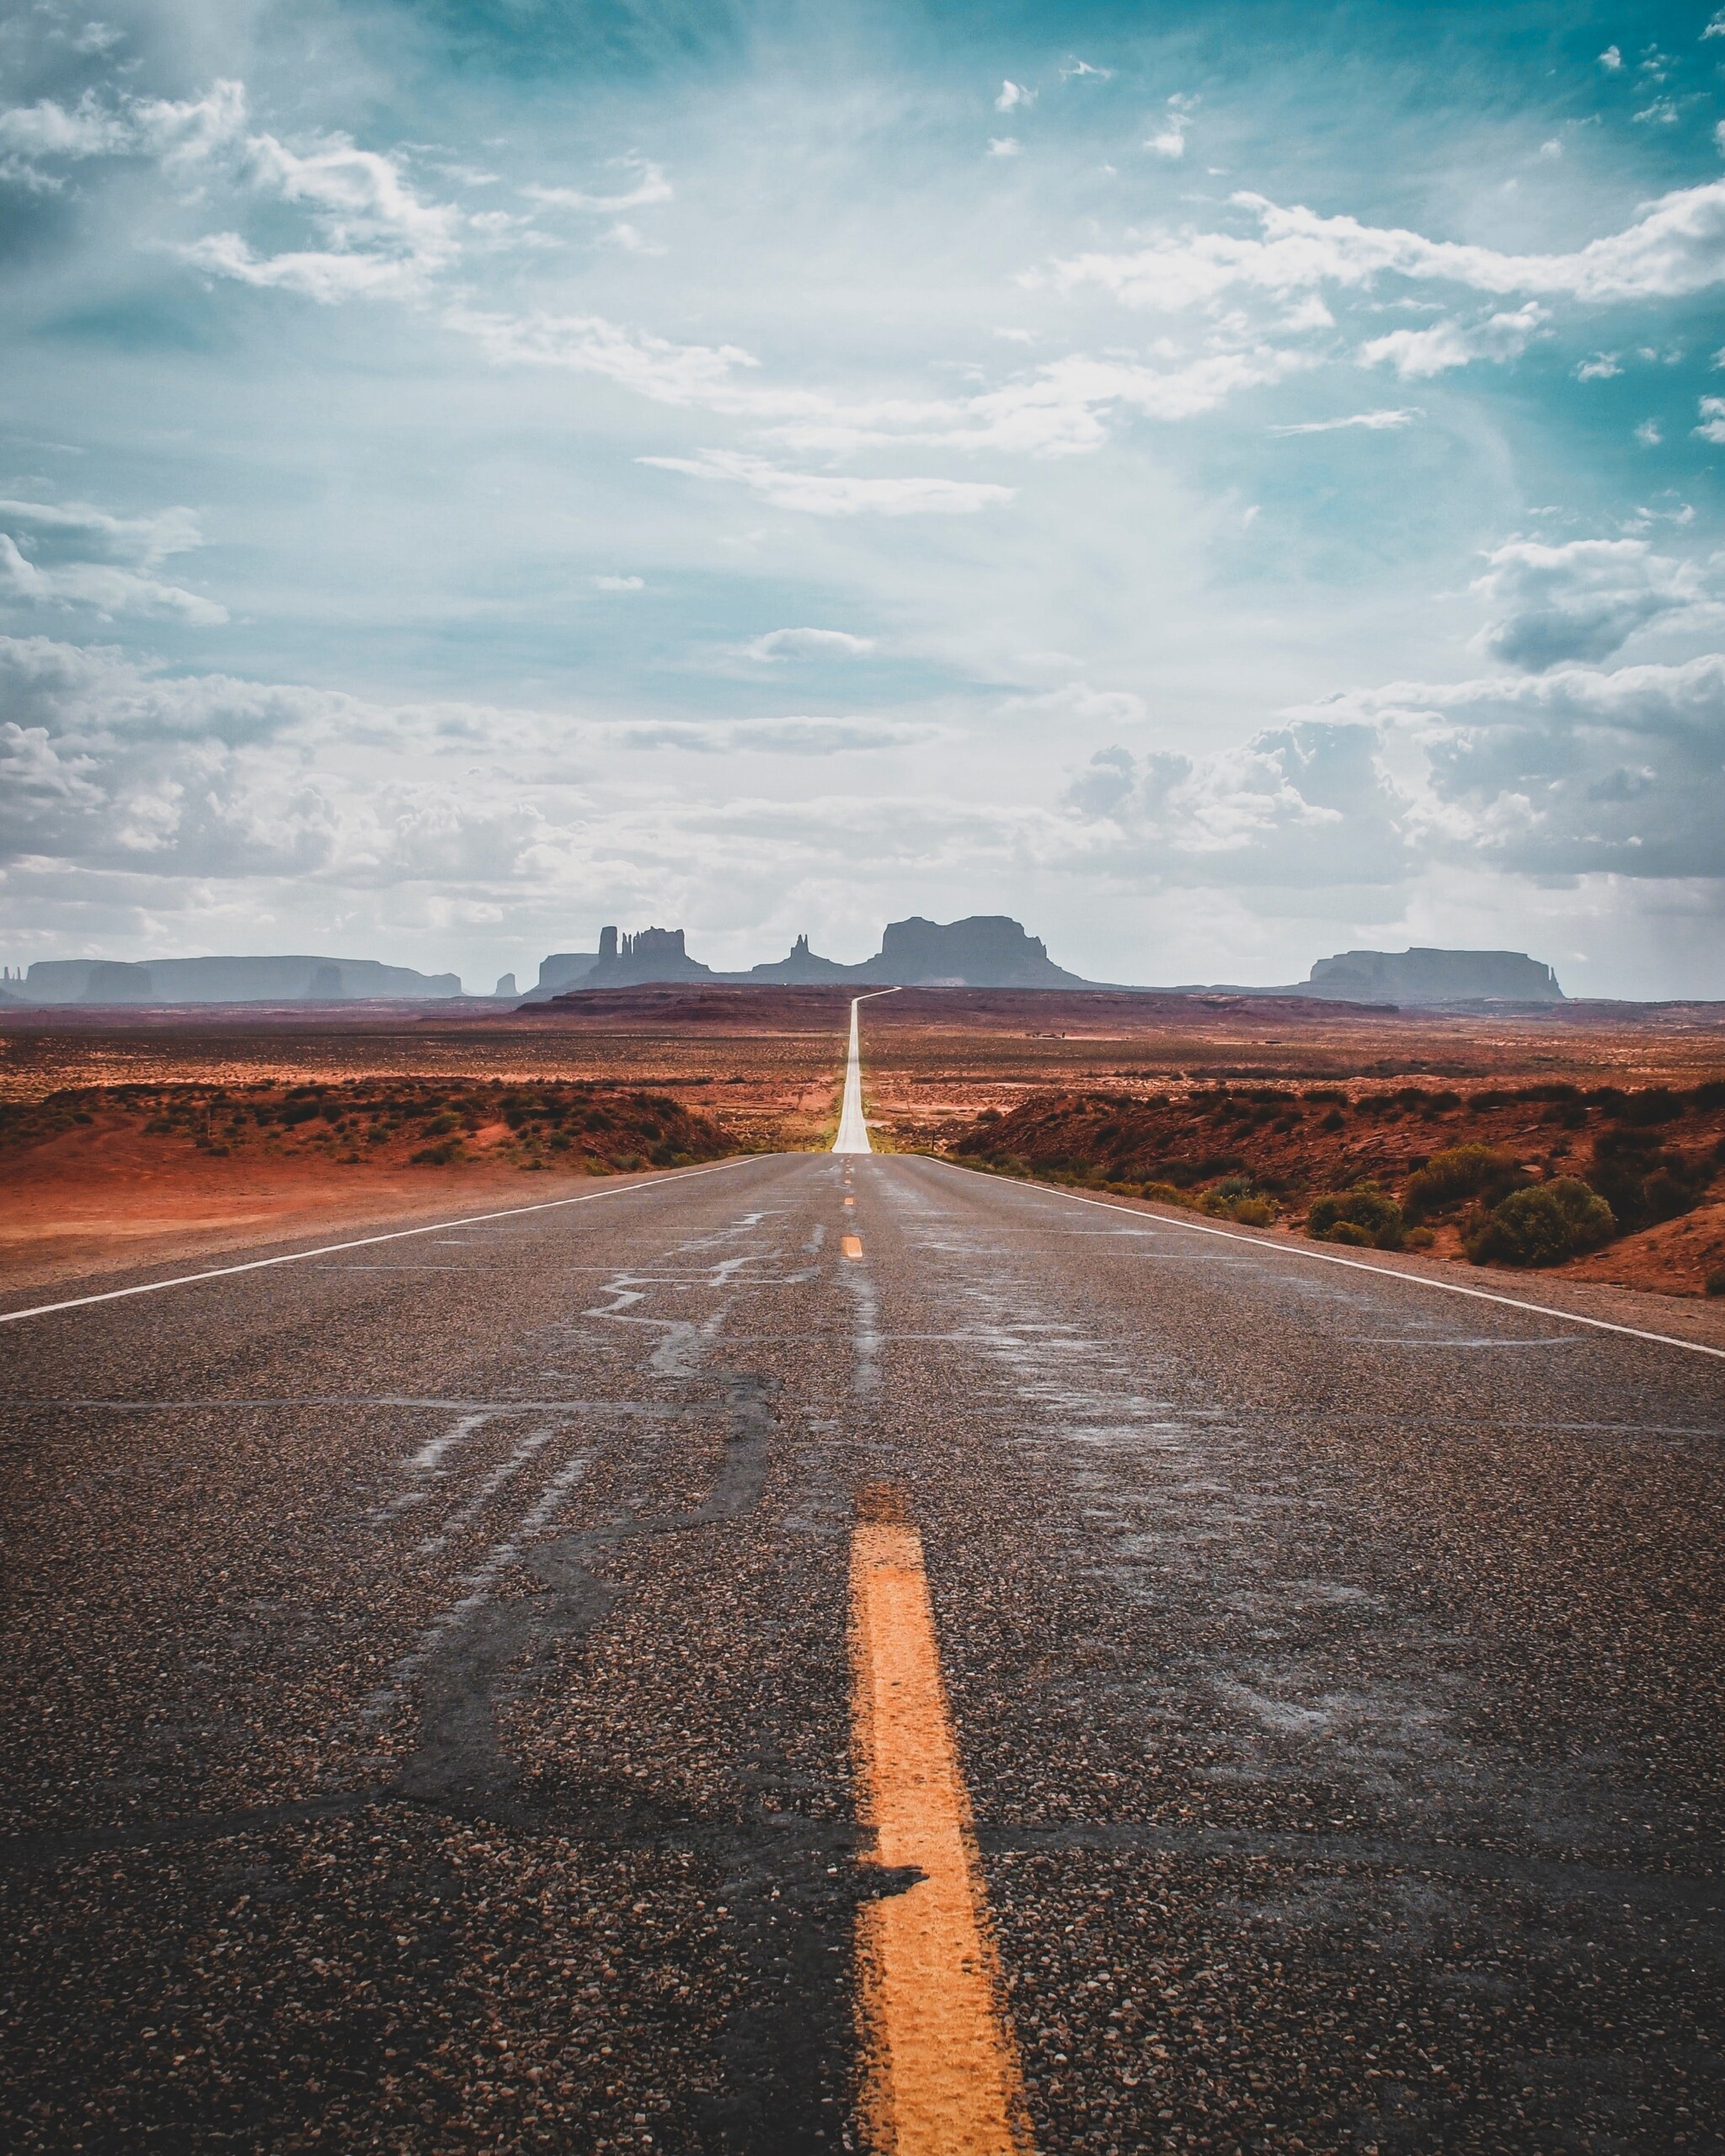
Do you dream of capturing images where every element, from the nearest detail to the distant horizon, is perfectly sharp? Focus stacking is a powerful photography technique that makes this dream a reality. It allows you to overcome the limitations of depth of field, achieving incredible clarity and detail in your photographs. Whether you are just starting out or have years of experience, understanding How To Photo Stack can dramatically improve your images.
Many photographers find focus stacking intimidating, but it’s actually quite accessible with the right approach. This guide is based on practical experience and will break down everything you need to know about how to focus stack, including:
- The definition of focus stacking and its advantages for photographers.
- When focus stacking is essential and when standard techniques suffice.
- A simple, step-by-step process for capturing and merging stacked images.
- Advanced tips and tricks to elevate your focus stacking results.
By the end of this article, you’ll be equipped to confidently use focus stacking for landscapes, macro shots, and a wide range of other photographic subjects, ensuring your images are sharp from front to back. Let’s begin by understanding the fundamentals of focus stacking.
What is Focus Stacking?
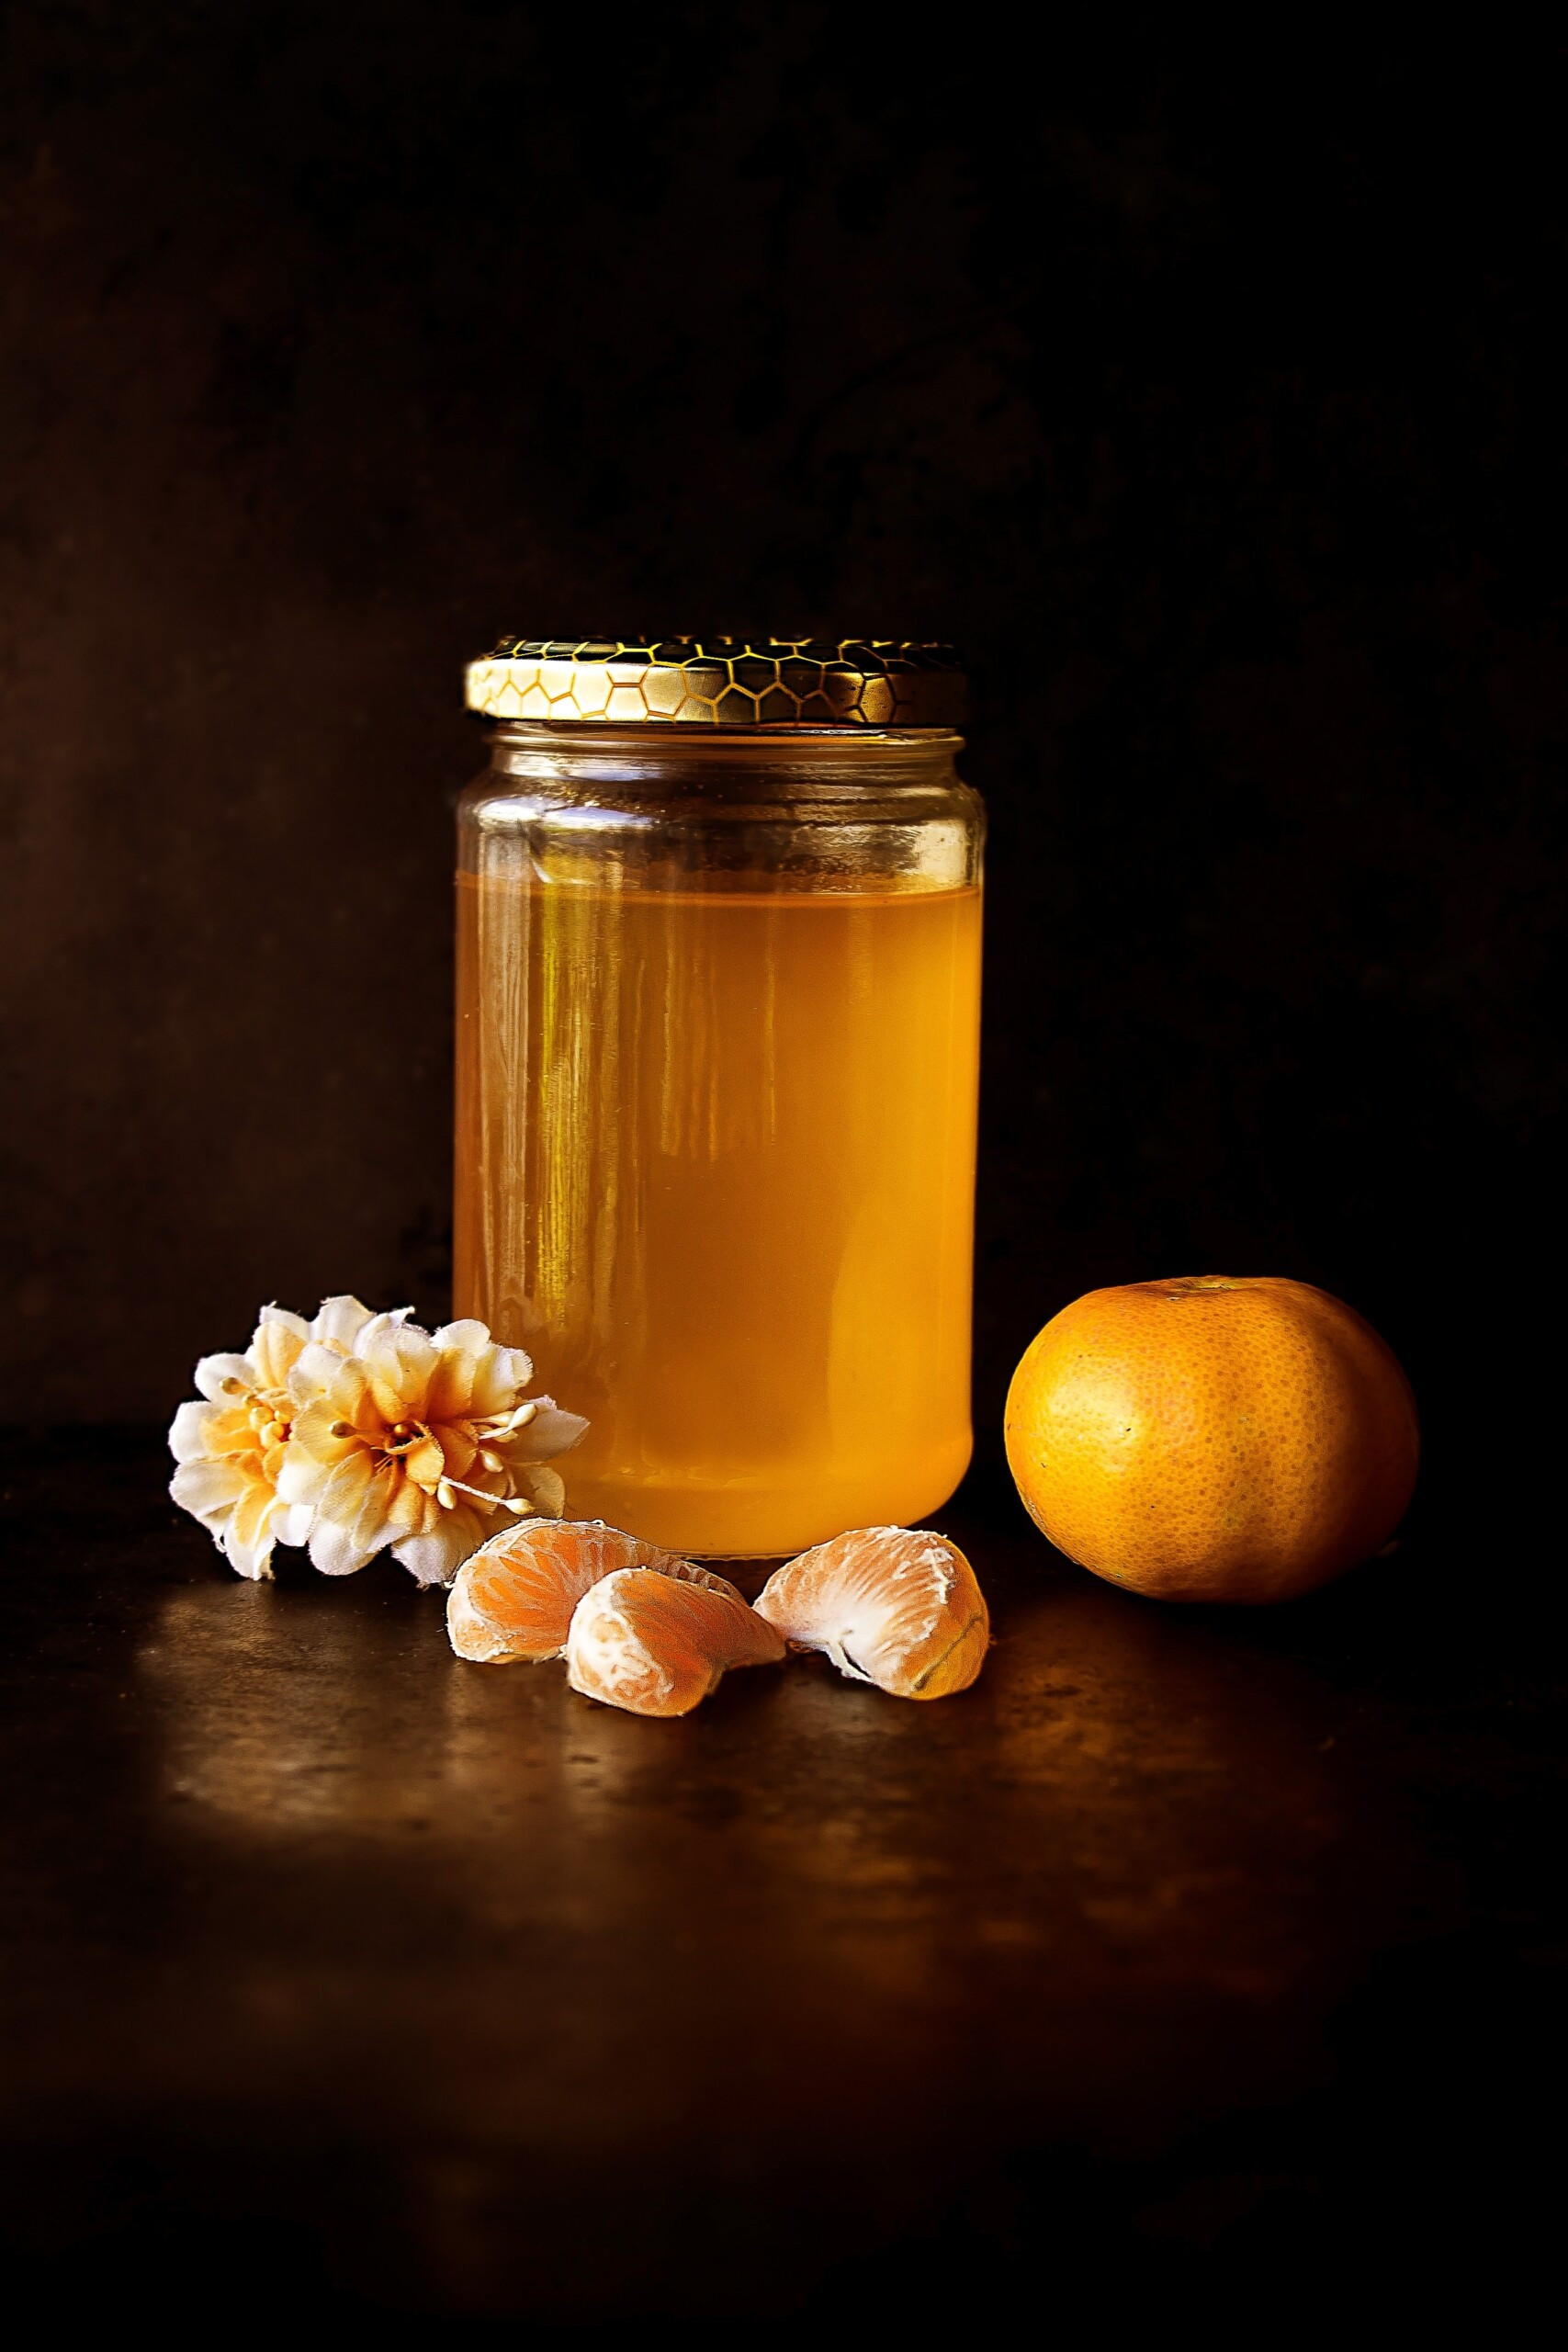
Focus stacking is a technique used to maximize depth of field by combining multiple images, each focused at a different distance within the scene. Think of it as creating a composite image where only the sharpest parts from each photograph are blended together. This process, often referred to as “stacking,” results in a final image with a depth of field that far exceeds what is possible with a single shot.
 Focus stacking in photography
Imagine a scene with intricate foreground details and a majestic background. Typically, capturing both in sharp focus in a single image can be challenging, if not impossible, due to the limitations of depth of field. Focus stacking provides the solution.
The basic workflow is straightforward:
- Capture a series of images of the same scene, methodically adjusting the focus point from the closest to the furthest part of your subject.
- Merge these images using specialized software. The software intelligently selects and combines the sharp areas from each image, creating a final picture that is entirely in focus.
Importantly, focus stacking doesn’t require specialized or expensive equipment. While certain tools can enhance the process, the technique is fundamentally accessible with standard camera gear, even smartphone cameras. Using a tripod and a manual focus lens is recommended for optimal control and precision, as we will explore further.
When Should You Focus Stack Your Photos?
 Focus stacking in photography
Focus stacking is specifically employed to overcome the inherent limitations of depth of field. It’s a technique you turn to when achieving sufficient sharpness throughout your scene is beyond the capabilities of your camera settings alone.
Depth of field, the area in your image that appears acceptably sharp, is governed by three primary factors:
- Lens Focal Length: Longer focal lengths result in shallower depth of field.
- Subject Distance: Closer subject distances lead to shallower depth of field.
- Lens Aperture: Wider apertures (smaller f-numbers like f/2.8) produce shallower depth of field, while narrower apertures (larger f-numbers like f/16) increase depth of field.
In many photographic scenarios, you can manage depth of field without resorting to focus stacking. For expansive landscapes, using a wide-angle lens and a narrow aperture (e.g., f/11 or f/16) can often render the entire scene sharp. Similarly, for typical close-up subjects, slightly moving back and using a moderately narrow aperture can achieve adequate depth of field.
However, there are specific situations where achieving edge-to-edge sharpness is impossible with single-shot techniques. Focus stacking becomes necessary when you encounter:
- Extremely Deep Landscape Scenes: Landscapes with significant foreground elements very close to the camera and distant backgrounds.
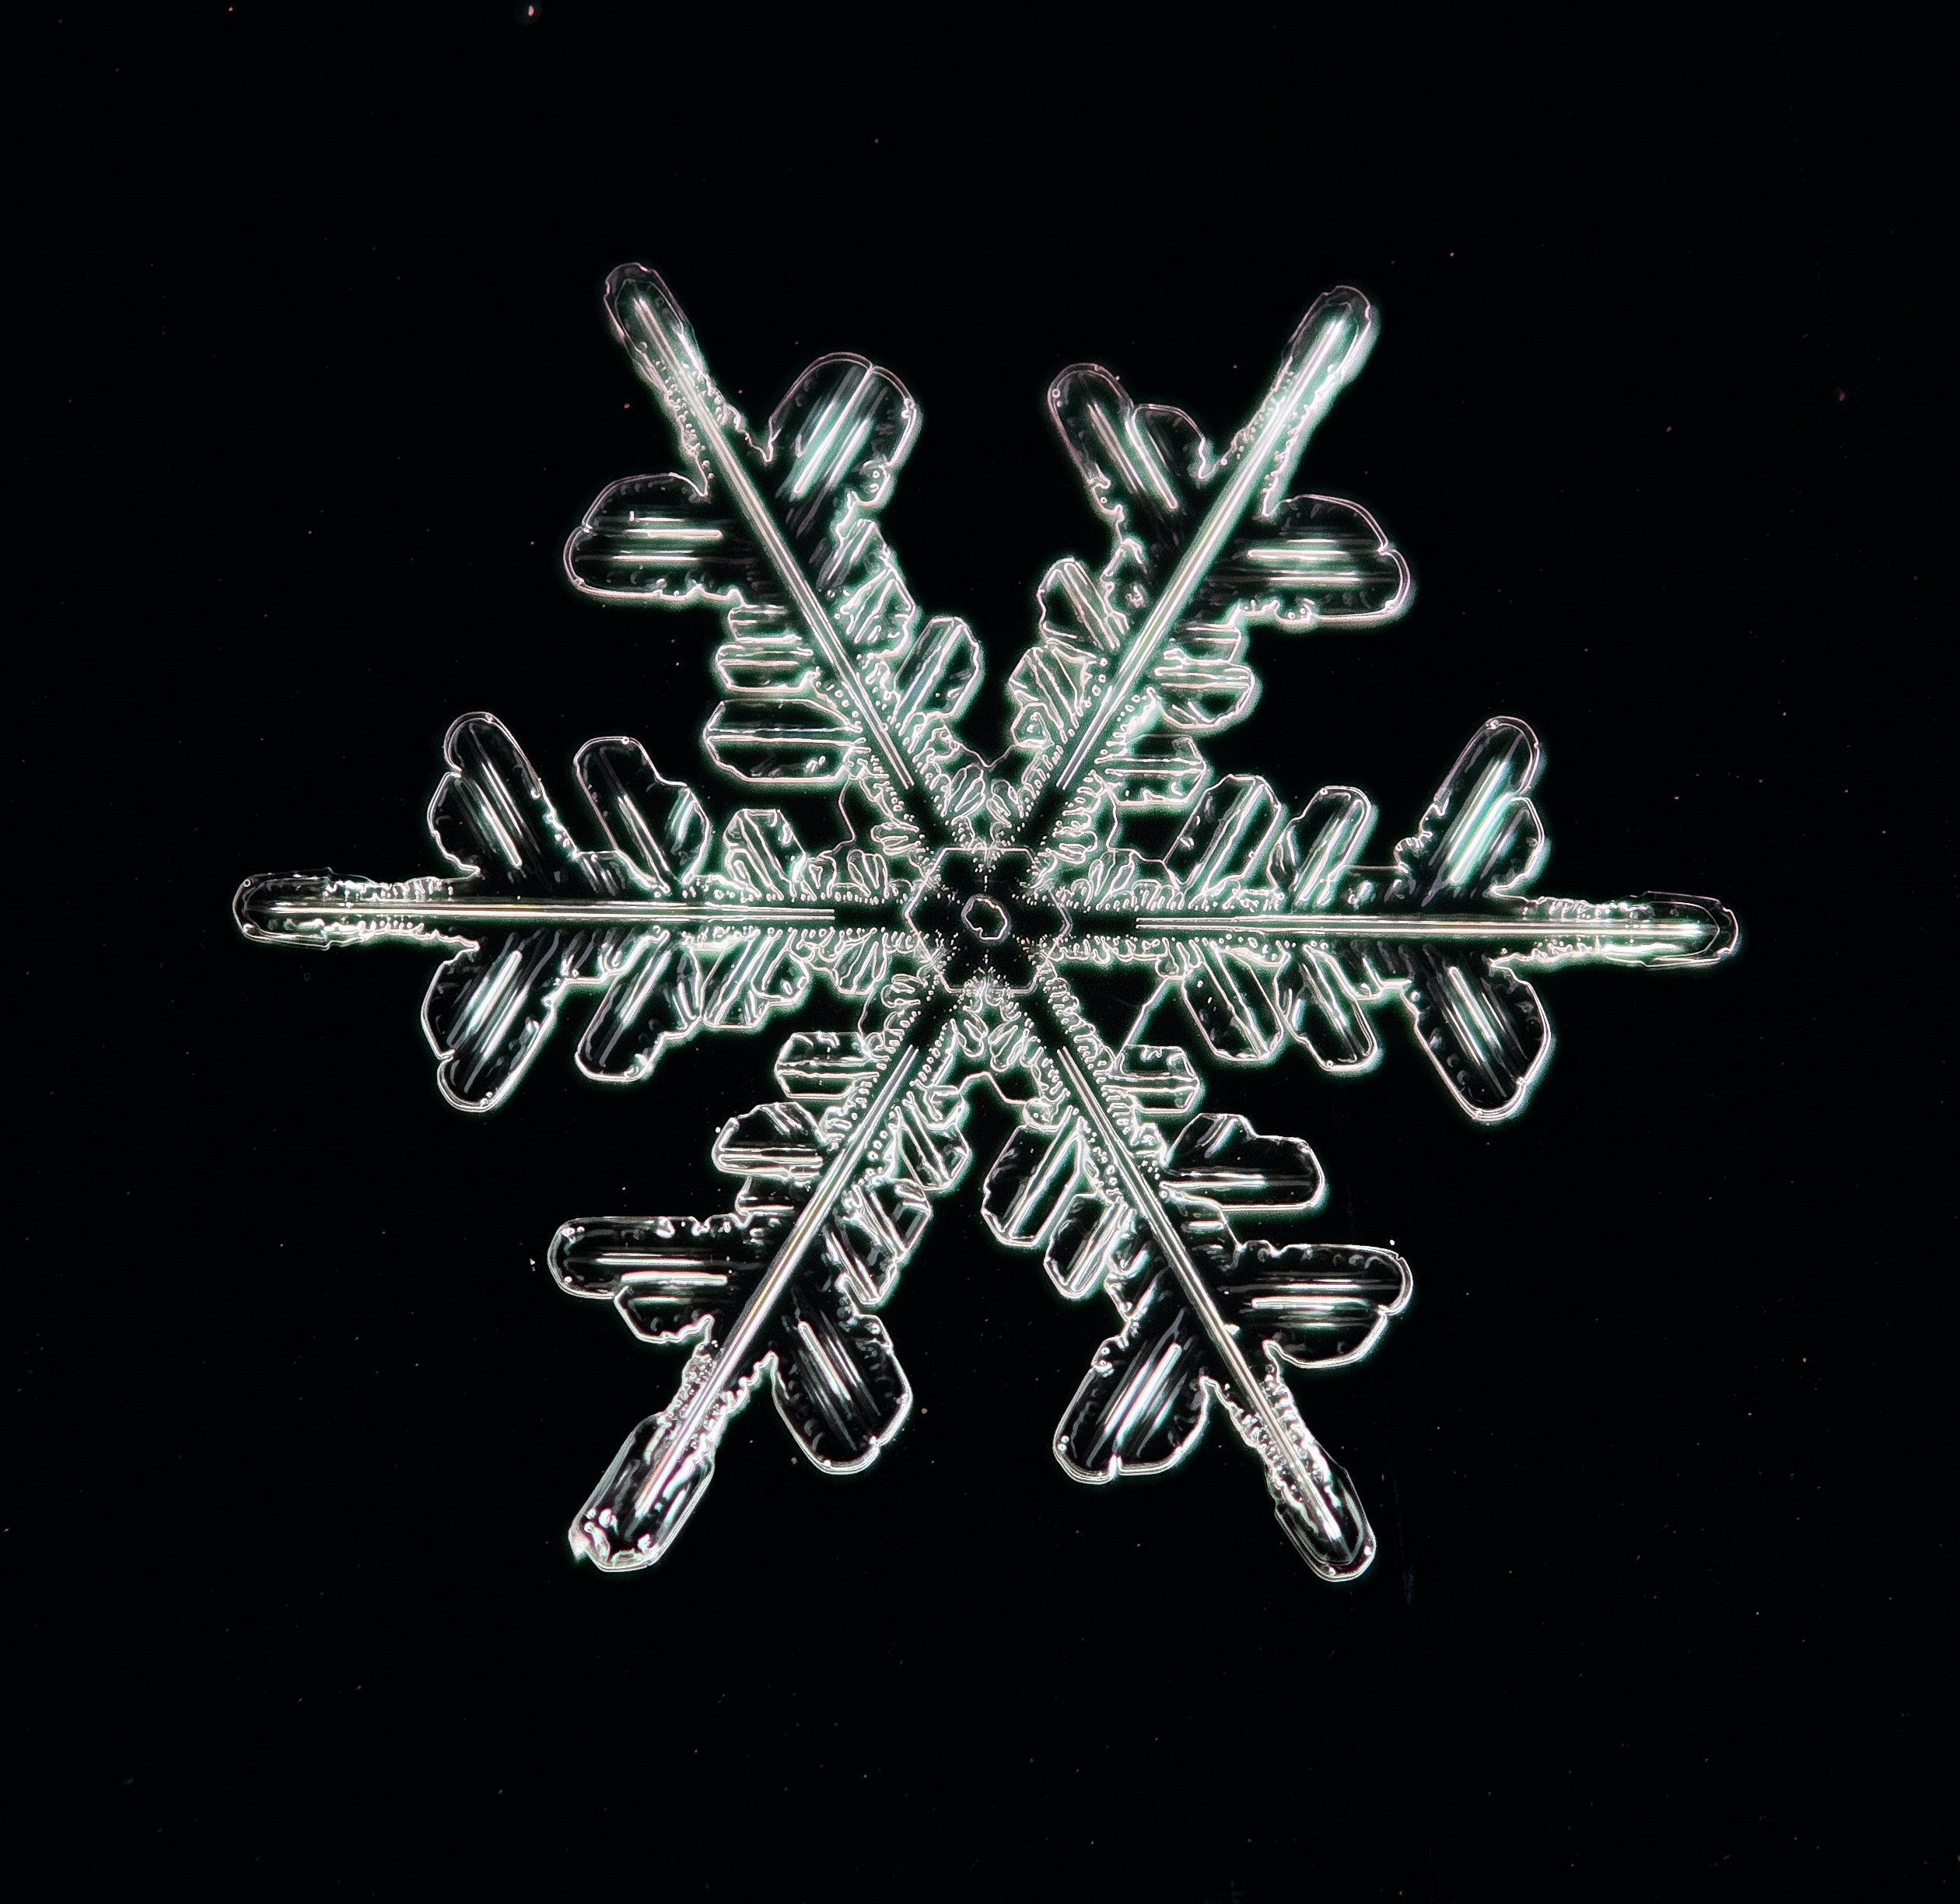
- Ultra-Close Macro Subjects: Macro photography, especially at high magnifications, where depth of field is razor-thin.
- Deep Interior Spaces: Interiors where you need to maintain sharpness from the closest objects to the far walls.
In these challenging scenarios, even narrowing your aperture to its maximum (e.g., f/22 or beyond) might not provide sufficient depth of field. Furthermore, extremely narrow apertures can introduce diffraction, an optical effect that actually reduces image sharpness.
When faced with these depth-of-field limitations, you have two main choices:
- Embrace Shallow Depth of Field: Take a single image and allow parts of the scene to be out of focus. While sometimes artistically desirable, this approach sacrifices overall sharpness.
- Utilize Focus Stacking: Employ focus stacking to ensure complete sharpness from the nearest foreground to the farthest background.
Essential Gear for Focus Stacking
While sophisticated equipment isn’t mandatory, certain gear can significantly enhance your focus stacking workflow and results. Here are recommended items for serious focus stacking:
- Tripod: A sturdy tripod is indispensable for focus stacking. It maintains camera stability and consistent framing throughout the series of shots, crucial for seamless blending.
- Interchangeable-Lens Camera (DSLR or Mirrorless): These cameras offer full manual control over settings and lens selection, providing the flexibility needed for precise focus stacking. Any model will suffice; prioritize features relevant to your general photography interests.
- Manual Focus Lens: A lens with manual focus capability is essential. Manual focus allows for precise, incremental adjustments to the focus point, which is critical for creating a stack of images with accurately shifting focus. Most lenses have an AF/MF switch for easy toggling between autofocus and manual focus.
- Focus Stacking Software: While some cameras offer in-camera focus stacking, dedicated software provides superior control and results. Options include:
- Adobe Photoshop: Offers competent focus stacking capabilities as part of its broader features.
- Helicon Focus: Specialized software renowned for its advanced stacking algorithms and control.
- Zerene Stacker: Another dedicated program known for its high-quality stacking and retouching tools.
How to Focus Stack: Step by Step
Ready to learn how to photo stack? Here’s a detailed guide to walk you through the process, from capturing images in the field to merging them on your computer.
Step 1: Pick Your Subject, Compose, and Set Exposure
The foundation of focus stacking is a well-composed and consistently exposed series of images.
Begin by mounting your camera securely on a tripod. Carefully compose your shot, paying attention to all elements from foreground to background. While handheld focus stacking is possible, a tripod is highly recommended for optimal results.
(Note: Focus stacking is best suited for static scenes. Moving subjects, such as wind-blown foliage or wildlife, can create challenges in alignment and blending. Choose subjects that will remain stationary during the capture process.)
Set your camera to Manual (M) mode. This is crucial for maintaining consistent exposure across all images in the stack. Dial in your desired exposure settings (aperture, shutter speed, and ISO). Use your camera’s exposure meter and histogram as guides to achieve a balanced exposure. Once set, do not alter these settings between shots in the stack.
Similarly, set your white balance. While adjustments can be made in post-processing, maintaining consistent white balance across the stack simplifies the blending process. Select a white balance preset appropriate for your lighting conditions.
Before proceeding, assess whether focus stacking is actually necessary. If using a wide-angle lens for a landscape, take a test shot focused approximately one-third into the scene at a narrow aperture (e.g., f/16). Review the image, zooming in to check sharpness in both the foreground and background. If sufficient sharpness is achieved throughout, focus stacking might be unnecessary. However, if parts of the image are blurry, proceed with the following steps.
Step 2: Switch to Manual Focus and Take Your First Shot
Set your lens to manual focus (MF) using the AF/MF switch on the lens barrel.
Manually focus on the closest point of interest in your composition. This could be a foreground rock in a landscape or the nearest part of a flower in a macro shot.
(If your lens lacks manual focus, autofocus on the nearest point and carefully maintain that focus setting throughout the subsequent steps.)
Take your first photograph. Ensure your composition and exposure remain unchanged.
Step 3: Capture Your Remaining Images
Now, systematically shift the focus point further into the scene, taking a photograph at each new focus position. Gradually rotate the focus ring, moving the plane of focus from the foreground towards the background.
The number of images required depends on the depth of your scene and magnification.
- Landscapes: Typically, 2-3 images suffice. One focused on the foreground, one on the middle ground, and one on the background. For scenes with exceptionally close foregrounds or when using longer focal lengths, 4-5 or more images might be needed.
 focus-stacked building with fence and garden
- Macro Photography: Macro focus stacking often requires significantly more images, typically 8 or more, and sometimes exceeding 20, especially at high magnifications (1:1 or greater).
 aster flowers focus stacked
For precise macro stacking, consider using a focus rail. This device mounts between your camera and tripod, allowing for minute, controlled adjustments to the camera’s position relative to the subject, enabling highly accurate focus increments.
When in doubt, it’s better to capture too many images than too few. Redundant images can be discarded later, but insufficient images will compromise the final stacked result.
Step 4: Blend Images in Post-Processing
Merging a series of images might seem complex, but software makes the process remarkably straightforward. While the instructions below are for Photoshop, similar workflows exist in other programs like Helicon Focus and Zerene Stacker.
- Import your image series to your computer.
- Open Photoshop. Navigate to File > Scripts > Load Files into Stack…
 selecting the Load Files into Stack option in Photoshop
- In the “Load Layers” dialog box, click Browse… and select all the images in your focus stack.
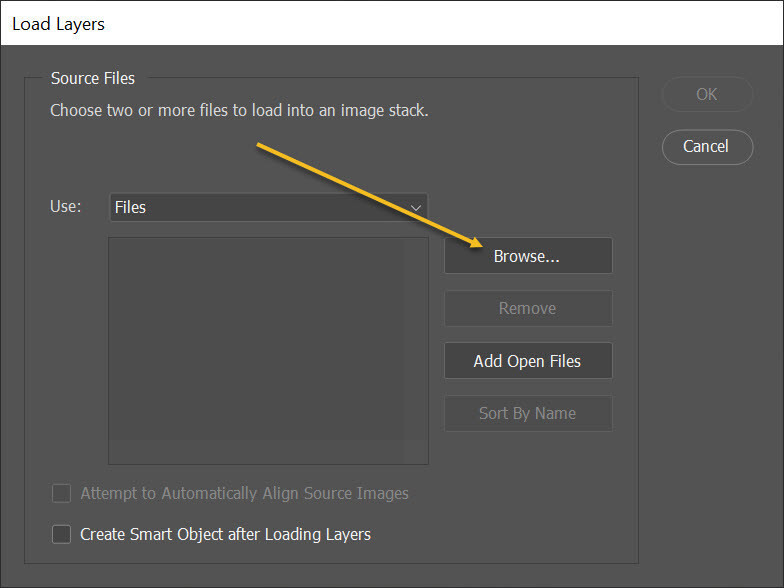 Clicking the Browse option in Photoshop
- Check the “Attempt to Automatically Align Source Images” box. This is important to compensate for any slight shifts in framing between shots, especially if handheld stacking or minor tripod adjustments were involved. Click OK.
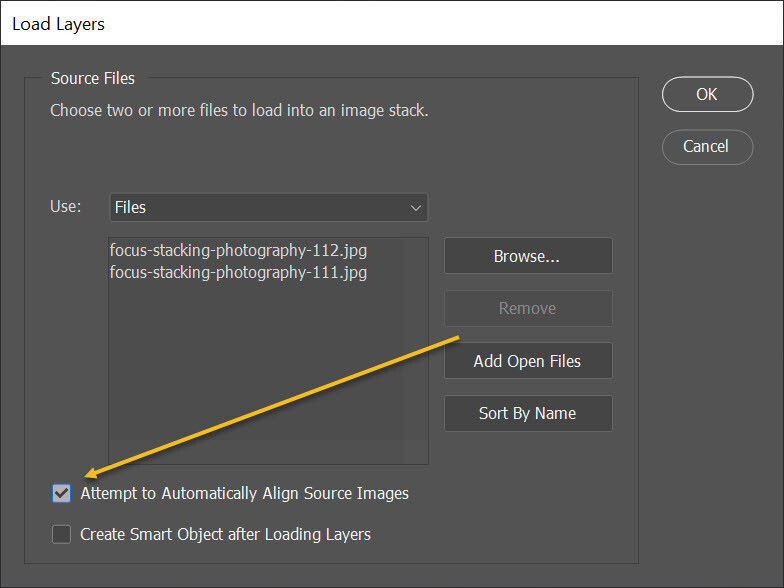 Checking the Attempt to Automatically Align Source Images in Photoshop
-
Once the images are loaded as layers, select all layers in the Layers panel. Then, go to Edit > Auto-Blend Layers…
-
In the “Auto-Blend Layers” dialog, select “Stack Images” as the blending mode. Ensure the “Seamless Tones and Colors” checkbox is also selected. Click OK.
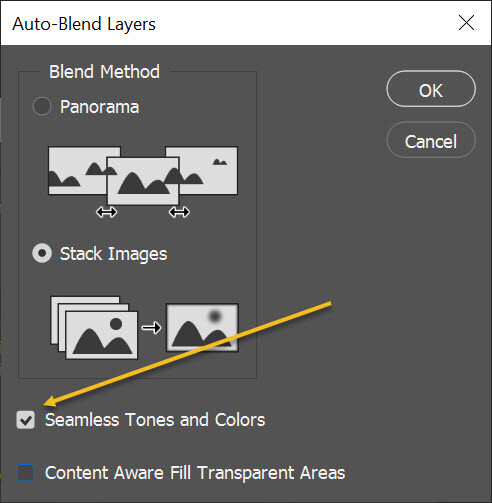 Check the Seamless Tones and Colors box in Photoshop
-
Photoshop will process the images, automatically blending the sharp areas from each layer to create the final stacked image.
-
Crop any edge artifacts. Auto-alignment may result in transparent edges. Use the Crop Tool to remove these.
-
Finally, go to Layer > Flatten Image to merge all layers into a single background layer. Your focus-stacked image is now ready for further editing.
Important Post-Stacking Check: Before exporting your stacked image, zoom to 100% and carefully inspect for any blending artifacts or inconsistencies. Occasionally, software may struggle with complex areas, leading to minor imperfections. These can often be easily corrected with Photoshop’s Healing Brush tool. This final check ensures a polished and artifact-free final image.
Tips and Tricks for Improving Your Image Stacks
 Focus stacking in photography cherries
Mastering the basics of focus stacking is just the beginning. Here are some advanced tips to take your image stacks to the next level:
1. Be Mindful of Moving Subjects
Focus stacking excels with static scenes. Movement within the frame, however slight, can introduce complications. A tree swaying in the wind, for example, will be positioned differently in each image of the stack, making seamless blending difficult and potentially resulting in ghosting artifacts.
To minimize issues with movement:
- Shoot in Still Conditions: Choose calm days for outdoor focus stacking.
- Stabilize Moving Elements: For subjects like flowers in light wind, use a plamp (plant clamp) to hold them steady or use your body as a wind block.
- Mask Moving Subjects (Advanced): If a moving subject is unavoidable, you can capture it sharply in a single image within the stack. Then, in post-processing, use manual masking to selectively overlay the sharp moving subject onto the stacked background. Masking can also be used to remove ghosting artifacts around moving elements.
2. Utilize a Remote Release in Low Light
In bright light, faster shutter speeds minimize camera shake from pressing the shutter button. However, in low light conditions, longer shutter speeds increase the risk of vibration-induced blur during each shot in the stack.
A remote release eliminates this risk. It allows you to trigger the shutter without physically touching the camera, ensuring maximum sharpness, especially at slower shutter speeds.
In practice: After adjusting focus for each shot, allow any vibrations to settle, then use the remote release to trigger the camera. Repeat this for each image in your stack.
 Focus stacking in photography
3. Don’t Dismiss Handheld Stacking
While a tripod is ideal, handheld focus stacking is a viable option when tripods are impractical. The key is to maintain consistent framing throughout the image series.
Techniques for handheld stacking:
- Stable Stance: Find a stable stance, leaning against a solid object if possible.
- Minimize Movement: Consciously minimize camera movement between shots.
- Wider Composition: Frame slightly wider than your intended final composition. Handheld stacking may result in minor frame shifts, requiring a slight crop in post-processing.
Handheld stacking requires practice but can yield surprisingly good results, offering flexibility when tripods are not feasible.
4. Combine Focus Stacking with HDR for Exceptional Dynamic Range
 Focus stacking in photography
For scenes with both deep depth of field needs and high dynamic range (extreme differences between bright highlights and deep shadows), combining focus stacking with HDR (High Dynamic Range) techniques can produce stunning results.
HDR photography involves capturing multiple exposures of the same scene at different brightness levels and merging them to capture detail in both highlights and shadows.
To combine HDR and focus stacking:
- Capture Bracketed Exposures at Each Focus Point: Instead of a single image at each focus position, capture a series of bracketed exposures (e.g., -2EV, 0EV, +2EV) at each focus point.
- Merge HDR Images First: In post-processing, first merge the bracketed exposures for each focus point into individual HDR images.
- Focus Stack the HDR Images: Then, focus stack the resulting HDR images using the standard focus stacking workflow.
This combined approach delivers images with both exceptional depth of field and extended dynamic range, ideal for complex landscape scenes with challenging lighting.
5. Achieve Macro Precision with a Focusing Rail
 Focus stacking in photography
In extreme macro photography, at magnifications of 1:1 and beyond, depth of field becomes incredibly shallow. Minute adjustments of the focus ring can shift the focus plane dramatically, making precise focus stacking challenging.
A focusing rail is an invaluable tool for macro focus stacking precision. It allows you to move the camera in minute, controlled increments along a track, maintaining focus plane accuracy.
Using a focusing rail:
- Set Initial Focus: Focus on the nearest part of your macro subject.
- Incremental Adjustments: Instead of adjusting the focus ring, use the focusing rail to move the camera incrementally closer to the subject for each subsequent shot. This ensures precise, parallel shifts in the focus plane, critical for high-magnification macro stacks.
While not essential for all macro stacking, a focusing rail significantly simplifies the process and improves the quality of high-magnification stacks.
Focus Stacking in Photography: Final Words
You now possess a comprehensive understanding of how to photo stack, from the fundamental principles to advanced techniques. With just your camera, a tripod, and post-processing software, you’re ready to unlock the power of focus stacking and create images with incredible sharpness and detail.
Experiment with focus stacking across various genres – capture the intricate details of a flower, the vastness of a landscape, or the miniature world of macro subjects. Embrace the technique, and watch your photography reach new levels of clarity and impact.
Now it’s your turn:
What subjects are you excited to focus stack? Have you tried focus stacking before? Share your experiences and focus-stacked images in the comments below!