Snow photography can be challenging, but capturing stunning winter images is achievable with the right knowledge and techniques. At dfphoto.net, we’ll guide you through essential tips for photographing snow, from camera settings to composition, ensuring you create breathtaking winter scenes, master the art of winter photography and produce visually arresting snow scenes. Explore our collection of resources to refine your skills and achieve artistic vision in your snow photography.
1. Prepare Before You Set Out
Before venturing out to capture a wintery landscape, meticulous preparation is crucial. Start with proper attire, opting for several layers of clothing for insulation rather than a single bulky layer. Wear warm, waterproof shoes, and don’t forget gloves and a hat to protect against the cold.
Protecting your eyes is equally important. Snow reflects light effectively, increasing the risk of snow blindness, even on cloudy days. Wearing sunglasses is the best way to prevent this condition.
Extra batteries are essential because cold weather can quickly drain a camera’s battery. Keep spare batteries close to your body, inside your clothing, to maintain their temperature and prevent faster discharge.
 Preparing for winter photography in a snowy landscape with warm clothing and sunglasses
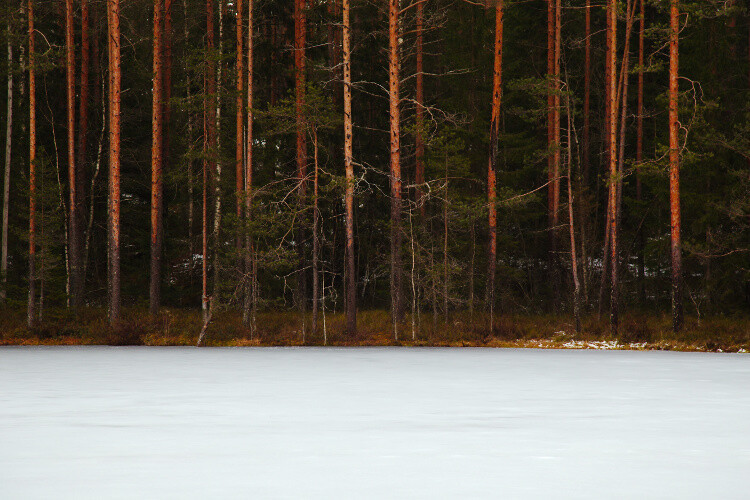
2. Focus on Contrast (or Use Manual Focus)
Camera autofocus relies on identifying contrast within a scene. In snowy environments, the abundance of white can make it challenging for autofocus to acquire focus.
To overcome this, switch your camera to single-point AF mode and position the focus point over a contrast-heavy area, such as tree bark, vegetation, or the roof of a house. Press the shutter button halfway to lock focus. If it doesn’t work, find an even more contrast-heavy subject.
Hold the shutter button down while recomposing the shot, then press it fully to capture the image.
For low-contrast scenes, consider using manual focus. Switch your lens to manual focus mode and turn the focus ring until you achieve perfect sharpness. Use Live View mode to preview the image on the rear LCD and zoom in for better focus accuracy.
 Using manual focus to photograph a low-contrast snowy scene with a white house in the background
3. Choose the Right Camera Settings for Snow Photography
The best snow photoshoot settings depend on the light, situation, and artistic intentions.
First, set your camera to shoot in RAW. The RAW file format provides more information for editing, allowing you to recover clipped shadows and highlights, which are common in snow photography.
Select Evaluative metering mode (also known as Matrix metering) to analyze the entire scene for optimal exposure. If you struggle to get a good exposure, try Spot metering or Partial metering.
Shoot in Aperture Priority mode to adjust the aperture and ISO while the camera automatically adjusts the shutter speed. This mode offers control without being overwhelming and is convenient in cold weather.
As for the aperture setting, a wide aperture (e.g., f/2.8) creates a shallow depth of field, while a narrow aperture (e.g., f/11) keeps most or all of the shot in focus. Experiment to find the best option for your artistic vision.
Set your ISO to its base level (generally ISO 100) to minimize noise.
Your camera chooses shutter speed based on exposure, but if shooting handheld, ensure it’s fast enough for a sharp shot (1/100s is a good starting point). If the shutter speed is too slow, widen the aperture or raise the ISO.
Dial in one or two stops of positive exposure compensation because the camera’s meter may make the snow look gray. Exposure compensation counteracts this effect.
Pay attention to your white balance setting to avoid yellow or blue tones in the snow. Use Auto White Balance and adjust in post-processing, or use a gray card to set white balance when shooting.
 Camera settings for capturing sharp and well-exposed snow photos in various lighting conditions
4. Use the Right Snow Photography Gear
While you can capture great snow photos with any gear, specific equipment can enhance your shots.
Use a camera with a larger sensor and strong high-ISO capabilities. A full-frame mirrorless camera like the Canon EOS R5 or the Sony a7 IV works well, but APS-C mirrorless models or DSLRs can also produce great results.
Select a weather-sealed lens if shooting in adverse weather. The focal length depends on your interests. A 50mm prime lens or a 24-70mm zoom lens are versatile options.
Use a sturdy tripod or monopod in limited light to keep your shots sharp, especially when the sky is overcast or there’s falling snow.
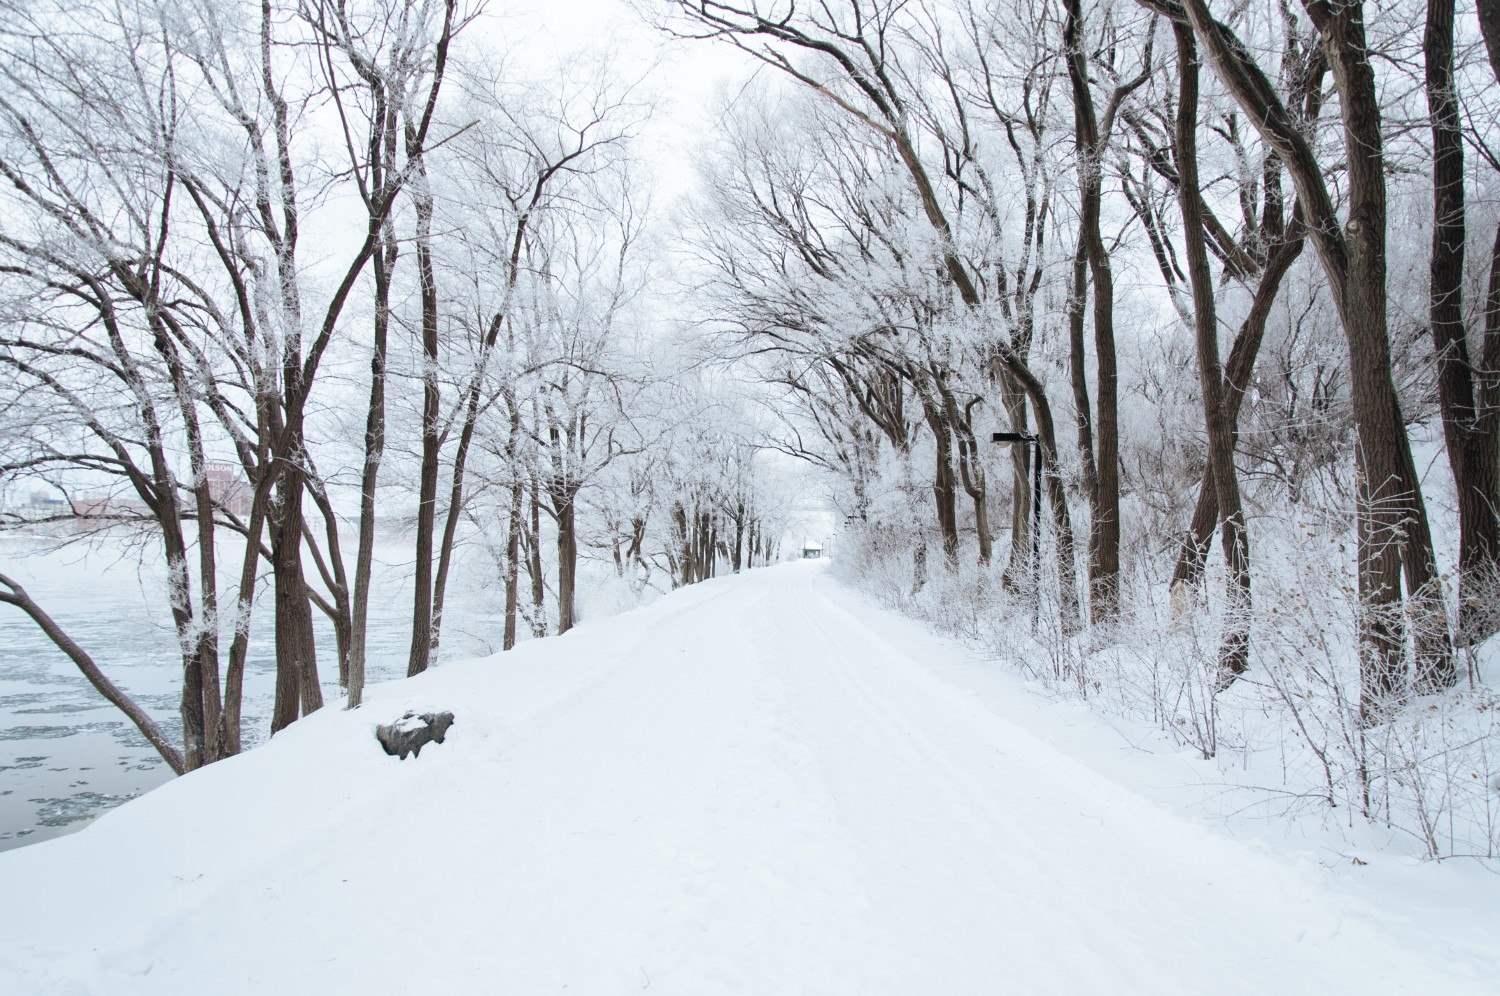
5. Capture Snow While It’s Still Fresh
For magical photos, head out after a fresh snowfall. The world will be pristine, allowing you to create stunning shots of your winter wonderland.
Plan the order in which you take photos to avoid trampling the snow. Capture fresh snow early before others disturb it.
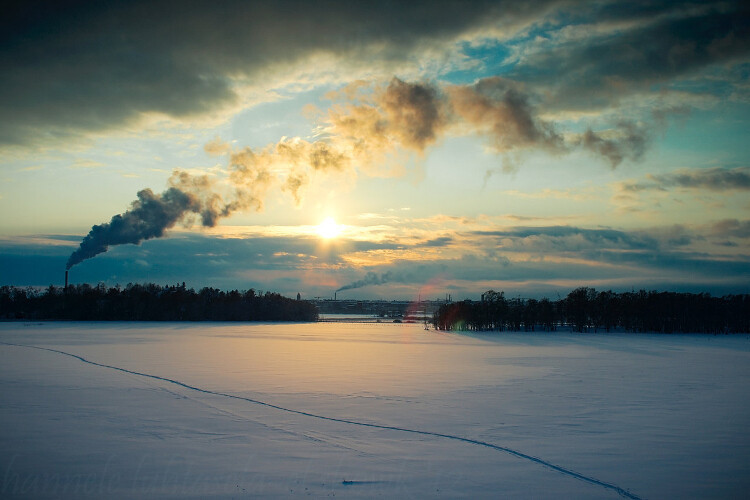
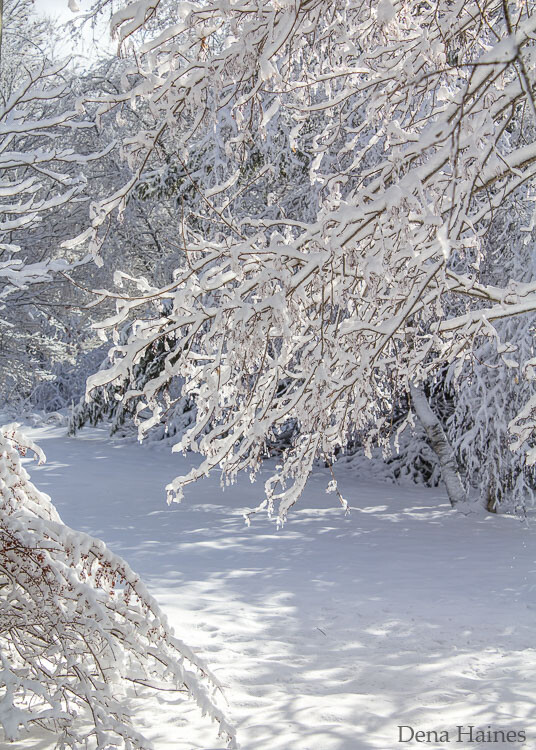
6. Seek Out Color or Tonal Contrast
Contrast, whether color or tonal, can enhance snow photos. In a white world, finding something to contrast with the snow can be challenging but rewarding.
Add color contrast by finding colorful subjects or waiting for sunset. Add tonal contrast by mixing the whites of the snow with dark elements, such as shadows. Moving water can contrast with the stillness of the snow.
 Seeking out color contrast with colorful elements in a snowy landscape
 Capturing tonal contrast by mixing white snow with dark elements like shadows in a snowy environment
 Using moving water as a contrasting element with the stillness of the snow to add visual interest
7. Keep Your Batteries Warm
Carry at least two batteries and keep one in an inside pocket at all times. When the battery in your camera runs low, replace it with a warm one. Put the drained battery in an inner pocket, as it may work again once warmed up.
 Keeping spare camera batteries warm to extend their life in cold weather conditions
8. Bag Your Camera When You Come Inside
When you take a cold camera into a warm environment, condensation can form on the lens and camera internals.
To prevent this, bring a large ziplock bag. When you’re ready to go inside, fill the bag with cold air, put your camera in the bag, and seal it tightly. Allow the camera to warm up slowly before taking it out of the bag.
Bag your cold camera before taking it into any warm environment, including stores, heated elevators, and heated cars.
 Bagging a cold camera in a ziplock bag to prevent condensation when bringing it into a warm environment
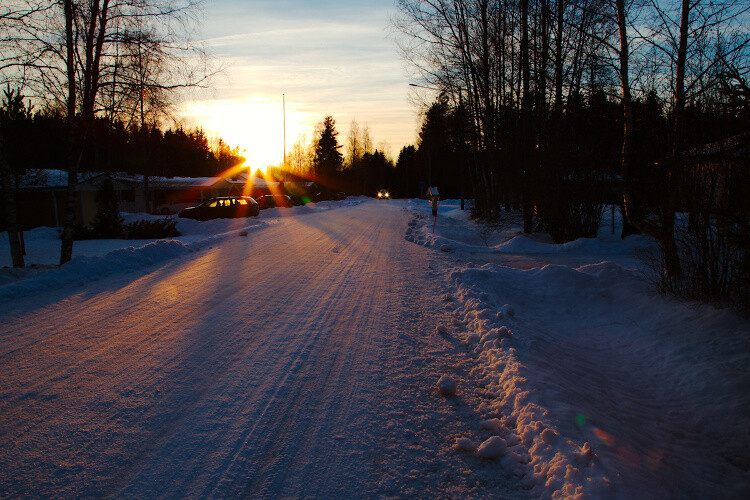
9. Shoot in Any Light
Snowy landscapes look good in both sunny and cloudy weather. Learn to work with the lighting conditions you’re given.
When the sky is cloudy, find elements that break up the white snow and add interest, such as trees, grass, or ice. Look for intricate landscapes, such as grasses against snow or patterns in frozen puddles and streams.
When the weather is sunny, look for shadows created by the bright sun and convert your shots to black and white. Shoot in the early morning or evening to capture the warm light on the cold snow. Use a wide-angle lens and find a high angle to convey the expanse of the landscape.
Capture blue-hour snowscapes using a tripod to keep your camera steady. Identify potential compositions in advance and set up before the blue hour arrives. Use a remote shutter release to avoid blur due to vibrations.
 Capturing snowscapes in varied lighting conditions, including sunny and cloudy weather, and during blue hour
10. Photograph Snow at Night for a Menacing Look
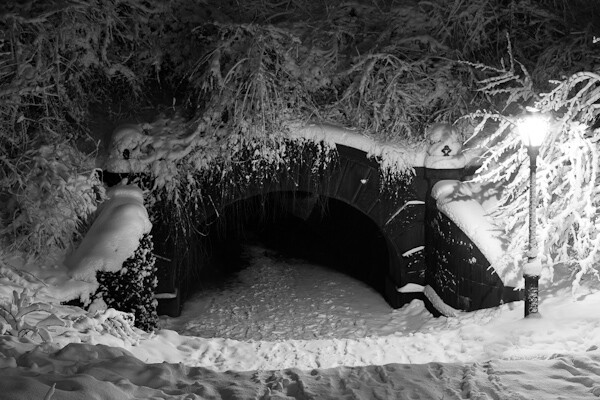
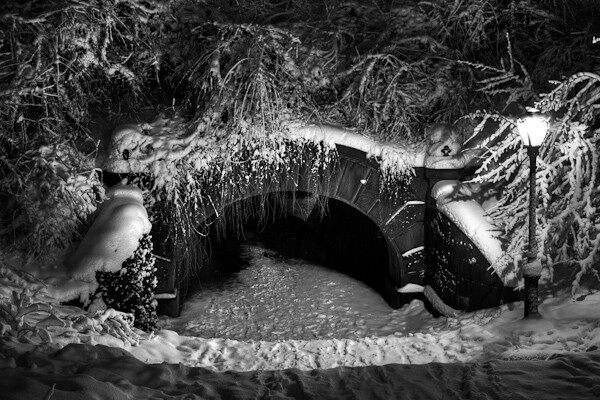
Photographing snow at dusk or at night can create a dark and menacing feel. The contrast between the white of the snow and the dark of everything else becomes emphasized, resulting in unique and dramatic images.
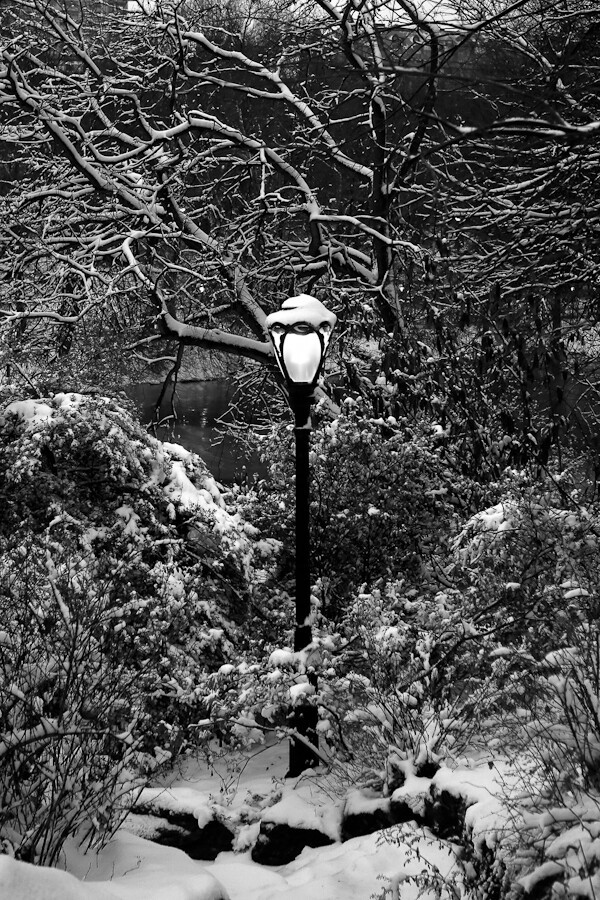 Photographing a lamppost at dusk in Central Park to capture the contrast between the snow and the dark surroundings
11. Photograph When the Snow Starts Falling
Snowy days offer amazing opportunities for images. Here are a few ideas:
- Birds huddled in snow-covered trees
- Trees surrounded by a minimalist expanse of white
- Pedestrians hunched over against the wind
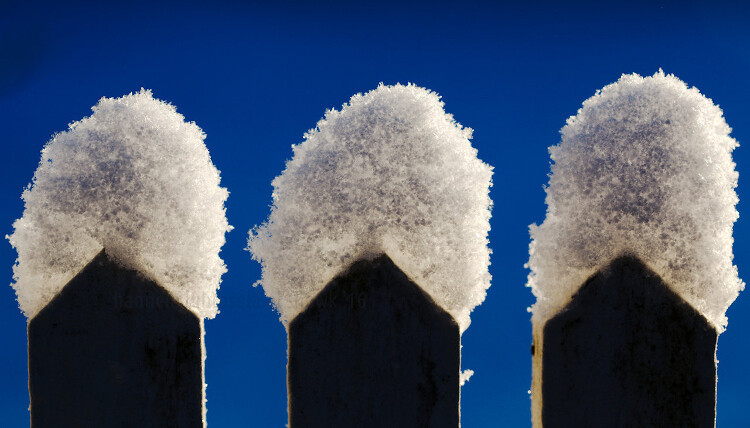
- Plants with little “hats” of snow
- Cityscapes with blowing snow and warm lights in the distance
Avoid using lengthy shutter speeds, which blur the snow. Make sure your shutter speed is fast enough to freeze the snow. Protect your camera with a rain cover or umbrella. Wipe stray flakes off your camera and lens and use a rocket blower to blow snow off the front lens element. Use a lens hood to prevent snow from landing on the front element.
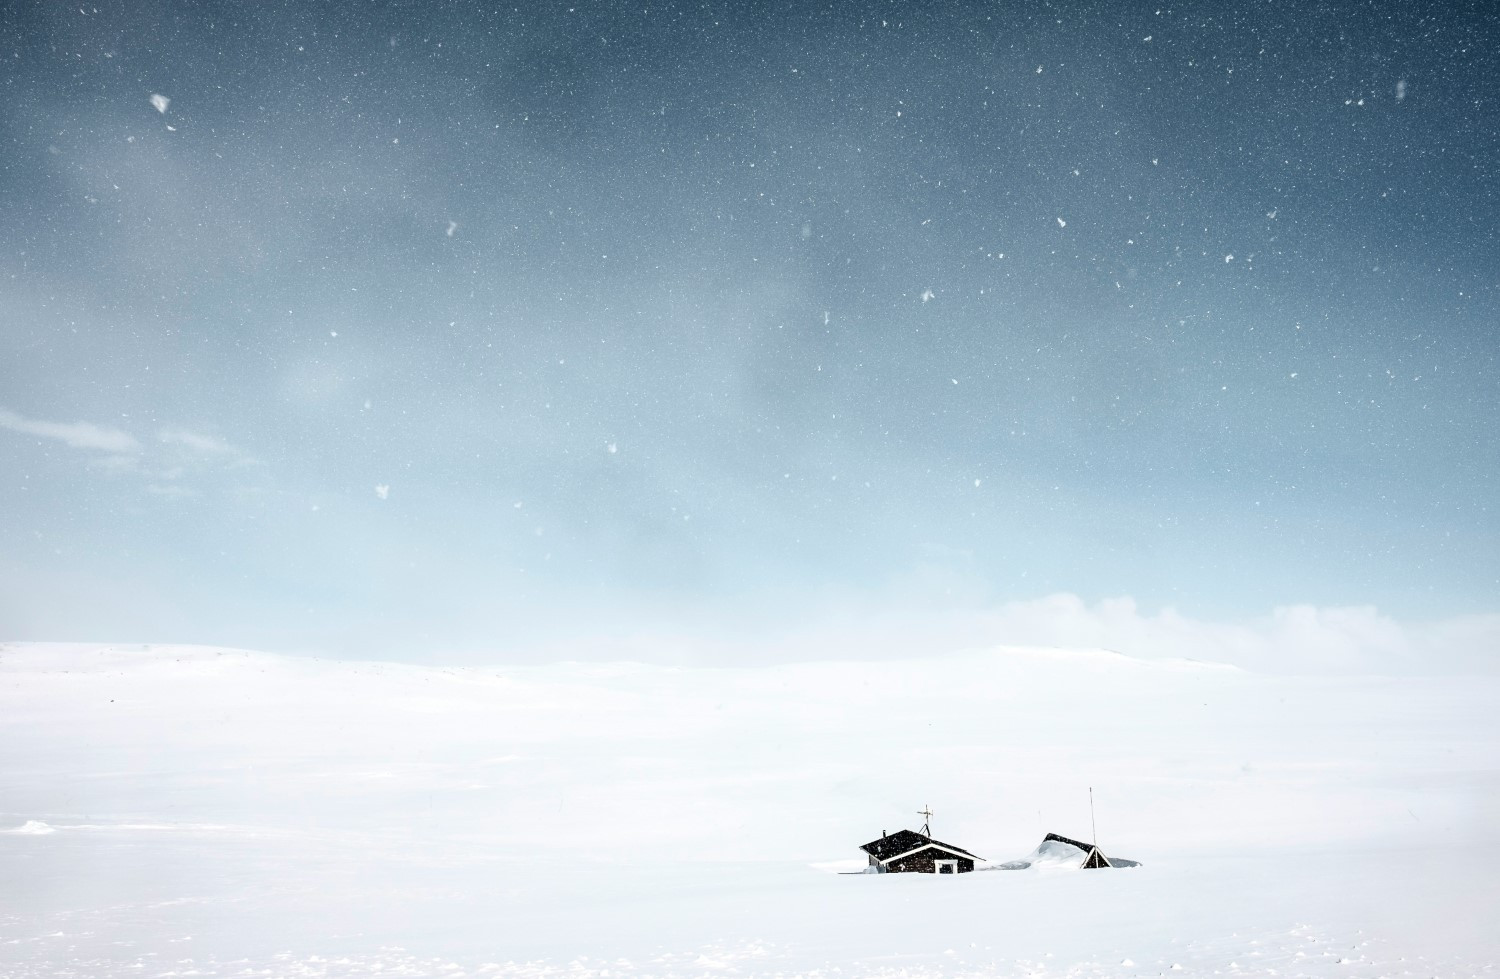
12. Try Something Different
Experiment with different approaches to capture unique winter photos. Snow can create negative space or add flashes of interest in an otherwise drab scene.
Go beyond the obvious to find treasures in your winter wonderland. Transition from landscape photos to close-ups, from strong color contrast to black and white, from a classic wide-angle landscape to a more intimate telephoto shot.
 Using snow to create negative space in an image for minimalist effect
 Photographing winter wonderland details in close-ups to capture intimate shots
13. Act Fast
Snow changes quickly. It can stop falling in an instant, and the sun can melt it rapidly. Monitor the weather carefully and have your gear ready to go. Capture snow photography while you still can.
 Capturing abstract snow photography of ice and branches quickly before conditions change
14. Try Some HDR Processing
Use HDR processing for black-and-white snow photos to add a great textural quality without unrealistic colors. HDR is perfect for scenes where snow lacks texture or has pronounced bright whites and deep shadows.
 Uedited photo of Central Park at night
 Edited HDR photo of Central Park at night with enhanced texture and contrast
15. Be Patient
Be patient when faced with rapidly changing conditions. The look of snow can vary greatly depending on the light. Wait for the right conditions to take your shot.
 Being patient to capture snow in the sun with beautiful light
16. Play with Perspective
Composition is essential for great snow photos. Pay careful attention to the items you include in the frame and consider your perspective. Get down low to shoot up or find a hill to shoot downward. Look for opportunities to make the shot even better by walking to either side of your subject, considering different angles, getting in close, walking far away, and even changing lenses.
 Photographing snow up a tree from a low angle to create a unique perspective
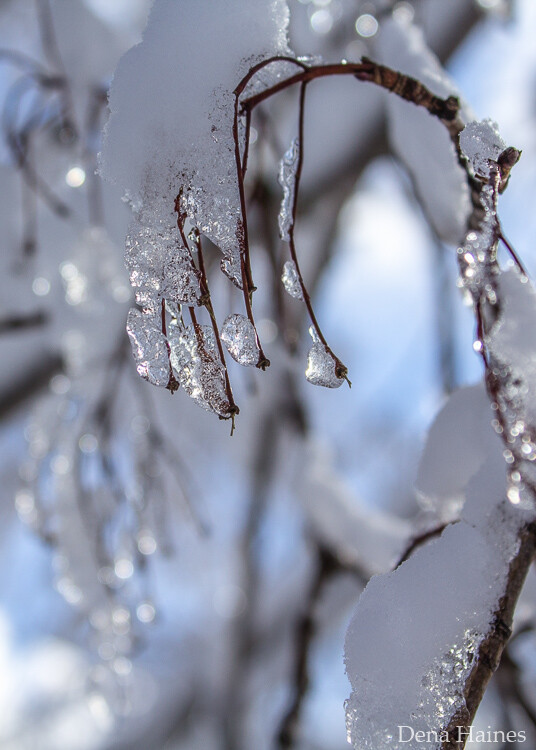
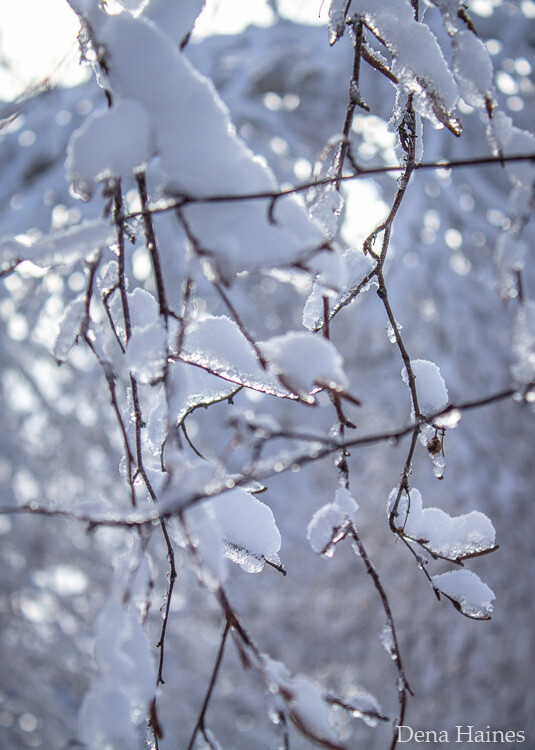
17. Capture Some Sparkly Bokeh
A sunny winter day is great for creating bokeh with sparkling snow and ice. Look for a subject with something bright or shiny in the background. Set your camera to a wide-open aperture and ensure distance between your subject and the shiny background.
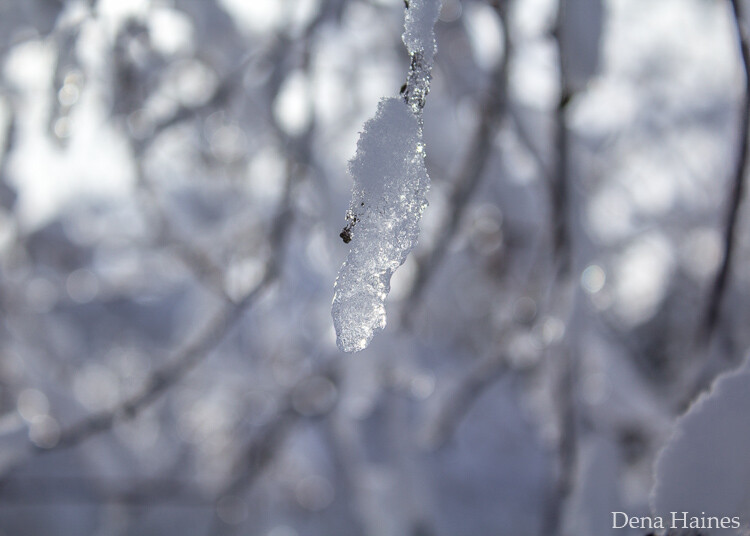 Capturing ice on a branch to create sparkly bokeh in snow photography
18. Use a Reverse (White) Vignette
Use a white vignette to add a magical quality to snow photographs and enhance the middle-of-the-storm effect. White vignettes can prevent the eyes from falling off the edge of an image and lead them back to the center.
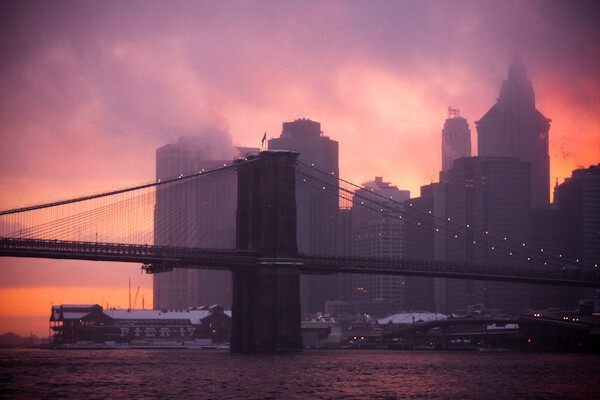 Photographing the Brooklyn Bridge at sunset during a snowstorm and adding a white vignette
19. Add Color and Contrast
Increase the contrast and saturation of snowstorm photos to enhance their painterly look. Over-saturating photographs is generally discouraged, but it can be amazing for snowstorm scenes.
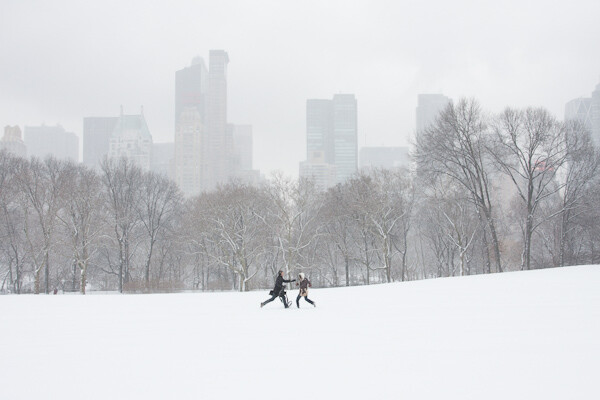 Original, untouched photo of a couple in Sheep Meadow
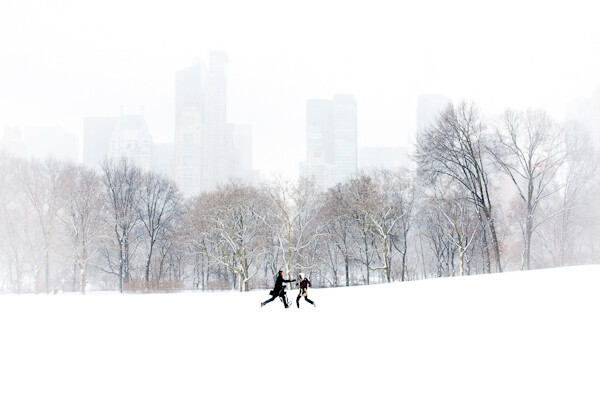 Enhanced photo of a couple in Sheep Meadow with added color, contrast, and a white vignette
Snow Photography Tips: Final Words
Have fun with your snow photography and experiment with different settings for creative results. Dress for the weather and protect your gear.
To elevate your skills and gain inspiration for snow photography, visit dfphoto.net. Our website offers a variety of resources, from detailed tutorials to stunning photo collections, and a thriving community of photographers to connect with and learn from.
Ready to capture the beauty of winter?
FAQ
1. What is the best time to photograph snow?
The best time to photograph snow is just after a fresh snowfall, when the landscape is pristine and untouched. Early morning or late afternoon light can also add warmth and dimension to your snow photos.
2. How do I protect my camera in snowy conditions?
To protect your camera in snowy conditions, use a rain cover or umbrella, wipe off stray flakes, and use a rocket blower to remove snow from the lens. Bag your camera in a ziplock bag before bringing it into a warm environment to prevent condensation.
3. What camera settings are best for snow photography?
For snow photography, shoot in RAW format, use Evaluative metering mode, and set your white balance to Auto or use a gray card. Choose Aperture Priority mode and adjust the aperture and ISO accordingly. Add one or two stops of positive exposure compensation to prevent the snow from appearing gray.
4. How can I achieve proper exposure in snowy scenes?
Achieving proper exposure in snowy scenes requires adding one or two stops of positive exposure compensation. This ensures that the snow appears bright white rather than gray in your photos.
5. What lens should I use for snow photography?
The best lens for snow photography depends on your artistic vision. A wide-angle lens is great for capturing expansive landscapes, while a telephoto lens can isolate specific elements. A 50mm prime lens or a 24-70mm zoom lens are versatile options.
6. How do I keep my camera batteries from dying in the cold?
To keep your camera batteries from dying in the cold, carry extra batteries and keep them in an inside pocket to maintain their temperature. Replace batteries with warm ones when they run low.
7. How can I add contrast to snow photos?
Add contrast to snow photos by seeking out colorful elements, waiting for sunset, or mixing the whites of the snow with dark elements like shadows.
8. What is snow blindness and how can I prevent it?
Snow blindness is a condition caused by the reflection of light off snow, which can damage your eyes. Prevent it by wearing sunglasses, even on cloudy days.
9. How do I photograph falling snow effectively?
To photograph falling snow effectively, use a fast shutter speed to freeze the snowflakes. Avoid lengthy shutter speeds, which will blur the snow into streaks.
10. How can I create bokeh in snow photography?
Create bokeh in snow photography by using a wide-open aperture and ensuring there is distance between your subject and a shiny background. Pinpricks of light reflecting off snow can create outstanding bokeh effects.
Address: 1600 St Michael’s Dr, Santa Fe, NM 87505, United States
Phone: +1 (505) 471-6001
Website: dfphoto.net.