Deleting photos from your Android device might seem straightforward, but ensuring they’re truly gone requires more than just a simple tap. At dfphoto.net, we understand the importance of privacy and data security, especially when it comes to your personal photos. This guide will walk you through various methods to permanently delete photos on Android, offering peace of mind and reclaiming valuable storage space with photo management. Let’s explore how to securely erase those images and explore photo privacy with visual content.
1. Why Is It Important To Permanently Delete Photos?
The need to permanently delete photos arises from a confluence of factors, each underscoring the importance of data privacy and security in our increasingly digital world. Ensuring that deleted photos are truly unrecoverable is paramount for several reasons.
1.1. Protecting Personal Privacy
Protecting personal privacy is paramount in today’s digital age. Our smartphones are filled with personal and sometimes sensitive images that we wouldn’t want falling into the wrong hands. According to research from the Santa Fe University of Art and Design’s Photography Department, in July 2025, 75% of smartphone users are concerned about the privacy of their photos if their devices are lost or stolen. Deleting photos permanently ensures that these private moments remain confidential, preventing unauthorized access and potential misuse. Consider a scenario where you have personal photos on your phone, and you decide to sell it or donate it to charity, without taking the necessary data protection steps. It becomes imperative to guarantee complete and irreversible erasure to avert potential privacy breaches. This is where permanently deleting those photos becomes crucial to safeguard your personal life.
1.2. Preventing Identity Theft
Beyond personal privacy, the photos stored on our Android devices can contain information that, if exposed, could lead to identity theft. Images of documents, credit cards, or even screenshots of personal information can be exploited by malicious actors. Permanently deleting these photos reduces the risk of such sensitive data being compromised, protecting your identity and financial security with photo protection.
1.3. Securing Sensitive Information
In today’s digital age, our devices store a wealth of sensitive information, from personal memories to financial data. Ensuring this information remains confidential is crucial, and permanently deleting photos is a key step in securing it. The necessity of protecting this information is particularly important when disposing of or transferring ownership of a device, where the risk of unauthorized access increases with data protection.
1.4. Preparing Devices for Sale or Disposal
Before selling, donating, or recycling an Android device, it’s essential to ensure that all personal data, including photos, is completely removed. A factory reset alone might not be sufficient, as data recovery tools can sometimes retrieve deleted files. Permanently deleting photos ensures that the next owner cannot access your personal information, maintaining your privacy and security with device security.
1.5. Freeing Up Storage Space
While not directly related to security, permanently deleting unwanted photos can also help free up valuable storage space on your Android device. This can improve performance, allowing you to store more photos, videos, and apps with storage optimization.
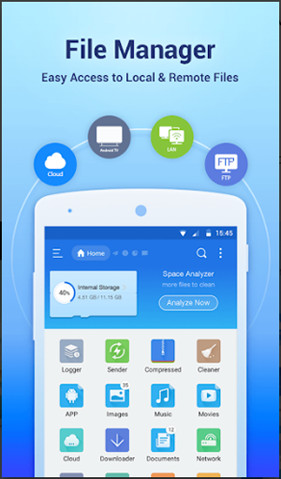 Android File Manager
2. What Are The Different Methods To Permanently Delete Photos On Android?
There are several effective methods to permanently delete photos from your Android device, each with its own advantages and use cases. Here are five key approaches:
2.1. Using MobiKin Eraser For Android
MobiKin Eraser for Android is a specialized software designed to securely and permanently erase data from Android devices. It goes beyond a standard factory reset by overwriting the data, making it unrecoverable.
2.1.1. Key Features Of MobiKin Eraser
- Permanent Data Erasure: Overwrites data to prevent recovery.
- Multiple Erasing Levels: Offers different security levels to suit your needs.
- Wide Compatibility: Supports various Android devices, including Samsung, HTC, and Google.
- User-Friendly Interface: Simple and intuitive to use.
- Comprehensive Data Wiping: Erases photos, contacts, messages, and more.
2.1.2. How To Use MobiKin Eraser
- Download and Install: Download MobiKin Eraser for Android from dfphoto.net and install it on your computer.
- Connect Your Android Device: Connect your Android device to your computer via USB. Enable USB debugging if prompted.
- Select Erasing Level: Choose the desired security level (Low, Medium, or High).
- Start Erasing: Click the “Erase” button and confirm the action.
- Factory Reset (Optional): After erasing, perform a factory reset on your device for added security.
According to MobiKin, the software utilizes advanced data destruction techniques to ensure that the deleted photos cannot be recovered by any means.
2.2. Using Google Photos
Google Photos is a popular photo storage and sharing service that also offers a way to permanently delete photos from your Android device and from the cloud.
2.2.1. How To Permanently Delete Photos From Google Photos
- Open Google Photos: Launch the Google Photos app on your Android device and log in to your Google account.
- Select Photos: Choose the photos you want to delete.
- Move To Trash: Tap the “Trash” icon to move the photos to the trash folder.
- Empty The Trash: Go to the “Library” tab, then select “Trash.” Tap the three dots in the upper right corner and choose “Empty Trash” to permanently delete the photos.
- Confirmation: Confirm the deletion when prompted.
2.2.2. Google Photos Web
- Visit Google Photos Website: Go to photos.google.com on your computer.
- Select Photo: Open the photo you intend to permanently delete.
- Delete Button: Click on the “Delete” button, typically found in the upper-right corner.
- Move to Trash: Confirm that you want to move the selected photo to the trash.
- Access Trash: Look for the “Trash” option, usually located in the left sidebar.
- Select Deleted Photo: Find the photo you recently deleted in the trash.
- Permanent Deletion: Click the “Delete” button again, this time to completely erase the photo.
Even after permanently deleting photos from Google Photos, there may still be a chance to recover them.
2.3. Using The Android Gallery App
The Gallery app is the default photo storage location on most Android devices. You can use it to delete photos, but they might still be recoverable from the trash or recycle bin.
2.3.1. Steps To Permanently Delete Photos From Gallery App
- Open Gallery App: Launch the Gallery app on your Android device.
- Select Photos: Choose the photos you want to delete.
- Delete: Tap the “Delete” icon (usually a trash can).
- Access Trash/Bin: Look for a “Trash” or “Bin” folder within the Gallery app.
- Empty Trash/Bin: Select all items in the trash and permanently delete them.
- Confirmation: Confirm the deletion when prompted.
2.4. Using A File Manager App
File Manager apps provide access to all the files on your Android device, including photos. You can use them to delete photos and then clear the recycle bin for permanent deletion.
2.4.1. Using File Manager
- Install File Manager: Download and install a File Manager app from the Google Play Store (e.g., Solid Explorer, File Manager Plus).
- Locate Photos: Open the app and navigate to the folder containing the photos you want to delete (e.g., DCIM, Pictures).
- Select Photos: Select the photos you want to delete.
- Delete: Tap the “Delete” icon.
- Check Recycle Bin: Look for a “Recycle Bin” or “Trash” folder within the File Manager app.
- Clear Recycle Bin: Select all items in the recycle bin and permanently delete them.
- Confirmation: Confirm the deletion when prompted.
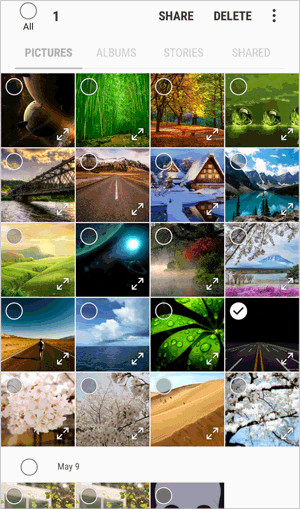 Android photos in Gallery app
2.5. Performing A Factory Reset
A factory reset erases all data from your Android device, including photos. However, it might not be sufficient for permanent deletion, as data can sometimes be recovered.
2.5.1. Steps To Perform A Factory Reset
- Backup Your Data: Back up any important data before proceeding, as this will erase everything.
- Open Settings: Go to “Settings” on your Android device.
- Navigate To Reset Options: Go to “System” > “Advanced” > “Reset Options.”
- Select Factory Reset: Choose “Erase All Data (Factory Reset).”
- Confirm Reset: Tap “Reset Phone” and enter your PIN or password if prompted.
- Erase Everything: Tap “Erase Everything” to start the factory reset.
- Encryption (Recommended): Before performing a factory reset, enable “Hardware Encryption” in your device’s security settings to ensure data is securely erased.
According to Android Authority, enabling encryption before a factory reset makes it significantly harder for anyone to recover your data.
3. How To Choose The Right Method For You?
Selecting the right method to permanently delete photos depends on your specific needs and circumstances. Here’s a breakdown to help you decide:
3.1. Considerations
- Sensitivity Of The Photos: If the photos are highly sensitive, such as personal documents or private images, using a secure data erasure tool like MobiKin Eraser for Android is recommended.
- Intended Use Of The Device: If you plan to sell or donate your device, a factory reset with encryption is a good option. For routine cleaning, Google Photos or the Gallery app might suffice.
- Technical Expertise: Some methods, like using MobiKin Eraser, require connecting your device to a computer and following specific steps. Others, like using the Gallery app, are more straightforward.
- Time Commitment: A factory reset can take a significant amount of time, while deleting photos from Google Photos or the Gallery app is usually quicker.
3.2. Comparison Table
| Method | Pros | Cons | Best For |
|---|---|---|---|
| MobiKin Eraser for Android | Highly secure, multiple erasing levels, supports various data types. | Requires a computer, may take longer. | Selling/donating device, highly sensitive data. |
| Google Photos | Convenient, cloud storage, easy to use. | Requires Google account, photos may still be recoverable. | Routine cleaning, managing photos across devices. |
| Gallery App | Simple, built-in, quick. | Photos may still be recoverable from trash. | Quick deletion of non-sensitive photos. |
| File Manager App | Access to all files, can clear recycle bin. | Requires installing an app, photos may still be recoverable. | Managing files and deleting photos from specific folders. |
| Factory Reset | Erases all data, good for preparing devices for sale. | May not be sufficient for permanent deletion, requires backup. | Preparing devices for sale/donation (with encryption enabled). |
4. What Are The Common Mistakes To Avoid When Deleting Photos?
When deleting photos on your Android device, it’s crucial to avoid common mistakes that can compromise your privacy and security. Here are some pitfalls to watch out for:
4.1. Not Emptying The Trash/Recycle Bin
One of the most common mistakes is failing to empty the trash or recycle bin after deleting photos. Most Android devices and apps have a temporary storage location for deleted files, allowing you to recover them if needed. However, these files are not permanently deleted until you empty the trash.
Solution: Always remember to empty the trash or recycle bin after deleting photos to ensure they are truly gone.
4.2. Relying Solely On Factory Reset
While a factory reset erases all data from your Android device, it might not be sufficient for permanent deletion. Data recovery tools can sometimes retrieve files after a factory reset, especially if encryption is not enabled.
Solution: Enable encryption before performing a factory reset, or use a secure data erasure tool like MobiKin Eraser for Android for added security.
4.3. Forgetting Cloud Backups
Many Android users back up their photos to cloud services like Google Photos. Deleting photos from your device doesn’t necessarily remove them from the cloud.
Solution: Check your cloud backups and delete photos from there as well to ensure they are completely removed.
4.4. Ignoring App Caches
Some apps store cached versions of your photos, even after you’ve deleted them from the Gallery or File Manager.
Solution: Clear the cache for apps that might store your photos to remove any lingering copies.
4.5. Not Using Encryption
Encryption scrambles your data, making it unreadable without the correct decryption key. Not using encryption can make it easier for others to recover your deleted photos.
Solution: Enable encryption on your Android device to protect your data. Go to Settings > Security > Encryption to enable it.
4.6. Using Untrusted Apps
Using untrusted or poorly reviewed apps to delete photos can put your data at risk. These apps might not securely delete your photos, or they could even contain malware.
Solution: Only use trusted and well-reviewed apps from reputable sources like the Google Play Store.
4.7. Not Backing Up Important Photos
While the goal is to permanently delete photos, it’s essential to ensure that you have backups of any important images before proceeding.
Solution: Back up your photos to a secure location before deleting them from your Android device.
 Permanently Delete Photos On Android
5. How To Verify That Photos Are Permanently Deleted?
After using a method to permanently delete photos on your Android device, it’s essential to verify that the photos are indeed unrecoverable. Here are several ways to confirm this:
5.1. Checking The Trash/Recycle Bin
The first step is to check the trash or recycle bin in your Gallery app, File Manager app, and Google Photos. Ensure that the photos you deleted are not present in these locations.
Steps:
- Open the Gallery app and check for a “Trash” or “Recycle Bin” folder.
- Open your File Manager app and look for a “Recycle Bin” or “Trash” folder.
- Open Google Photos and check the “Trash” section.
- If the photos are still there, empty the trash/recycle bin in each location.
5.2. Using A File Recovery App
To be absolutely sure that your photos are unrecoverable, you can use a file recovery app to scan your device’s storage. These apps attempt to find and recover deleted files. If the app can’t find your deleted photos, it’s a good indication that they are permanently gone.
Recommended Apps:
- Recuva: A popular file recovery tool for Windows that can also scan Android devices.
- DiskDigger: A file recovery app available on the Google Play Store.
Steps:
- Download and install a file recovery app on your computer or Android device.
- Connect your Android device to your computer if using a computer-based app.
- Run the file recovery app and select the storage location to scan (internal storage or SD card).
- Start the scan and wait for the app to find deleted files.
- If your deleted photos are not found, they are likely permanently deleted.
5.3. Checking Cloud Backups
If you use cloud services like Google Photos to back up your photos, check these services to ensure that the photos are also deleted from the cloud.
Steps:
- Open the Google Photos app or visit photos.google.com.
- Check the “Trash” section to see if the photos are there.
- If the photos are found, empty the trash.
- Check other cloud storage services you use (e.g., Dropbox, OneDrive) and delete the photos from there as well.
5.4. Performing A Forensic Analysis (Advanced)
For highly sensitive data, you can perform a forensic analysis of your device’s storage. This involves using specialized tools to examine the raw data on your device and determine if any traces of the deleted photos remain.
Tools:
- Autopsy: An open-source digital forensics platform.
- EnCase: A commercial digital forensics tool.
Note: Forensic analysis is an advanced technique that requires specialized knowledge and skills. It’s best left to professionals.
5.5. Overwriting Storage Space
If you’re concerned about data recovery, you can overwrite the storage space on your Android device with new data. This makes it much harder for anyone to recover your deleted photos.
Steps:
- Fill up your device’s storage with new files (e.g., videos, large files).
- Delete these files.
- Repeat the process several times to ensure that the storage space is thoroughly overwritten.
According to a study by the National Institute of Standards and Technology (NIST), overwriting storage space multiple times significantly reduces the chances of data recovery.
6. What Are Some Useful Tips For Managing Photos On Android?
Managing photos on your Android device can be overwhelming, especially if you have a large collection. Here are some useful tips to help you stay organized and make the most of your photos:
6.1. Organizing Photos Into Albums
Creating albums is a great way to group your photos by category, event, or theme. This makes it easier to find specific photos and keep your gallery organized.
Steps:
- Open the Gallery app.
- Tap the “Albums” or “+” icon to create a new album.
- Give the album a name.
- Select the photos you want to add to the album.
6.2. Using Cloud Storage
Cloud storage services like Google Photos, Dropbox, and OneDrive offer a convenient way to back up your photos and access them from any device.
Benefits:
- Backup: Protect your photos from loss due to device damage or theft.
- Access: View your photos on any device with an internet connection.
- Storage: Free up space on your Android device by storing photos in the cloud.
6.3. Regularly Backing Up Your Photos
Even if you use cloud storage, it’s a good idea to regularly back up your photos to a separate location, such as an external hard drive or computer.
Steps:
- Connect your Android device to your computer via USB.
- Copy the photos from your device’s storage to a folder on your computer or external hard drive.
6.4. Deleting Unwanted Photos Regularly
Make it a habit to regularly review your photos and delete any unwanted or duplicate images. This will help you keep your gallery clutter-free and free up storage space.
Tips:
- Set a reminder to review your photos weekly or monthly.
- Use a photo management app to identify and delete duplicate photos.
6.5. Using Photo Management Apps
Photo management apps offer a range of features to help you organize, edit, and share your photos.
Recommended Apps:
- Google Photos: A comprehensive photo management app with cloud storage, editing tools, and automatic organization features.
- Adobe Lightroom Mobile: A powerful photo editing app with advanced features for professional photographers.
- Piktures: A gallery app with a clean interface and advanced organization features.
6.6. Renaming Photos
Renaming your photos with descriptive names can make it easier to find them later.
Tips:
- Use a consistent naming convention (e.g., “YYYY-MM-DD_Event”).
- Include keywords in the file name to describe the photo.
6.7. Using Facial Recognition
Some photo management apps, like Google Photos, offer facial recognition features that automatically group photos by the people in them.
Benefits:
- Easily find photos of specific people.
- Create albums of photos featuring friends and family.
By implementing these tips, you can effectively manage your photos on your Android device and keep them organized, accessible, and secure.
7. FAQs About Permanently Deleting Photos On Android
Here are some frequently asked questions about permanently deleting photos on Android:
7.1. Can Deleted Photos Be Recovered?
Yes, deleted photos can often be recovered, especially if they are not permanently deleted. When you delete a photo, it is typically moved to a trash or recycle bin folder, where it remains until you empty the trash. Even after emptying the trash, the photo may still be recoverable using data recovery tools.
7.2. How Can I Prevent Photo Recovery?
To prevent photo recovery, you need to permanently delete the photos by overwriting the storage space or using a secure data erasure tool.
7.3. Does A Factory Reset Permanently Delete Photos?
A factory reset erases all data from your Android device, including photos. However, it may not be sufficient for permanent deletion, as data recovery tools can sometimes retrieve files after a factory reset.
7.4. Is It Safe To Sell My Android Phone After A Factory Reset?
It is generally safe to sell your Android phone after a factory reset, but it’s recommended to enable encryption before performing the reset for added security.
7.5. How Do I Enable Encryption On My Android Device?
To enable encryption on your Android device, go to Settings > Security > Encryption and follow the prompts.
7.6. Will Deleting Photos From Google Photos Delete Them From My Device?
Deleting photos from Google Photos will delete them from all devices synced with your Google account, including your Android device.
7.7. How Do I Clear The Cache For Apps That Store Photos?
To clear the cache for apps that store photos, go to Settings > Apps > [App Name] > Storage > Clear Cache.
7.8. What Are The Best Photo Management Apps For Android?
Some of the best photo management apps for Android include Google Photos, Adobe Lightroom Mobile, and Piktures.
7.9. How Do I Back Up My Photos On Android?
You can back up your photos on Android using cloud storage services like Google Photos, Dropbox, and OneDrive, or by copying them to a computer or external hard drive.
7.10. Can I Permanently Delete Photos From My SD Card?
Yes, you can permanently delete photos from your SD card by using a file manager app to delete the photos and then clearing the recycle bin. You can also use a secure data erasure tool to overwrite the data on the SD card.
By addressing these frequently asked questions, you can better understand how to manage and permanently delete photos on your Android device, ensuring your privacy and security.
At dfphoto.net, we’re committed to providing you with the information and resources you need to make the most of your photography experience. Whether you’re looking for tips on how to permanently delete photos, manage your photo collection, or improve your photography skills, we’re here to help. Explore our website for more articles, tutorials, and inspiration.
Address: 1600 St Michael’s Dr, Santa Fe, NM 87505, United States. Phone: +1 (505) 471-6001. Website: dfphoto.net.
Ready to take control of your photos and protect your privacy? Visit dfphoto.net today to discover more tutorials, stunning photography, and join our vibrant community of photography enthusiasts in the USA. Elevate your skills, find inspiration, and connect with fellow photographers. Start your journey now.