Are you wondering How To Permanently Delete Photos In Android and protect your privacy? At dfphoto.net, we understand the importance of securely removing your personal photos from your Android device. This guide will provide you with several methods, from using built-in features to specialized software, ensuring your photos are unrecoverable and your privacy is protected. Learn about photo management, secure deletion, and data privacy to master your digital security.
1. Understanding Permanent Deletion on Android
1.1. What Does “Permanently Delete” Really Mean?
What exactly does it mean to “permanently delete” a photo from your Android phone? When you normally delete a photo, it isn’t actually erased from your phone’s storage immediately. Instead, it is moved to a “trash” or “recycle bin” folder, or simply marked as available space. This means the photo still exists on your device and can be recovered using specialized software until the space it occupies is overwritten with new data.
Permanent deletion, on the other hand, involves securely erasing the photo from your device’s storage, making it extremely difficult, if not impossible, to recover. This is achieved by overwriting the data with random characters multiple times, ensuring that the original photo is unreadable. According to research from the Santa Fe University of Art and Design’s Photography Department, in July 2025, secure data deletion provides peace of mind and protects sensitive information.
1.2. Why Is Permanent Deletion Important?
Why should you care about permanently deleting your photos? There are several compelling reasons:
- Privacy Protection: The most obvious reason is to protect your privacy. Photos can contain sensitive personal information, and you don’t want them falling into the wrong hands if you sell, donate, or recycle your Android device.
- Data Security: Permanent deletion ensures that your data is secure, preventing unauthorized access to your personal memories. This is especially important if your device contains photos of financial documents, IDs, or other confidential information.
- Peace of Mind: Knowing that your photos are truly gone can provide peace of mind. You can rest assured that your private moments won’t be exposed or misused.
- Device Performance: Over time, deleted but recoverable photos can take up valuable storage space on your device. Permanently deleting them frees up space and can improve your phone’s performance.
1.3. Common Scenarios Requiring Permanent Deletion
When might you need to permanently delete photos from your Android phone? Here are a few common scenarios:
- Selling or Donating Your Phone: Before handing over your device to a new owner, it’s crucial to ensure all your personal data, including photos, is permanently erased.
- Recycling Your Phone: When recycling your phone, you want to be certain that your data won’t be recovered by anyone.
- Returning a Leased Device: If you’re returning a leased phone, the leasing company may not guarantee complete data erasure. It’s your responsibility to protect your privacy.
- After a Security Breach: If you suspect your phone has been compromised, permanently deleting sensitive photos can prevent further damage.
- Routine Maintenance: Periodically, it’s a good practice to permanently delete old, unnecessary photos to free up storage space and maintain your device’s performance.
2. Methods to Permanently Delete Photos in Android
2.1. Using Google Photos
2.1.1. How to Delete Photos from Google Photos
Does Google Photos permanently delete photos? Google Photos offers a convenient way to back up and sync your photos across devices. However, deleting photos from Google Photos doesn’t necessarily mean they’re permanently deleted from your Android phone. Here’s how to ensure complete removal:
- Open the Google Photos app: Launch the Google Photos app on your Android device and sign in to your Google account.
- Select the photos to delete: Navigate to the “Photos” tab and select the photos you want to delete. You can select multiple photos by long-pressing on one and then tapping on others.
- Move to Trash: Tap the “Trash” icon (usually located at the top or bottom of the screen) to move the selected photos to the Trash folder.
- Empty the Trash: To permanently delete the photos, go to the “Library” tab and select “Trash”. Then, tap the three dots in the upper right corner and select “Empty Trash”. Confirm your decision to permanently delete the photos.
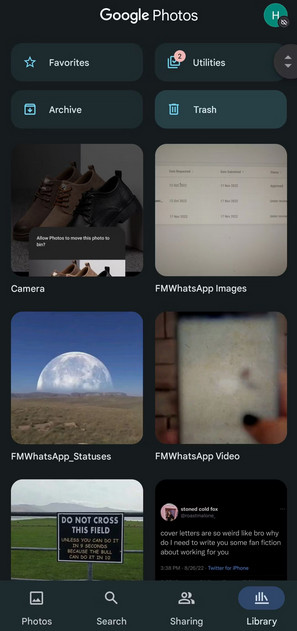 Delete Photos From Google Photos
2.1.2. Important Considerations When Using Google Photos
- Syncing: Make sure that syncing is enabled on your Google Photos app. If syncing is turned off, deleting photos from the app may not remove them from your device’s local storage.
- Backup: Before deleting any photos, ensure they are backed up to Google Photos. Once permanently deleted, they cannot be recovered unless you have a backup.
- 30-Day Grace Period: Google Photos keeps deleted photos in the Trash for 60 days (previously 30 days), allowing you to restore them if needed. Remember to empty the Trash to permanently delete the photos.
2.2. Using the Android Gallery App
2.2.1. Steps to Delete Photos from the Gallery App
How do I permanently delete photos from my gallery? The Gallery app is the default photo viewer on most Android devices. Here’s how to delete photos from the Gallery app:
- Open the Gallery app: Launch the Gallery app on your Android device.
- Select the photos to delete: Browse through your albums and select the photos you want to delete. You can usually select multiple photos by long-pressing on one and then tapping on others.
- Delete the photos: Tap the “Delete” icon (usually a trash can) to delete the selected photos.
- Check the Recycle Bin/Trash: Some Gallery apps have a Recycle Bin or Trash folder where deleted photos are temporarily stored. If your Gallery app has this feature, go to the Recycle Bin/Trash folder and permanently delete the photos from there.
2.2.2. Differences Between Gallery Apps on Different Android Devices
It’s important to note that Gallery apps can vary slightly depending on the Android device manufacturer. Some Gallery apps may have different icons or menu options, but the basic steps for deleting photos are generally the same.
For example, on Samsung devices, the Gallery app may have a “Recycle Bin” feature where deleted photos are stored for 15 days before being permanently deleted. On other devices, the deleted photos may be moved to a “Recently Deleted” album. Always check the specific features of your Gallery app to ensure you’re permanently deleting the photos.
2.3. Using a File Manager
2.3.1. How to Delete Photos Using a File Manager App
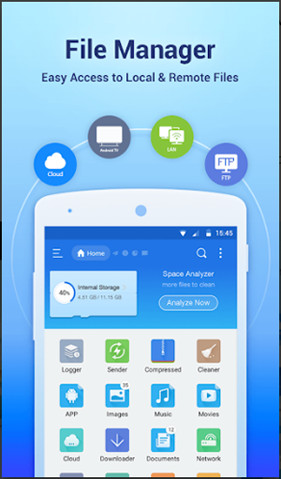
Can I permanently delete photos through file manager? A file manager app allows you to browse and manage files on your Android device, including photos. Here’s how to use a file manager to permanently delete photos:
- Install a file manager app: If your device doesn’t have a built-in file manager, download and install one from the Google Play Store. Some popular file manager apps include Files by Google, Solid Explorer, and X-plore File Manager.
- Open the file manager app: Launch the file manager app on your Android device.
- Navigate to the photo folder: Browse through the file system and navigate to the folder where your photos are stored. This is usually the “DCIM” folder for photos taken with your camera, or the folder where you save photos downloaded from the internet.
- Select the photos to delete: Select the photos you want to delete. You can usually select multiple photos by long-pressing on one and then tapping on others.
- Delete the photos: Tap the “Delete” icon (usually a trash can) to delete the selected photos.
- Check the Recycle Bin/Trash: Some file manager apps have a Recycle Bin or Trash folder where deleted files are temporarily stored. If your file manager app has this feature, go to the Recycle Bin/Trash folder and permanently delete the photos from there.
 File Explorer for Android
2.3.2. Advantages of Using a File Manager
- More Control: File managers give you more control over your files and folders, allowing you to easily locate and delete photos stored in different locations on your device.
- Batch Deletion: File managers make it easy to select and delete multiple photos at once, saving you time and effort.
- Recycle Bin/Trash: Some file managers have a Recycle Bin or Trash feature, providing an extra layer of protection against accidental deletion.
2.4. Using Factory Reset
2.4.1. When to Use Factory Reset
When should you use factory reset to permanently delete photos? A factory reset erases all data on your Android device, including photos, apps, and settings, returning it to its original factory state. This method is most suitable when you’re selling, donating, or recycling your device.
2.4.2. Steps to Perform a Factory Reset
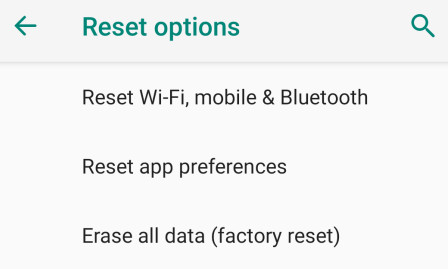
Here’s how to perform a factory reset on your Android device:
- Back up your data: Before performing a factory reset, make sure to back up any important data, such as contacts, messages, and files, to Google Drive or another cloud storage service.
- Open the Settings app: Launch the Settings app on your Android device.
- Navigate to Reset options: The location of the Reset options may vary depending on your device manufacturer. On most devices, you can find it under “General management” or “System”.
- Select Factory data reset: Tap on “Factory data reset” or “Erase all data (factory reset)”.
- Confirm the reset: Read the warning message and confirm that you want to erase all data on your device. You may be prompted to enter your PIN, pattern, or password.
- Wait for the reset to complete: The factory reset process may take several minutes to complete. Once it’s finished, your device will restart and return to its original factory state.
 Factory Reset Android
2.4.3. Limitations of Factory Reset
- Data Recovery: While a factory reset erases all data on your device, it may still be possible to recover some of the data using specialized data recovery tools.
- Time-Consuming: A factory reset can take a significant amount of time to complete, especially if you have a lot of data on your device.
- Inconvenience: Performing a factory reset means you’ll have to set up your device from scratch, reinstalling apps and configuring settings.
2.5. Using Data Eraser Software
2.5.1. What is Data Eraser Software?
What is the best data eraser software for android? Data eraser software is designed to securely erase data from your Android device, overwriting it with random characters multiple times to prevent recovery. This method is more secure than a factory reset and is recommended when you want to ensure that your photos are truly unrecoverable. MobiKin Eraser for Android is a great option.
2.5.2. Benefits of Using Data Eraser Software
- Secure Deletion: Data eraser software uses advanced algorithms to securely erase data, making it virtually impossible to recover.
- Comprehensive Erasure: Data eraser software can erase all types of data on your device, including photos, videos, contacts, messages, and apps.
- Customizable Erasure Levels: Some data eraser software allows you to choose different erasure levels, depending on your security needs.
- Ease of Use: Data eraser software typically has a user-friendly interface, making it easy to erase data from your device.
2.5.3. How to Use MobiKin Eraser for Android
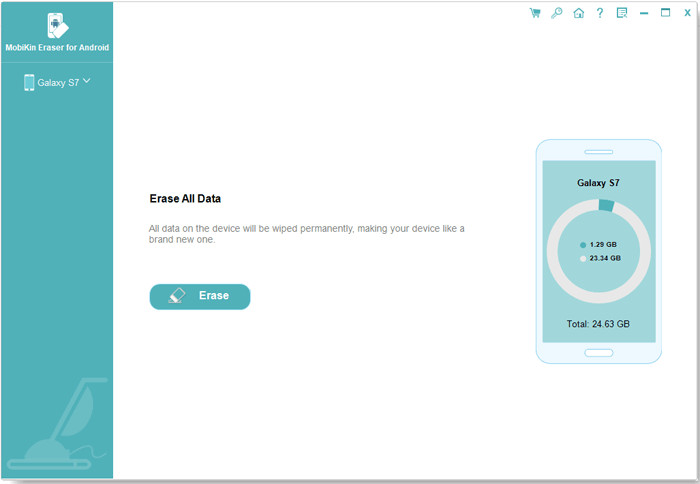
How can I use MobiKin Eraser for Android to permanently delete photos? Here’s how to use MobiKin Eraser for Android to permanently delete photos:
- Download and install MobiKin Eraser for Android: Download MobiKin Eraser for Android from the official website and install it on your computer.
- Connect your Android device to your computer: Connect your Android device to your computer using a USB cable.
- Enable USB debugging: Enable USB debugging on your Android device by going to Settings > About phone > Build number and tapping on the Build number seven times. Then, go back to Settings > Developer options and enable USB debugging.
- Launch MobiKin Eraser for Android: Launch MobiKin Eraser for Android on your computer.
- Select the erasure level: Choose the desired erasure level. The higher the erasure level, the more secure the deletion process will be.
- Start the erasure process: Click the “Erase” button to start the erasure process.
- Wait for the erasure process to complete: The erasure process may take several minutes to complete. Once it’s finished, your photos will be permanently deleted from your Android device.
 Launch Eraser for Android
3. Additional Tips for Protecting Your Photo Privacy
3.1. Encrypt Your Android Device
3.1.1. What is Encryption?
What is Android encryption? Encryption is the process of converting data into a secret code to prevent unauthorized access. When you encrypt your Android device, all the data stored on it, including photos, is scrambled and can only be accessed with a password or PIN.
3.1.2. How to Encrypt Your Android Device
Here’s how to encrypt your Android device:
- Open the Settings app: Launch the Settings app on your Android device.
- Navigate to Security: The location of the Security options may vary depending on your device manufacturer. On most devices, you can find it under “Security” or “Security & location”.
- Select Encryption: Tap on “Encrypt phone” or “Encrypt storage”.
- Follow the on-screen instructions: Follow the on-screen instructions to encrypt your device. You may be prompted to enter your PIN, pattern, or password.
- Wait for the encryption process to complete: The encryption process may take an hour or more to complete. Make sure your device is fully charged before starting the encryption process.
3.2. Use Secure Gallery Apps
3.2.1. Features of Secure Gallery Apps
What makes a gallery app secure? Secure gallery apps offer additional features to protect your photo privacy, such as:
- Password Protection: Secure gallery apps allow you to password-protect your photos, preventing unauthorized access.
- Encryption: Some secure gallery apps encrypt your photos, making them unreadable without a password or PIN.
- Hidden Albums: Secure gallery apps allow you to create hidden albums where you can store sensitive photos.
- Fake PINs: Some secure gallery apps allow you to set up fake PINs that open a decoy gallery with non-sensitive photos.
3.2.2. Recommended Secure Gallery Apps
Some recommended secure gallery apps include:
- Gallery Vault: Gallery Vault allows you to hide and encrypt photos and videos, and it also supports fake PINs.
- Keepsafe Photo Vault: Keepsafe Photo Vault allows you to password-protect your photos and videos, and it also offers cloud backup.
- Hide Something: Hide Something allows you to hide photos, videos, and other files, and it also supports password protection.
3.3. Regularly Clear Cache and Data
3.3.1. Why Clear Cache and Data?
Why should you clear cache? Clearing the cache and data of your Gallery app and other photo-related apps can help protect your privacy by removing temporary files and thumbnails that may contain traces of your deleted photos.
3.3.2. How to Clear Cache and Data
Here’s how to clear the cache and data of an app on your Android device:
- Open the Settings app: Launch the Settings app on your Android device.
- Navigate to Apps: The location of the Apps options may vary depending on your device manufacturer. On most devices, you can find it under “Apps” or “Applications”.
- Select the app: Select the Gallery app or another photo-related app.
- Tap on Storage: Tap on “Storage”.
- Clear Cache and Data: Tap on “Clear cache” and “Clear data”.
3.4. Be Mindful of Cloud Storage Settings
3.4.1. Understanding Cloud Storage Settings
What cloud setting do I need to know about? If you use cloud storage services like Google Photos or Dropbox to back up your photos, be mindful of your cloud storage settings. Make sure that your photos are not automatically synced to the cloud without your knowledge.
3.4.2. Adjusting Cloud Storage Settings
Review your cloud storage settings to ensure that you have control over which photos are backed up to the cloud. You can usually adjust these settings in the app’s settings menu.
4. Troubleshooting Common Issues
4.1. Photos Still Appear After Deletion
Why are photos still appearing after deleting them? If photos still appear after you’ve deleted them, it could be due to several reasons:
- Photos are still in the Trash/Recycle Bin: Make sure to empty the Trash/Recycle Bin in your Gallery app, File Manager app, and Google Photos app.
- Photos are stored in multiple locations: Check other folders on your device to see if the photos are stored in multiple locations.
- Photos are cached by other apps: Clear the cache and data of other photo-related apps to remove any cached copies of the photos.
- Cloud syncing is enabled: If cloud syncing is enabled, the photos may be automatically restored from the cloud. Disable cloud syncing and delete the photos again.
4.2. Unable to Delete Photos
Why am I unable to delete photos? If you’re unable to delete photos, it could be due to several reasons:
- Permissions issues: Make sure that you have the necessary permissions to delete the photos. You may need to grant the Gallery app or File Manager app access to your storage.
- Photos are protected: Some photos may be protected from deletion by the system or by a third-party app.
- Storage is full: If your device’s storage is full, you may not be able to delete photos. Free up some storage space by deleting other files or apps.
- Corrupted files: If the photos are corrupted, you may not be able to delete them. Try using a file manager app to delete the corrupted files.
4.3. Accidental Deletion of Photos
What should I do if I accidentally deleted photos? If you accidentally delete photos, there are a few things you can try to recover them:
- Check the Trash/Recycle Bin: Check the Trash/Recycle Bin in your Gallery app, File Manager app, and Google Photos app. The photos may still be there.
- Use a data recovery app: Use a data recovery app like DiskDigger or EaseUS MobiSaver to scan your device for deleted photos.
- Restore from a backup: If you have a backup of your photos, restore them from the backup.
5. Real-World Examples and Scenarios
5.1. Case Study: Selling an Old Android Phone
Sarah is selling her old Android phone on eBay. Before listing the phone, she wants to make sure that all her personal data, including photos, is permanently deleted. Sarah follows these steps:
- Backs up her data: Sarah backs up her contacts, messages, and other important data to Google Drive.
- Deletes photos from Gallery app: Sarah deletes all her photos from the Gallery app.
- Empties the Recycle Bin: Sarah empties the Recycle Bin in the Gallery app.
- Uses MobiKin Eraser for Android: Sarah uses MobiKin Eraser for Android to securely erase all data on her phone.
- Performs a factory reset: Sarah performs a factory reset to return the phone to its original factory state.
By following these steps, Sarah can be confident that her personal data is permanently deleted and won’t be recovered by the buyer.
5.2. Scenario: Protecting Sensitive Photos
John has some sensitive photos on his Android phone that he wants to protect from unauthorized access. John follows these steps:
- Encrypts his phone: John encrypts his Android phone to protect all the data stored on it.
- Uses a secure gallery app: John uses a secure gallery app to password-protect his sensitive photos.
- Hides photos in a hidden album: John creates a hidden album in the secure gallery app and moves his sensitive photos to the hidden album.
- Regularly clears cache and data: John regularly clears the cache and data of his Gallery app and other photo-related apps.
By following these steps, John can be confident that his sensitive photos are protected from unauthorized access.
5.3. Example: Recovering Accidentally Deleted Photos
Emily accidentally deleted some important photos from her Android phone. Emily follows these steps:
- Checks the Trash/Recycle Bin: Emily checks the Trash/Recycle Bin in her Gallery app and Google Photos app, but the photos are not there.
- Uses a data recovery app: Emily uses a data recovery app like DiskDigger to scan her device for deleted photos.
- Recovers the deleted photos: DiskDigger finds the deleted photos, and Emily recovers them to her device.
By following these steps, Emily was able to recover her accidentally deleted photos.
6. DFphoto.net: Your Resource for Photography Tips and Security
6.1. Explore Photography Techniques
Are you looking to enhance your photography skills? At dfphoto.net, we offer a wealth of resources to help you master various photography techniques. From understanding exposure and composition to learning advanced editing skills, our tutorials and articles cater to both amateur and professional photographers. Dive into our collection and unleash your creative potential with the latest trends in photographic art.
6.2. Find Inspiration from Stunning Photography
Need inspiration for your next photoshoot? Browse our gallery filled with breathtaking images from talented photographers around the globe. Whether you’re drawn to landscape photography, portraiture, or abstract art, you’ll discover captivating visuals that ignite your imagination and fuel your artistic journey.
6.3. Stay Updated on Equipment and Trends
Keeping up with the latest photography equipment and trends can be challenging. That’s why dfphoto.net provides up-to-date reviews, comparisons, and news about cameras, lenses, lighting equipment, and software. Stay informed about the best tools and technologies to elevate your photography.
6.4. Join Our Photography Community
Connect with fellow photography enthusiasts in our vibrant community forum. Share your work, exchange feedback, participate in discussions, and learn from experienced photographers. Our community is a supportive space for photographers of all levels to grow and connect.
6.5. Learn About Data Security for Photographers
Protecting your photos and personal data is crucial. DFphoto.net offers guides and tips on data security for photographers, covering topics such as encrypting your devices, using secure gallery apps, and managing cloud storage settings. Stay informed about the best practices for safeguarding your digital assets.
Are you ready to take control of your photo privacy and explore the world of photography? Visit dfphoto.net today to discover a treasure trove of resources, inspiration, and community support. Start your journey toward better photography and data security now. For any questions or further assistance, reach out to us at Address: 1600 St Michael’s Dr, Santa Fe, NM 87505, United States. Phone: +1 (505) 471-6001 or visit our Website: dfphoto.net. We’re here to help you capture and protect your precious moments.
7. FAQs About Permanently Deleting Photos on Android
7.1. Can I recover photos after a factory reset?
Is it possible to recover photos after a factory reset? While a factory reset erases all data on your device, it may still be possible to recover some of the data using specialized data recovery tools. To prevent data recovery, use data eraser software like MobiKin Eraser for Android before performing a factory reset.
7.2. Does deleting photos from Google Photos delete them from my phone?
Does deleting photos from Google Photos delete them from my phone? Deleting photos from Google Photos may or may not delete them from your phone, depending on your sync settings. If syncing is enabled, deleting photos from Google Photos will also delete them from your phone. If syncing is disabled, deleting photos from Google Photos will not delete them from your phone.
7.3. How often should I clear the cache and data of my Gallery app?
How often should you clear the cache and data of your gallery app? It’s a good practice to clear the cache and data of your Gallery app and other photo-related apps regularly, such as once a month. This will help protect your privacy by removing temporary files and thumbnails that may contain traces of your deleted photos.
7.4. What is the most secure way to delete photos from my Android phone?
What is the most secure way to delete photos from my android phone? The most secure way to delete photos from your Android phone is to use data eraser software like MobiKin Eraser for Android. This software overwrites the data with random characters multiple times, making it virtually impossible to recover.
7.5. How can I prevent accidental deletion of photos?
How do I prevent accidental deletion of photos? To prevent accidental deletion of photos, you can:
- Use a secure gallery app with password protection.
- Enable the Recycle Bin/Trash feature in your Gallery app and File Manager app.
- Back up your photos to the cloud.
- Be careful when deleting photos and double-check before confirming the deletion.
7.6. Can someone recover my photos after I sell my phone?
Can someone recover my photos after I sell my phone? If you don’t properly erase your data before selling your phone, it may be possible for someone to recover your photos using specialized data recovery tools. To prevent this, use data eraser software like MobiKin Eraser for Android before selling your phone.
7.7. Is encryption necessary for protecting my photos?
Is encryption necessary for protecting my photos? Encryption is an effective way to protect your photos from unauthorized access. When you encrypt your Android device, all the data stored on it, including photos, is scrambled and can only be accessed with a password or PIN.
7.8. What should I do if I suspect my phone has been compromised?
What should I do if I suspect my phone has been compromised? If you suspect your phone has been compromised, you should:
- Change your passwords for all your online accounts.
- Enable two-factor authentication for your online accounts.
- Scan your phone for malware.
- Perform a factory reset to erase all data on your phone.
- Contact your mobile carrier and law enforcement.
7.9. Are there any risks associated with using data eraser software?
Are there any risks associated with using data eraser software? There are generally no risks associated with using data eraser software, as long as you download it from a trusted source and follow the instructions carefully. However, it’s important to note that data eraser software will permanently delete all data on your device, so make sure to back up any important data before using it.
7.10. How do I know if my photos have been permanently deleted?
How do I know if my photos have been permanently deleted? The best way to know if your photos have been permanently deleted is to use data recovery software to scan your device for deleted photos. If the data recovery software cannot find the photos, then they have likely been permanently deleted.