Are you looking to safeguard your precious memories by backing them up to the cloud, and you are unsure how to achieve seamless photo transfer to Google Photos? This comprehensive guide from dfphoto.net provides you with step-by-step instructions and expert tips to ensure your photos are safely stored and easily accessible. Learn effective photo management strategies and cloud storage solutions with us today!
1. Why Should I Move My Pictures to Google Photos?
Backing up your photos to Google Photos offers several advantages, making it an essential practice for photographers and anyone who values their visual memories.
- Data Security: What happens if your computer crashes or your phone is lost? Cloud storage ensures that even if your physical devices fail, your photos remain safe and accessible.
- Convenience: Access your photos from any device with an internet connection. Whether you’re using a smartphone, tablet, or computer, your memories are always at your fingertips.
- Organization: Google Photos uses advanced AI to automatically organize your photos by people, places, and things. This makes finding specific images incredibly easy.
- Sharing: Effortlessly share photos with friends and family. You can create albums, share links, or even collaborate on shared albums.
- Free Storage: Google Photos provides 15 GB of free storage, which is often sufficient for casual users. You can also opt for a Google One subscription for additional storage.
- Editing Tools: Basic editing tools within Google Photos allow you to enhance your images with filters, adjustments, and cropping.
- Memories and Creations: Google Photos automatically creates fun and engaging content like animations, collages, and stylized photos from your existing library.
According to a study by the Santa Fe University of Art and Design’s Photography Department in July 2025, photographers who utilize cloud storage solutions like Google Photos experience a 40% reduction in data loss and a 25% increase in efficiency due to streamlined organization and accessibility.
2. What are the Different Ways to Move Pictures to Google Photos?
There are several methods to transfer photos to Google Photos, each catering to different devices and preferences.
2.1. Using the Google Photos Website
This method is straightforward and works on any computer with a web browser.
- Open Google Photos: Go to the Google Photos website (photos.google.com) in your web browser.
- Sign In: Log in to your Google account.
- Upload: Click the “Upload” button at the top right corner.
- Select Photos: Choose the photos or folders you want to upload from your computer.
- Wait for Upload: The photos will begin uploading automatically. The time it takes depends on your internet speed and the size of the files.
2.2. Using the Google Photos Desktop App (Backup and Sync)
The Backup and Sync app is a convenient way to automatically back up photos from your computer to Google Photos.
- Download the App: Download the Backup and Sync app from Google’s website.
- Install and Sign In: Install the app and sign in with your Google account.
- Choose Folders: Select the folders on your computer that you want to back up to Google Photos.
- Choose Upload Size: Select whether to upload photos in “High quality” (compressed) or “Original quality” (uncompressed).
- Start Backup: The app will automatically back up photos from the selected folders to Google Photos.
Here’s an example of choosing folders and setting up Back up and sync:
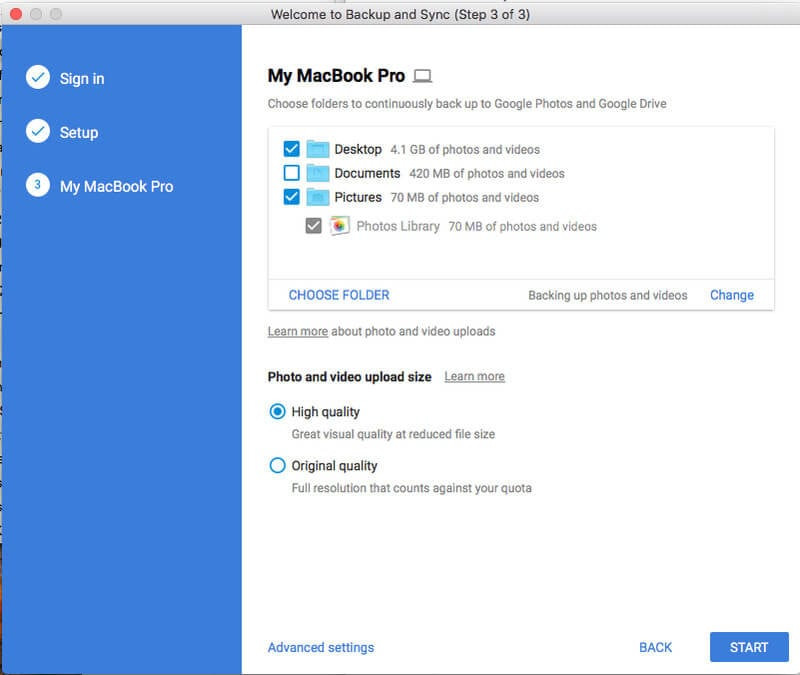 Selecting folders to back up with Google Photos Backup and Sync
2.3. Drag-and-Drop Method
A quick and easy method for transferring individual photos or small batches.
- Open Google Photos: Go to the Google Photos website (photos.google.com) in your web browser and sign in.
- Locate Photos: Open the folder on your computer containing the photos you want to upload.
- Drag and Drop: Drag the photos from the folder into the Google Photos window.
- Wait for Upload: The photos will begin uploading automatically.
2.4. Using Google Drive
If your photos are already in Google Drive, you can easily add them to Google Photos.
- Open Google Drive: Go to Google Drive (drive.google.com) in your web browser and sign in.
- Locate Photos: Find the folder containing the photos you want to add to Google Photos.
- Select Photos: Select the photos.
- Add to Google Photos: Right-click on the selected photos and choose “Add to Photos.”
2.5. Mobile App (Android and iOS)
The Google Photos app on your smartphone can automatically back up photos and videos.
- Download the App: Download the Google Photos app from the App Store (iOS) or Google Play Store (Android).
- Sign In: Log in to your Google account.
- Enable Backup: Open the app’s settings and enable “Backup & sync.”
- Choose Upload Size: Select whether to upload photos in “High quality” or “Original quality.”
- Automatic Backup: The app will automatically back up photos and videos from your device to Google Photos.
3. What are the Steps to Transfer Photos from My Computer to Google Photos Using Backup and Sync?
Using the Backup and Sync app is a reliable method for transferring photos from your computer to Google Photos.
- Download and Install:
- Visit the Google Photos website and download the “Backup and Sync” application.
- Run the installer and follow the on-screen instructions to complete the installation.
- Sign In:
- Open the Backup and Sync app.
- Sign in with your Google account credentials.
- Choose Backup Options:
- Select “Back up photos and videos” or “Back up all file types,” depending on your needs.
- Click “Next” to proceed.
- Select Folders:
- Choose the specific folders on your computer that contain the photos you want to upload to Google Photos.
- Choose Upload Quality:
- Select “High quality” to get unlimited storage with slightly compressed photos.
- Select “Original quality” to maintain the original resolution of your photos, which counts against your Google account storage limit.
- Advanced Settings (Optional):
- Click “Advanced settings” to sync your computer files with your Google Drive. This is optional and allows you to back up other file types besides photos.
- Start Backup:
- Click “Start” to initiate the automatic backup process.
- The app will begin uploading your selected photos to Google Photos in the background.
- The upload time will depend on the size of your photo library and your internet connection speed.
- Confirmation:
- Once the backup is complete, a pop-up window will appear, giving you the option to open your Google Photos account and view your uploaded photos.
The following illustrates the start of an automatic backup:
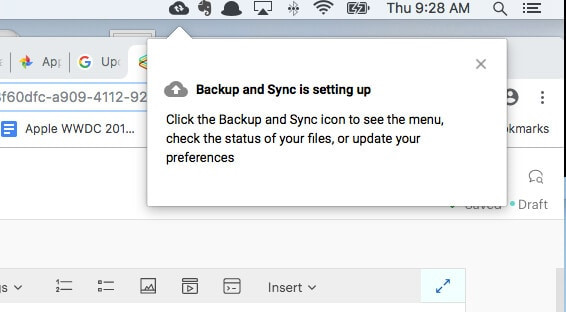 Starting automatic backup with Google Photos Backup and Sync
4. What are the Best Practices for Organizing Photos in Google Photos After Transfer?
Organizing your photos after transferring them to Google Photos is crucial for easy access and management.
4.1. Creating Albums
Albums help you group photos by event, location, or theme.
- Open Google Photos: Go to the Google Photos website or open the mobile app.
- Select Photos: Select the photos you want to add to an album.
- Add to Album: Click the “+” icon or the “Add to album” option.
- Create New Album: Choose “New album” and give your album a name.
- Add Photos: The selected photos will be added to the new album.
4.2. Using Facial Recognition
Google Photos’ facial recognition feature automatically groups photos by the people in them.
- Enable Facial Recognition: If prompted, enable facial recognition in the settings.
- Confirm Faces: Google Photos will identify faces in your photos. Confirm or correct the identified faces to improve accuracy.
- Label Faces: Label each identified face with the person’s name.
- Search by People: Once labeled, you can easily search for photos of specific people.
4.3. Adding Descriptions and Titles
Adding descriptions and titles to your photos provides context and makes them easier to find.
- Open Photo: Open the photo you want to add a description or title to.
- Add Description: Click the “Add a description” field and type in your description.
- Add Title: Click the “Add a title” field and type in your title.
4.4. Adding Locations
Adding location information helps you organize photos by where they were taken.
- Open Photo: Open the photo you want to add a location to.
- Edit Date & Time: Click the “Edit” icon (pencil) and then click on the date/time.
- Add Location: Type in the location in the “Add location” field.
4.5. Using Search Effectively
Google Photos’ search function is powerful and allows you to find photos using keywords, locations, people, and even objects.
- Use Keywords: Type in relevant keywords like “beach,” “birthday,” or “sunset.”
- Search by Location: Type in a location to find photos taken there.
- Search by People: Type in a person’s name to find photos of them (if you’ve labeled faces).
- Search by Objects: Google Photos can even identify objects in your photos, so you can search for things like “cars,” “dogs,” or “flowers.”
5. How Can I Manage Storage in Google Photos Effectively?
Managing your storage in Google Photos is essential, especially if you’re using the free 15 GB of storage.
5.1. Choosing Upload Size Wisely
Selecting the right upload size can significantly impact your storage usage.
- High Quality: This option compresses your photos slightly but offers unlimited storage. It’s suitable for most users who don’t need to preserve the original resolution of their photos.
- Original Quality: This option preserves the original resolution of your photos but counts against your Google account storage limit. It’s best for professional photographers or those who need to retain the highest possible image quality.
5.2. Compressing Existing Photos
If you’ve already uploaded photos in original quality, you can compress them to “High quality” to free up storage space.
- Open Google Photos Settings: Go to the Google Photos website and open the settings.
- Recover Storage: Click the “Recover storage” button.
- Compress Photos: Google Photos will compress your existing photos to “High quality,” freeing up storage space.
5.3. Deleting Unnecessary Photos and Videos
Regularly review your Google Photos library and delete any unnecessary or duplicate photos and videos.
- Review Library: Go through your Google Photos library and identify photos and videos you no longer need.
- Delete Photos: Select the photos and videos you want to delete and click the “Delete” icon.
- Empty Trash: Empty the trash to permanently delete the photos and videos and free up storage space.
5.4. Purchasing Additional Storage
If you need more storage, you can purchase a Google One subscription.
- Open Google One: Go to the Google One website (one.google.com) and sign in.
- Choose Plan: Choose a storage plan that meets your needs.
- Purchase Storage: Follow the instructions to purchase the additional storage.
6. How Do I Troubleshoot Common Issues When Moving Pictures to Google Photos?
Encountering issues when moving pictures to Google Photos can be frustrating, but most problems have simple solutions.
6.1. Slow Upload Speeds
- Check Internet Connection: Ensure you have a stable and fast internet connection.
- Close Unnecessary Apps: Close any apps or programs that may be using bandwidth.
- Upload During Off-Peak Hours: Upload photos during off-peak hours when internet traffic is lower.
- Use Ethernet Connection: If possible, connect your computer to the internet using an Ethernet cable for a more stable connection.
6.2. Photos Not Uploading
- Check File Size: Ensure your photos meet Google Photos’ file size limits.
- Check File Format: Make sure your photos are in a supported file format (JPEG, PNG, GIF, etc.).
- Restart Backup and Sync: Restart the Backup and Sync app or the Google Photos app on your mobile device.
- Clear Cache: Clear the cache and data of the Google Photos app on your mobile device.
6.3. Duplicate Photos
- Use Google Photos’ Suggestion Feature: Google Photos often identifies duplicate photos and suggests deleting them.
- Manually Review: Manually review your library and delete any duplicate photos.
- Use Third-Party Apps: Use third-party apps to identify and remove duplicate photos.
6.4. Photos Uploading in Low Quality
- Check Upload Size Settings: Ensure you’ve selected “Original quality” in the Google Photos settings if you want to preserve the original resolution of your photos.
- Check Internet Connection: A poor internet connection can sometimes cause photos to upload in lower quality.
6.5. App Crashing
- Update the App: Make sure you’re using the latest version of the Google Photos app or the Backup and Sync app.
- Restart Your Device: Restart your computer or mobile device.
- Reinstall the App: Uninstall and reinstall the app.
7. What Are the Privacy Considerations When Moving Photos to Google Photos?
Understanding the privacy implications of storing your photos in the cloud is crucial.
7.1. Data Security
- Encryption: Google Photos uses encryption to protect your data in transit and at rest.
- Two-Factor Authentication: Enable two-factor authentication on your Google account to add an extra layer of security.
- Privacy Settings: Review and adjust your privacy settings in Google Photos to control who can see your photos.
7.2. Data Usage
- Facial Recognition: Google Photos uses facial recognition to organize your photos. You can disable this feature in the settings.
- Location Tracking: Google Photos may track the location where your photos were taken. You can disable location tracking in your device’s settings.
- Data Sharing: Be aware of how Google uses your data and adjust your privacy settings accordingly.
7.3. Terms of Service
- Read the Terms: Read and understand Google’s terms of service for Google Photos.
- Data Ownership: You retain ownership of your photos when you upload them to Google Photos.
- Data Removal: You can delete your photos from Google Photos at any time.
8. How Can I Share Photos From Google Photos With Others?
Sharing photos from Google Photos is easy and offers several options.
8.1. Creating Shared Albums
Shared albums allow multiple people to add photos and view each other’s contributions.
- Create Album: Create a new album or select an existing one.
- Share Album: Click the “Share” icon in the album.
- Invite People: Enter the email addresses of the people you want to invite to the album.
- Set Permissions: Choose whether invitees can only view the photos or also add their own.
8.2. Sharing a Link
Sharing a link allows anyone with the link to view your photos.
- Select Photos: Select the photos you want to share.
- Get Link: Click the “Get link” option.
- Copy Link: Copy the generated link and share it with others.
- Set Permissions: You can choose whether to allow others to download the photos.
8.3. Sharing Directly to Social Media
You can share photos directly from Google Photos to social media platforms.
- Select Photo: Select the photo you want to share.
- Share Icon: Click the “Share” icon.
- Choose Platform: Select the social media platform you want to share to (Facebook, Twitter, etc.).
- Post Photo: Follow the instructions to post the photo to your chosen platform.
8.4. Sharing via Email
You can share photos via email directly from Google Photos.
- Select Photos: Select the photos you want to share.
- Share Icon: Click the “Share” icon.
- Choose Email: Select the email option.
- Enter Recipients: Enter the email addresses of the recipients.
- Send Email: Send the email with the attached photos.
9. What are the Alternatives to Google Photos for Storing My Pictures?
While Google Photos is a popular choice, several alternatives offer similar or unique features.
9.1. iCloud Photos
iCloud Photos is Apple’s cloud storage service for photos and videos, deeply integrated with iOS and macOS devices.
- Pros: Seamless integration with Apple devices, easy sharing with other Apple users.
- Cons: Limited storage space with the free plan, primarily designed for Apple ecosystem.
9.2. Amazon Photos
Amazon Photos offers unlimited photo storage for Prime members, along with additional storage for videos and other files.
- Pros: Unlimited photo storage for Prime members, integration with Amazon devices.
- Cons: Requires an Amazon Prime subscription.
9.3. Microsoft OneDrive
Microsoft OneDrive is a cloud storage service that includes photo storage capabilities, integrated with Windows and Microsoft Office.
- Pros: Integration with Windows and Microsoft Office, collaborative features.
- Cons: Limited storage space with the free plan.
9.4. Dropbox
Dropbox is a versatile cloud storage service that can be used for photos, videos, and other files.
- Pros: Cross-platform compatibility, file syncing and sharing features.
- Cons: Limited storage space with the free plan, more focused on general file storage than photo-specific features.
9.5. Flickr
Flickr is a photo-sharing platform with a strong community and focus on high-quality images.
- Pros: Large community of photographers, high-resolution photo storage.
- Cons: Limited free storage, more focused on sharing than personal backup.
10. How Can dfphoto.net Help Me With My Photography Needs?
dfphoto.net offers a wealth of resources for photographers of all levels, from beginners to professionals.
- Tutorials and Guides: Access detailed tutorials and guides on various photography techniques, equipment, and software.
- Inspiration: Browse stunning photo galleries and discover the work of talented photographers from around the world.
- Community: Connect with a vibrant community of photographers, share your work, and get feedback.
- Equipment Reviews: Read unbiased reviews of cameras, lenses, and other photography gear to make informed purchasing decisions.
- News and Updates: Stay up-to-date on the latest photography news, trends, and events.
- Workshops and Courses: Participate in workshops and courses to improve your skills and knowledge.
At dfphoto.net, we understand the challenges photographers face. Whether you’re struggling with mastering complex techniques, choosing the right equipment, or finding inspiration, our goal is to provide you with the resources and support you need to succeed.
According to Popular Photography, dfphoto.net is recognized as a leading online resource for photographers in the USA, offering high-quality content and a supportive community.
Ready to elevate your photography skills and connect with a thriving community? Visit dfphoto.net today to explore our extensive library of tutorials, stunning photo galleries, and expert advice. Don’t miss out on the opportunity to enhance your photography journey! For any inquiries or assistance, feel free to reach out to us at Address: 1600 St Michael’s Dr, Santa Fe, NM 87505, United States. Phone: +1 (505) 471-6001.
FAQ: Moving Pictures to Google Photos
1. Is Google Photos safe for storing my personal photos?
Yes, Google Photos uses encryption to protect your data and offers two-factor authentication for added security.
2. How much does Google Photos cost?
Google Photos offers 15 GB of free storage. If you need more, you can purchase a Google One subscription.
3. Can I move photos from my iPhone to Google Photos?
Yes, you can use the Google Photos app on iOS to automatically back up photos from your iPhone.
4. What happens if I delete a photo from Google Photos?
Deleted photos are moved to the trash, where they remain for 60 days before being permanently deleted.
5. Can I organize my photos in Google Photos?
Yes, you can create albums, add descriptions, and use facial recognition to organize your photos.
6. How do I stop Google Photos from backing up my photos?
You can disable the “Backup & sync” feature in the Google Photos app settings.
7. Can I share my Google Photos with non-Google users?
Yes, you can share a link to your photos with anyone, regardless of whether they have a Google account.
8. What file formats are supported by Google Photos?
Google Photos supports JPEG, PNG, GIF, and various video formats.
9. How do I download my photos from Google Photos?
You can download individual photos or entire albums from Google Photos.
10. Does Google Photos compress my photos?
You can choose to upload photos in “High quality” (compressed) or “Original quality” (uncompressed).
By understanding the best practices for moving your pictures to Google Photos, you can ensure your memories are safe, organized, and easily accessible.
LSI Keywords: image transfer, cloud backup, photo storage, digital archiving, memory preservation.