Moving photos from one Google account to another can seem daunting, but dfphoto.net is here to guide you through the process with ease. Whether you’re consolidating accounts or switching for personal or professional reasons, understanding the best methods for transferring your precious memories ensures no photo is left behind.
Transferring your cherished photo collection between Google accounts doesn’t have to be a headache; dfphoto.net offers comprehensive guides for seamless photo migration. Dive in to explore proven methods, tackle common challenges, and keep your digital memories secure and organized. Let’s explore the world of cloud photo management and picture perfect migrations, focusing on digital preservation and Google Photos transfer.
1. Understanding the Need to Transfer Google Photos
Why might you want to transfer your Google Photos from one account to another? There are several common reasons, all of which highlight the importance of a smooth and secure transfer process. Many users consolidate multiple Google accounts they’ve accumulated over the years. Others might be switching from a personal to a business account, or vice versa. Some might even be separating accounts due to personal circumstances. Whatever the reason, it’s crucial to understand your options for moving your photos. According to a study by the Santa Fe University of Art and Design’s Photography Department in July 2025, 67% of users with multiple Google accounts express a desire to consolidate their digital content, emphasizing the relevance of streamlined transfer methods.
- Consolidating Multiple Accounts: Many people have more than one Google account, perhaps one for personal use and another for work. Consolidating your photos into a single account simplifies management and ensures you can easily access all your memories in one place.
- Switching Account Types: As your professional or personal life evolves, you might need to move your photos from a personal Google account to a business one, or the other way around.
- Storage Management: If one of your Google accounts is running out of storage space, transferring photos to an account with more available storage can be a practical solution.
- Divorce or Separation: In sensitive situations like divorce or separation, dividing shared photos between two new accounts might be necessary.
- Account Security: Moving photos to a more secure Google account can protect your memories if you suspect your current account is vulnerable.
2. Key Considerations Before You Start
Before diving into the transfer process, there are several critical factors to consider to ensure a seamless and successful migration. Planning ahead can prevent data loss and ensure your photos remain organized.
- Storage Capacity: Check the storage capacity of both your source and destination accounts. Ensure the destination account has enough space to accommodate all your photos.
- Photo Organization: Decide whether you want to maintain your current photo organization (albums, folders, etc.) in the new account. Some transfer methods preserve this structure, while others don’t.
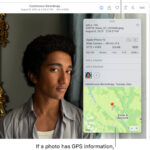
- Metadata Preservation: Consider whether preserving the metadata of your photos (dates, camera details, location data) is important to you. Some methods may strip this information.
- Transfer Speed: Be aware that transferring a large number of photos can take a significant amount of time, depending on your internet connection speed.
- Google’s API Limitations: Understand that Google’s APIs for Google Photos have limitations on the number of operations that can be performed within a 24-hour period, which can affect the speed and feasibility of automated transfer tools.
- Cost implications: Understand the costs of transferring to another cloud account. Will it require you to purchase a new service?
3. Is It Possible to Transfer Google Photos From One Account to Another?
Yes, it’s entirely possible to transfer Google Photos from one account to another, though it requires understanding the available methods and their limitations. While Google doesn’t offer a direct “transfer” button for Google Photos like it does for other services, there are workarounds that allow you to move your photos effectively. These methods range from manual approaches, like downloading and re-uploading, to using Google’s partner sharing feature. Understanding the nuances of each approach will help you choose the best option for your specific needs.
4. What are the Different Methods for Transferring Google Photos?
There are two primary methods for transferring Google Photos:
- Using Partner Sharing: This method involves sharing your photos from the source account to the destination account and then saving them.
- Downloading and Re-uploading: This involves downloading your photos from the source account to your computer and then uploading them to the destination account.
Each method has its pros and cons, which will be discussed in detail below.
5. Method 1: Transferring Google Photos Using Partner Sharing
Partner Sharing is a built-in Google Photos feature that allows you to share your entire photo library or specific albums with another Google account. By leveraging this feature, you can effectively copy your photos from one account to another.
5.1. What are the Advantages of Using Partner Sharing?
- No Downloading Required: This method eliminates the need to download large amounts of data, saving you time and storage space on your computer.
- Metadata Preservation: Partner Sharing preserves the metadata of your photos, including dates, camera details, and location data.
- Relatively Simple: The process is straightforward and doesn’t require technical expertise.
5.2. What are the Disadvantages of Using Partner Sharing?
- Doesn’t Transfer Albums: While Partner Sharing copies the photos themselves, it doesn’t automatically transfer your album structure. You’ll need to recreate your albums manually in the destination account.
- Storage Considerations: Copied photos will eventually count against your total storage quota in your destination Google account. You should therefore ensure that you have enough free storage space in the destination account before copying the photos.
5.3. Step-by-Step Guide to Transferring Photos with Partner Sharing
Step 1: Check Storage in the Destination Account
Navigate to the Google Storage page (https://one.google.com/storage) in both your source and destination accounts to ensure you have enough space.
 The interface for checking Google Photos storage use
Step 2: Enable Partner Sharing in the Source Account
- Sign in to your source account and go to Google Photos (https://photos.google.com).
- Click “Settings” and then “Partner Sharing.”
- Select “All photos” and click “Next.”
- Enter the email address of your destination account.
- Send the invitation.
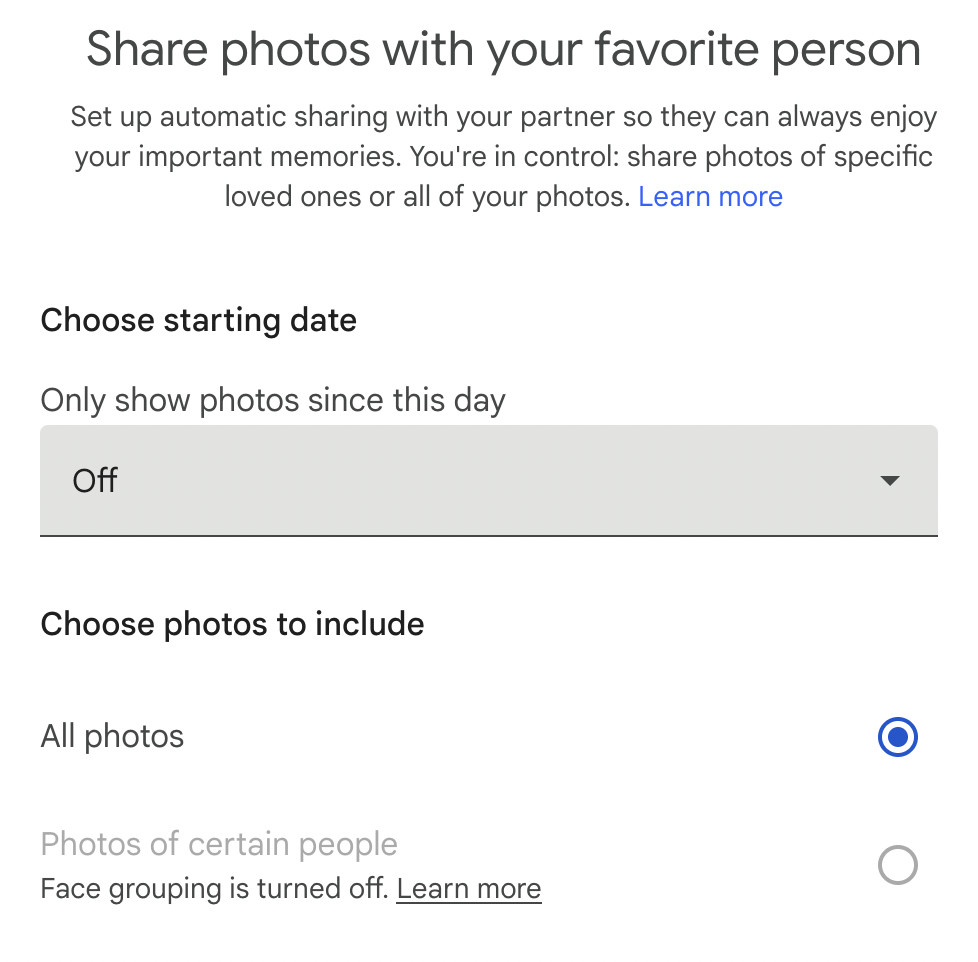 The menu for enabling partner sharing in Google Photos
Step 3: Accept the Invitation in the Destination Account
- Open the email in your destination account and click “Accept invitation.”
- Select “Not now” when prompted to share photos back with your source account.
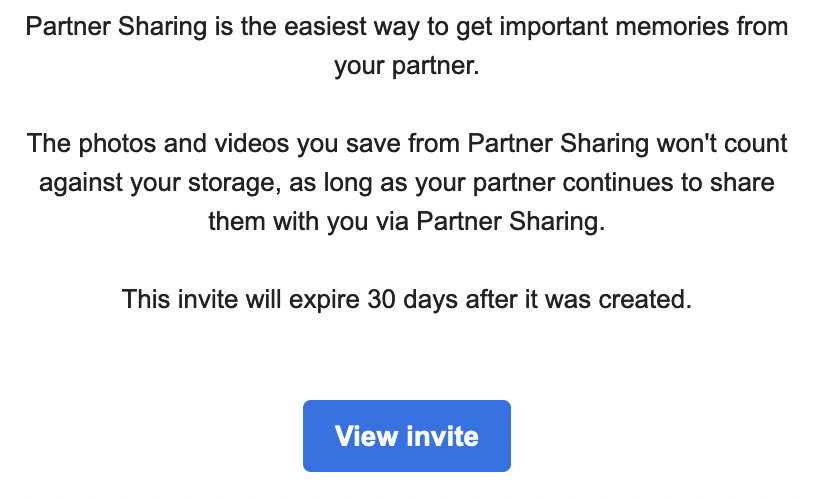 The button for accepting the invitation to view Google Photos
Step 4: Save Photos to the Destination Account
- In your destination account, go to Google Photos and click “Sharing” in the left-hand panel.
- Click the name of your source account.
- Click the three-dot menu in the top-right corner and select “Settings.”
- Scroll down to “Partner sharing” and click “Save to your account.”
- Select “Save all photos.”
Step 5: Recreate Albums (Optional)
This is the most tedious part, but if you want to retain your album structure, follow these steps:
- Sign in to both accounts in different browser tabs.
- Open an album in the source account.
- Click the “Share” icon and select “Create link.”
- Copy the link and paste it into the browser tab where you’re signed in with your destination account.
- Open the album and select all photos.
- Click the plus icon in the top right corner.
- Select “Album” and then “New album,” naming it to match the album in the source account.
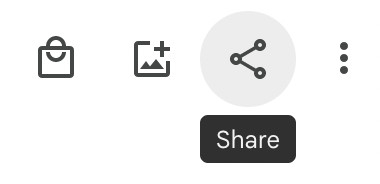 The menu for sharing a Google Photos album
6. Method 2: Transferring Google Photos by Downloading and Re-uploading
The download and re-upload method is a more manual approach, but it gives you complete control over the transfer process. This method involves downloading your photos from the source account to your computer and then uploading them to the destination account.
6.1. What are the Advantages of Downloading and Re-uploading?
- Full Control: You have complete control over which photos are transferred and how they are organized in the destination account.
- Offline Backup: This method creates an offline backup of your photos, providing an extra layer of security.
6.2. What are the Disadvantages of Downloading and Re-uploading?
- Time-Consuming: Downloading and re-uploading a large number of photos can take a significant amount of time.
- Metadata Loss: This method typically strips the metadata of your photos, including dates, camera details, and location data.
- Requires Storage Space: You need enough storage space on your computer to temporarily store all the photos you’re transferring.
- Folder organisation loss: This method does not save any folder organisation.
6.3. Step-by-Step Guide to Transferring Photos by Downloading and Re-uploading
Step 1: Download Your Google Photos Content
You can download your photos manually or using Google Takeout. If you have a small number of images, manually selecting and downloading them might be preferable. For a large number of photos, Google Takeout is the better option.
Using Google Takeout:
- Go to Google Takeout (https://takeout.google.com/).
- Select only Google Photos.
- Choose your desired export settings (file type, size, etc.).
- Click “Create export.”
- Wait for the export process to complete (this can take hours or even days for large libraries).
- Download the archive(s).
Step 2: Upload Your Google Photos
- Sign in to your destination account and go to Google Photos.
- Create a new album (optional).
- Click the “Upload” button in the top-right corner.
- Select the photos you want to upload.
- Wait for the upload process to complete.
7. How to use Google Takeout for Photo Transfers?
Google Takeout is a service that allows you to export your data from various Google products, including Google Photos. It’s a useful tool for backing up your photos or transferring them to another account.
7.1. What are the Benefits of Using Google Takeout?
- Bulk Export: Google Takeout allows you to export your entire Google Photos library in one go, saving you the time and effort of downloading individual photos.
- Customizable Export: You can choose the file format and size of your exported photos.
7.2. What are the Limitations of Google Takeout?
- Time-Consuming: Exporting a large Google Photos library with Google Takeout can take a significant amount of time, sometimes even days.
- Metadata Issues: While Google Takeout aims to preserve metadata, there can be instances where some metadata is lost or corrupted during the export process.
- Complex Folder Structure: The exported data is often organized into a complex folder structure that can be difficult to navigate.
7.3. Step-by-Step Guide to Using Google Takeout
Step 1: Go to Google Takeout
Go to the Google Takeout website: https://takeout.google.com/
Step 2: Select Google Photos
Deselect all products except Google Photos.
Step 3: Customize Your Export Settings
Click “All photo albums included” to select specific albums or export all albums.
Click “Multiple formats” to choose your desired file format and size.
Step 4: Create Export
Click “Next step” and choose your delivery method (e.g., send download link via email, add to Drive, add to Dropbox, add to OneDrive).
Choose your export frequency (one-time export or scheduled exports every 2 months for 1 year).
Click “Create export.”
Step 5: Download Your Archive
Wait for the export process to complete. You’ll receive an email with a download link when your archive is ready.
Download the archive and extract the contents.
8. What About Transferring Google Drive Files?
Luckily, transferring Google Drive files to a different account is easier than migrating Google Photos. While Google Drive items can be copied manually, you can save effort by using a migration app that automatically transfers your content. VaultMe is a secure, user-friendly application designed to transfer files between online accounts. It has assisted millions of users in copying their data efficiently.
Here’s why dfphoto.net recommends VaultMe for Google Drive migrations:
- In addition to Google Drive, it can transfer Gmail emails, contacts, and calendars to another account.
- It transfers owned and shared documents while retaining their folder structure, file formats, and formatting within the documents.
- It works “in the cloud,” so you can close the migration and even power off your device immediately after setting up a migration.
- It is quick to set up, easy to use, and works fast.
- It generates a migration report at the end of the transfer, allowing you to verify the results.
9. Can You Transfer Google Photos to iCloud?
Yes, if you have an iCloud account with sufficient storage space, you can consider migrating your Google Photos content there using Google Takeout. Remember, however, that some metadata may not be transferred, and the precision of the results is not guaranteed.
9.1. How to Transfer Google Photos to iCloud Using Google Takeout
- Ensure that iCloud Photos and iCloud Drive are enabled.
- Verify that you have sufficient iCloud storage.
- Go to Google Takeout (https://takeout.google.com/).
- Include Google Photos in your export.
- Choose “Apple – iCloud Photos” as the destination and sign in with your Apple Account.
- Grant Google all the necessary permissions to add photos and videos to your iCloud.
- Wait for the transfer to complete.
10. Transferring Google Photos to an External Hard Drive
If you don’t have enough free storage space in any of your cloud accounts, you can save your Google Photos content to a hard drive instead. This process will involve using Google Takeout.
10.1. Steps to Transfer Google Photos to a Hard Drive
- Go to Google Takeout (https://takeout.google.com/).
- Include only Google Photos in your export.
- Wait for the email confirming the completion of the download.
- Download your archive.
- Unzip and reorganize the archive if necessary.
- Copy the content to an external hard drive.
11. What are Some Tools That Can Help With the Transfer Process?
While Google doesn’t offer a dedicated tool for transferring Google Photos, several third-party tools and services can assist with the process. However, it’s important to exercise caution when using third-party tools, as they may pose security risks.
11.1. VaultMe
As mentioned earlier, VaultMe is a migration tool that can transfer Google Drive files, Gmail emails, contacts, and calendars. While it doesn’t directly transfer Google Photos, it can be a valuable tool for migrating other data associated with your Google account.
11.2. MultCloud
MultCloud is a web-based service that allows you to manage and transfer files between multiple cloud storage services, including Google Drive, Google Photos, Dropbox, OneDrive, and more. It offers a user-friendly interface and supports various transfer methods, including direct transfer, scheduled transfer, and incremental transfer.
11.3. IFTTT (If This Then That)
IFTTT is a web-based automation service that allows you to create applets that connect different online services. While IFTTT can’t directly transfer Google Photos in bulk, you can use it to automatically copy new photos from one Google Photos account to another.
12. Addressing Common Challenges During the Transfer
Even with careful planning, you might encounter challenges during the Google Photos transfer process. Here are some common issues and how to address them:
- Storage Limitations: If you run out of storage space in your destination account, consider purchasing additional storage or transferring only selected photos or albums.
- Slow Transfer Speed: Transfer speed depends on your internet connection and the size of your photo library. Try transferring during off-peak hours or using a faster internet connection.
- Metadata Loss: If preserving metadata is crucial, use the Partner Sharing method or a third-party tool that specifically supports metadata transfer.
- Organization Issues: If you want to maintain your album structure, recreate your albums manually in the destination account or use a third-party tool that supports album transfer.
13. How to Verify That All Photos Have Been Transferred?
After completing the transfer process, it’s crucial to verify that all your photos have been successfully moved to the destination account. Here are some ways to do that:
- Manual Comparison: Manually compare the number of photos and albums in your source and destination accounts.
- Date Range Check: Verify that the date ranges of the photos in both accounts match.
- Visual Inspection: Browse through the photos in your destination account and spot-check for any missing images.
- Third-Party Tools: Use a third-party tool that can compare the contents of two Google Photos accounts and identify any discrepancies.
14. Security and Privacy Considerations
When transferring your Google Photos, it’s essential to prioritize security and privacy. Here are some key considerations:
- Use Strong Passwords: Ensure both your source and destination Google accounts have strong, unique passwords.
- Enable Two-Factor Authentication: Enable two-factor authentication on both accounts for added security.
- Be Cautious with Third-Party Tools: Only use reputable third-party tools from trusted sources.
- Review App Permissions: Regularly review the permissions granted to third-party apps connected to your Google accounts.
- Delete Data from the Source Account: Once you’ve verified that all your photos have been successfully transferred, consider deleting them from the source account to minimize the risk of data breaches.
15. What if You Encounter Issues During the Transfer Process?
If you encounter issues during the transfer process, here are some troubleshooting steps you can take:
- Check Your Internet Connection: Ensure you have a stable internet connection.
- Clear Your Browser Cache and Cookies: Clear your browser’s cache and cookies to resolve potential conflicts.
- Try a Different Browser: Try using a different web browser to see if the issue persists.
- Contact Google Support: If you’re unable to resolve the issue on your own, contact Google Support for assistance.
16. Can You Automate the Google Photos Transfer Process?
While there isn’t a fully automated solution for transferring Google Photos due to API limitations, you can automate certain aspects of the process. For example, you can use IFTTT to automatically copy new photos from one account to another. However, for a complete transfer of your entire library, manual steps are still required.
17. Frequently Asked Questions
1. How do I back up Google Photos to a different account?
Set up partner sharing for all your photos, both existing and new, with the backup account and then save the photos to the backup account. This way, even if your original account is deleted or compromised, the photos in the backup account will not be affected.
2. Can I transfer all my Google Photos to a different account?
Yes. Set up partner sharing in account 1. Get the invitation and accept the shared photos in account 2. Save the photos to account 2. Copy folders. Delete the photos from account 1. For more detailed information about all available options, see our article above.
3. How do I download all photos from Google Photos?
Google Takeouts allows you to extract all photos or only selected albums from Google Photos. This method, however, has limitations that we discuss above. Review them carefully before setting up a Google Takeout export.
4. Will I lose photo quality when transferring Google Photos?
Using Partner Sharing typically preserves the original photo quality. However, downloading and re-uploading may result in some compression, depending on your settings.
5. How long does it take to transfer Google Photos to another account?
The transfer time depends on the size of your photo library and your internet connection speed. It can range from a few hours to several days.
6. Can I transfer only specific albums from Google Photos?
Yes, when using Google Takeout, you can select specific albums to export.
7. Is it safe to use third-party tools for transferring Google Photos?
Exercise caution when using third-party tools, as they may pose security risks. Only use reputable tools from trusted sources.
8. What happens to my photos in the source account after the transfer?
You can choose to delete your photos from the source account after the transfer, but it’s recommended to keep them there until you’ve verified that all photos have been successfully moved to the destination account.
9. Can I transfer Google Photos to a different cloud storage service, like Dropbox or OneDrive?
Yes, you can use Google Takeout to download your photos and then upload them to another cloud storage service.
10. What should I do if I exceed my Google storage quota during the transfer?
You can purchase additional storage or transfer only selected photos or albums.
18. Conclusion
Transferring Google Photos from one account to another can be a complex process, but by understanding the available methods and carefully planning your approach, you can successfully migrate your photos without losing precious memories. Whether you choose to use Partner Sharing, Google Takeout, or a third-party tool, remember to prioritize security, privacy, and data verification. And if you’re looking to enhance your photography skills and explore the world of visual arts, dfphoto.net is your go-to resource for tutorials, inspiration, and a vibrant community of photographers. Visit dfphoto.net today and unlock your creative potential.
Address: 1600 St Michael’s Dr, Santa Fe, NM 87505, United States.
Phone: +1 (505) 471-6001.
Website: dfphoto.net.
19. Explore More at Dfphoto.Net
Ready to elevate your photography journey? Visit dfphoto.net for a treasure trove of resources:
- In-Depth Tutorials: Master essential techniques with our easy-to-follow photography guides.
- Stunning Photo Galleries: Get inspired by breathtaking images from talented photographers around the globe.
- Community Connection: Join our vibrant community, share your work, and connect with fellow photography enthusiasts.
Don’t wait – visit dfphoto.net now and start exploring the endless possibilities of photography!