Moving photos from Google Photos to Google Drive can enhance your file management and accessibility. This guide provides two simple methods for transferring your images: manual download and upload, and using Google Takeout. We’ll explore each step-by-step, ensuring a seamless transfer experience.
Method 1: Download and Upload
This method involves downloading photos from Google Photos and uploading them to Google Drive. It’s ideal for transferring a small number of files.
-
Access Google Photos: Log in to your Google Photos account and locate the pictures you want to move.
-
Select Photos: Click the empty circle in the top left corner of each photo to select it. For multiple selections, hold down the Shift key while clicking the last image in the desired range.
-
Access Download Option: Click the three vertically aligned dots (More Options) in the upper right corner and select “Download” or use the keyboard shortcut Shift+D.
-
Choose Download Location: Select a folder on your computer where the photos will be saved. Downloaded multiple images will be zipped into an archive file. Extract the files before proceeding.
-
Access Google Drive: Log in to your Google Drive account via the web interface or desktop application.
-
Upload Photos: Drag and drop the extracted photos into your Google Drive window. Alternatively, use the “New” button, select “Folder upload,” and choose the folder containing your extracted images.
 Selecting and downloading photos from Google Photos.
This manual method can be time-consuming, particularly for large files or slow internet connections.
Method 2: Google Takeout
Google Takeout provides a streamlined way to transfer data between Google services, including moving photos from Google Photos to Google Drive.
-
Access Google Takeout: Visit takeout.google.com or access it through your Google Photos settings.
-
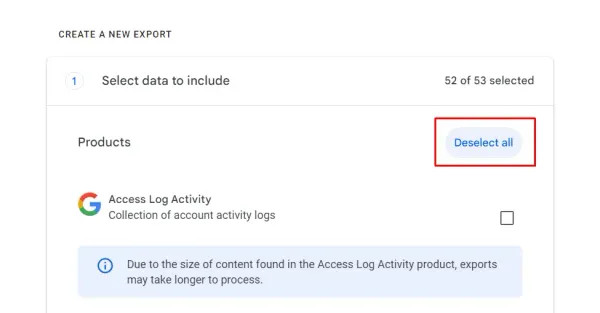
Deselect All and Choose Google Photos: Click “Deselect all” and then select the checkbox next to “Google Photos.”
 Deselecting all services and selecting Google Photos in Google Takeout
-
Proceed to Next Step: Click “Next step” at the bottom of the page.
-
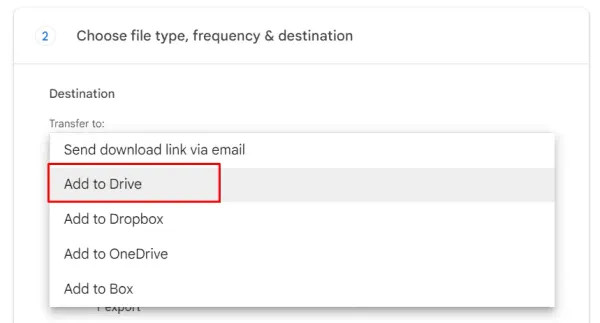
Choose Delivery Method: In the “Destination” section, select “Add to Drive.”
 Choosing to add the exported data to Google Drive in Google Takeout.
-
Configure Export Settings: Choose “*.zip” as the file type and set the maximum archive size to 10 GB. Larger collections will be split into multiple archives. You can also set the export frequency if needed.
-
Create Export: Click “Create export” to initiate the transfer. Google Takeout will estimate the transfer time.
-
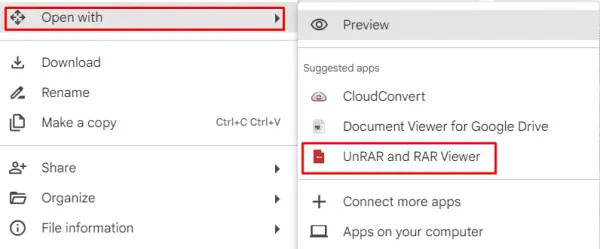
Access Files in Google Drive: Once the export is complete, the zipped archive(s) will be located in your “My Drive” section. You can unzip them directly within Google Drive using available add-ons.
 Locating the exported archive in Google Drive.
Google Takeout offers a more efficient and convenient way to move large photo collections.
Conclusion
Transferring photos from Google Photos to Google Drive can be accomplished effortlessly using either the manual download/upload method or the automated Google Takeout service. Choose the method best suited to your needs and enjoy improved organization and access to your valuable photos. Using a Digital Asset Management (DAM) system can further enhance your workflow and organization after transferring your photos.