It’s important to understand the relationship between Google Drive and Google Photos, especially since a key change in July 2019. After this update, new photos and videos in Google Drive no longer automatically appear in Google Photos, and vice versa. Deleting items in one service does not affect the other. This separation means that if you want your Google Drive photos in Google Photos, you’ll need to move them manually.
While Google Drive is excellent for general file storage, organization, and sharing, it’s not specifically designed for photo management and editing. You can store photos in Drive, but editing requires third-party tools.
Alt text: Google Photos versus Google Drive comparison table highlighting features for photo management and general file storage.
Why Should You Move Photos from Google Drive to Google Photos?
Google Photos offers significant advantages over Google Drive when it comes to managing and enjoying your images. Here’s why you might want to move your photos:
⭕ Easier Photo Viewing: Google Photos is designed for visual browsing. You can view your photos conveniently on photos.google.com or through the Google Photos app on your smartphone. Photos are neatly organized by date, allowing you to easily scroll through years of memories.
⭕ Smarter Search Capabilities: Google Photos boasts powerful AI-driven search. You can search for almost anything – from “beach” to “dog” to specific people – and get remarkably accurate results. Its facial recognition technology also helps in identifying people, pets, and even plants within your photos.
⭕ Built-in Photo Editing Tools: Google Photos provides user-friendly, basic photo editing functionalities directly within the app. You can apply filters, adjust brightness and contrast, rotate, and crop images, enhancing your photos without needing extra software.
In essence, Google Photos is a dedicated photo library application packed with features ideal for creating albums, storing photos and videos from your devices, and managing downloaded GIFs. For a deeper comparison, you can explore Google Drive vs. Google Photos. So, how do you actually transfer your pictures from Google Drive to Google Photos? Let’s explore the methods.
How to Move Photos from Google Drive to Google Photos on Your Computer: 4 Methods
Given Google Photos’ specialization in image handling, many users prefer to consolidate their photos from Google Drive into Google Photos for better organization and accessibility.
Below are four reliable and straightforward methods to transfer photos from Google Drive to Google Photos on a computer. These methods are widely recommended and safe to use.
Way 1. Transfer Photos with MultCloud: The Simplest Method
Is it possible to move photos directly from Google Drive to Google Photos without the hassle of downloading and re-uploading? Yes, it is! You can achieve this using MultCloud, a professional and FREE multi-cloud management tool. MultCloud allows you to manage multiple cloud storage accounts in one centralized platform, eliminating the need to switch between accounts.
![]()
MultCloud offers these key benefits for cloud transfers:
- Flexible Cloud Sync: Seamlessly synchronize data between different cloud services, offering 10 versatile sync modes including one-way, two-way, and real-time synchronization.
- Efficient Cloud Transfer: Transfer files between clouds with a single click, no manual downloading needed. Option to automatically delete source files after transfer.
- Scheduled Cloud Backup: Regularly back up files from one cloud to another, adding an extra layer of data protection. Schedule backups daily, weekly, or monthly.
Get Started FreeView Premium Features
Step-by-Step Guide to Move Photos from Drive to Google Photos with MultCloud
Here’s how to move your photos from Google Drive to Google Photos using MultCloud:
- Create a MultCloud Account and Log In: First, you’ll need to create a MultCloud account and then log in to the platform.
Sign up Free 100% secure
- Add Google Drive and Google Photos: Connect your cloud accounts to MultCloud. Click the “Add Cloud” button on the left sidebar. Select Google Drive and follow the on-screen instructions to authorize access. Repeat this process to add Google Photos.
Alt text: Screenshot showing the MultCloud interface to add Google Drive and Google Photos accounts for cloud management.
Important Notes:
- MultCloud adds cloud accounts one at a time. Repeat the process to add more accounts.
- There is no limit to the number of cloud accounts you can add in MultCloud.
-
Set Up Cloud Sync: Once both Google Drive and Google Photos are added, click on “Cloud Sync“. Designate your Google Drive photo folders as the source and choose a destination folder within Google Photos as the target.
-
Initiate the Transfer: Click “Sync Now” to start moving your photos from Google Drive to Google Photos.
Alt text: MultCloud Cloud Sync interface showing Google Drive as source and Google Photos as destination for photo transfer.
Additional Options:
- Scheduled Sync: Automate the photo transfer process by setting up a schedule (Daily, Weekly, Monthly) in the “Schedule” section.
- Advanced Sync Modes: Under “Options“, explore advanced sync modes like Real-Time Sync, One-way Sync, Two-way Sync, and more. You can also enable email notifications and file filtering.
- Faster Transfer Speed: For even faster transfers, consider upgrading to a premium MultCloud account to unlock 10 transfer threads and other advanced features.
Get Started FreeView Premium Features
★ Advantages of MultCloud over Manual Methods:
- Data Traffic Efficiency: MultCloud transfers data directly between clouds without using your internet bandwidth. The transfer process is stable even with unstable networks, and you can close your browser or device once the task starts.
- Online Transfer: MultCloud processes data online, directly from cloud to cloud. Your photos don’t pass through your local computer, saving local storage space.
- Scheduled Transfers: Set up recurring transfers or syncs from Google Drive to Google Photos automatically using the “Schedule” feature.
- File Filtering: Use the “Filter” option to easily select and migrate all photos based on file extensions, streamlining the process instead of manual selection.
MultCloud also offers a “Cloud Transfer” feature which allows you to move photos and automatically free up space in Google Drive after the transfer is complete.
Way 2. Manual Download and Re-Upload: Simple but Time-Consuming
If you only need to move a few folders, the manual download and re-upload method is straightforward, though less efficient for large transfers.
Step 1: Download Photos from Google Drive. Go to Google Drive, locate your photos and videos. Select the files you want to move, click the three-dot menu, and choose “Download“.
Alt text: Google Drive interface showing selected images and the download option from the menu.
Note: Downloaded files will be compressed into a ZIP folder. You’ll need to unzip this folder on your computer.
Step 2: Upload to Google Photos. Log in to Google Photos. Click “Upload” and select “Computer” to upload the unzipped photos from your local storage to Google Photos.
Alt text: Google Photos interface showing the upload button and options to upload from computer or Google Drive.
Note: To avoid duplicate storage and save space, remember to delete the original photos from Google Drive after confirming the upload to Google Photos is successful.
This method requires local storage space as a temporary holding area and can be slow and cumbersome for large photo collections.
Way 3. Direct Import from Google Drive via Google Photos Website
Google Photos offers a direct upload feature allowing you to import photos directly from Google Drive without downloading them to your computer first.
Before you begin, consider these points:
- Photos must be larger than 256 pixels.
- Supported file types include .jpg, .gif, .webp, .tiff, and .raw.
- If you are using a Google account provided by your work or school, you may need to download photos from Google Drive and then upload them to Google Photos using another method.
Here’s how to directly import:
Step 1: Access Google Photos Upload. Go to the Google Photos website and click “Upload” at the top right. In the dropdown menu, select “Google Drive“.
Alt text: Google Photos upload dropdown menu with Google Drive selected as the import source.
Step 2: Choose Photos from Google Drive. In the pop-up window, select “My Drive“. You can filter photos by file type, date modified, or owner to easily find your pictures. Select the photos you want to move and click “Upload“.
Alt text: Google Photos interface showing file filtering options within Google Drive to select photos for import.
Tip: Besides “My Drive”, you can also select options like “Recent”, “Shared with me”, “Starred”, or “Computers” to locate photos from different areas of your Google Drive ecosystem.
This method is faster than manual download/upload as it eliminates the download and decompression steps.
Way 4. Using Google Drive for Desktop Application
Google Drive for Desktop is the official application for Windows and macOS that synchronizes files and photos between your computer, Google Drive, and Google Photos. You can also use it to back up photos from SD cards, cameras, and external hard drives to Google services.
Step 1: Install Google Drive for Desktop. Download and install the Google Drive for Desktop application on your computer.
Step 2: Run the Application and Sign In. Launch the application and log in with your Google account credentials.
Step 3: Access Preferences. Right-click the Google Drive icon in your system tray (or menu bar) and select “Preferences“.
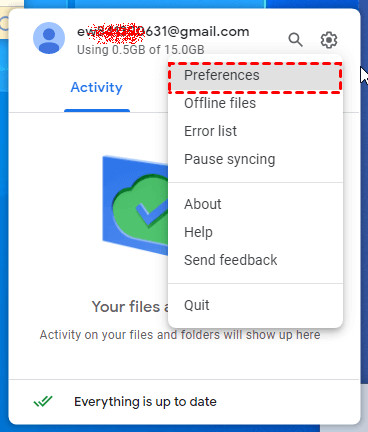 Google Drive Preference
Alt text: Google Drive for Desktop preferences window showing settings for My Computer and Google Drive syncing.
Step 4: Add Google Drive Folder. In Preferences, go to “My Computer” and click “Add Folder“. Navigate to and select the photos folder within your local Google Drive folder.
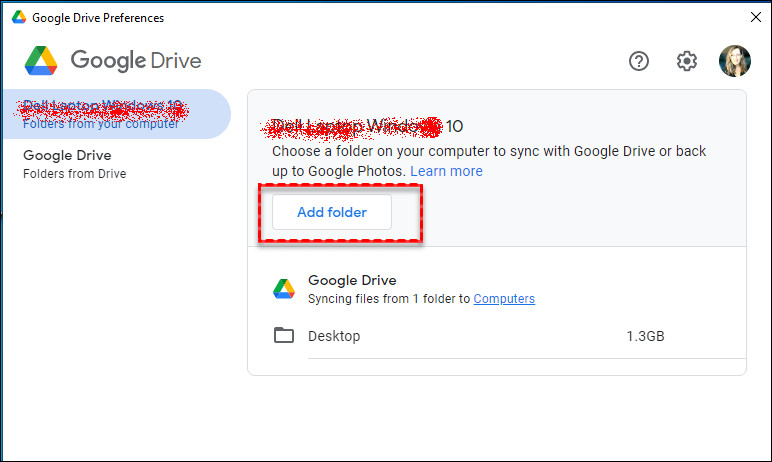 Choose Folder
Alt text: File explorer window within Google Drive for Desktop, prompting user to choose a folder to add.
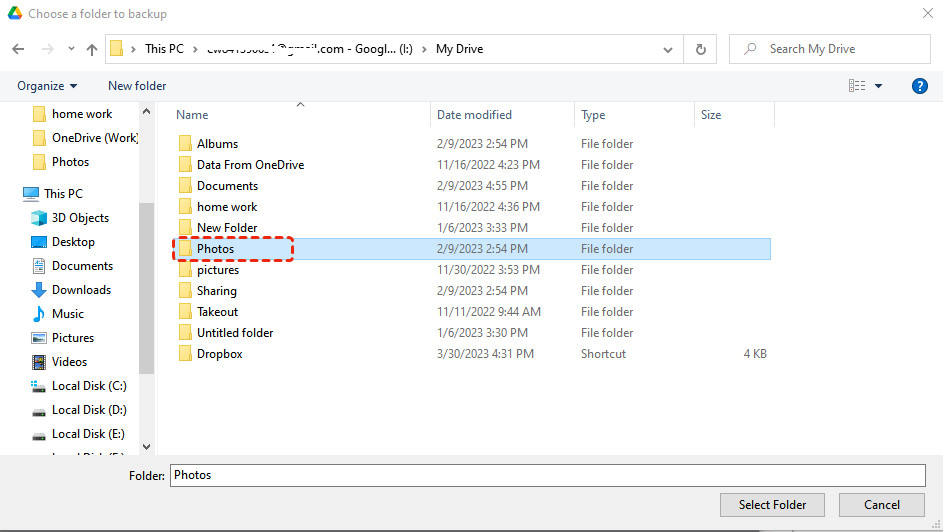 Choose Google Drive Folder
Alt text: Selecting the Google Drive folder within the file explorer in Google Drive for Desktop application.
Step 5: Enable Backup to Google Photos. In the “Add Folder” settings, tick the option “Back up to Google Photos” and click “Done” to initiate the transfer of photos from Google Drive to Google Photos.
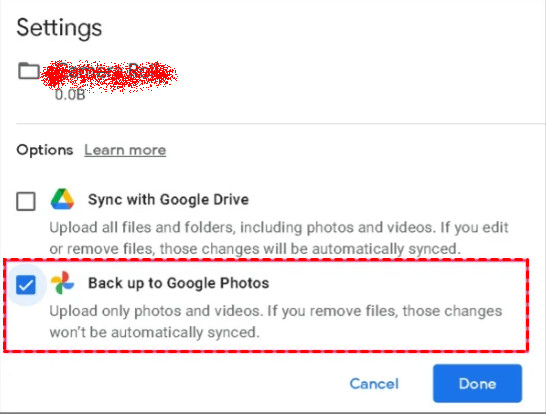 Backup Google Photos
Alt text: Google Drive for Desktop folder backup settings with “Back up to Google Photos” option highlighted and ticked.
This method requires that you have Google Drive for Desktop installed and that the photos are also stored locally on your computer as part of the Google Drive sync. It then allows you to choose to back up these local Google Drive photos to Google Photos during the synchronization process.
How to Move Photos from Google Drive to Google Photos on Android
Moving photos on Android is also possible. Here are the steps:
- Open Google Drive App: Launch the Google Drive app on your Android device.
Alt text: Screenshot of Google Drive app on Android, highlighting the “Files” section at the bottom.
-
Navigate to Files: Tap on “Files” located at the bottom right of the app.
-
Select Photos: Locate the photos you wish to move. Long press to select photos individually. Tap the three-dot menu icon at the top right.
Alt text: Google Drive app on Android showing selected photos and the three-dot menu icon for options.
- Send a Copy: Choose “Send a copy” from the menu list, and then select “Upload to Photos“.
Alt text: Android share sheet menu in Google Drive app with “Send a copy” option highlighted.
- Choose Account and Upload: Select your Google account if prompted and tap “Upload” to finalize moving the photos from Google Drive to Google Photos on your Android device.
How to Move Photos from Google Drive to Google Photos on iPhone
For iPhone users, moving photos involves a download and re-upload process:
-
Open Google Drive App: Open the Google Drive app on your iPhone.
-
Select Photos: Find and select the photo(s). Tap the three-dot icon next to the photo or at the top right.
-
Send a Copy: Choose “Send a copy” from the options.
Alt text: iPhone share sheet menu in Google Drive app with “Send a copy” option highlighted.
- Save to iPhone: Select “Save Image” from the menu. This saves the selected photos to your iPhone’s Photos app.
Alt text: iPhone menu after “Send a copy” in Google Drive app, showing “Save Image” option to save to device.
- Backup to Google Photos: Open the Google Photos app, tap “Photos” at the bottom, and then select the downloaded photos from your iPhone’s library. Tap “Backup” to upload these photos from your iPhone to Google Photos.
[Backup Google Photos
Alt text: Google Photos app on iPhone showing selection of photos from device library and the “Backup” option.
Conclusion
Using any of the methods detailed above, you can efficiently move your photos from Google Drive to Google Photos. If you are looking for a robust and feature-rich solution, especially for computer-based transfers, MultCloud offers significant advantages. For mobile users, while direct transfer options are available, using a computer may offer a smoother and faster experience, particularly for large photo libraries.
Beyond “Cloud Sync“, MultCloud provides a comprehensive platform for managing multiple cloud services, allowing you to transfer and backup files between clouds, and perform basic file management tasks across all your connected cloud storage accounts.
MultCloud supports a wide range of popular cloud drives beyond Google Drive and Google Photos, including MEGA, OneDrive, Dropbox, and more. This makes it easy to manage and transfer photos and files between various services, such as moving photos from OneDrive to Google Photos.
Next Page