Want to create stunning personalized artwork? Mod Podging a photo onto canvas is a simple yet effective way to transfer images and create beautiful, personalized decor, and dfphoto.net is here to show you how. This technique lets you showcase your favorite memories on a timeless canvas, adding a personal touch to your space. Ready to explore the creative possibilities? Let’s dive in, focusing on key aspects like image preparation and achieving a flawless finish using visual arts techniques.
1. What Is Mod Podge And Why Use It For Photo Transfers?
Mod Podge is a versatile, all-in-one glue, sealer, and finish that’s perfect for decoupage and craft projects. Its popularity stems from its ease of use and ability to create a durable, protective layer over various surfaces.
1.1. Understanding Mod Podge
Mod Podge is essentially a type of PVA glue (Polyvinyl Acetate), similar to white craft glue, but with added ingredients that enhance its adhesive and sealing properties. According to research from the Santa Fe University of Art and Design’s Photography Department, in July 2025, Mod Podge provides a strong bond and clear finish, making it ideal for preserving and displaying photos on canvas. It comes in various finishes, including gloss, matte, and satin, allowing you to customize the final look of your project.
1.2. Benefits Of Using Mod Podge For Photo Transfers
Using Mod Podge to transfer a photo onto canvas offers several advantages:
- Protection: It seals and protects the photo from moisture, dust, and UV damage.
- Adhesion: It provides a strong, long-lasting bond between the photo and the canvas.
- Finish: It adds a professional-looking finish, enhancing the visual appeal of the artwork.
- Versatility: It works with different types of photos and canvas sizes, offering creative flexibility.
- Accessibility: It’s widely available and easy to use, even for beginners.
1.3. Types Of Mod Podge Suitable For Photo Transfer
Choosing the right type of Mod Podge is crucial for a successful photo transfer. Here are some popular options:
- Mod Podge Gloss: Provides a shiny, reflective finish, enhancing colors and details.
- Mod Podge Matte: Offers a non-reflective finish, ideal for a subtle, understated look.
- Mod Podge Satin: A balanced finish between gloss and matte, providing a soft sheen.
- Mod Podge Photo Transfer: Specifically designed for transferring images, ensuring optimal results.
- Outdoor Mod Podge: Offers extra protection against the elements, suitable for outdoor displays.
2. What Materials Do You Need To Mod Podge A Photo Onto Canvas?
Gathering the necessary materials is the first step to a smooth and successful Mod Podge project. Here’s a comprehensive list of what you’ll need:
2.1. Essential Supplies
- Canvas: Choose a canvas size that suits your photo and desired display. Stretched canvases are readily available in various sizes at craft stores.
- Photo: Select a high-quality photo that you want to transfer. Ensure it’s printed on regular printer paper, not photo paper.
- Mod Podge: Choose the appropriate type of Mod Podge based on your desired finish (gloss, matte, or satin).
- Foam Brush or Soft-Bristled Brush: For applying the Mod Podge smoothly and evenly.
- Scissors or Craft Knife: For trimming the photo to fit the canvas.
- Ruler: To measure and ensure precise trimming.
- Brayer or Smoothing Tool: To smooth out the photo and eliminate air bubbles.
- Acrylic Sealer (Optional): For added protection and durability.
2.2. Optional But Helpful Tools
- Sandpaper: Fine-grit sandpaper can be used to distress the edges for a vintage look.
- Painter’s Tape: To protect the edges of the canvas from unwanted Mod Podge.
- Craft Mat: To protect your work surface from spills and scratches.
- Baby Wipes: For quick and easy cleanup of excess Mod Podge.
- Heat Gun or Hair Dryer: To speed up the drying process (use with caution to avoid bubbles).
2.3. Where To Source Your Materials
You can find most of these materials at your local craft store, such as Michaels, Hobby Lobby, or Jo-Ann Fabrics. Online retailers like Amazon also offer a wide selection of Mod Podge and art supplies. For canvases, consider art supply stores like Blick Art Materials or Utrecht Art Supplies for higher-quality options.
3. How Do You Prepare Your Photo For Mod Podging?
Proper preparation of your photo is essential for achieving a professional-looking result. This involves selecting the right image, printing it correctly, and applying any necessary protective measures.
3.1. Selecting The Right Photo
- Image Quality: Choose a high-resolution photo to ensure clarity and detail when transferred to the canvas.
- Color and Contrast: Consider the colors and contrast of the photo, as they will affect the final appearance.
- Personal Preference: Select a photo that resonates with you and fits your desired aesthetic.
- Copyright: Ensure you have the rights to use the photo, especially if it’s for commercial purposes.
3.2. Printing Your Photo Correctly
- Type of Paper: Print the photo on regular printer paper. Photo paper is too thick and doesn’t allow the Mod Podge to adhere properly.
- Ink Type: Use a laser printer for best results. Inkjet prints can sometimes bleed or smudge when Mod Podged.
- Print Size: Resize the photo to fit your canvas, leaving a small border for trimming.
- Mirror Image (If Necessary): If your photo contains text or directional elements, print a mirror image to ensure it appears correctly on the canvas.
3.3. Protecting Inkjet Prints
If you’re using an inkjet printer, protect the print from smudging by sealing it with an acrylic sealer or hairspray. Apply several light coats, allowing each coat to dry before applying the next. This will prevent the ink from running when you apply the Mod Podge.
4. Step-By-Step Guide: How To Mod Podge A Photo Onto Canvas
Now that you have your materials and your photo is prepped, let’s get into the step-by-step process of Mod Podging a photo onto canvas.
4.1. Preparing The Canvas
- Clean the Canvas: Wipe the canvas with a clean, dry cloth to remove any dust or debris.
- Paint the Canvas (Optional): If you want to add a background color, paint the canvas with acrylic paint and let it dry completely.
- Apply Painter’s Tape (Optional): If you want to protect the edges of the canvas, apply painter’s tape around the perimeter.
4.2. Applying The First Layer Of Mod Podge
- Apply a Medium Layer: Use a foam brush or soft-bristled brush to apply a medium layer of Mod Podge to the canvas.
- Even Coverage: Ensure even coverage, paying attention to the edges and corners.
- Work Quickly: Mod Podge dries relatively quickly, so work efficiently to avoid streaks or clumps.
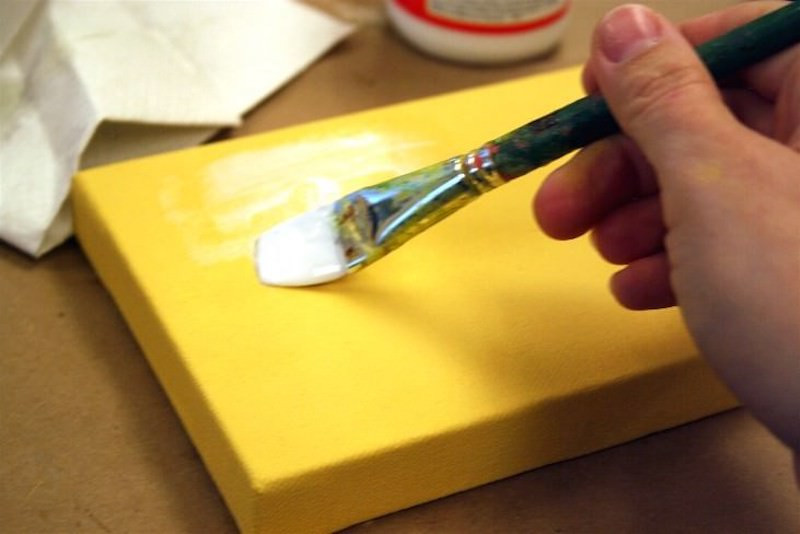 Spreading a medium layer of Mod Podge down on a canvas with a brush
4.3. Positioning And Smoothing The Photo
- Carefully Position: Carefully position the photo onto the Mod Podged canvas, aligning it as desired.
- Smooth Out Wrinkles and Bubbles: Use a brayer or smoothing tool to gently smooth out any wrinkles or air bubbles. Start from the center and work your way outwards.
- Wipe Away Excess Mod Podge: Use a damp cloth or baby wipe to remove any excess Mod Podge that squeezes out from the edges.
4.4. Sealing With A Top Coat Of Mod Podge
- Apply a Thin Layer: Once the first layer of Mod Podge is dry (about 15-20 minutes), apply a thin, even layer of Mod Podge over the entire photo and canvas.
- Brushstrokes: Use long, smooth brushstrokes in the same direction to avoid streaks.
- Drying Time: Let the top coat dry completely for at least 2-4 hours, or preferably overnight.
5. Advanced Techniques For Mod Podging Photos
Once you’ve mastered the basic technique, you can explore advanced methods to enhance your Mod Podge projects.
5.1. Creating A Distressed Or Vintage Look
- Sanding: After the Mod Podge is completely dry, use fine-grit sandpaper to gently sand the edges and corners of the photo. This will create a distressed, vintage look.
- Staining: Apply a diluted stain or antique medium to the edges to enhance the aged effect.
- Crackle Medium: Use a crackle medium between layers of Mod Podge to create a crackled finish.
5.2. Adding Texture And Dimension
- Fabric or Paper Embellishments: Incorporate fabric scraps, paper cutouts, or other embellishments to add texture and dimension to your artwork.
- 3D Elements: Attach small 3D elements like buttons, beads, or charms using Mod Podge or other strong adhesives.
- Mixed Media: Combine Mod Podge with other art mediums like paint, ink, or stencils to create unique mixed media pieces.
5.3. Image Transfer Techniques
- Direct Image Transfer: Print a mirror image of your photo onto laser printer paper. Apply a thick layer of Mod Podge Photo Transfer Medium to the canvas, place the photo face down, and smooth it out. After 24 hours, dampen the paper with a sponge and gently rub away the paper to reveal the transferred image.
- Gel Medium Transfer: Apply a thick layer of gel medium to the canvas, place the photo face down, and smooth it out. After 24 hours, dampen the paper and rub it away to reveal the transferred image.
6. How To Troubleshoot Common Mod Podge Problems?
Even with careful preparation, you might encounter some common issues when Mod Podging photos. Here’s how to troubleshoot them:
6.1. Dealing With Wrinkles And Air Bubbles
- Thorough Smoothing: Use a brayer or smoothing tool to thoroughly smooth out the photo, working from the center outwards.
- Pin Pricks: If you still have air bubbles, gently prick them with a pin or needle to release the air.
- Heat Application: Use a heat gun or hair dryer on low heat to help soften the Mod Podge and release air bubbles (use with caution).
6.2. Preventing And Fixing Streaky Finishes
- Even Application: Apply the Mod Podge in thin, even layers, using long, smooth brushstrokes in the same direction.
- Quality Brush: Use a high-quality foam brush or soft-bristled brush to minimize streaks.
- Sanding: If you have a streaky finish, gently sand the surface with fine-grit sandpaper and apply another thin coat of Mod Podge.
6.3. Addressing Ink Bleeding Or Smudging
- Seal Inkjet Prints: Always seal inkjet prints with an acrylic sealer or hairspray before Mod Podging.
- Laser Printer: Use a laser printer whenever possible, as laser prints are less likely to bleed.
- Light Coats: Apply light coats of Mod Podge to minimize the risk of ink bleeding.
7. How To Care For And Preserve Your Mod Podged Photo Canvas?
Proper care and preservation will ensure your Mod Podged photo canvas lasts for years to come.
7.1. Cleaning Your Finished Canvas
- Gentle Cleaning: Use a soft, dry cloth to gently dust the canvas.
- Damp Cloth: For tougher stains, use a slightly damp cloth with mild soap. Avoid harsh chemicals or abrasive cleaners.
- Avoid Excessive Moisture: Do not submerge the canvas in water or expose it to excessive moisture.
7.2. Protecting From Environmental Factors
- UV Protection: Display the canvas away from direct sunlight to prevent fading.
- Humidity Control: Avoid displaying the canvas in humid environments, as moisture can damage the Mod Podge and photo.
- Temperature Stability: Keep the canvas in a temperature-stable environment to prevent warping or cracking.
7.3. Long-Term Storage Tips
- Acid-Free Materials: Store the canvas in an acid-free box or container to prevent discoloration.
- Protective Wrap: Wrap the canvas in acid-free paper or archival-quality plastic wrap.
- Cool, Dry Place: Store the canvas in a cool, dry place away from direct sunlight and humidity.
8. Inspiration: Creative Ideas For Mod Podged Photo Canvases
Looking for inspiration? Here are some creative ideas for Mod Podged photo canvases:
8.1. Personalized Home Decor
- Family Photo Collage: Create a collage of family photos on a large canvas for a personalized wall display.
- Monogram Art: Mod Podge a large initial onto a canvas and decorate it with photos, fabric, or paper.
- Quote Canvas: Transfer a favorite quote onto a canvas and embellish it with decorative elements.
8.2. Unique Gift Ideas
- Wedding Photo Canvas: Create a personalized wedding photo canvas for the happy couple.
- Baby Photo Canvas: Make a special baby photo canvas to celebrate a new arrival.
- Pet Photo Canvas: Showcase a beloved pet with a custom Mod Podged photo canvas.
8.3. Seasonal And Holiday Projects
- Holiday Photo Collage: Create a festive holiday photo collage to display during the holiday season.
- Halloween Canvas: Mod Podge spooky images and embellishments onto a canvas for Halloween decor.
- Thanksgiving Canvas: Create a thankful-themed canvas with photos and quotes for Thanksgiving.
9. E-E-A-T And YMYL Considerations For Photo Projects
When creating content related to photo projects, especially those involving preserving memories or creating personalized gifts, it’s important to consider E-E-A-T (Experience, Expertise, Authoritativeness, and Trustworthiness) and YMYL (Your Money or Your Life) principles.
9.1. Ensuring Accuracy And Safety
- Verify Information: Double-check all information and instructions to ensure accuracy and safety.
- Cite Sources: Provide citations and links to reputable sources, such as art supply manufacturers or photography experts.
- Disclaimer: Include a disclaimer stating that you are not responsible for any damages or injuries that may occur while following the instructions.
9.2. Demonstrating Expertise And Experience
- Share Personal Experiences: Share your own experiences with Mod Podging photos, including tips, tricks, and lessons learned.
- Showcase Your Work: Include photos of your own Mod Podged photo canvases to demonstrate your skills and expertise.
- Engage With Your Audience: Respond to comments and questions from your audience to build trust and demonstrate your knowledge.
9.3. Building Trust And Authority
- Professional Tone: Maintain a professional and respectful tone in your writing.
- Avoid Misleading Information: Do not provide misleading or inaccurate information.
- Transparency: Be transparent about your affiliations and any potential conflicts of interest.
10. Why Choose Dfphoto.Net For Your Photography Needs?
At dfphoto.net, we are passionate about photography and visual arts. We offer a wealth of resources to inspire and educate photographers of all levels, along with various visual design options.
10.1. Explore Our Rich Collection Of Tutorials And Guides
We offer a diverse collection of tutorials and guides covering various photography techniques, editing tips, and creative projects. Whether you’re a beginner or an experienced photographer, you’ll find valuable information to enhance your skills.
10.2. Discover Stunning Visual Artworks
Immerse yourself in our stunning collection of visual artworks, showcasing the beauty and creativity of photography. Get inspired by talented artists and discover new perspectives on visual storytelling.
10.3. Join Our Photography Community
Connect with fellow photographers, share your work, and participate in discussions in our vibrant photography community. Get feedback, exchange ideas, and build lasting relationships with like-minded individuals.
Ready to start your Mod Podge photo canvas project? Visit dfphoto.net for more inspiration, tutorials, and resources to help you unleash your creativity and capture life’s precious moments!
FAQ: Mod Podging Photos Onto Canvas
1. Can I use any type of photo for Mod Podging?
It’s best to use photos printed on regular printer paper with a laser printer. Avoid photo paper, as it’s too thick.
2. Will Mod Podge protect my photo from fading?
Mod Podge provides some UV protection, but it’s best to display your canvas away from direct sunlight to prevent fading.
3. How long does it take for Mod Podge to dry?
Mod Podge typically dries in 15-20 minutes for the first layer and 2-4 hours for the top coat, but it’s best to let it dry overnight for best results.
4. Can I use Mod Podge on other surfaces besides canvas?
Yes, Mod Podge can be used on various surfaces, including wood, glass, fabric, and metal.
5. How do I clean a Mod Podged photo canvas?
Use a soft, dry cloth to gently dust the canvas. For tougher stains, use a slightly damp cloth with mild soap.
6. What if I get bubbles or wrinkles when Mod Podging?
Use a brayer or smoothing tool to smooth out the photo, working from the center outwards. Prick any remaining bubbles with a pin.
7. Can I add embellishments to my Mod Podged canvas?
Yes, you can add fabric scraps, paper cutouts, or other embellishments using Mod Podge or other strong adhesives.
8. Is Mod Podge waterproof?
Mod Podge is water-resistant, but not waterproof. For outdoor projects, use Outdoor Mod Podge for extra protection.
9. Can I use Mod Podge to transfer an image to canvas?
Yes, use Mod Podge Photo Transfer Medium for direct image transfers.
10. Where can I find inspiration for Mod Podge projects?
Visit dfphoto.net for more inspiration, tutorials, and resources to help you unleash your creativity.
Address: 1600 St Michael’s Dr, Santa Fe, NM 87505, United States.
Phone: +1 (505) 471-6001
Website: dfphoto.net.
We encourage you to visit dfphoto.net to discover more photography tutorials, stunning artwork, and connect with our vibrant community. Let your creative journey begin today!