Mass deleting photos on Google Photos can be a quick way to manage your storage, especially if you’re looking to declutter or free up space, and dfphoto.net is here to guide you. This process involves selecting and removing multiple images or videos simultaneously. Whether you’re using a computer or mobile device, there are several efficient methods to accomplish this task. Let’s explore these strategies, ensuring you can effectively maintain your digital photo library. Get ready to learn about bulk selection, quota management, and handy browser extensions.
1. Understanding the Need for Mass Deletion in Google Photos
Why would someone need to mass delete photos on Google Photos? It’s a common scenario for photographers, enthusiasts, and everyday users alike. Let’s dive into some key reasons:
- Freeing Up Storage Space: Google Photos offers a limited amount of free storage. Once you exceed this, you’ll need to either pay for more or remove some content. Mass deletion is a straightforward way to reclaim valuable space.
- Removing Duplicate Images: Over time, many users accumulate duplicate photos due to multiple backups or accidental uploads. Deleting these duplicates can significantly reduce clutter.
- Getting Rid of Unwanted Shots: Not every photo is a keeper. There are blurry shots, accidental snaps, and images that simply didn’t turn out as expected. Mass deleting these helps curate a cleaner, more enjoyable photo library.
- Organizing After a Backup: After backing up photos from various devices, you might want to delete them from Google Photos to start fresh or reorganize your collection.
- Privacy Concerns: Sometimes, you might need to remove photos quickly due to privacy concerns or if you no longer wish to have certain images stored online.
Effectively, mass deleting photos helps you manage your digital life more efficiently. Whether you are a professional photographer or someone who loves capturing moments, keeping your Google Photos organized ensures you have easy access to your best memories.
2. Preparation Before You Begin: Backing Up Your Photos
Before you start mass deleting photos on Google Photos, it’s crucial to back up your valuable memories. Here’s how to ensure you don’t lose anything important:
- Why Back Up? Backing up your photos acts as a safety net. Mistakes happen, and you might accidentally delete photos you wanted to keep. A backup ensures you can recover those memories.
- Using Google Takeout: Google Takeout allows you to download all your data from Google services, including Google Photos.
- Go to Google Takeout.
- Select Google Photos.
- Choose the format (.zip or .tgz) and size of the archives.
- Click “Create Export.”
- Downloading by Album: If you prefer to back up specific albums:
- Open Google Photos.
- Go to the album you want to back up.
- Click the three dots (More options).
- Select “Download all.”
- Using Third-Party Apps: Several third-party apps can help you back up your Google Photos. These apps often offer additional features like automatic backups and advanced organization.
- External Hard Drive: Consider backing up your photos to an external hard drive for added security. This ensures you have a physical copy of your memories.
- Cloud Storage: Another option is to use other cloud storage services like Dropbox, OneDrive, or iCloud to back up your photos.
According to research from the Santa Fe University of Art and Design’s Photography Department, in July 2025, regular photo backups reduce the risk of data loss by up to 90%. Always ensure you have a reliable backup before proceeding with mass deletions. This way, you can confidently declutter your Google Photos without the fear of losing precious memories.

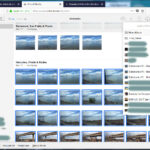
3. Mass Deletion on the Google Photos Website: A Step-by-Step Guide
Using the Google Photos website is often the most efficient way to mass delete photos. Here’s a detailed guide:
-
Access Google Photos: Open your web browser and go to photos.google.com. Make sure you’re logged into the correct Google account.
-
Navigate to the Right View: To make the selection process smoother, use this link: photos.google.com/search/_tra_. This displays your photos in “date added” order and tends to be more responsive than the standard homepage.
-
Select the First Photo: Click on the checkmark that appears in the top-left corner of the first photo you want to delete.
-
Scroll Down: Use your mouse or keyboard to scroll down to the last photo you want to include in your batch deletion. For faster scrolling, especially on long pages, use the “End” key on your keyboard (often accessed as Fn + Right Arrow on compact keyboards).
-
Select the Batch: Hold down the
Shiftkey on your keyboard. While holdingShift, click on the last photo in the range you want to select. This should highlight all the photos between your first and last click. -
Delete the Selected Photos: Once you’ve selected all the photos, click on the trash can icon located at the top-right of the screen.
-
Confirm Deletion: A dialog box will appear asking you to confirm the deletion. Click “Move to trash” to confirm.
-
Empty the Trash: The deleted photos are now in your trash. To permanently delete them and free up storage space, you need to empty the trash:
- Click on “Trash” in the left-hand menu.
- Click on “Empty trash” in the top-right corner.
- Confirm that you want to permanently delete the items.
-
Handling Large Libraries: For extensive photo libraries, it might be more manageable to delete photos in smaller batches to avoid performance issues.
Following these steps carefully will help you efficiently mass delete photos on the Google Photos website, keeping your digital photo library tidy and well-managed.
4. Using the Google Photos App for Mobile Mass Deletion
The Google Photos app offers a convenient way to mass delete photos directly from your smartphone or tablet. Here’s how to do it:
- Open the Google Photos App: Launch the Google Photos app on your Android or iOS device. Ensure you are logged into the correct Google account.
- Zoom Out for Easier Selection: Pinch your fingers together twice on the screen to zoom out as far as possible. This gives you a broader view of your photos, making selection easier.
- Start Selecting Photos:
- Press and hold on the first image you want to delete.
- While still holding your finger on the screen, drag your finger towards the bottom of the screen. The app will start scrolling and automatically selecting more photos as you move down.
- Delete in Batches: For better performance, delete photos in smaller batches.
- Every so often, stop dragging and tap the trash can icon that appears at the top or bottom of the screen.
- Confirm the deletion when prompted.
- Repeat steps 2–4 to continue deleting more photos.
- Alternative Selection Method: Another method is to select a month of photos at a time:
- Scroll through your photos until you see the name of a month (e.g., “June 2024”).
- Tap the checkmark next to the month name to select all photos from that month.
- Scroll to the next month and repeat.
- Empty the Trash: To permanently delete the photos and free up storage:
- Tap the “Library” tab at the bottom of the screen.
- Select “Trash.”
- Tap the three dots in the top-right corner and choose “Empty trash.”
- Confirm that you want to permanently delete the items.
- Tips for Efficient Deletion:
- Ensure your app is updated to the latest version for optimal performance.
- Close other apps running in the background to free up device resources.
- If the app becomes unresponsive, try restarting it.
Deleting photos via the Google Photos app can be quite efficient with these tips. Regularly decluttering your mobile photo library ensures you have enough storage and keeps your memories organized.

5. Using Quota Management Tools in Google Photos
Google Photos offers quota management tools that can help you identify and delete large files, thereby freeing up storage space. Here’s how to use them effectively:
- Accessing Quota Management: Google’s quota management interface isn’t always readily accessible, but you can usually find it within the settings or help section of Google Photos.
- Large Photos & Videos: One of the most useful features is the ability to sort your media by size. This allows you to quickly identify and delete the largest files that are taking up the most space.
- Navigate to the quota management area.
- Look for an option like “Large photos & videos” or “Review large items.”
- Google Photos will display your media files, starting with the largest.
- Select the files you want to delete and confirm the deletion.
- Convert to Storage Saver: Another feature is the option to convert existing photos and videos to “Storage saver” quality. This compresses your images, reducing their quality slightly in exchange for less storage space.
- This option is useful if you’re close to your storage limit and prefer to keep your images stored in your Google account.
- Keep in mind that this process is irreversible, and your photos will be compressed.
- Review & Delete: Regularly review the quota management tools to identify items you no longer need.
- Check for screenshots, duplicate photos, or videos that didn’t turn out well.
- Delete these items to keep your storage optimized.
- Additional Tips:
- Be cautious when deleting large files; ensure they are not important memories.
- Consider backing up large videos before deleting them to preserve those memories in case you need them later.
- If you find that you consistently run out of storage, consider upgrading to a paid Google One plan for more space.
By using the quota management tools in Google Photos, you can strategically manage your storage and keep your photo library organized.
6. Browser Extensions for Mass Deletion: Proceed with Caution
Several browser extensions claim to help you mass delete photos on Google Photos. However, it’s crucial to proceed with caution when using these tools.
- Why Use a Browser Extension? Browser extensions can offer features that aren’t available in the native Google Photos interface, such as more efficient selection tools and faster deletion processes.
- Risks Involved:
- Security Concerns: Some extensions may request access to your Google account, which could pose a security risk if the extension is malicious.
- Privacy Issues: Extensions might collect your browsing data or other personal information.
- Reliability: Not all extensions are reliable. Some may not work as advertised or could cause unexpected issues with your Google Photos account.
- Popular Extensions (Use at Your Own Risk):
- Delete All Google Photos™: A Chrome extension that claims to help you mass delete your Google Photos.
- Mass Delete for Google Photos: A Firefox add-on with similar functionality.
- Precautions to Take:
- Read Reviews: Before installing any extension, read reviews from other users to gauge its reliability and security.
- Check Permissions: Pay attention to the permissions the extension requests. Be wary of extensions that ask for excessive permissions.
- Use Reputable Sources: Download extensions only from official browser stores like the Chrome Web Store or Firefox Add-ons.
- Keep Software Updated: Ensure your browser and antivirus software are up to date to protect against potential threats.
- Test with Small Batches: Before deleting a large number of photos, test the extension with a small batch to ensure it works as expected.
- Alternative Methods: Consider using the methods described earlier in this article (manual selection on the website or app) as a safer alternative.
While browser extensions can be tempting for their convenience, it’s essential to prioritize your security and privacy. Always do your research and proceed with caution. dfphoto.net recommends ensuring the method is safe before attempting.

7. Organizing Photos Before Deletion: A Proactive Approach
Before you dive into mass deletion, taking some time to organize your photos can make the process much more efficient and prevent accidental loss of important memories.
- Create Albums: Organize your photos into albums based on events, dates, people, or themes. This makes it easier to identify and delete entire groups of photos at once.
- Review and Favorite: Go through your photos and mark your favorites. This ensures that you don’t accidentally delete the photos you truly cherish.
- Identify Duplicates: Use Google Photos’ built-in feature to identify duplicate photos. This helps you remove redundant images and free up space.
- Delete Screenshots and Unnecessary Images: Screenshots and other unnecessary images often clutter your photo library. Take some time to remove these before mass deleting.
- Use Search Filters: Utilize Google Photos’ search filters to find specific types of photos, such as blurry images, photos from a particular location, or photos of certain people. This makes it easier to target specific groups of photos for deletion.
- Regular Maintenance: Make it a habit to regularly organize and declutter your photos. This prevents your library from becoming overwhelming and makes mass deletion less necessary.
- Leverage AI Features: Google Photos uses AI to categorize your photos. Use these AI-driven categories to quickly find and manage your images.
By organizing your photos before deleting them, you can streamline the process and ensure that you only remove the images you no longer need. This proactive approach saves time and reduces the risk of accidental deletions.
8. Common Mistakes to Avoid When Mass Deleting Photos
Mass deleting photos can be a quick and efficient way to manage your Google Photos library, but it’s easy to make mistakes. Here are some common pitfalls to avoid:
- Not Backing Up First: The most critical mistake is not backing up your photos before deleting them. Always ensure you have a backup in case you accidentally delete something important.
- Deleting Without Reviewing: Avoid blindly selecting and deleting large batches of photos without reviewing them. Take the time to scroll through and ensure you’re not deleting precious memories.
- Deleting From All Devices: Remember that deleting photos from Google Photos will remove them from all synced devices. Be sure you want to delete them everywhere before proceeding.
- Not Emptying the Trash: Photos moved to the trash still take up storage space. Don’t forget to empty the trash to permanently delete the photos and free up space.
- Using Unreliable Extensions: As mentioned earlier, using untrusted browser extensions can pose security and privacy risks. Stick to manual methods or thoroughly vetted extensions.
- Deleting Shared Photos: Be cautious when deleting photos from shared albums or collaborations. Your deletions might affect others who have access to those albums.
- Forgetting About Hidden Albums: Check your hidden or archived albums before deleting to ensure you’re not accidentally removing important photos stored there.
- Ignoring Storage Saver Settings: If you’re using the Storage saver option, be aware that deleting the original high-quality versions will leave you with only the compressed versions.
- Rushing the Process: Take your time when mass deleting photos. Rushing can lead to mistakes and accidental deletions.
- Not Checking for Duplicates: Before deleting, check for duplicates. Google Photos can help identify these, ensuring you don’t delete unique images unnecessarily.
Avoiding these common mistakes can help you mass delete photos safely and efficiently, keeping your Google Photos library organized and your memories protected.

9. Alternative Solutions for Managing Google Photos Storage
Mass deleting photos is just one way to manage your Google Photos storage. Here are some alternative solutions to consider:
- Upgrade Your Google One Storage: The simplest solution is to upgrade to a paid Google One plan. This gives you more storage space, allowing you to keep all your photos and videos without deleting anything.
- Use the Storage Saver Quality: Google Photos offers a “Storage saver” option that compresses your photos and videos, reducing their file size. This allows you to store more content without using as much storage space.
- Regularly Review and Delete: Make it a habit to regularly review your Google Photos library and delete any unnecessary or low-quality photos and videos. This helps prevent your storage from filling up too quickly.
- Download and Delete: Download your photos and videos to an external hard drive or another cloud storage service, then delete them from Google Photos. This frees up space while still allowing you to keep your memories.
- Archive Infrequently Accessed Photos: Use the archive feature to hide photos and videos that you don’t access frequently. This keeps your main library clean and organized.
- Optimize Video Quality: Reduce the resolution of your videos before uploading them to Google Photos. Lower-resolution videos take up less storage space.
- Use a Different Photo Management Service: Consider using a different photo management service that offers more storage space or better storage options.
- Turn Off Backup for Certain Folders: If you’re using Google Photos to back up your entire phone, turn off backup for folders that contain unnecessary images, such as screenshots or downloaded files.
- Compress Photos Before Uploading: Use a photo compression tool to reduce the file size of your photos before uploading them to Google Photos.
- Take Advantage of Google’s AI Features: Use Google Photos’ AI features to identify and remove duplicates, blurry photos, and other unnecessary images.
These alternative solutions can help you manage your Google Photos storage more effectively, reducing the need for frequent mass deletions.
10. Maintaining Your Photo Library: Best Practices
Maintaining an organized and efficient photo library requires ongoing effort. Here are some best practices to keep your Google Photos in top shape:
- Regular Backups: Schedule regular backups of your Google Photos library to an external hard drive or another cloud storage service. This ensures you always have a copy of your memories in case something goes wrong.
- Consistent Organization: Develop a consistent system for organizing your photos, such as using albums, tags, and descriptions. This makes it easier to find and manage your photos in the future.
- Frequent Reviews: Regularly review your Google Photos library and delete any unnecessary or low-quality photos and videos. This prevents your storage from filling up and keeps your library clean.
- Utilize AI Features: Take advantage of Google Photos’ AI features to identify and remove duplicates, blurry photos, and other unwanted images.
- Properly Tag Photos: Tag your photos with relevant information, such as the date, location, and people in the photo. This makes it easier to search for and find specific photos.
- Create Albums for Events: Create albums for specific events, such as vacations, birthdays, and holidays. This helps you keep your photos organized and makes it easier to share them with others.
- Use Descriptive Titles: Use descriptive titles for your photos and albums. This makes it easier to understand what the photo is about and helps you find it in the future.
- Stay Updated: Keep your Google Photos app and other photo management software up to date. This ensures you have access to the latest features and security updates.
- Monitor Storage Usage: Regularly monitor your Google Photos storage usage to ensure you’re not running out of space.
- Share Sparingly: Be mindful of the photos you share with others. Avoid sharing sensitive or personal information that could compromise your privacy.
By following these best practices, you can maintain an organized and efficient Google Photos library that you’ll enjoy for years to come.

FAQ: Mass Deleting Photos on Google Photos
Here are some frequently asked questions about mass deleting photos on Google Photos:
-
Can I undo a mass deletion in Google Photos?
Yes, you can undo a mass deletion if you act quickly. Deleted photos are moved to the trash, where they remain for 60 days before being permanently deleted. You can restore them from the trash during this period.
-
How do I empty the trash in Google Photos?
To empty the trash, go to the “Library” tab, select “Trash,” and then click “Empty trash” in the top-right corner. Confirm that you want to permanently delete the items.
-
Will deleting photos from Google Photos delete them from my phone?
Yes, if you have sync enabled, deleting photos from Google Photos will also delete them from your phone. Be sure you want to delete them everywhere before proceeding.
-
How do I stop Google Photos from syncing with my phone?
To stop syncing, go to the Google Photos app settings and turn off the “Backup & sync” option. This will prevent Google Photos from automatically backing up and syncing your photos.
-
Is there a limit to how many photos I can delete at once?
Google Photos doesn’t have a specific limit, but deleting very large batches of photos at once can sometimes cause performance issues. It’s best to delete in smaller batches for optimal performance.
-
Can I delete photos from a shared album?
Yes, you can delete photos from a shared album, but be aware that your deletions will affect others who have access to the album.
-
How do I find duplicate photos in Google Photos?
Google Photos can automatically identify duplicate photos. Go to the “Search” tab and look for the “Duplicates” option to find and remove duplicate images.
-
What happens to photos I delete from Google Photos?
Deleted photos are moved to the trash, where they remain for 60 days. After 60 days, they are permanently deleted from your Google account.
-
How do I download all my photos from Google Photos?
You can download all your photos using Google Takeout. Go to takeout.google.com, select Google Photos, and follow the instructions to create an export of your photos.
-
Can I recover permanently deleted photos from Google Photos?
No, once photos are permanently deleted from the trash, they cannot be recovered. This is why it’s so important to back up your photos before deleting them.
Conclusion
Mastering the art of mass deleting photos on Google Photos can significantly enhance your digital life. Whether you’re decluttering to free up storage, removing duplicates, or simply organizing your memories, the techniques outlined here will help you achieve a tidy and efficient photo library. Remember to back up your photos before you begin and to proceed with caution, especially when using browser extensions.
By following these guidelines, you can confidently manage your Google Photos, ensuring that your cherished memories are both safe and accessible. Want to learn more about photography techniques, find inspiration, and connect with a vibrant community of photographers? Visit dfphoto.net today to explore our extensive collection of tutorials, stunning photo galleries, and a community forum where you can share your work and get feedback. Join us at dfphoto.net and take your photography journey to the next level!
Address: 1600 St Michael’s Dr, Santa Fe, NM 87505, United States
Phone: +1 (505) 471-6001
Website: dfphoto.net