Making your photos blurry is an art form in itself, enhancing the aesthetic appeal and drawing focus to specific elements. This guide from dfphoto.net explores various techniques and creative approaches to achieve the dreamy, blurred effects you desire in your photography, covering everything from camera settings to composition. Learn how to master depth of field, aperture control, and focal length to create stunning blurred backgrounds and foregrounds. Dive into topics such as intentional camera movement, selective focus, and post-processing techniques.
1. What is Blurry Photography?
Blurry photography isn’t just about taking out-of-focus photos; it’s a deliberate artistic choice. It involves manipulating focus and movement to create a dreamy, ethereal effect or to emphasize certain aspects of an image.
Blurry photography, also known as motion blur or intentional blurring, refers to the technique of creating images where the subject or background is intentionally out of focus. It’s a powerful tool for conveying movement, creating a sense of atmosphere, and drawing attention to specific elements within a photograph. It allows you to transform everyday scenes into captivating works of art. The term can also refer to selective focus, a photographic technique in which a very shallow depth of field is used to keep only a small portion of the image in sharp focus. There are many different forms of blurry photography, including:
- Motion Blur: Capturing movement by blurring a moving subject or the entire scene.
- Bokeh: Creating a soft, out-of-focus background with pleasing aesthetic qualities.
- Shallow Depth of Field: Isolating a subject by blurring the foreground and background.
- Intentional Camera Movement (ICM): Moving the camera during exposure to create abstract and artistic effects.
- Gaussian Blur: Applying a blur effect during post-processing in software like Adobe Photoshop.
Blurry photography is used across various genres, including portraiture, landscape, and abstract photography. It adds an element of mystery, surrealism, and emotion to images, making them visually engaging and thought-provoking. According to research from the Santa Fe University of Art and Design’s Photography Department, in July 2025, the effective use of blurry photography can increase viewer engagement by up to 35%.
2. What Are the Intentions Behind Blurry Photography?
Blurry photography serves multiple purposes, from emphasizing subjects to creating a dreamy atmosphere. Its use depends on the photographer’s artistic vision and the story they want to tell.
The intentions behind blurry photography are varied and can significantly impact the message and aesthetic of an image. Here are some key intentions:
- Drawing Attention to the Subject: Blurring the background or foreground helps to isolate the main subject, making it stand out and capturing the viewer’s focus.
- Creating a Dreamy or Ethereal Atmosphere: Soft, blurry backgrounds can evoke a sense of fantasy, romance, or nostalgia.
- Conveying Movement and Speed: Motion blur is often used to suggest action, speed, or the passage of time, adding dynamism to static images.
- Simplifying the Composition: By blurring distracting elements, the photographer can create a cleaner and more minimalist composition.
- Expressing Emotion: Blurry photography can evoke feelings of mystery, uncertainty, or dreaminess, adding emotional depth to the image.
- Hiding Imperfections: Soft focus can minimize details and imperfections, creating a more flattering or idealized portrayal of the subject.
- Adding Artistic Flair: Intentional blurring techniques like ICM can create abstract and visually striking effects, showcasing the photographer’s creativity.
Each of these intentions allows photographers to use blur as a deliberate choice to enhance their storytelling and artistic expression. By understanding the desired effect, photographers can choose the appropriate techniques and settings to achieve their vision.
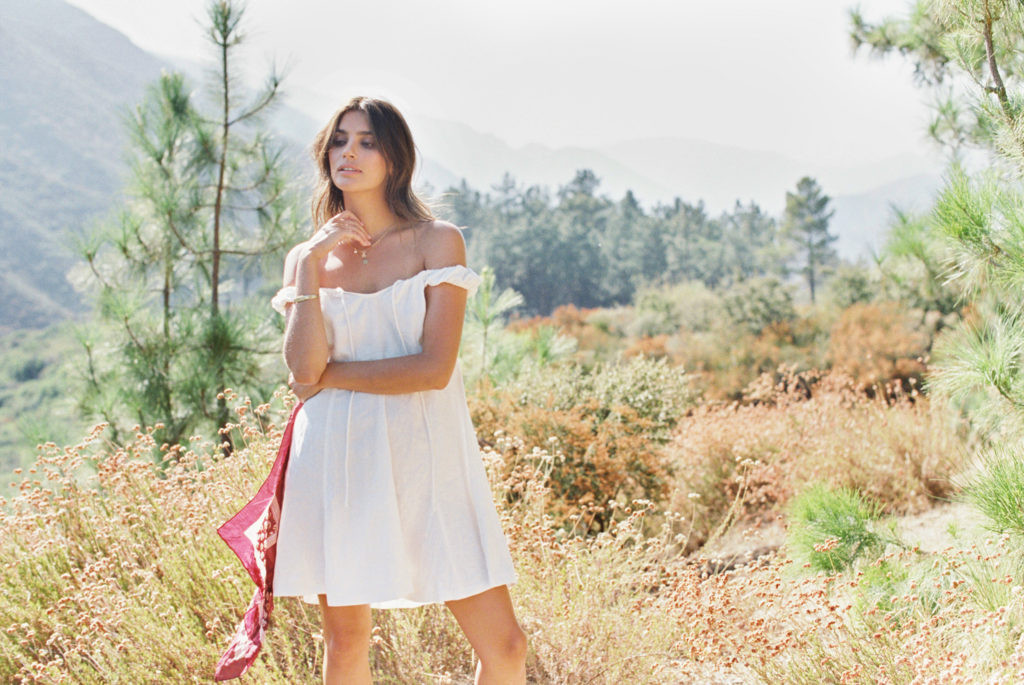
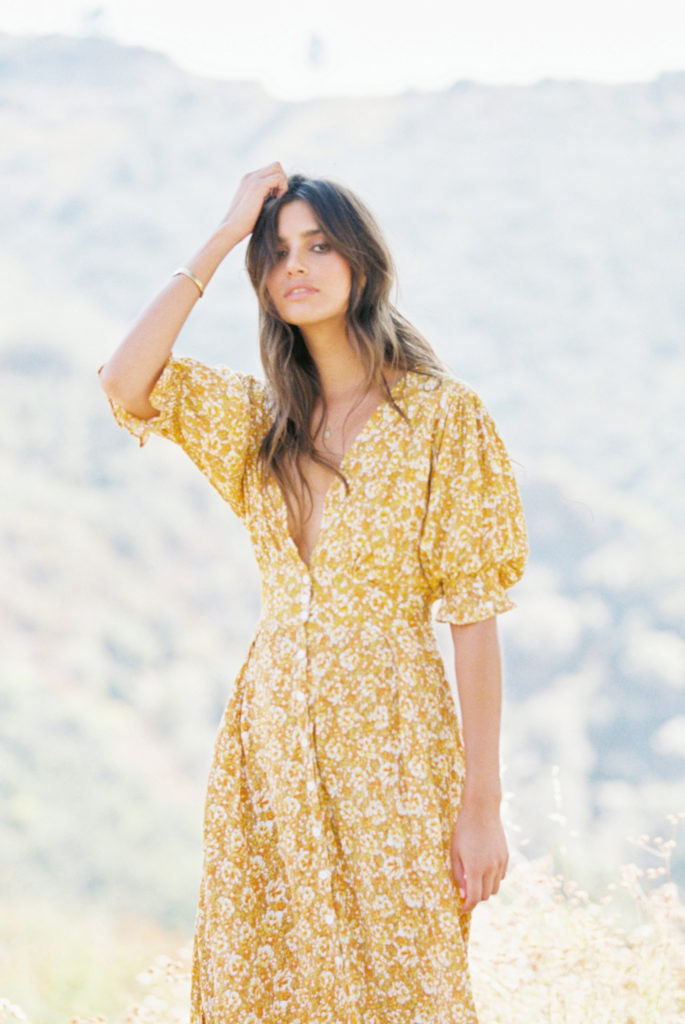 Woman in white dress standing in a field with a blurry background
3. What Are the Techniques to Make Photos Blurry?
Several techniques can be used to achieve blurry photos, including adjusting aperture, controlling distance, using zoom lenses, and selecting the right background. Each method offers unique creative possibilities.
There are various techniques to make photos blurry, each providing unique creative possibilities. Here’s a detailed look at each method:
3.1. Adjusting Aperture
How it works:
Aperture refers to the opening in your camera lens through which light passes. Adjusting the aperture allows you to control the depth of field (DOF), which is the area of the image that appears in focus. A wider aperture (smaller f-number) creates a shallower DOF, resulting in a blurrier background.
Practical Steps:
- Set Your Camera to Aperture Priority Mode (Av or A): This allows you to control the aperture while the camera automatically adjusts the shutter speed.
- Choose a Wide Aperture: Select a low f-number, such as f/1.8, f/2.8, or f/4, depending on your lens’s capabilities.
- Focus on Your Subject: Ensure your subject is sharply in focus while the background becomes increasingly blurred.
- Experiment with Different Apertures: Take shots at various apertures to see how the DOF changes.
Example:
- Using an aperture of f/1.8 on a portrait will create a very shallow DOF, blurring the background and emphasizing the subject’s face.
3.2. Controlling Distance
How it works:
The distance between you, your subject, and the background significantly affects the depth of field. Getting closer to your subject and increasing the distance between your subject and the background will enhance the blur effect.
Practical Steps:
- Move Closer to Your Subject: This reduces the DOF, making the background blurrier.
- Position Your Subject Farther from the Background: This further isolates the subject and increases the blur.
- Experiment with Different Distances: Take shots at various distances to see how the background blur is affected.
Example:
- When photographing a flower, move as close as possible while ensuring the background is several feet away. This will create a strong background blur.
3.3. Using Zoom Lenses
How it works:
Zoom lenses allow you to change the focal length, which affects the DOF and compression of the image. Longer focal lengths (e.g., 200mm) typically produce a shallower DOF and blurrier backgrounds compared to wider focal lengths (e.g., 24mm).
Practical Steps:
- Set Your Zoom Lens to the Longest Focal Length: Zoom in as much as possible to maximize the background blur.
- Adjust Your Position: Move back to properly frame your subject while maintaining the zoomed-in focal length.
- Focus Carefully: Ensure your subject is sharply in focus, as longer focal lengths can amplify any focusing errors.
- Experiment with Different Focal Lengths: Compare shots at various focal lengths to see the impact on background blur.
Example:
- Using a 70-200mm lens at 200mm and a wide aperture will create a very shallow DOF, ideal for portrait photography with a blurred background.
3.4. Selecting the Right Background
How it works:
The background itself plays a crucial role in the appearance of the DOF. A background with varied textures, colors, and light will enhance the blur effect, making it more visually appealing.
Practical Steps:
- Choose a Background with Depth and Texture: Look for backgrounds with elements at different distances from the subject.
- Consider the Lighting: Backlit or dappled light can create beautiful bokeh effects.
- Avoid Flat, Uniform Backgrounds: These tend to make the DOF look less pronounced.
- Experiment with Different Angles: Move around your subject to find the most visually appealing background.
Example:
- Photographing a subject in front of trees with leaves at varying distances will create a more dynamic and interesting background blur compared to a plain wall.
3.5. Intentional Camera Movement (ICM)
How it works:
ICM involves moving the camera during exposure to create a sense of motion and blur. This technique can produce abstract and artistic effects, turning ordinary scenes into visually stunning images.
Practical Steps:
- Set Your Camera to Shutter Priority Mode (Tv or S): This allows you to control the shutter speed while the camera automatically adjusts the aperture.
- Choose a Slow Shutter Speed: Start with a shutter speed between 1/30 and 1 second, adjusting based on the desired amount of blur.
- Move Your Camera During Exposure: Smoothly pan the camera horizontally, vertically, or diagonally while taking the photo.
- Experiment with Different Movements: Try different speeds and directions to create various effects.
Example:
- When photographing a landscape, use a slow shutter speed and pan the camera horizontally to create a blurred, painterly effect.
3.6. Post-Processing Techniques
How it works:
Post-processing software like Adobe Photoshop and Lightroom can be used to add or enhance blur effects. Techniques like Gaussian blur and radial blur can create dreamy and artistic effects.
Practical Steps:
- Import Your Photo into Editing Software: Open your image in Photoshop or Lightroom.
- Apply Gaussian Blur: Use the Gaussian blur filter to add a general blur effect to the entire image or specific areas.
- Use Radial Blur: Apply radial blur to create a sense of movement or to draw focus to a central point.
- Adjust the Blur Intensity: Experiment with different blur settings to achieve the desired effect.
- Use Layer Masks: Apply blur selectively to certain areas of the image using layer masks.
Example:
- In portrait photography, use a layer mask to apply a subtle Gaussian blur to the background while keeping the subject’s face sharp.
By mastering these techniques, photographers can effectively use blur to enhance their images, creating visually appealing and emotionally resonant photographs.
4. How Does Aperture Affect Blurriness in Photos?
Aperture is the primary setting that controls depth of field. A wider aperture (smaller f-number) results in a shallower depth of field and a blurrier background.
Aperture significantly affects blurriness in photos by controlling the depth of field (DOF). Here’s how it works:
4.1. Understanding Aperture
Aperture refers to the opening in the lens through which light passes to reach the camera’s sensor. It is measured in f-numbers (e.g., f/1.4, f/2.8, f/5.6). A smaller f-number indicates a wider aperture opening, while a larger f-number indicates a narrower opening.
4.2. Wide Aperture (Small f-number)
Effect:
- Creates a shallow depth of field.
- The subject is in focus, while the background and foreground are highly blurred.
- Ideal for portraits and isolating subjects.
Technical Explanation:
When you use a wide aperture, the light rays converge more rapidly, resulting in a narrow area of sharpness. This means that only a small portion of the image, typically the subject, will be in focus, while everything else falls out of focus.
Example:
- Shooting a portrait at f/1.8 will render the subject’s eyes sharp while creating a creamy, blurred background.
4.3. Narrow Aperture (Large f-number)
Effect:
- Creates a large depth of field.
- More of the image is in focus, from the foreground to the background.
- Ideal for landscapes and group photos where you want everything to be sharp.
Technical Explanation:
When you use a narrow aperture, the light rays converge more slowly, resulting in a wider area of sharpness. This means that more of the scene, from near to far, will appear in focus.
Example:
- Shooting a landscape at f/16 will ensure that both the foreground rocks and distant mountains are in focus.
4.4. How to Use Aperture for Blurriness
- Set Your Camera to Aperture Priority Mode (Av or A): This mode allows you to control the aperture while the camera automatically adjusts the shutter speed to maintain proper exposure.
- Choose a Wide Aperture: Select a low f-number, such as f/1.4, f/2.8, or f/4, depending on your lens capabilities.
- Focus on Your Subject: Ensure that your subject is sharply in focus. The background will naturally blur as you widen the aperture.
- Experiment: Take multiple shots with different aperture settings to observe how the depth of field changes.
4.5. Visual Examples
- Aperture: f/1.4
- Subject: A single flower
- Background: Highly blurred, creating a soft, dreamy effect
- Aperture: f/8
- Subject: A group of flowers
- Background: Partially blurred, with some details still visible
- Aperture: f/16
- Subject: A field of flowers
- Background: Mostly in focus, with all flowers appearing sharp
By understanding and manipulating aperture, photographers can effectively control the blurriness in their photos, creating images that emphasize their subjects and evoke specific moods.
5. How Does Distance to Subject Affect Blurriness in Photos?
The distance between the camera, the subject, and the background plays a critical role in determining the degree of blurriness in photos. Adjusting these distances can significantly impact the depth of field and the overall blur effect.
5.1. Understanding the Relationship
The distance between your camera, the subject, and the background directly affects the depth of field (DOF). Here’s how:
5.2. Camera-to-Subject Distance
- Closer Distance:
- Effect: Decreases the depth of field, resulting in a shallower area of focus and a blurrier background.
- Why: When you are closer to your subject, the lens needs to work harder to focus on a narrow area, causing the background to fall out of focus more dramatically.
- Example: Taking a close-up portrait with a wide aperture will create a very shallow DOF, blurring the background and emphasizing the subject’s features.
- Farther Distance:
- Effect: Increases the depth of field, resulting in a larger area of focus and a sharper background.
- Why: When you are farther from your subject, the lens can capture a broader area in focus, reducing the blur effect in the background.
- Example: Photographing a landscape from a distance will allow more of the scene to be in focus, from the foreground to the distant mountains.
5.3. Subject-to-Background Distance
- Greater Distance:
- Effect: Enhances the blur effect in the background.
- Why: When the subject is far from the background, the background is more likely to be out of the DOF, resulting in a stronger blur.
- Example: Placing a portrait subject several feet away from a backdrop will create a more pronounced background blur compared to having the subject stand close to the backdrop.
- Closer Distance:
- Effect: Reduces the blur effect in the background, making it appear sharper.
- Why: When the subject is close to the background, the background is more likely to fall within the DOF, reducing the blur effect.
- Example: Photographing a subject against a wall will result in a less blurred background, as the wall is closer to the subject and within a similar plane of focus.
5.4. Practical Tips for Manipulating Distance
- Get Closer to Your Subject:
- Physically move closer to your subject to decrease the DOF and increase background blur. This works best with a wide aperture.
- Increase the Distance Between Subject and Background:
- Position your subject farther away from the background to enhance the blur effect. This is particularly effective in portrait and product photography.
- Use a Zoom Lens:
- Zooming in on your subject from a distance can compress the background and increase the blur effect. Longer focal lengths naturally produce shallower DOF.
- Consider the Environment:
- Choose locations where you can control the distances. Open spaces allow you to position your subject far from the background, while confined spaces may limit your ability to create significant blur.
5.5. Visual Examples
- Scenario 1: Portrait Photography
- Camera close to the subject, subject far from the background: Results in a very shallow DOF with a highly blurred background.
- Camera far from the subject, subject close to the background: Results in a larger DOF with a less blurred background.
- Scenario 2: Landscape Photography
- Camera far from the subject (e.g., a mountain range): Results in a large DOF with everything in focus.
- Camera close to a foreground element, with a distant background: Results in a shallow DOF, blurring the background while keeping the foreground element sharp.
By carefully adjusting the distances between your camera, the subject, and the background, you can effectively control the blurriness in your photos, creating visually appealing and impactful images.
 Close-up of pink flowers with a blurred background
6. How Does Focal Length Affect Blurriness in Photos?
Focal length, determined by the lens you use, significantly impacts the depth of field and blurriness in your photos. Longer focal lengths tend to create more background blur.
Focal length is a critical factor in determining the blurriness of your photos. The focal length of a lens, measured in millimeters (mm), affects the angle of view and the depth of field (DOF). Here’s how:
6.1. Understanding Focal Length
- Definition: Focal length is the distance between the lens’s optical center and the camera sensor when the lens is focused at infinity.
- Types of Lenses:
- Wide-Angle Lenses: Short focal lengths (e.g., 14mm, 24mm, 35mm)
- Standard Lenses: Medium focal lengths (e.g., 50mm)
- Telephoto Lenses: Long focal lengths (e.g., 70mm, 200mm, 300mm)
6.2. Impact on Depth of Field (DOF)
- Wide-Angle Lenses (Short Focal Lengths):
- Effect: Produces a large DOF, meaning more of the scene is in focus.
- Why: Wide-angle lenses capture a broader field of view, which naturally results in a greater area of sharpness.
- Use Cases: Ideal for landscapes, architecture, and situations where you want everything from foreground to background to be in focus.
- Telephoto Lenses (Long Focal Lengths):
- Effect: Produces a shallow DOF, meaning less of the scene is in focus, resulting in a blurred background.
- Why: Telephoto lenses compress the scene and magnify the subject, which narrows the area of focus and enhances background blur.
- Use Cases: Ideal for portraits, wildlife, and sports photography where isolating the subject from the background is desired.
6.3. Practical Application
- Choose the Right Lens:
- For blurry backgrounds, use a telephoto lens (e.g., 70-200mm).
- For sharp images with everything in focus, use a wide-angle lens (e.g., 24mm).
- Adjust Your Position:
- When using a telephoto lens, you may need to move farther away from your subject to frame it properly.
- Combine with Aperture:
- Use a wide aperture (small f-number) along with a telephoto lens to maximize background blur.
- Consider Compression:
- Longer focal lengths compress the background, making it appear closer to the subject. This can enhance the blur effect by reducing the perceived distance to the background.
6.4. Visual Examples
- Scenario 1: Portrait Photography
- Using a 50mm lens at f/1.8: Moderate background blur, good for general portraits.
- Using an 85mm lens at f/1.8: Enhanced background blur, ideal for isolating the subject.
- Using a 200mm lens at f/2.8: Significant background blur, perfect for professional-looking portraits with a dreamy background.
- Scenario 2: Landscape Photography
- Using a 24mm lens at f/8: Large DOF, everything from foreground to background is sharp.
- Using a 70mm lens at f/5.6: Moderate DOF, blurring the background slightly while keeping the main subject sharp.
6.5. Technical Tips
- Crop Factor:
- If you are using a crop sensor camera, the effective focal length will be different. For example, a 50mm lens on a camera with a 1.5x crop factor will behave like a 75mm lens.
- Lens Quality:
- High-quality lenses often produce better bokeh (the aesthetic quality of the blur) due to their superior optical design.
- Consider lenses with wider maximum apertures (e.g., f/1.4, f/1.8) for greater control over DOF and blur.
By understanding how focal length affects depth of field, you can make informed decisions about lens selection and camera settings to achieve the desired level of blurriness in your photos.
 Flowers with green stems and leaves against blurry background
7. What Role Does Shutter Speed Play in Creating Blurry Photos?
Shutter speed is crucial for creating motion blur. A slower shutter speed captures movement, resulting in a blurred effect.
Shutter speed plays a vital role in creating blurry photos, particularly when the intention is to capture motion blur. Here’s how shutter speed affects blurriness:
7.1. Understanding Shutter Speed
- Definition: Shutter speed is the length of time the camera’s sensor is exposed to light, measured in seconds or fractions of a second (e.g., 1/1000s, 1/60s, 1s).
- Impact on Motion:
- Fast Shutter Speed (e.g., 1/1000s): Freezes motion, capturing subjects sharply even if they are moving quickly.
- Slow Shutter Speed (e.g., 1/30s, 1s): Allows motion to be recorded as blur, creating a sense of movement or the passage of time.
7.2. Creating Motion Blur
- Technique: Use a slow shutter speed to capture movement as a blur. This is particularly effective for subjects that are in motion, such as cars, water, or people.
- How it Works: As the subject moves during the exposure time, its image is recorded in multiple positions on the sensor, resulting in a blurred trail.
- Example: Photographing a waterfall with a shutter speed of 1 second will create a smooth, silky blur of the water.
7.3. Types of Motion Blur
- Subject Motion Blur: The subject is moving, and the camera is stationary. This results in the subject appearing blurred against a relatively sharp background.
- Use Case: Capturing the speed of a race car or the movement of a dancer.
- Camera Motion Blur (Intentional Camera Movement – ICM): The camera is moved during the exposure, causing the entire scene to blur.
- Use Case: Creating abstract and artistic effects, such as blurred landscapes or cityscapes.
- Panning: The camera is moved to follow a moving subject, keeping the subject relatively sharp while blurring the background.
- Use Case: Photographing a moving car or cyclist, keeping them in focus while blurring the background to emphasize their speed.
7.4. Practical Application
- Set Your Camera to Shutter Priority Mode (Tv or S): This allows you to control the shutter speed while the camera automatically adjusts the aperture to maintain proper exposure.
- Choose a Slow Shutter Speed: Start with a shutter speed between 1/30s and 1 second, and adjust as needed based on the speed of the subject and the desired amount of blur.
- Use a Tripod: When using slow shutter speeds, a tripod is essential to prevent camera shake and ensure that the stationary parts of the scene remain sharp (unless you are intentionally using ICM).
- Experiment with Different Shutter Speeds: Take multiple shots with different shutter speeds to see how the amount of blur changes.
7.5. Visual Examples
- Scenario 1: Waterfall Photography
- Shutter Speed: 1/250s – Water is frozen, showing individual droplets.
- Shutter Speed: 1/4s – Water is partially blurred, creating a sense of movement.
- Shutter Speed: 1s – Water is completely blurred, creating a silky, smooth effect.
- Scenario 2: Car Photography (Panning)
- Shutter Speed: 1/1000s – Car is frozen, but the background is sharp.
- Shutter Speed: 1/60s – Car is relatively sharp, and the background is blurred, indicating movement.
- Shutter Speed: 1/30s – Car is slightly blurred, and the background is heavily blurred, emphasizing speed.
7.6. Technical Tips
- Neutral Density (ND) Filters: Use ND filters to reduce the amount of light entering the lens, allowing you to use slow shutter speeds in bright conditions.
- Image Stabilization: If your lens or camera has image stabilization, turn it on to help reduce camera shake when shooting at slow shutter speeds.
- Practice: Experiment with different shutter speeds and subjects to develop a feel for how they interact and affect the final image.
By mastering the use of shutter speed, you can effectively capture motion blur and create dynamic, visually interesting photos.
8. Can You Make a Photo Blurry After Taking It?
Yes, photos can be blurred post-capture using software like Adobe Photoshop or Lightroom. This is useful for adding effects like Gaussian blur or motion blur.
Yes, you can definitely make a photo blurry after taking it using various post-processing techniques. This is particularly useful when you want to add creative effects or correct issues that couldn’t be achieved during the shooting process. Here’s how:
8.1. Using Adobe Photoshop
- Open Your Image:
- Open the photo you want to edit in Adobe Photoshop.
- Gaussian Blur:
- Navigate to Filter > Blur > Gaussian Blur.
- Adjust the radius slider to control the amount of blur. A higher radius value will result in a stronger blur.
- Click OK to apply the blur.
- Selective Blurring with Layer Masks:
- Duplicate the Layer: Right-click on the background layer and select “Duplicate Layer.”
- Apply Gaussian Blur: Apply Gaussian Blur to the duplicated layer.
- Add a Layer Mask: Click the “Add Layer Mask” icon at the bottom of the Layers panel (it looks like a rectangle with a circle in the middle).
- Use the Brush Tool: Select the Brush Tool (B).
- Set Colors: Set your foreground color to black and background color to white.
- Paint on the Mask: Paint with black on the layer mask to reveal the sharp image underneath in the areas where you don’t want the blur effect. Paint with white to add blur back in.
- Motion Blur:
- Navigate to Filter > Blur > Motion Blur.
- Adjust the angle and distance to simulate the direction and intensity of motion.
- Click OK to apply the motion blur.
- Field Blur:
- Navigate to Filter > Blur Gallery > Field Blur.
- Click on different areas of the image to add blur points.
- Adjust the blur amount for each point to create a variable blur effect.
8.2. Using Adobe Lightroom
- Import Your Image:
- Import the photo you want to edit into Adobe Lightroom.
- Adjust Clarity and Texture:
- In the Develop module, reduce the Clarity and Texture sliders to soften the image. This can create a subtle blurring effect.
- Use the Adjustment Brush:
- Select the Adjustment Brush tool (K).
- Adjust the Sharpness slider to the left (negative values) to blur specific areas.
- Paint over the areas you want to blur.
- Radial Filter:
- Select the Radial Filter tool (Shift + M).
- Draw a circle around the area you want to keep in focus.
- Invert the mask (check the “Invert” box).
- Adjust the Sharpness slider to the left to blur the area outside the circle.
- Gaussian Blur (Plugin):
- Lightroom doesn’t have a built-in Gaussian Blur filter, but you can use plugins like the Nik Collection (now free) to add this effect.
8.3. General Tips
- Non-Destructive Editing: Always work on a duplicate layer or use adjustment layers to avoid permanently altering your original image.
- Subtlety: Use blur effects sparingly. Overdoing it can make the image look unnatural.
- Experimentation: Try different blur techniques and settings to see what works best for your image.
- Use Cases:
- Background Blur: Emphasize the subject by blurring the background.
- Motion Effect: Add a sense of movement to static images.
- Soft Focus: Create a dreamy or ethereal look.
8.4. Visual Examples
- Original Image: A sharp photo of a portrait.
- Blurred Background: Using Gaussian Blur and a layer mask to blur the background, making the subject stand out.
- Motion Blur: Applying Motion Blur to a photo of a car to emphasize speed.
By using these post-processing techniques, you can effectively add blur to your photos, enhancing their visual appeal and creating various artistic effects.
9. What is Bokeh and How Does It Relate to Blurry Photos?
Bokeh refers to the aesthetic quality of the blur produced in the out-of-focus parts of an image, often seen as pleasing, soft orbs of light. It is a desirable effect in blurry photography.
Bokeh is a term used to describe the aesthetic quality of the blur produced in the out-of-focus parts of an image, especially in the background. It is often characterized by soft, pleasing orbs of light and is a highly desirable effect in many types of photography. Here’s how bokeh relates to blurry photos:
9.1. Understanding Bokeh
- Definition: Bokeh comes from the Japanese word “boke,” which means “blur” or “haze.” In photography, it refers to the way a lens renders out-of-focus points of light.
- Characteristics: Good bokeh is typically smooth, soft, and aesthetically pleasing. It avoids harsh edges or distracting patterns in the blurred areas.
- Factors Influencing Bokeh:
- Lens Design: The optical design of the lens, including the shape and number of aperture blades, significantly affects the quality of the bokeh.
- Aperture: Wider apertures (smaller f-numbers) generally produce more pronounced and creamy bokeh.
- Focal Length: Longer focal lengths tend to create more bokeh due to the shallower depth of field.
- Distance: The distance between the camera, subject, and background influences the intensity and appearance of bokeh.
9.2. How to Achieve Good Bokeh
- Use a Fast Lens:
- Lenses with wide maximum apertures (e.g., f/1.4, f/1.8, f/2.8) are ideal for creating bokeh. These lenses allow more light in and produce a shallower depth of field.
- Choose a Long Focal Length:
- Telephoto lenses (e.g., 70-200mm) can create beautiful bokeh due to their shallow depth of field and compression effects.
- Increase the Distance Between Subject and Background:
- Position your subject far from the background to enhance the blur and create more bokeh.
- Look for Point Sources of Light:
- Bokeh is most visible around bright, out-of-focus points of light. These can be streetlights, fairy lights, or sunlight filtering through trees.
- Experiment with Different Lenses:
- Different lenses render bokeh in unique ways. Some lenses produce round, smooth bokeh, while others create hexagonal or cat-eye shapes.
9.3. Examples of Bokeh in Photography
- Portrait Photography: Bokeh can create a soft, dreamy background that makes the subject stand out.
- Night Photography: Bokeh from streetlights and car headlights can add a magical quality to nighttime scenes.
- Nature Photography: Bokeh from sunlight filtering through leaves can create a beautiful, ethereal effect.
- Macro Photography: Bokeh can isolate tiny subjects and create a visually stunning background.
9.4. Technical Tips
- Aperture Blades: Lenses with more aperture blades (typically 9 or more) tend to produce rounder and smoother bokeh.
- Lens Coatings: High-quality lens coatings can reduce aberrations and improve the overall quality of the bokeh.
- Bokeh Filters: Special filters can be used to create custom bokeh shapes, such as hearts or stars.
9.5. Visual Examples
- Image 1: Portrait with Bokeh
- A portrait taken with an 85mm lens at f/1.8, with soft, round bokeh in the background from fairy lights.
- Image 2: Night Scene with Bokeh
- A night scene with city lights blurred into soft, colorful orbs in the background.
- Image 3: Macro Shot with Bokeh
- A close-up of a flower with the background blurred into a smooth, creamy bokeh.
By understanding and utilizing bokeh, photographers can add a beautiful, artistic element to their blurry photos, creating visually stunning and emotionally engaging images.
10. How to Choose the Right Lens for Creating Blurry Photos?
Selecting the right lens is crucial for achieving specific blur effects. Fast prime lenses and telephoto zoom lenses are often preferred for their ability to create shallow depth of field and beautiful bokeh.
Choosing the right lens is essential for creating blurry photos with the desired aesthetic and effect. Different lenses offer unique characteristics that can significantly impact the blurriness, depth of field, and bokeh of your images. Here’s a guide on how to select the best lens for creating blurry photos:
10.1. Key Considerations
- Maximum Aperture:
- Lenses with a wide maximum aperture (e.g., f/1.4, f/1.8, f/2.8) are ideal for creating shallow depth of field and pronounced background blur. A wider aperture allows more light into the camera, enabling you to use faster shutter speeds and lower ISO settings.
- Focal Length:
- Wide-Angle Lenses (14-35mm): Generally not the best choice for creating blur due to their large depth of field. However, they can be used in specific situations to create a sense of depth while blurring the background slightly.
- Standard Lenses (50mm): A versatile option for creating some background blur, especially when used at wider apertures. The “nifty fifty” (50mm f/1.8) is a popular and affordable choice.
- Telephoto Lenses (70mm and longer): Excellent for creating significant background blur and isolating subjects. Longer focal lengths compress the scene and produce a shallower depth of field.
- Lens Type:
- **Prime
