Are you looking to elevate your photography game by crafting unique and personalized photo backdrops? At dfphoto.net, we’ll guide you through creating stunning backdrops, enhancing your visual storytelling and artistic vision. Unlock a world of creative possibilities, from geometric designs to floral arrangements, and turn ordinary photoshoots into extraordinary visual experiences. Let’s explore the art of backdrop design and discover some backdrop alternatives together.
1. Understanding the Basics of Photo Backdrops
Photo backdrops are essential for setting the scene and mood in photography. They provide a non-distracting background, allowing the subject to stand out. Understanding the basic elements ensures effective backdrop creation.
1.1. Why Use a Photo Backdrop?
Photo backdrops are used to eliminate distractions, control the environment, and enhance the overall aesthetic of a photograph. They help to:
- Focus Attention: Keeps the viewer’s focus on the subject.
- Set the Mood: Creates a specific atmosphere or theme.
- Control the Environment: Provides a consistent background regardless of location.
- Add Professionalism: Gives photos a polished, studio-quality look.
1.2. Types of Backdrops
Various types of backdrops cater to different photographic needs. Common types include:
- Paper Backdrops: Affordable and available in many colors, ideal for studio use.
- Fabric Backdrops: Versatile and reusable, suitable for various themes and settings.
- Vinyl Backdrops: Durable and easy to clean, perfect for high-traffic photography.
- Muslin Backdrops: Lightweight and customizable, allowing for creative painting and dyeing.
- Digital Backdrops: Used in post-processing to add or change backgrounds digitally.
1.3. Essential Materials
Gathering the right materials is crucial for creating a successful photo backdrop. Essential materials include:
| Material | Use |
|---|---|
| Backdrop Stand | Provides a stable support for the backdrop. |
| Clamps | Secures the backdrop to the stand, preventing wrinkles and movement. |
| Fabric/Paper/Vinyl | The primary material for the backdrop itself. |
| Scissors/Cutting Tools | For cutting and shaping the backdrop material. |
| Paint/Markers | For adding designs, patterns, or colors to the backdrop. |
| Adhesive | For attaching decorative elements to the backdrop. |
2. DIY Photo Backdrop Ideas for Studio Photography
Transform your studio photography with these creative DIY backdrop ideas. Perfect for adding a professional and personalized touch to your photoshoots.
2.1. Geometric DIY Photo Backdrop
Geometric backdrops are fantastic for enhancing portraits and adding a touch of style. You can easily create these with cardboard, acrylics, and a plain-colored background.
How to create:
- Cut cardboard into various shapes like triangles, circles, and hexagons.
- Paint the shapes with acrylics in a color palette that complements your model’s wardrobe.
- Attach the painted shapes to a plain-colored wall, cloth, or paper.
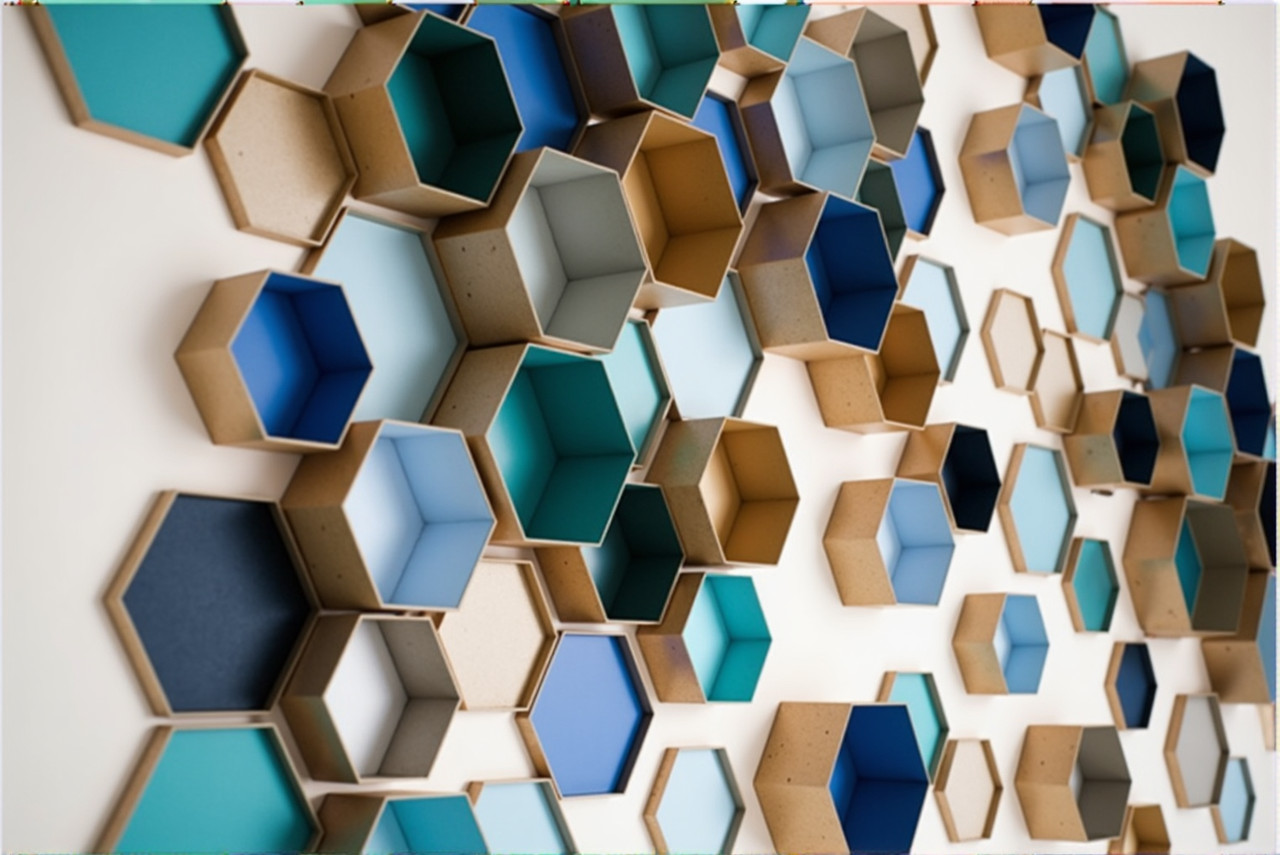 Geometric DIY wall
2.2. 3D Triangles for Trippy Backdrops
Add a three-dimensional effect to your backdrops with 3D triangles, perfect for creating an eye-catching visual impact.
How to create:
- Create paper pyramids by attaching four plain triangles.
- Place and attach the pyramids together on a plain background.
- Watch your pictures come to life with this easy-to-make optical illusion.
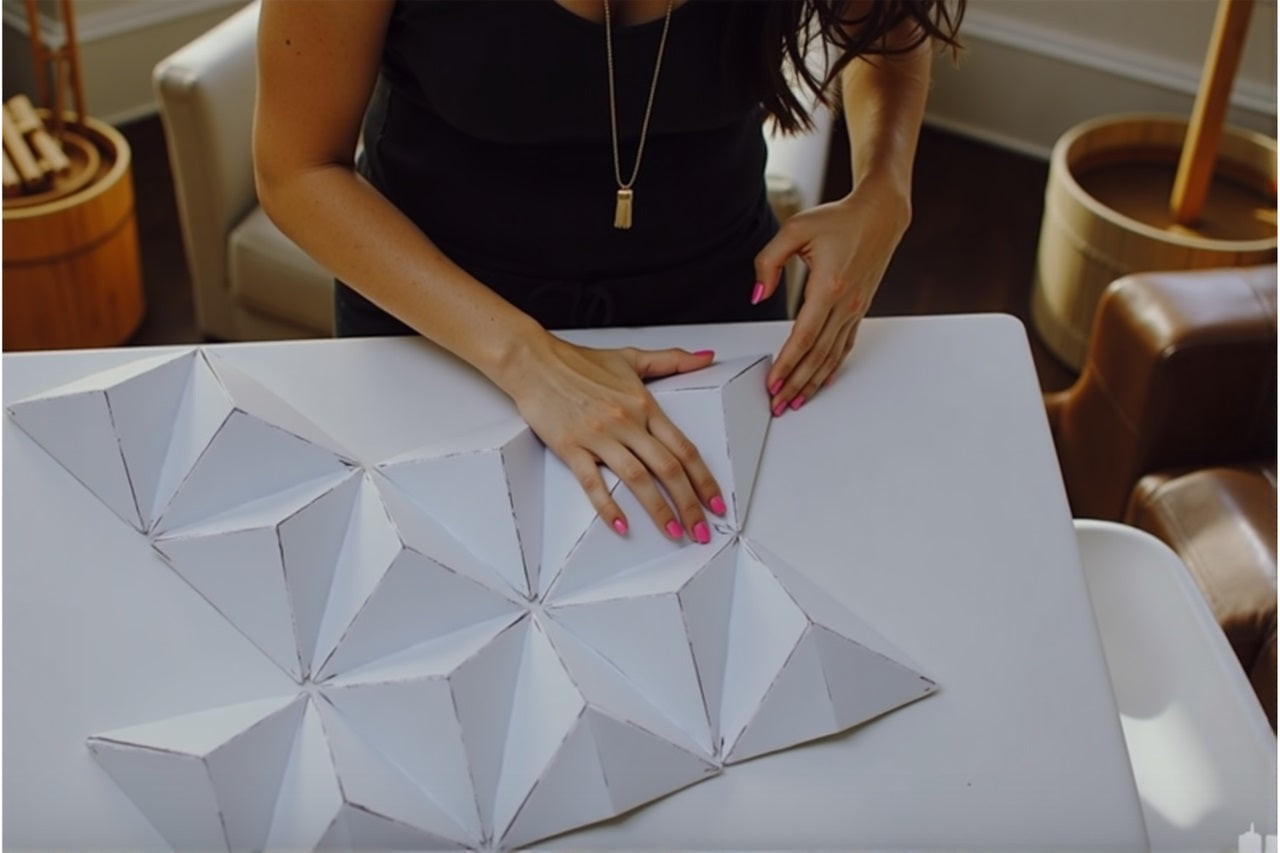 3D Triangles
2.3. Tissue Paper or Flower Photo Backdrop
Use tissue paper to create a delicate and floral-like backdrop. This budget-friendly option adds texture and color to your photos.
How to create:
- Paint tissue paper with your favorite colors.
- Wrinkle the painted tissue paper and attach it to a piece of cloth or cardboard.
- Choose harmonious colors that blend well together to resemble flowers.
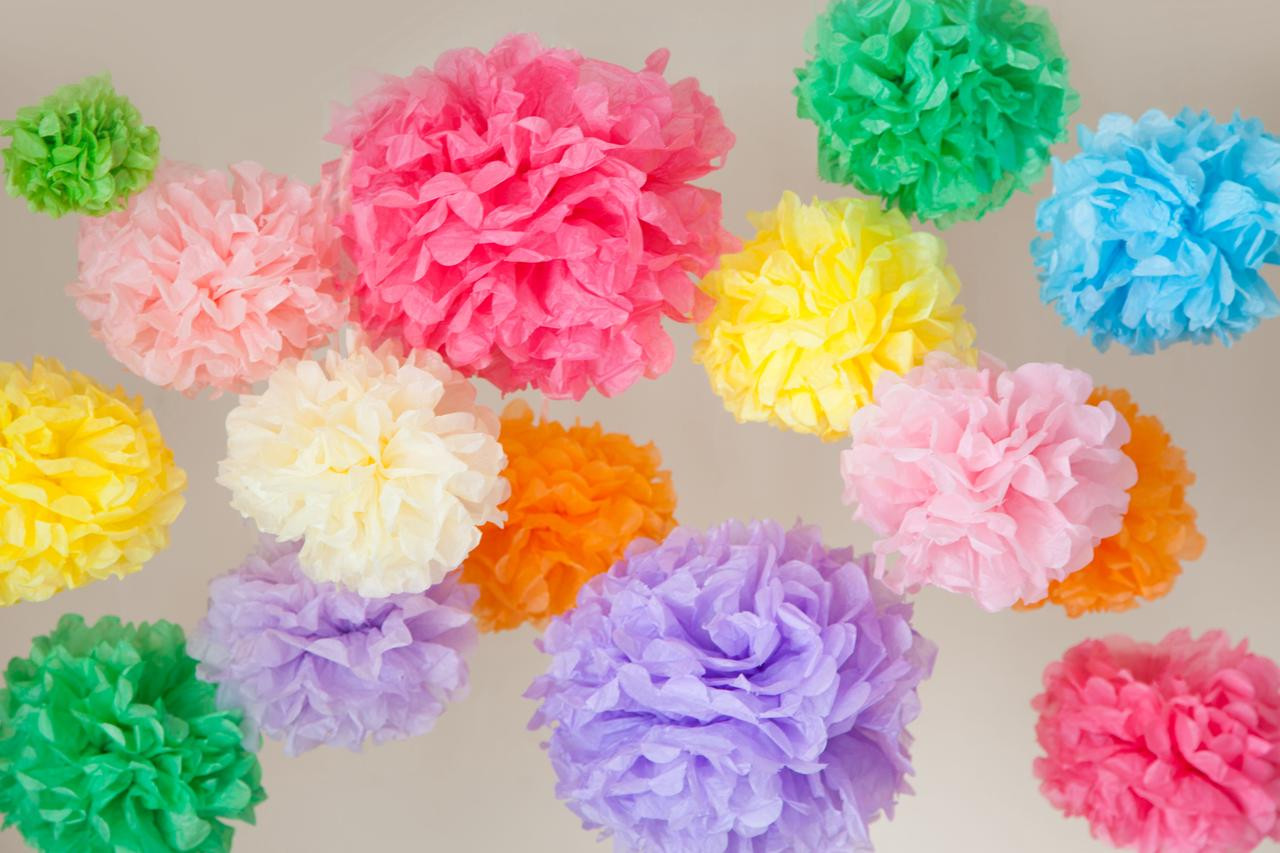 Tissue Paper for Flower Backdrop
2.4. Magic Fairy Lights Backdrop
Fairy lights add a cozy, mystical vibe to any photograph. This backdrop is perfect for creating magical and aesthetic photos.
How to create:
- Hang fairy lights all over a plain, clear setting.
- Let the lights create the magic.
- Add more personalized touches according to the specific shooting requirements.
2.5. Coffee Filter Backdrop
Reuse coffee filters to create a sustainable and unique backdrop. This eco-friendly option adds texture and an interesting visual element.
How to create:
- Color coffee filters with your favorite color scheme using watercolors.
- Thread the colored filters onto a long string using a needle and thread.
- Hang the strings close to one another to create a full backdrop.
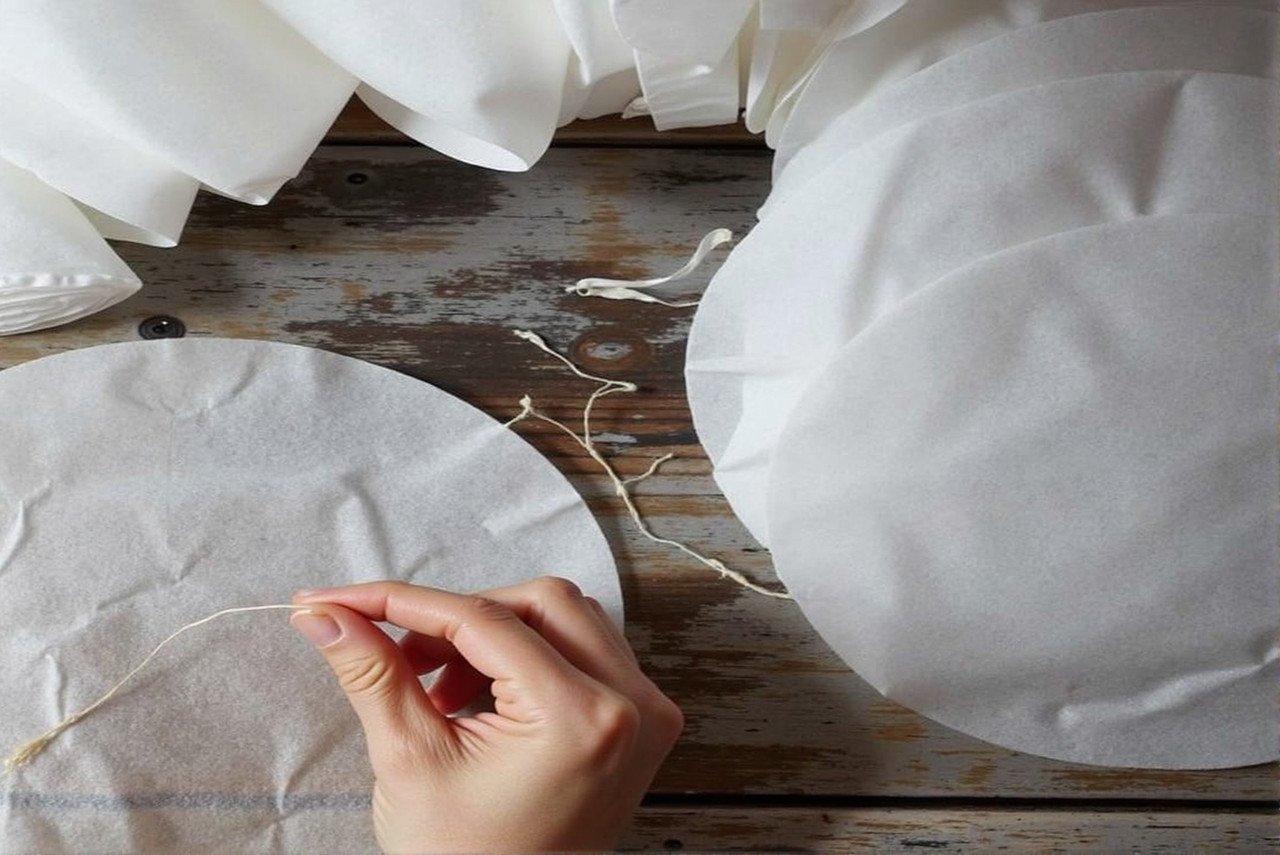 Coffee Filter
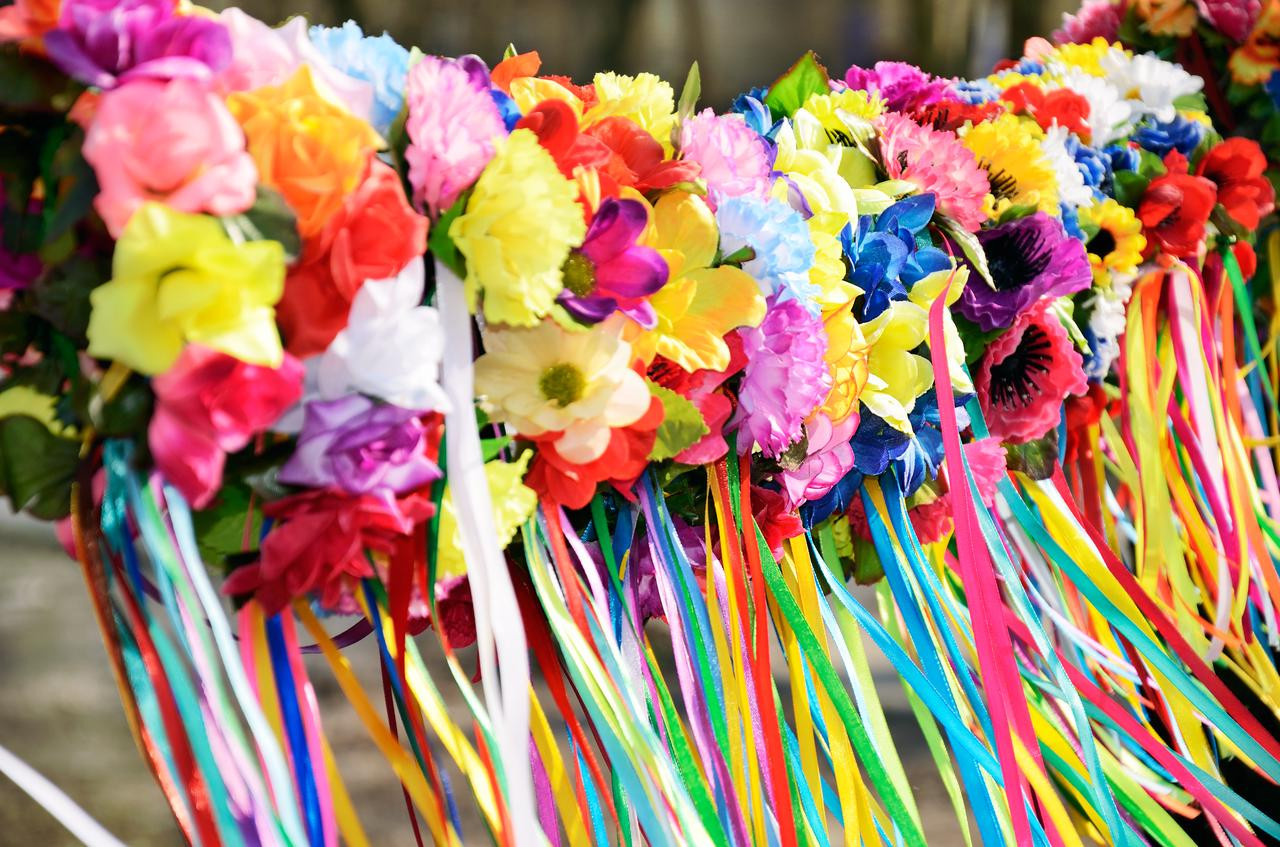
2.6. Ribbon Drape and Flowers Backdrop
Create a romantic and poetic backdrop with ribbon drapes and fresh flowers. This charming combination is perfect for adding elegance to your photos.
How to create:
- Buy your favorite colored ribbon drape.
- Find flowers that match or complement the ribbon colors.
- Attach the fresh flowers to the ribbon drape and hang them on your chosen surface.
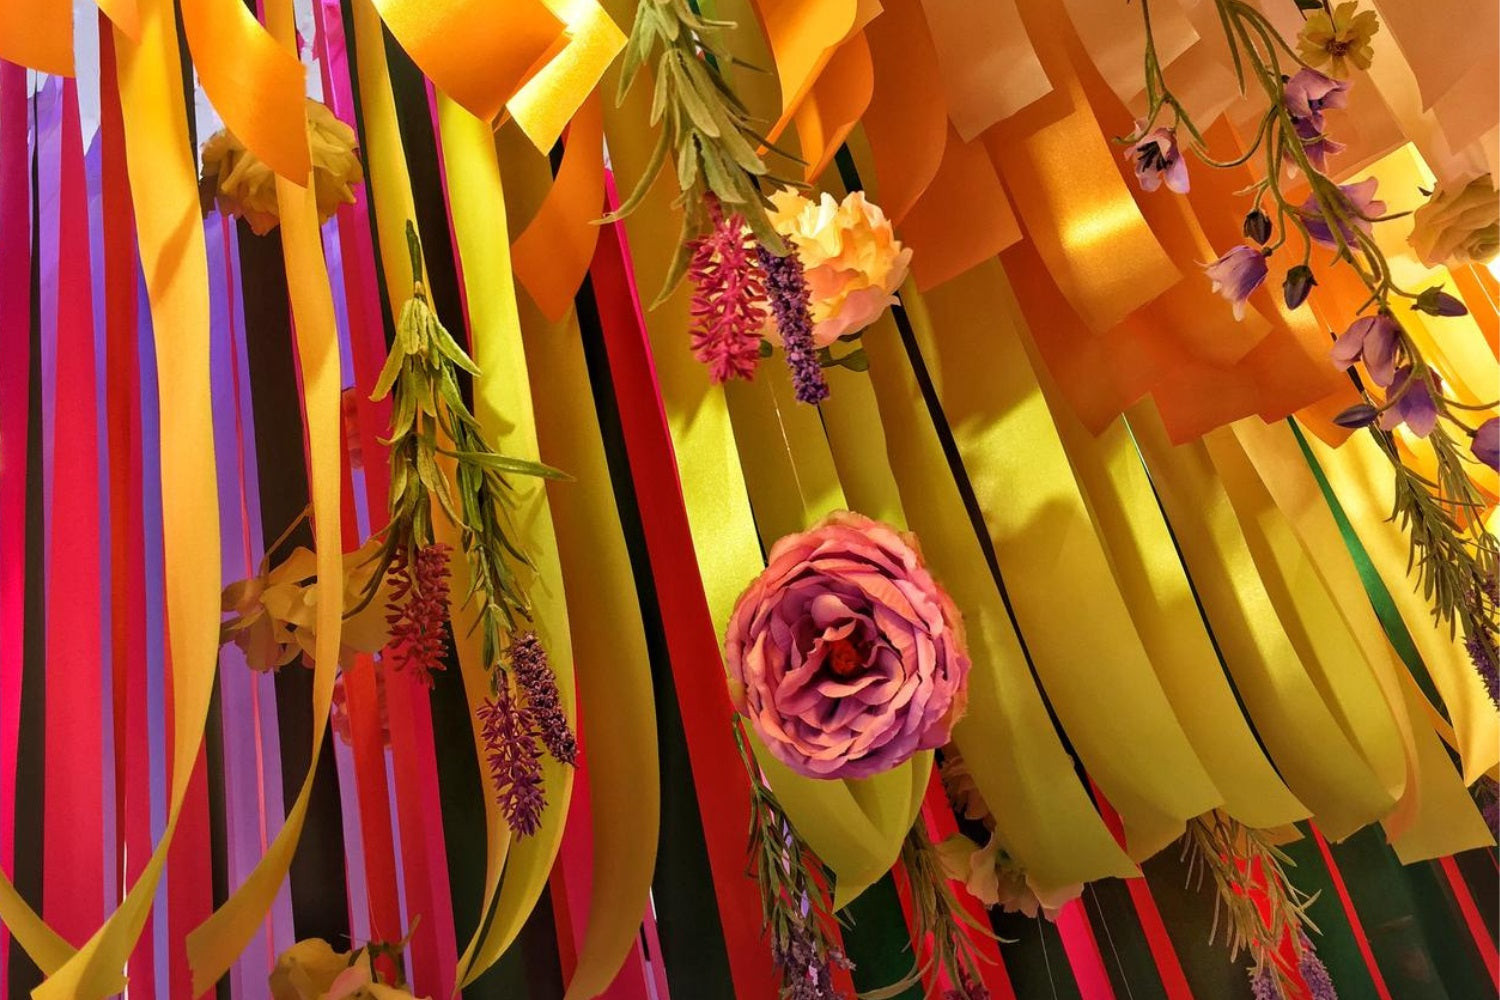 Ribbon drape and flowers
2.7. Fabric Garland Aesthetic Backdrop
Personalize your backdrop with fabric garlands, allowing you to choose your favorite fabrics and style your setting exactly how you want.
How to create:
- Find different bits and pieces of fabric.
- Cut them to your preferred size.
- Hang them together on a large surface to create a customized backdrop.
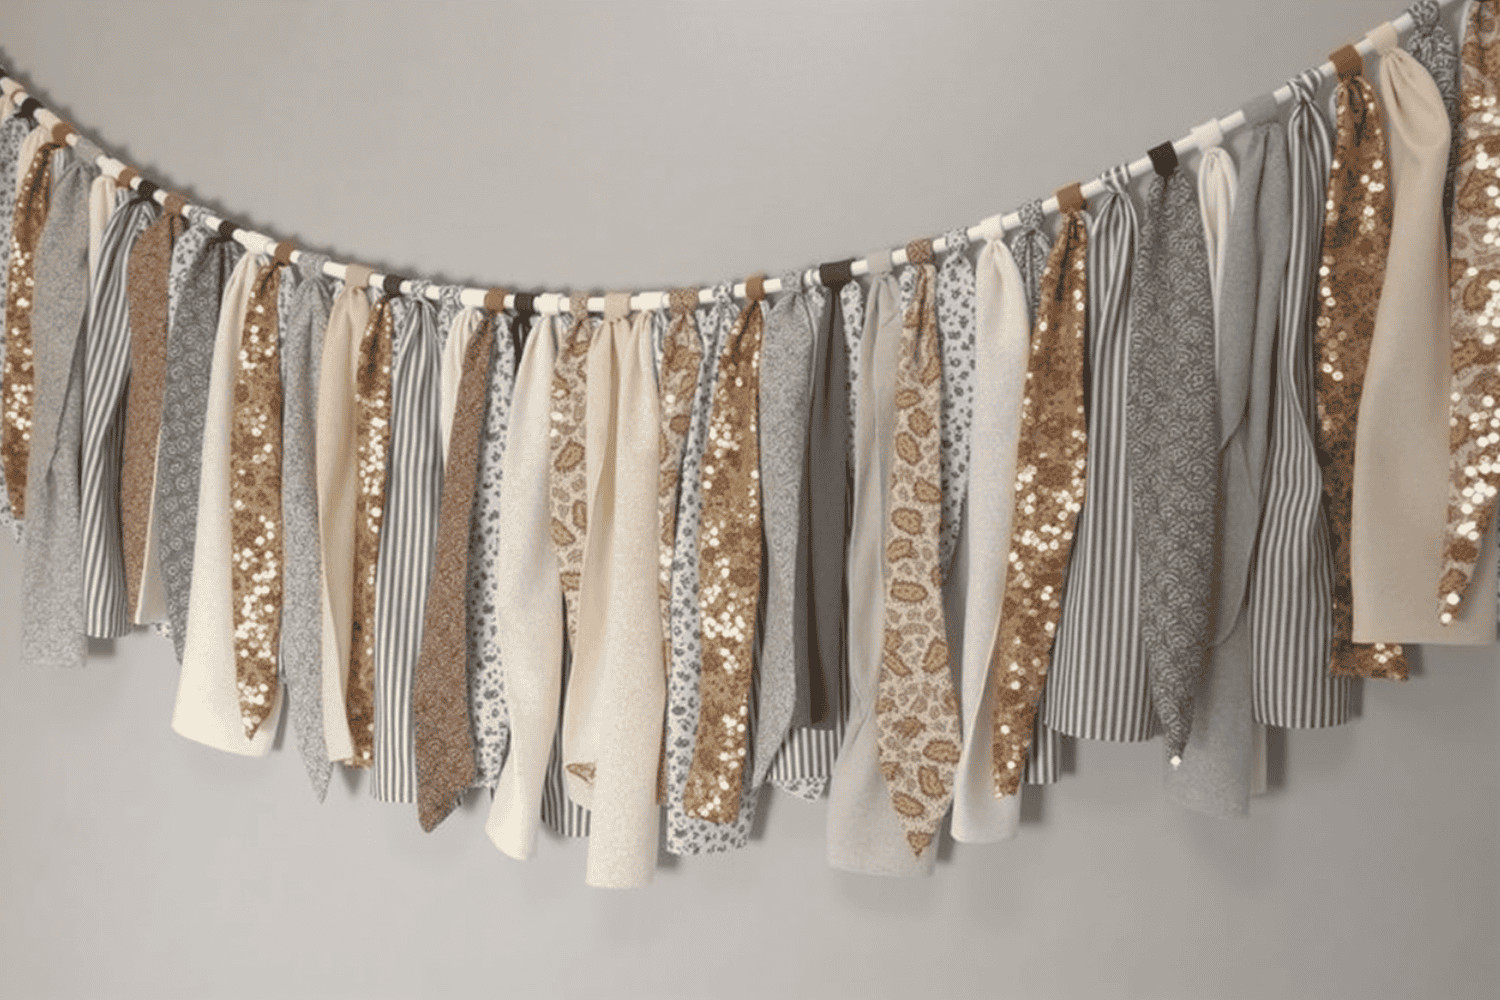 Fabric Garland Aesthetic
2.8. Paper Floral Backdrop
Create lasting paper flowers for a backdrop that endures. This option lets you have fun creating and provides a beautiful, long-lasting decoration.
How to create:
- Use crepe paper in your favorite colors.
- Cut out petal shapes and attach them to a round card paper.
- Arrange the paper flowers on a large surface to fill the backdrop or create a frame.
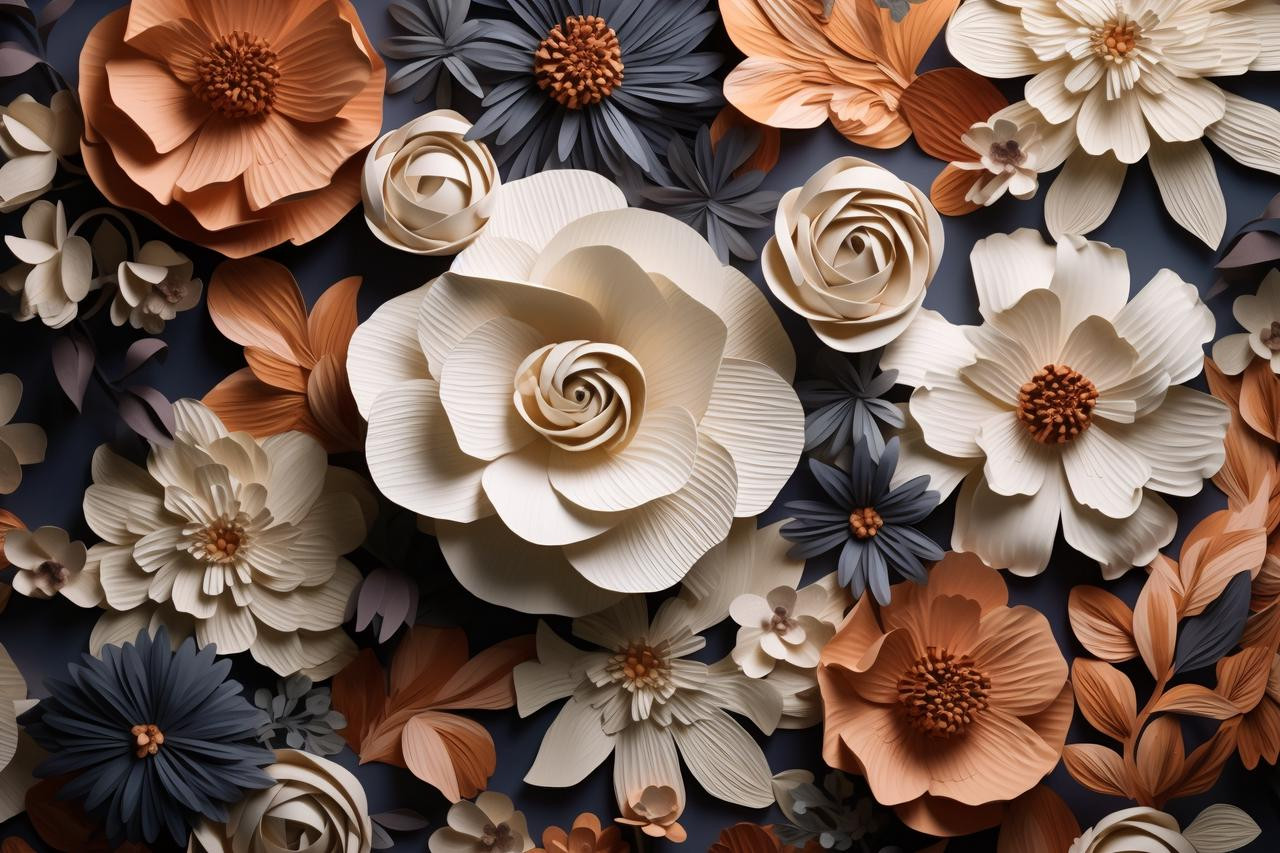 Paper Floral Backdrop
2.9. DIY Paper Chain Backdrop
Create a less demanding yet colorful backdrop with DIY paper chains. This simple project is perfect for adding a playful touch to your photos.
How to create:
- Cut stripes out of colored-card paper.
- Attach the ends to create a circle.
- Link the circles together like chains.
- Create multiple chains for a colorful and cool backdrop.
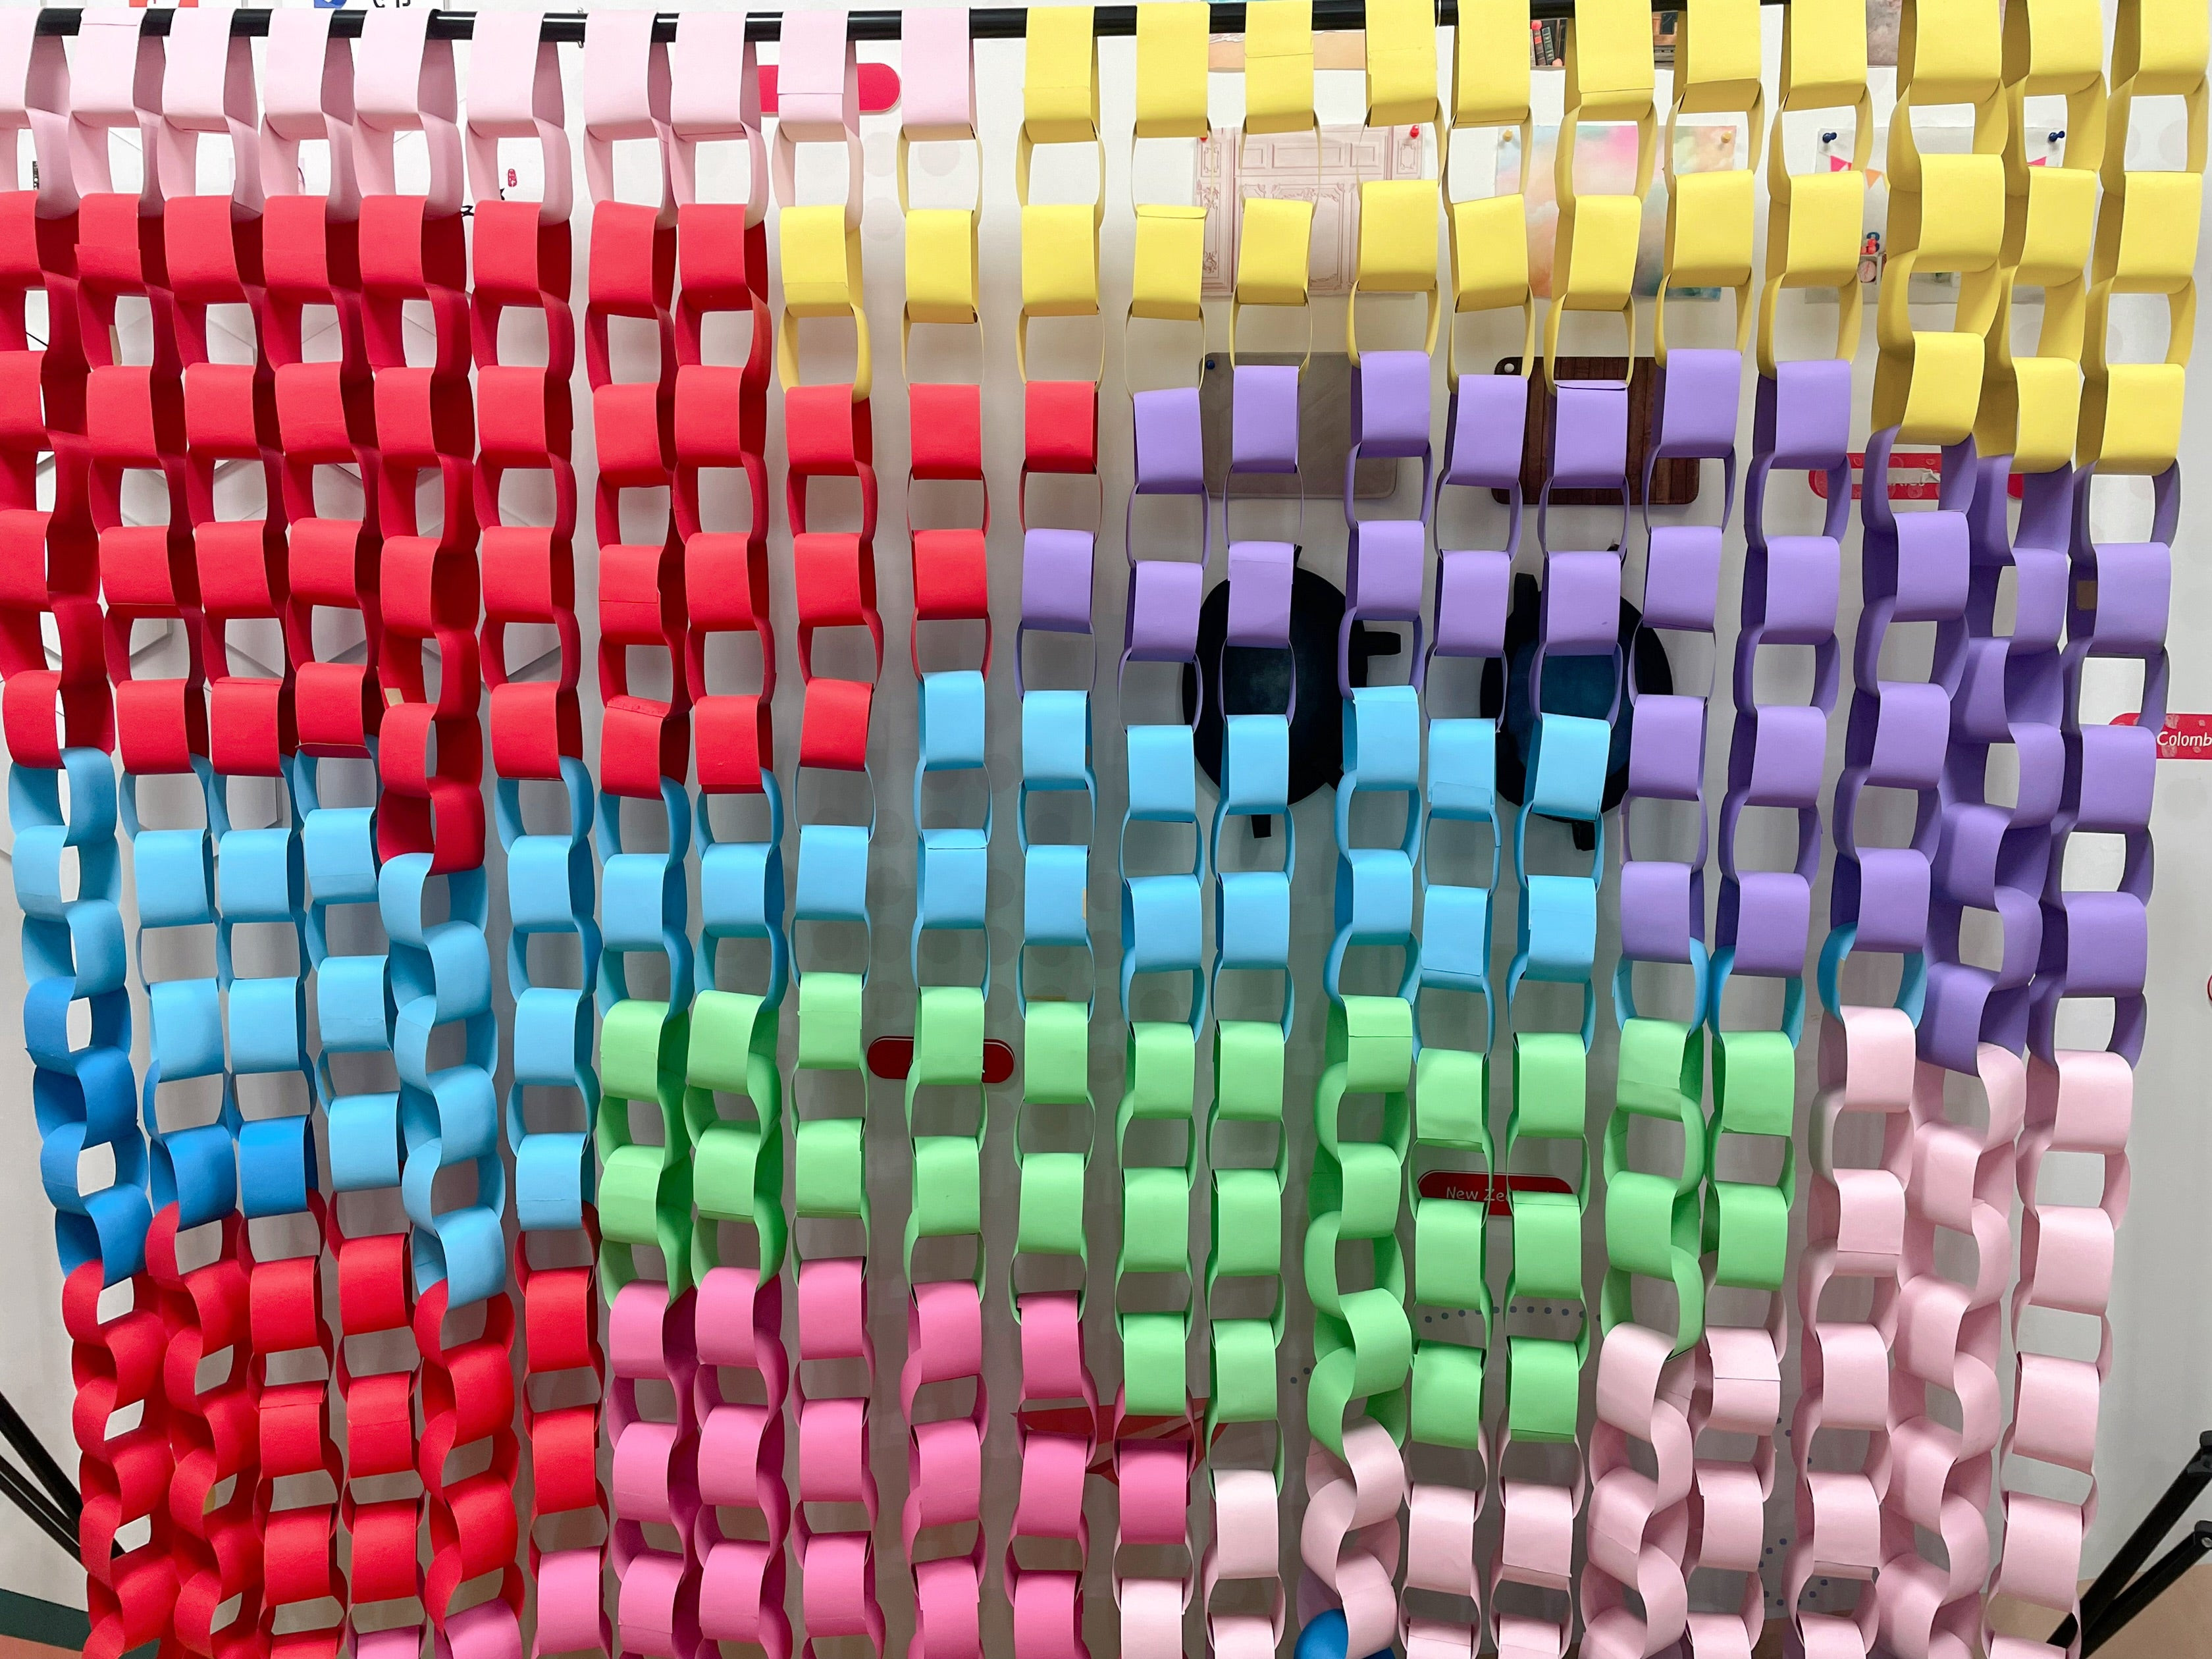 DIY Paper Chain Backdrop
2.10. Woodsy Photo Backdrop
Use wood to create a warm, country-aesthetic look. A wood photography backdrop can add a natural and inviting feel to any picture.
How to create:
- Use carpentry to create a wood platform or have one made.
- Ensure good lighting to enhance the wood’s natural texture and color.
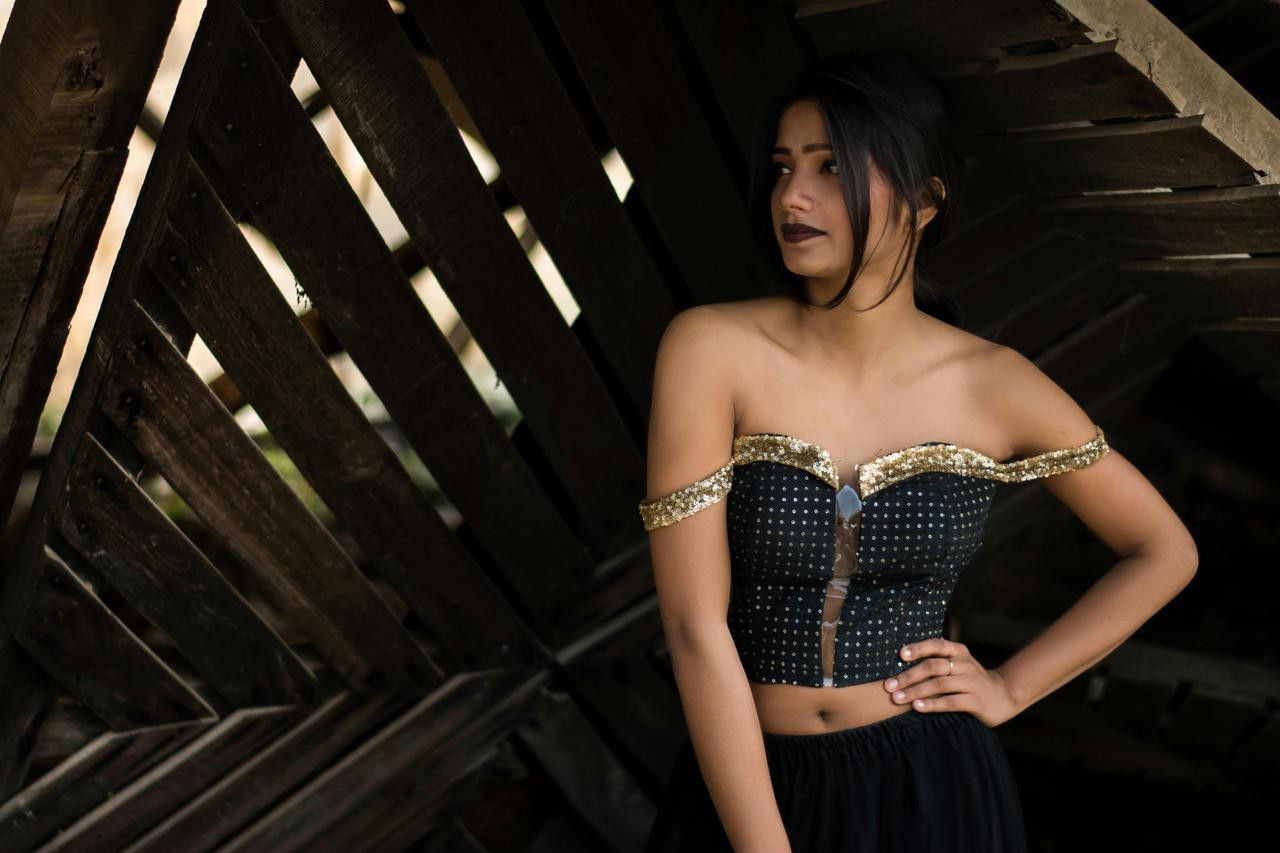 A woman in front of Wooden Backdrop
2.11. DIY Citrus Backdrop
Add a warm, yellow, and orange touch to your photos with a citrus backdrop. This fragrant option will make your photoshoots smell as good as they look.
How to create:
- Buy oranges, lemons, and grapefruits.
- Cut them into slices and let them dry for a day.
- Tie the dried slices together with clear string and add them to a plain surface.
- Bonus: Add fairy lights for an atmospheric touch.
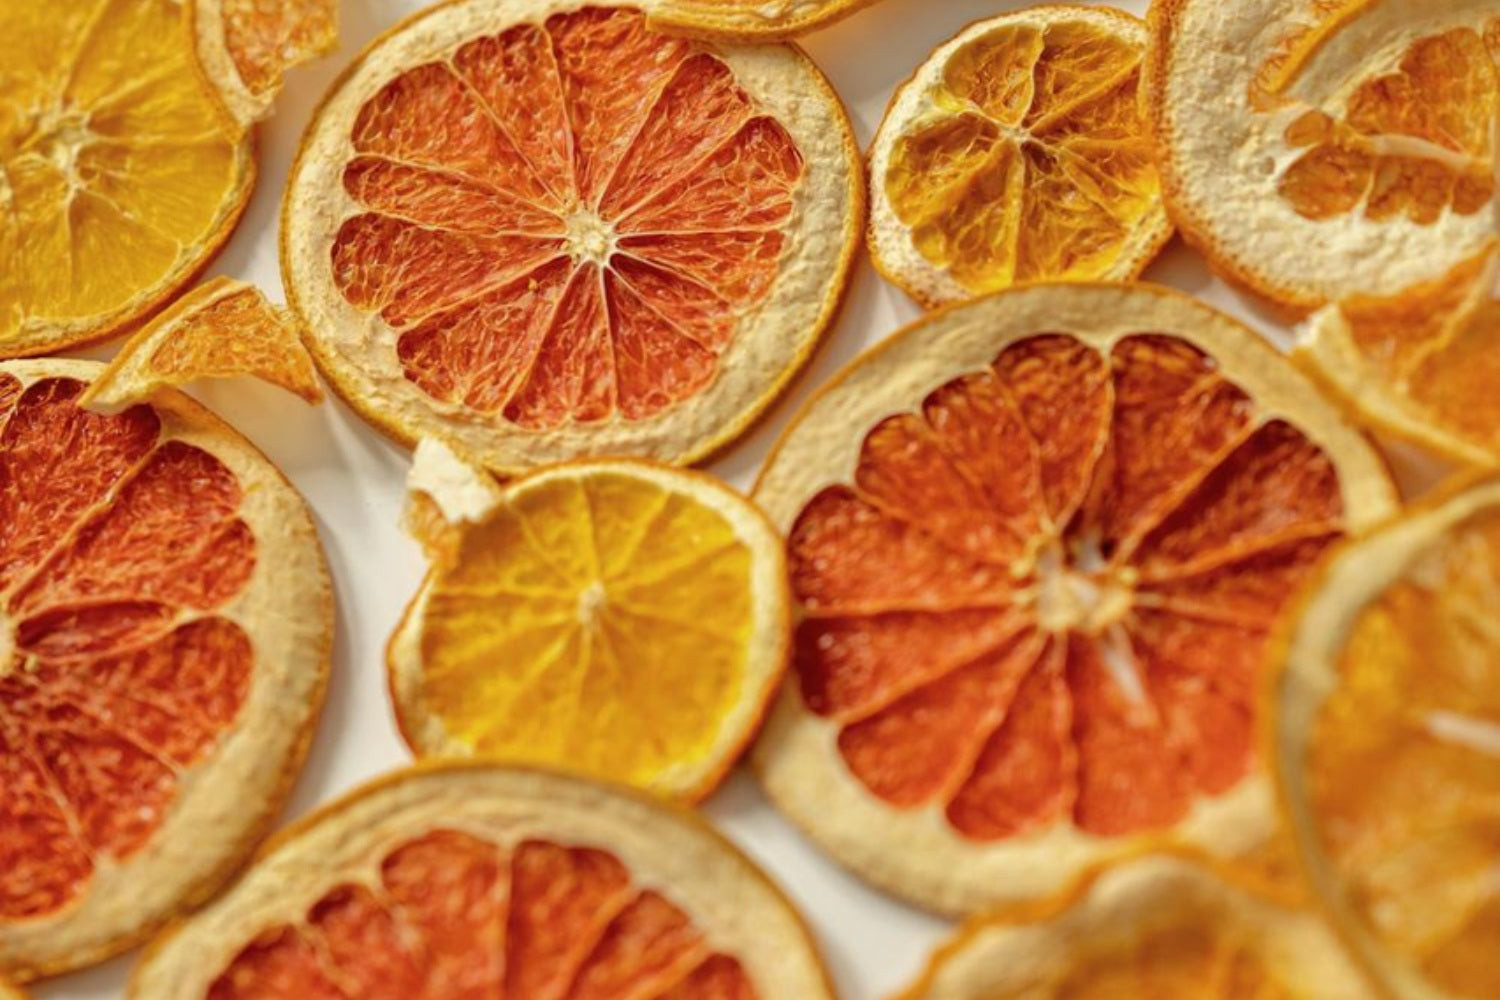 Citrus Backdrop
2.12. DIY Cotton Cloth Backdrop
For a budget-friendly and plain backdrop, use a cotton cloth painted to your liking. This versatile option allows for various artistic expressions.
How to create:
- Buy a cotton cloth large enough to fit your photo requirements.
- Paint it with earth-looking colors, draw on it, or practice wood print serigraphy.
 A black woman pose in front of Pink Cotton Cloth Backdrop.
3. Creative DIY Photo Booth Backdrop Ideas
Transform any event into a memorable occasion with these fun and interactive DIY photo booth backdrop ideas. Perfect for parties, weddings, and festive events.
3.1. Scalloped Paper DIY Backdrop
Create a mermaid-themed backdrop with scalloped paper, customized to your colors and preferences. This fun project is perfect for themed parties.
How to create:
- Buy colored paper or paint white paper with acrylics or watercolors.
- Cut round ends to create a scalloped effect.
- Place them all together on a cardboard platform.
- Add personalized decorations or keep it simple.
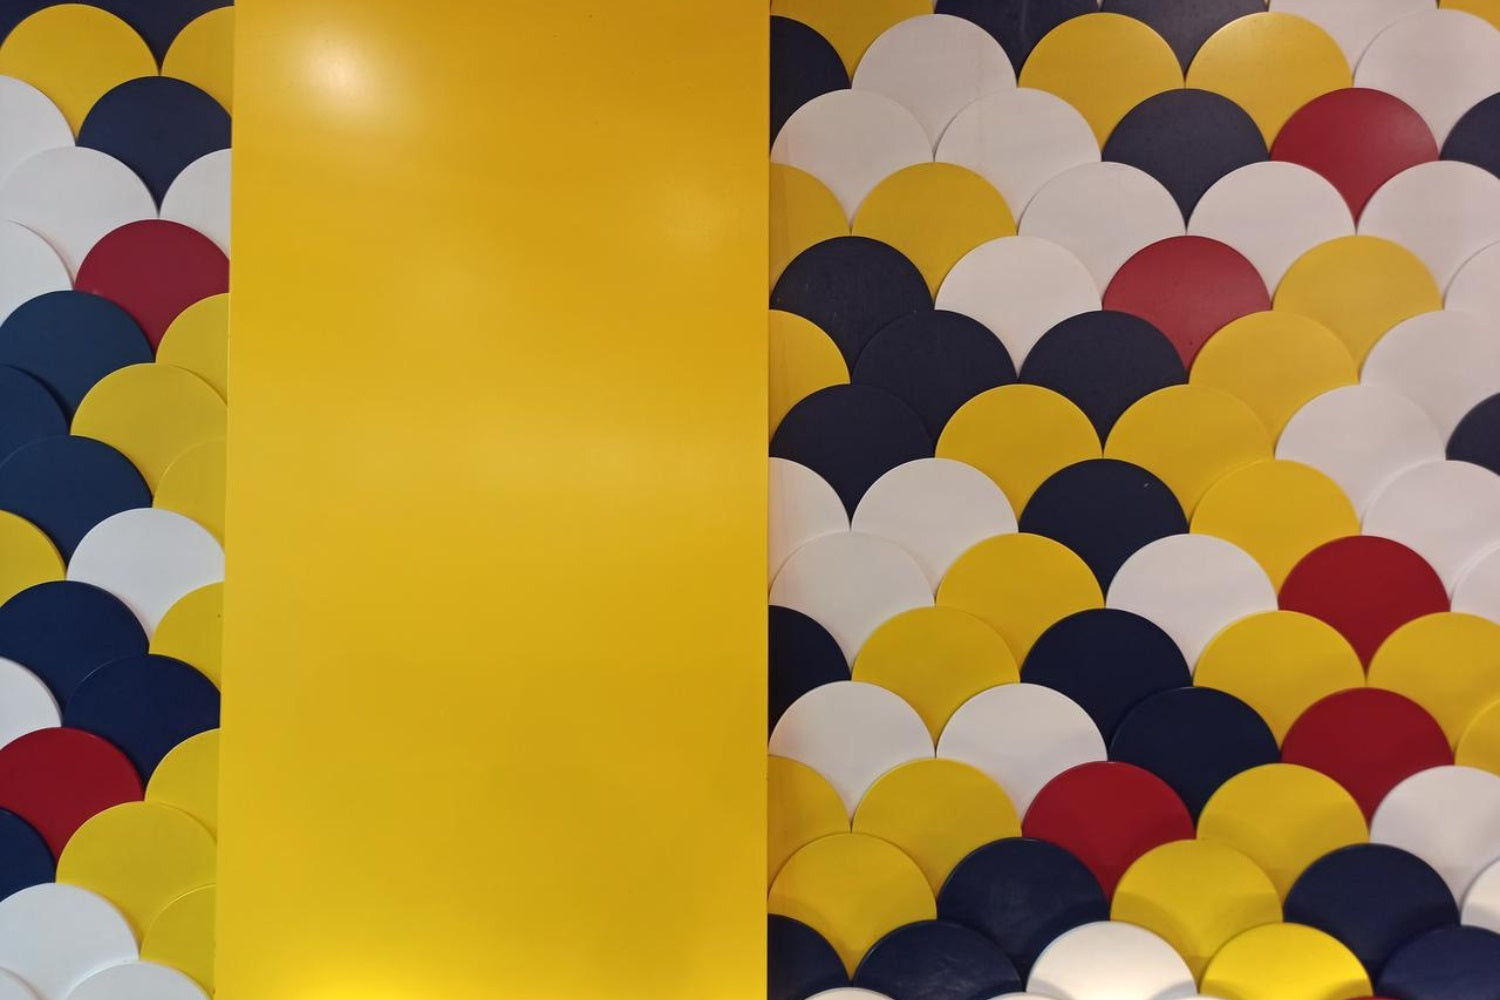 Scalloped Paper Backdrop
3.2. Cut-out Colorful Tissue Paper Backdrop
Tailor colorful tissue paper to match your themed event. This budget-friendly option allows for creative expression and personalization.
How to create:
- Cut colorful tissue paper into shapes that resemble a symbol, sentence, or name.
- Arrange the tissue paper on a backdrop to create the desired design.
 Colorful Tissue Paper Backdrop.
3.3. Streamers Photo Backdrop
Streamers are a classic choice for adding light and life to any event. This simple yet effective backdrop is perfect for creating a festive atmosphere.
How to create:
- Select glitter-looking, color-fitting streamers.
- Hang the streamers to create a vibrant and lively backdrop.
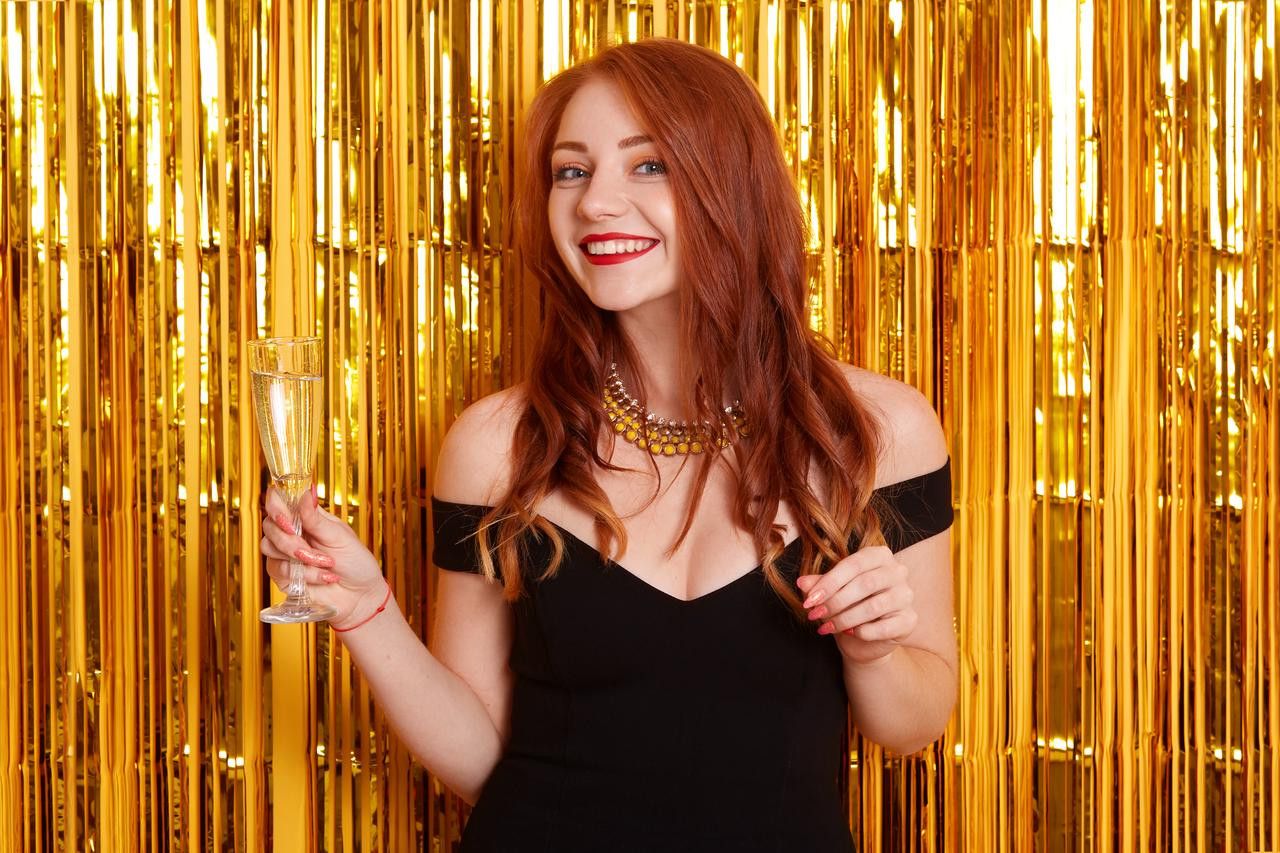 A girl with a glass of wine pose in front of the streamers backdrop.
3.4. Creased Tin Foil Backdrop
Use creased tin foil to add a disco vibe to your photo booth. This simple and cheap material can enhance your photos with light and personality.
How to create:
- Glue creased tin foil to a cardboard surface.
- Attach some tin foil to the floor for an extra disco effect.
 Creased Tin Foil Backdrop
3.5. Popsicle Backdrop for Endless Summer Vibes
Bring endless summer vibes to your event with a popsicle-themed backdrop. This fun and colorful option is perfect for creating light-hearted memories.
How to create:
- Save popsicle sticks from real popsicles.
- Draw, cut, and paint popsicle shapes out of cardboard or card paper.
- Attach them on a string and place them on a plain background.
- Bonus: Use extra popsicles as props.
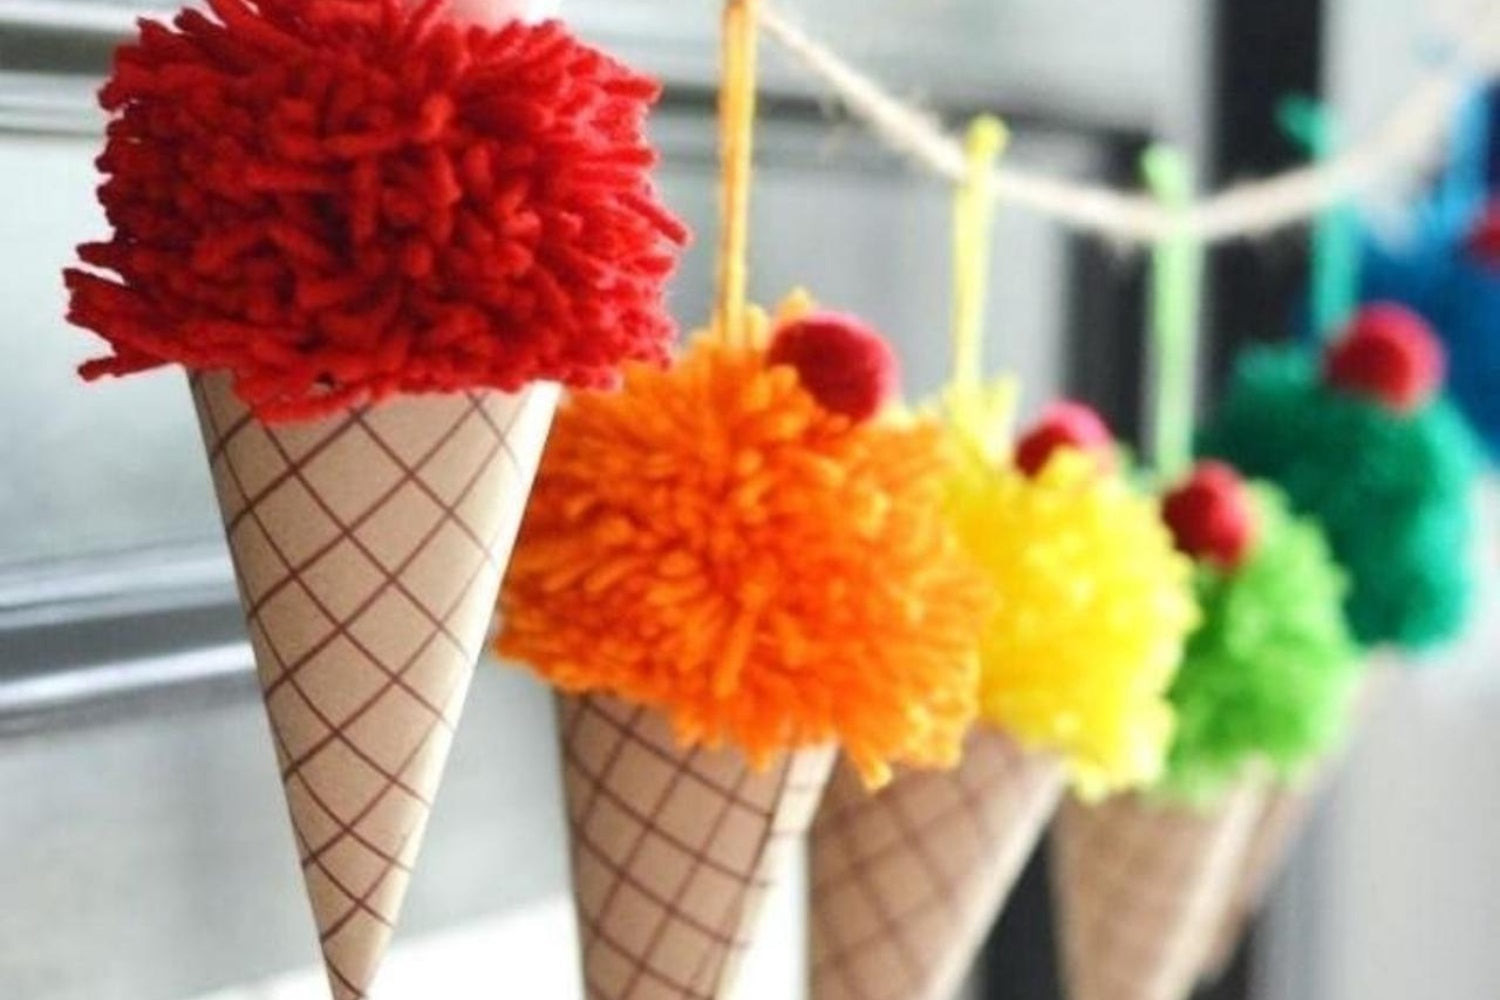 Summer Ice-cream and Popsicle Backdrop
3.6. DIY Paper Fan Photo Backdrop
Create an aesthetic and elegant backdrop with paper fans. This graceful option can be customized to match your event’s color scheme.
How to create:
- Accordion-fold colored papers.
- Glue the extremes together to form a round shape.
- Place the paper fans all over a plain background or just as a frame.
 Coloful Paper Fan Backdrop
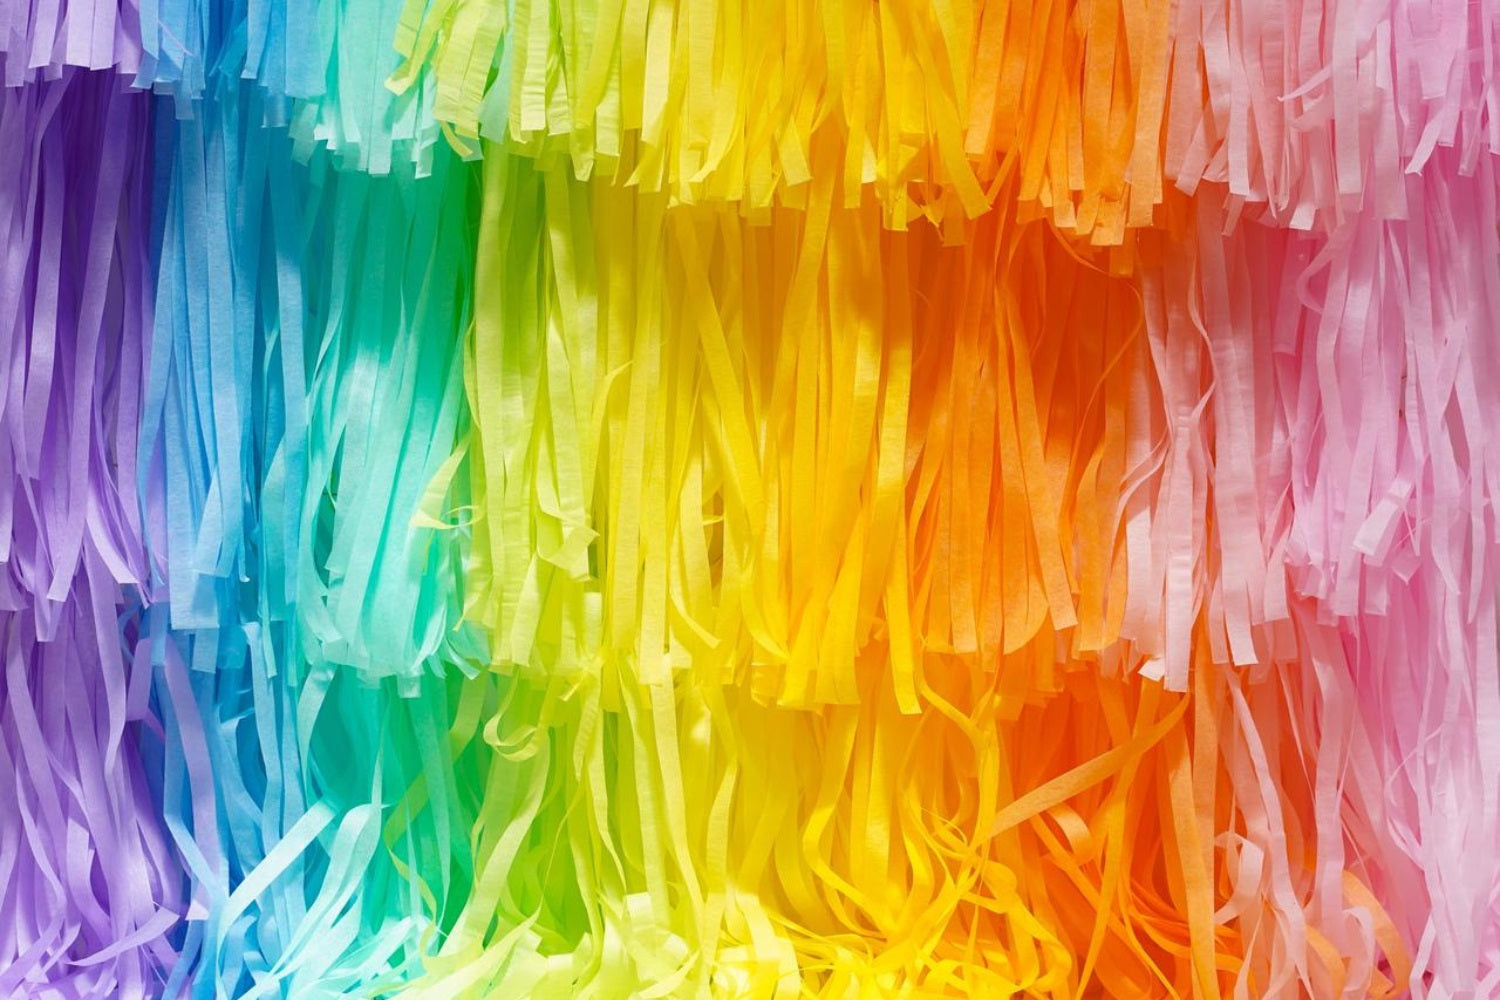
3.7. Fringe Backdrop
Fringes are a cool-looking and easy-to-make backdrop idea. This fancy background is perfect for unique photo booths.
How to create:
- Choose your material: cloth, paper, fabric, or ribbon.
- Cut the material into little stripes.
- Attach them all together, creating a unique color combination.
 A woman in front of Fringe Backdrop.
3.8. DIY Macrame Backdrop
Go all the way into creativity with macrame. This beautiful art form creates aesthetically powerful and long-lasting backdrops.
How to create:
- Learn macrame techniques.
- Knot textiles to create beautiful art.
- Use the macrame to create a stunning backdrop.
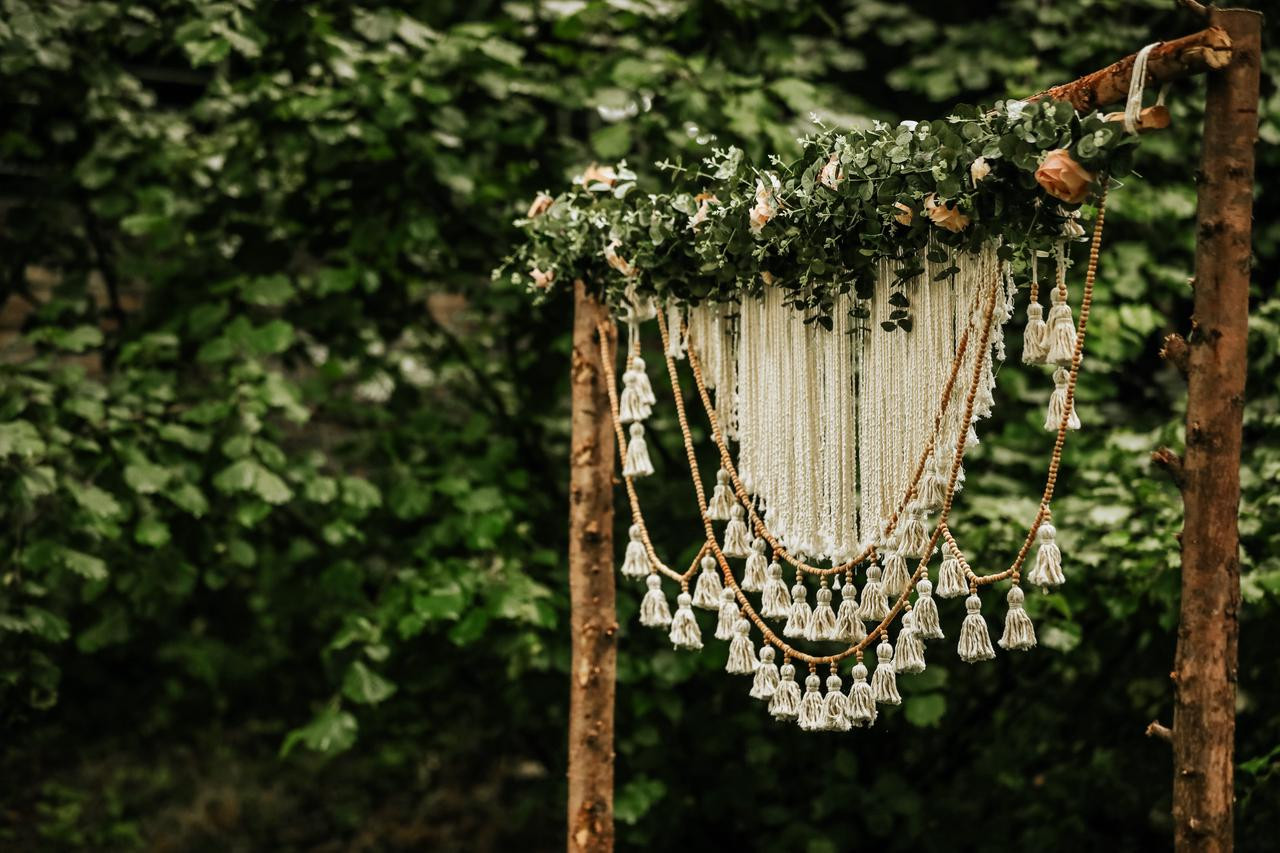 The Macrame Backdrop
3.9. DIY Wooden Crate Backdrop
Use wooden crates to add simplicity and vibe to your event. This easy-to-assemble backdrop can be personalized with plants and signs.
How to create:
- Take some wooden crates and place them together.
- Personalize them with plants, fabric, and unique signs.
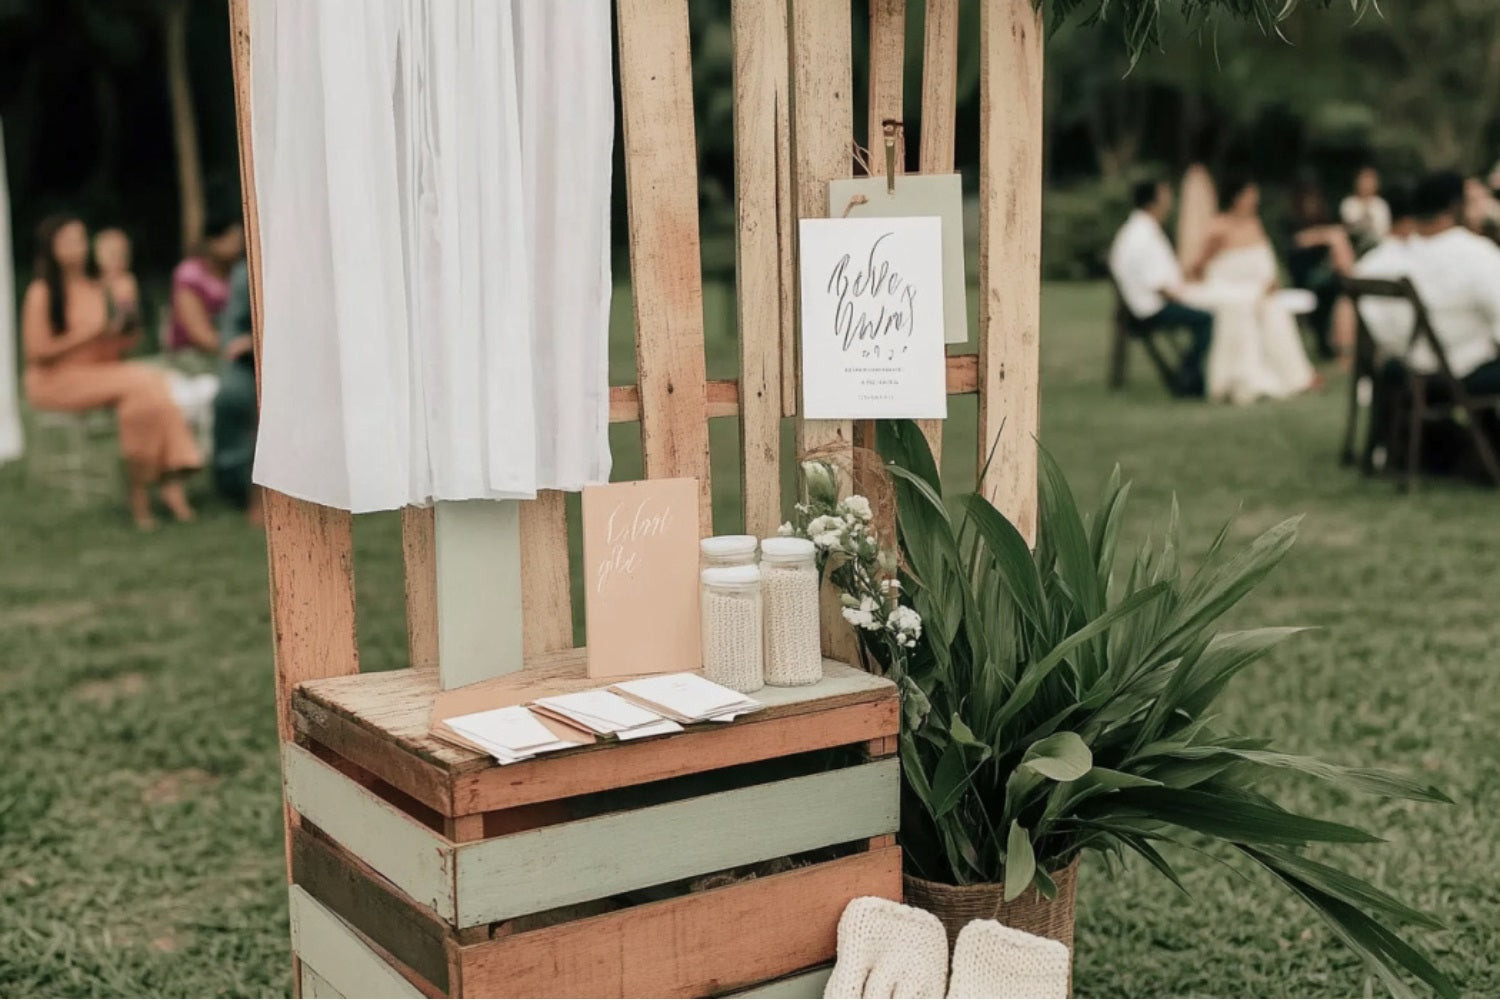 The Wooden Crate Backdrop
3.10. Cardboard Backdrop DIY
Create a last-minute, budget-friendly backdrop with cardboard. This unique option is perfect for casual and original photo booths.
How to create:
- Find cardboards you thought you would never use.
- Break them into pieces and glue them flat on your preferred background.
- Add a plain-looking frame for people to play with.
 A girl pose in front of the Cardboard Backdrop.
3.11. Memory Lane Wall
Create a meaningful and beautiful backdrop by going down memory lane. This nostalgic option is perfect for friends who want to reminisce.
How to create:
- Print cute, nostalgic pictures that represent you and your friends.
- Add notes, cards, drawings, and anything meaningful.
- Hang them from a wall or wooden crate.
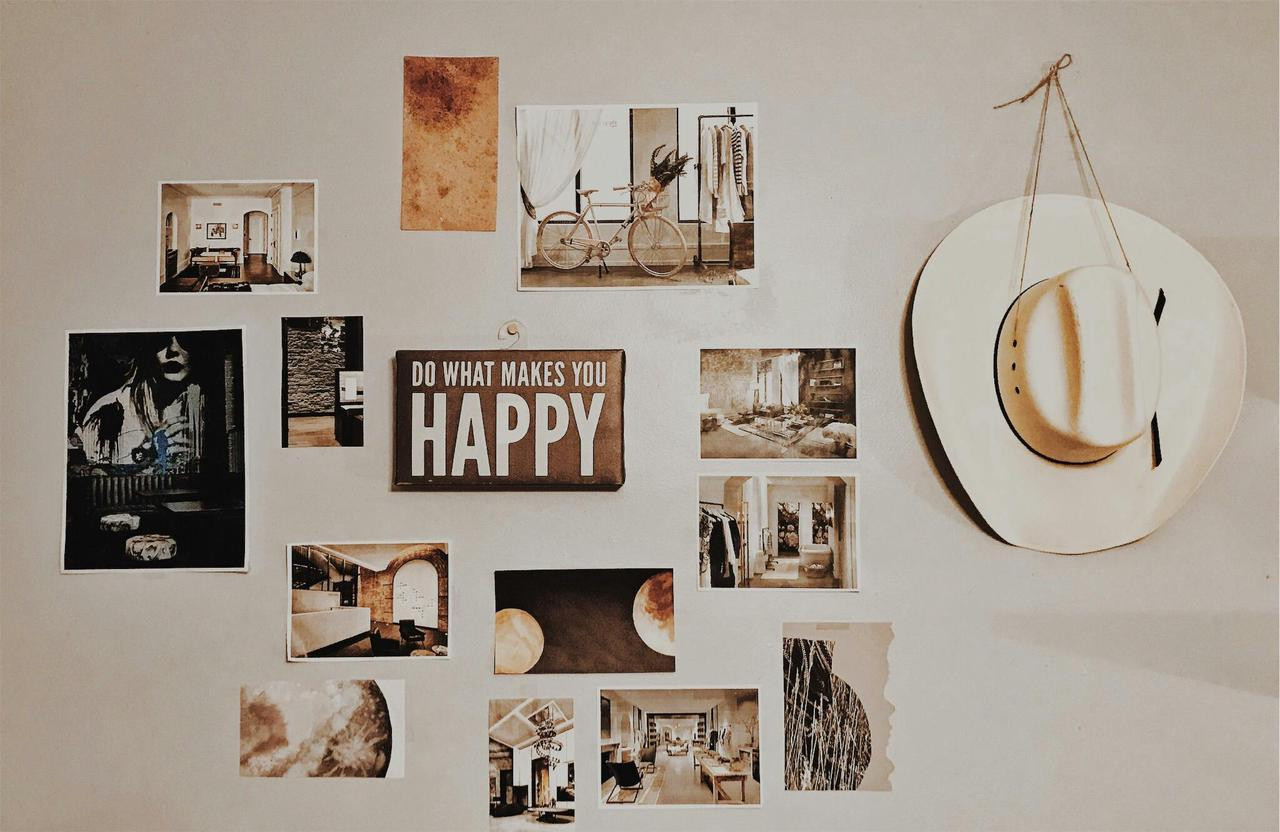 The Memory Photos Wall.
3.12. Book Wall DIY
Create a magical, literal wall that everyone will feel attracted to with a book-themed photo booth. Perfect for weddings or artistic events.
How to create:
- Take books and hang them.
- Or select your favorite book’s pages, cut them, and glue them on a wall.
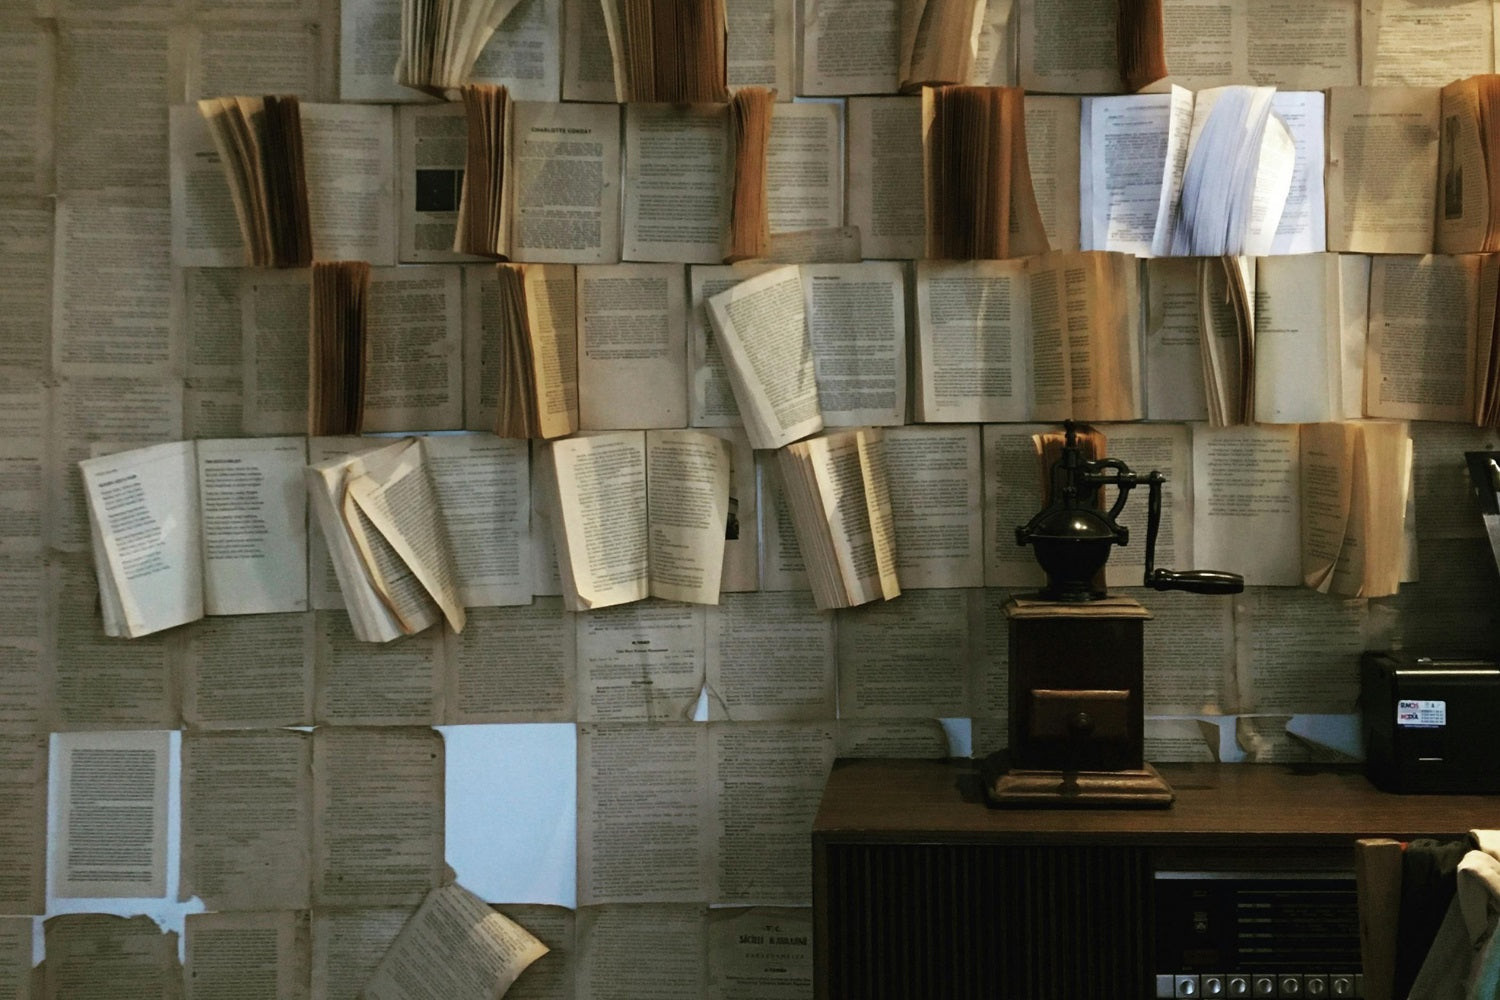 DIY Book Wall.
4. Unique DIY Birthday Backdrop Ideas
Make birthday parties extra special with these creative and personalized DIY backdrop ideas. Tailored to your needs, these backdrops will add a unique touch to your celebrations.
4.1. DIY Plate Photo Backdrop
Use birthday plates to create a colorful and stylish backdrop. This easy-to-make option is perfect for adding personality to any birthday party.
How to create:
- Color birthday plates with your favorite, birthday-themed colors.
- Glue them on a wall, cardboard, or cloth.
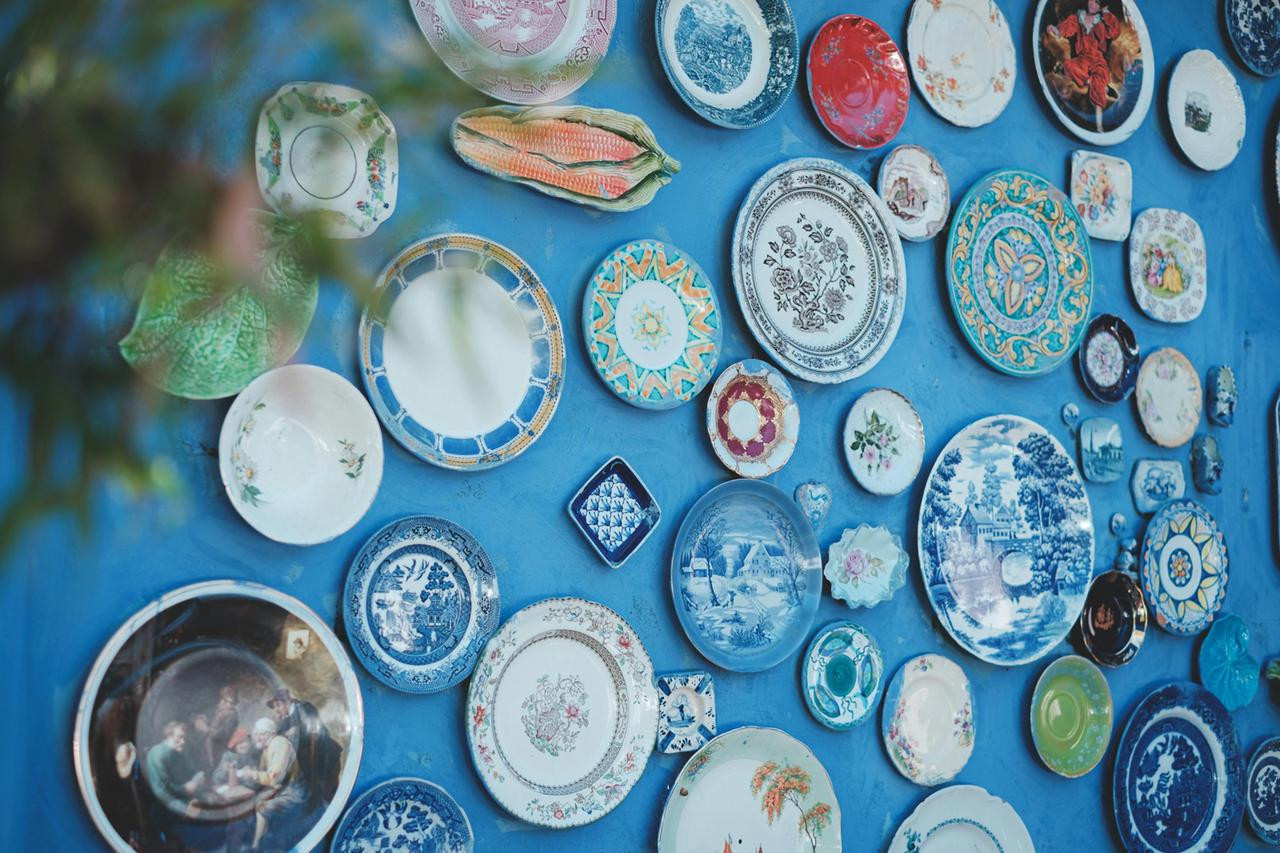 The Plate Backdrop
4.2. DIY Floral Birthday Number Backdrops
Create a birthday number backdrop with flowers to highlight the age of the birthday celebrant. This beautiful and thematic option adds a personal touch.
How to create:
- Buy flowers or make some with crepe paper.
- Glue them together in the shape of the birthday boy/girl’s turning age.
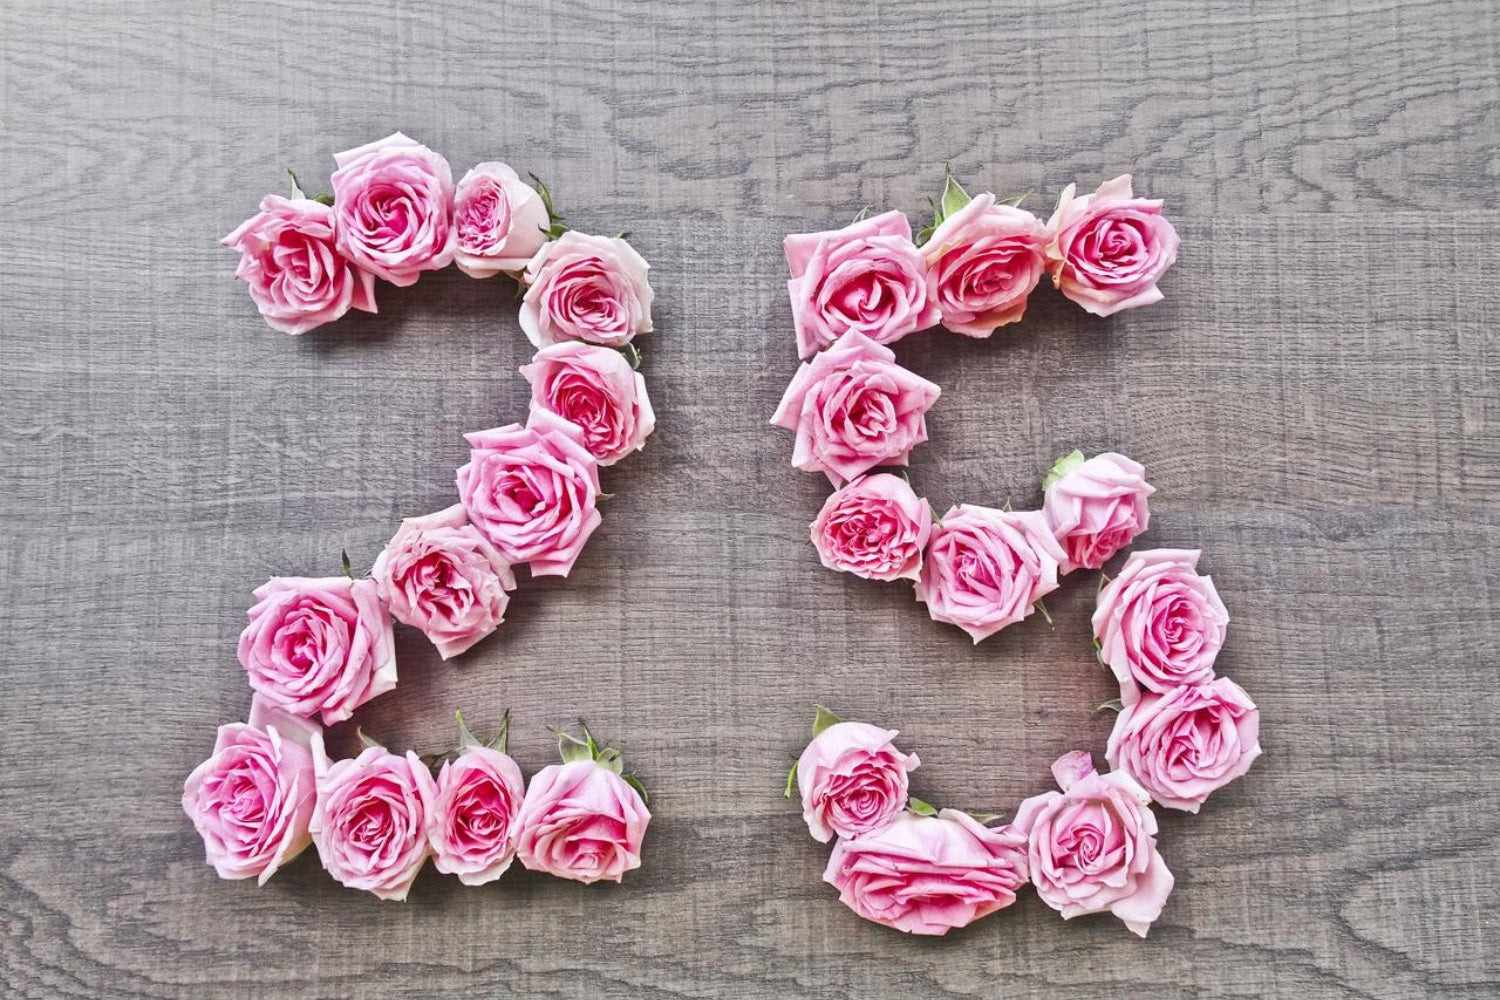 Floral Birthday Number Backdrop.
4.3. DIY Pom Pom Backdrop
Add a touch of celebration with a pom pom backdrop. This fun and easy-to-make option is perfect for expressing joy at any birthday party.
How to create:
- Buy little colorful pom poms or make some with wool and needles.
- Attach them with a string.
- Hang many strings to create a brimming and aesthetic effect.
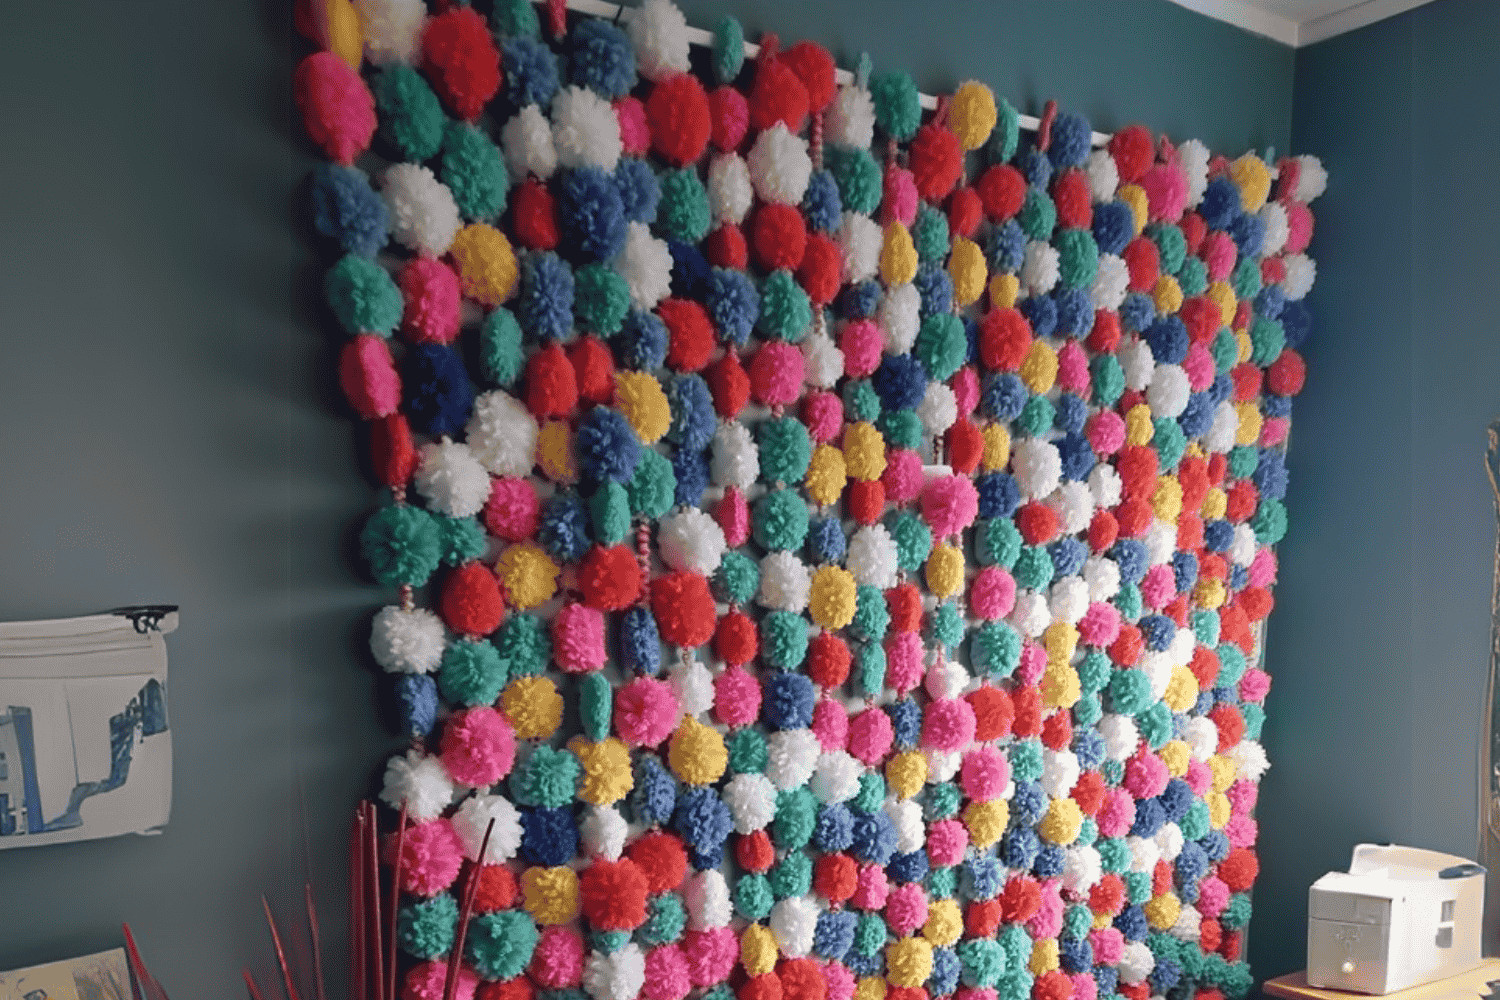 DIY Pom Pom Backdrop
4.4. Origami Backdrop
Get creative and learn origami to make a unique and artistic backdrop. This intricate option adds a touch of elegance and sophistication.
How to create:
- Learn how to make various origami shapes.
- Create origami figures to match your birthday party theme.
- Arrange the origami figures on a backdrop.
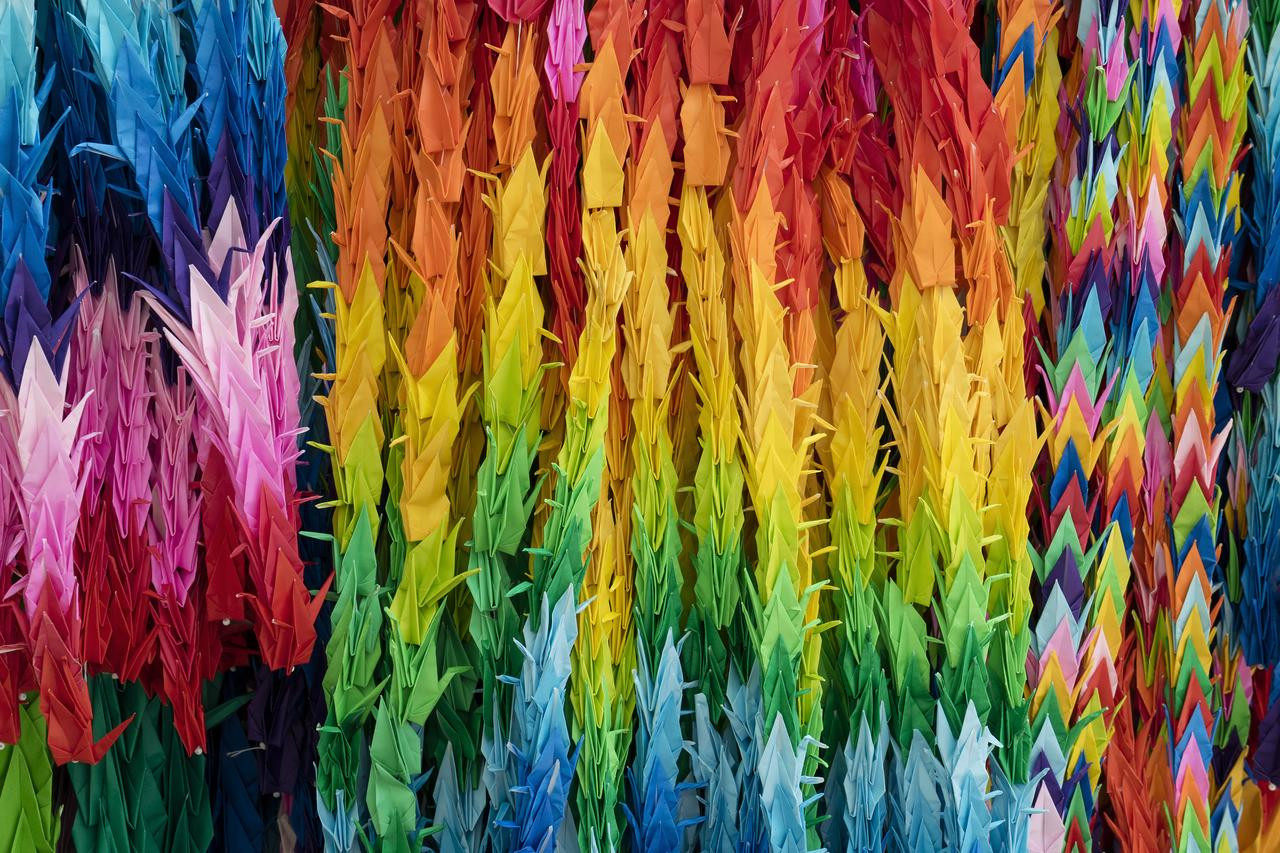 Origami Backdrop
4.5. Gift Wrapping Paper Backdrop
Use gift wrapping paper to create a festive and colorful backdrop. This thematic option is perfect for setting the birthday mood.
How to create:
- Choose aesthetically-looking wrapping paper.
- Create a backdrop with the paper or fill it with fake birthday gifts by wrapping empty boxes.
 Gift Wrapping Paper Backdrop
4.6. Ribbon Flower Backdrop
Create a beautiful backdrop with ribbon flowers. This decorative option adds a touch of elegance and charm to any birthday photo.
How to create:
- Stitch ribbons together to resemble a flower.
- Glue the ribbon flowers all over a background to fill a wall or create a frame.
 Ribbon Flower Backdrop
4.7. Classic Balloon Backdrop
Fill your birthday party with joy using a classic balloon backdrop. This safe and cheap option is perfect for enhancing any birthday party’s photos.
How to create:
- Buy all kinds of colored balloons.
- Create a rainbow cloud setting, a balloon arch, or fill your selected background with balloons.
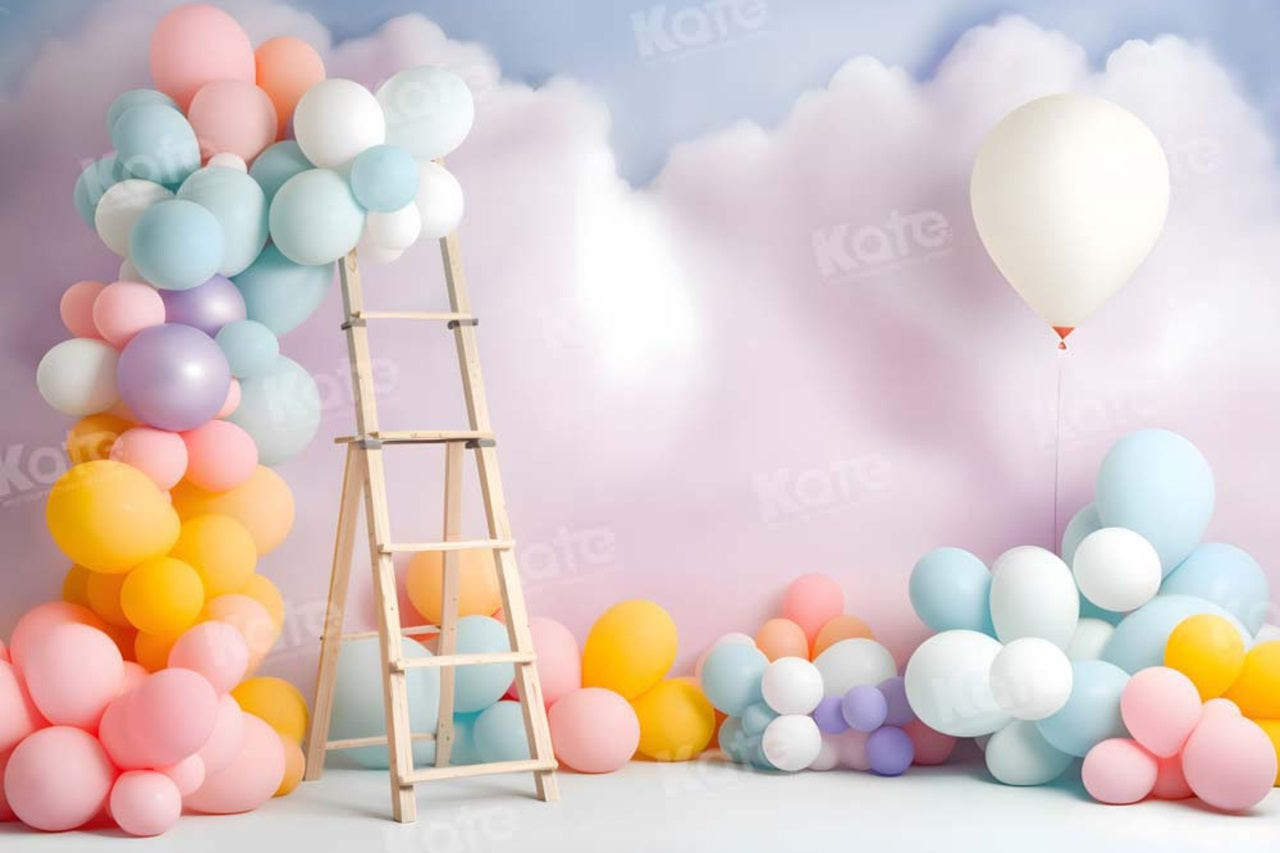 The colorful Balloon Backdrop
4.8. Personalized Birthday Backdrop
Get personal and create a unique birthday backdrop with personalized elements. This option is perfect for making the birthday celebrant feel special.
How to create:
- Get your preferred type of backdrop paper.
- Paint the birthday boy/girl’s name, age, and some nice elements and drawings.
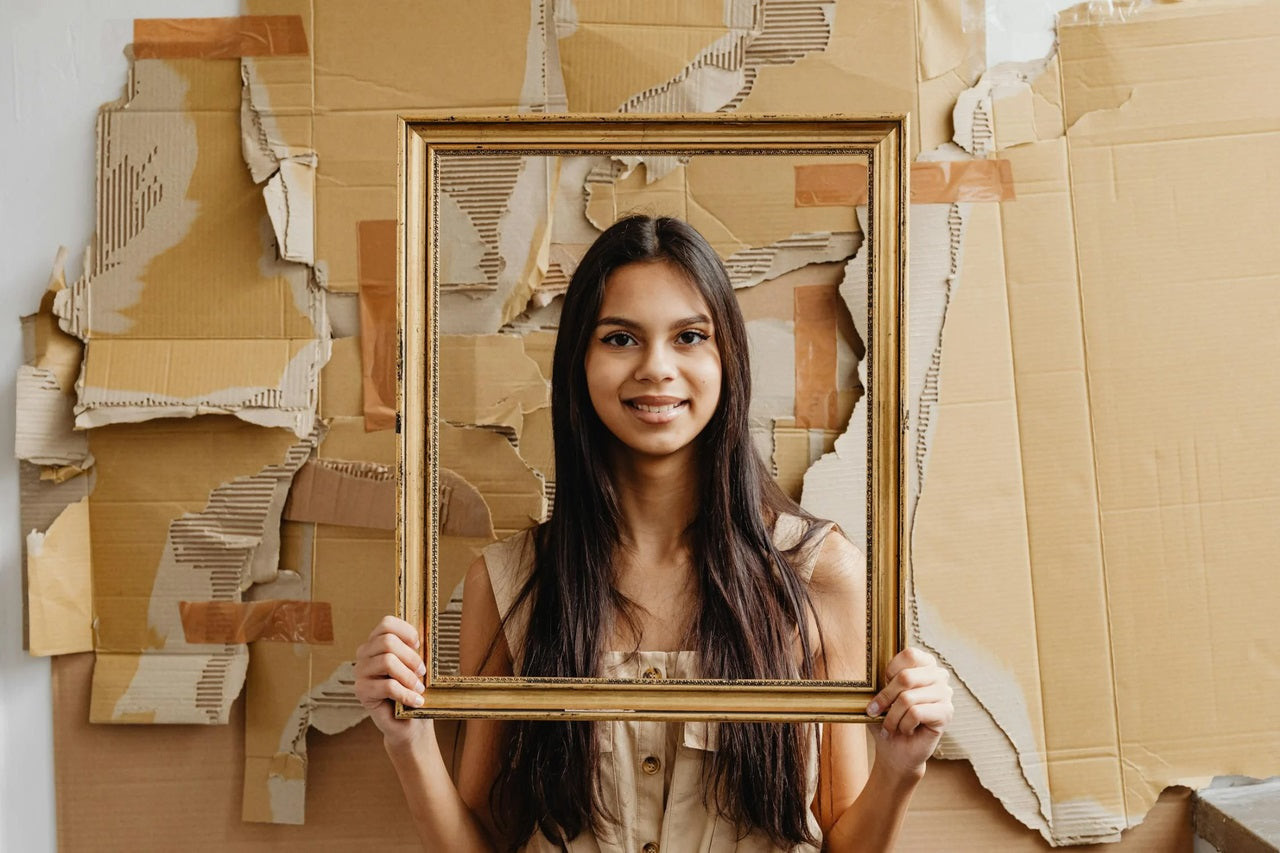
4.9. Polaroid Frame Backdrop
Create an Instagram-worthy backdrop with a polaroid-looking frame. This trendy option is perfect for making your party viral.
How to create:
- Create a polaroid-looking frame big enough to fit at least three/four people.
- Paint a “Happy Birthday” right under it.
- Add flowers, candles, or any other element you love around it.
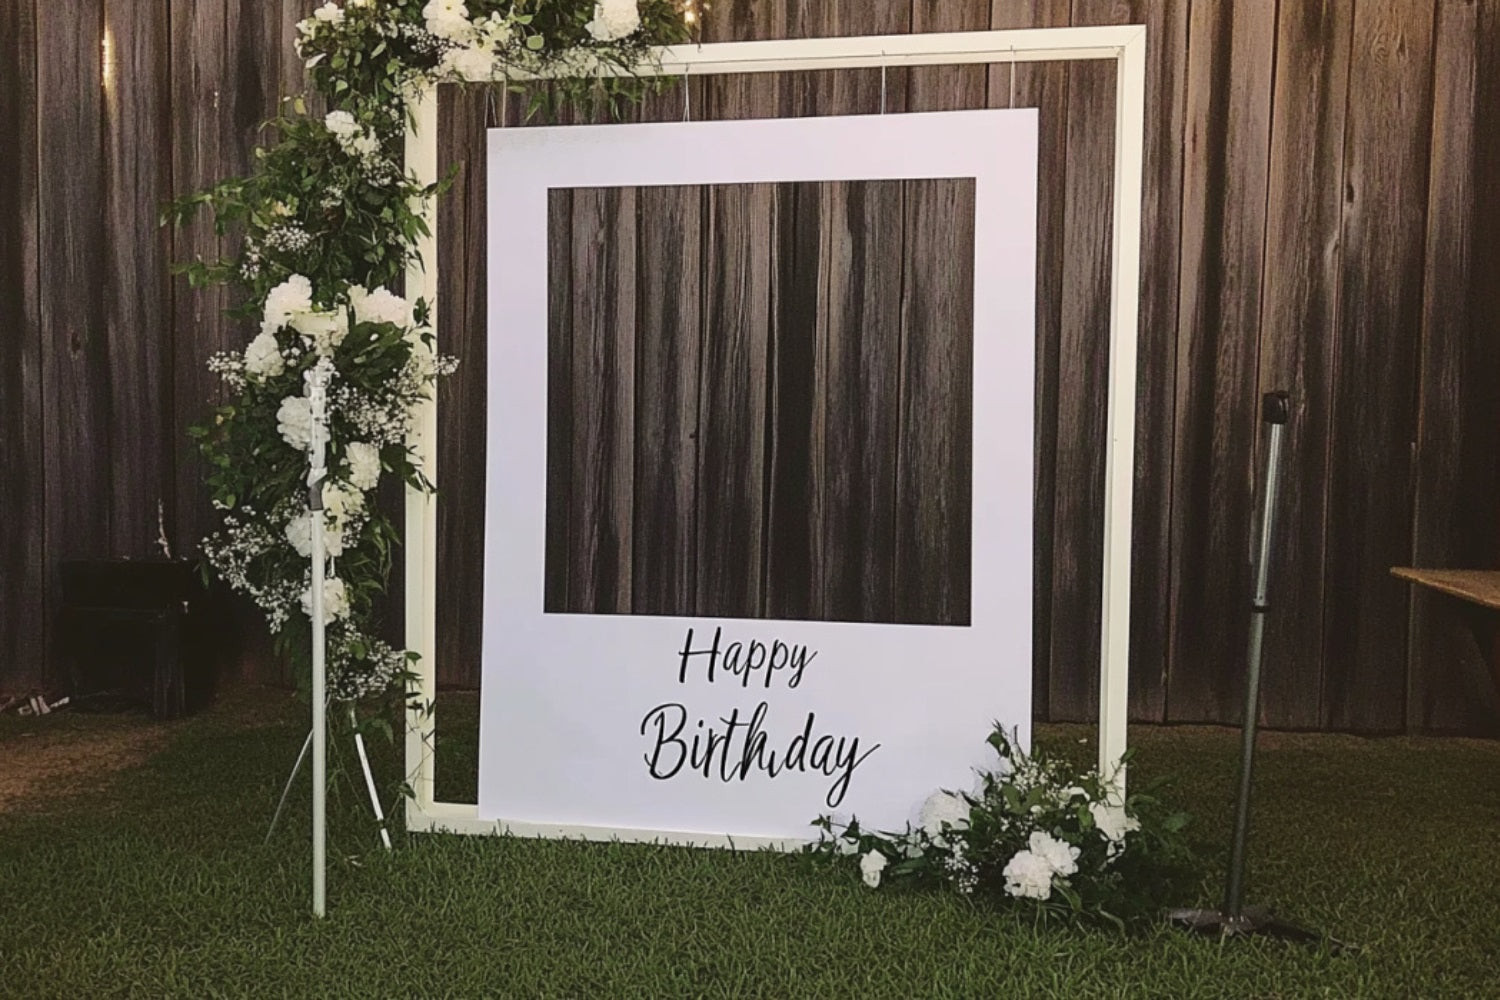 Polaroid Frame Backdrop
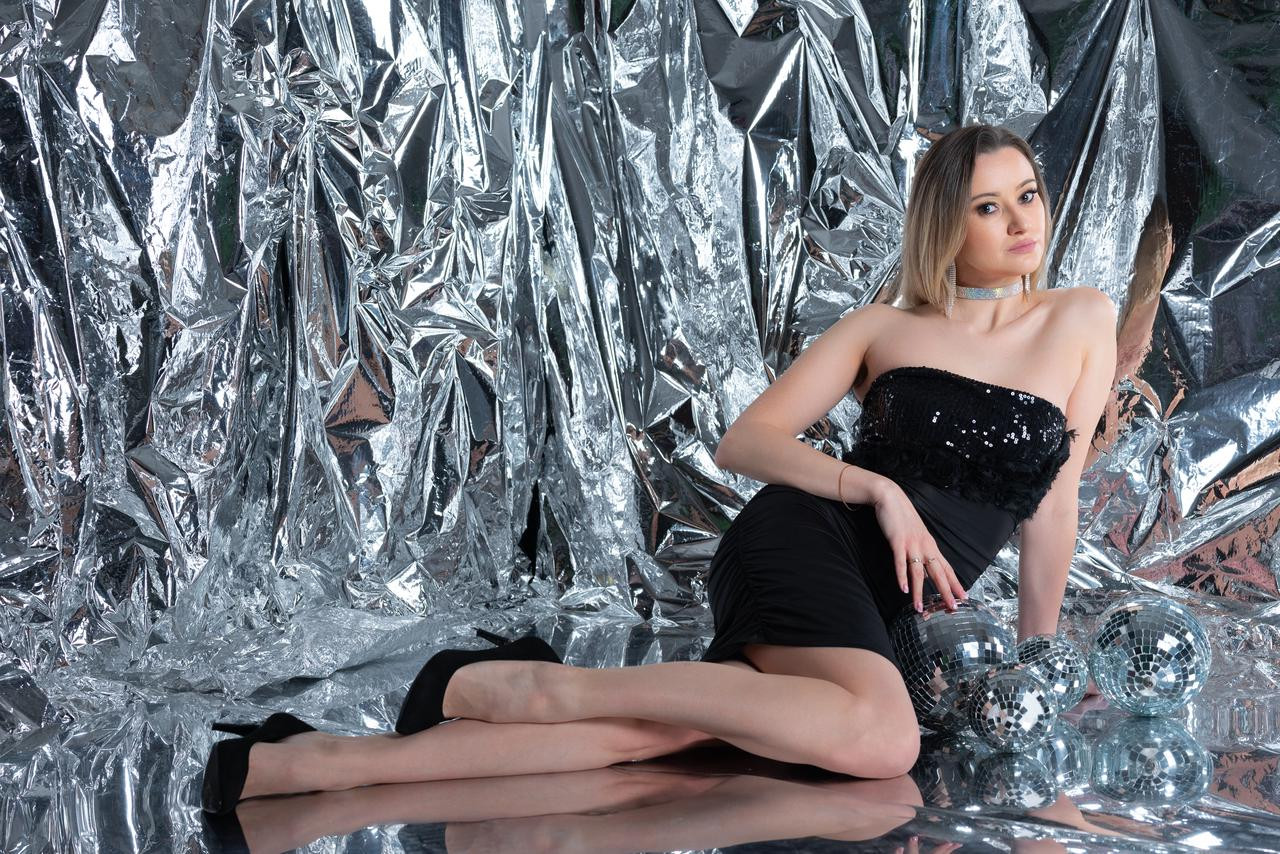
4.10. Disco DIY Backdrop
Transform your birthday party into a disco glitter extravaganza. This fancy option is perfect for adding sparkle and shine to your celebration.
How to create:
- Go all the way glitter with silver or golden streamers or little shiny mirrors.
- Frame it with gold or silver balloons.
- Add a neon “Happy Birthday” sign.
- Place a fancy armchair or stool in front for people to sit and have their shot taken.
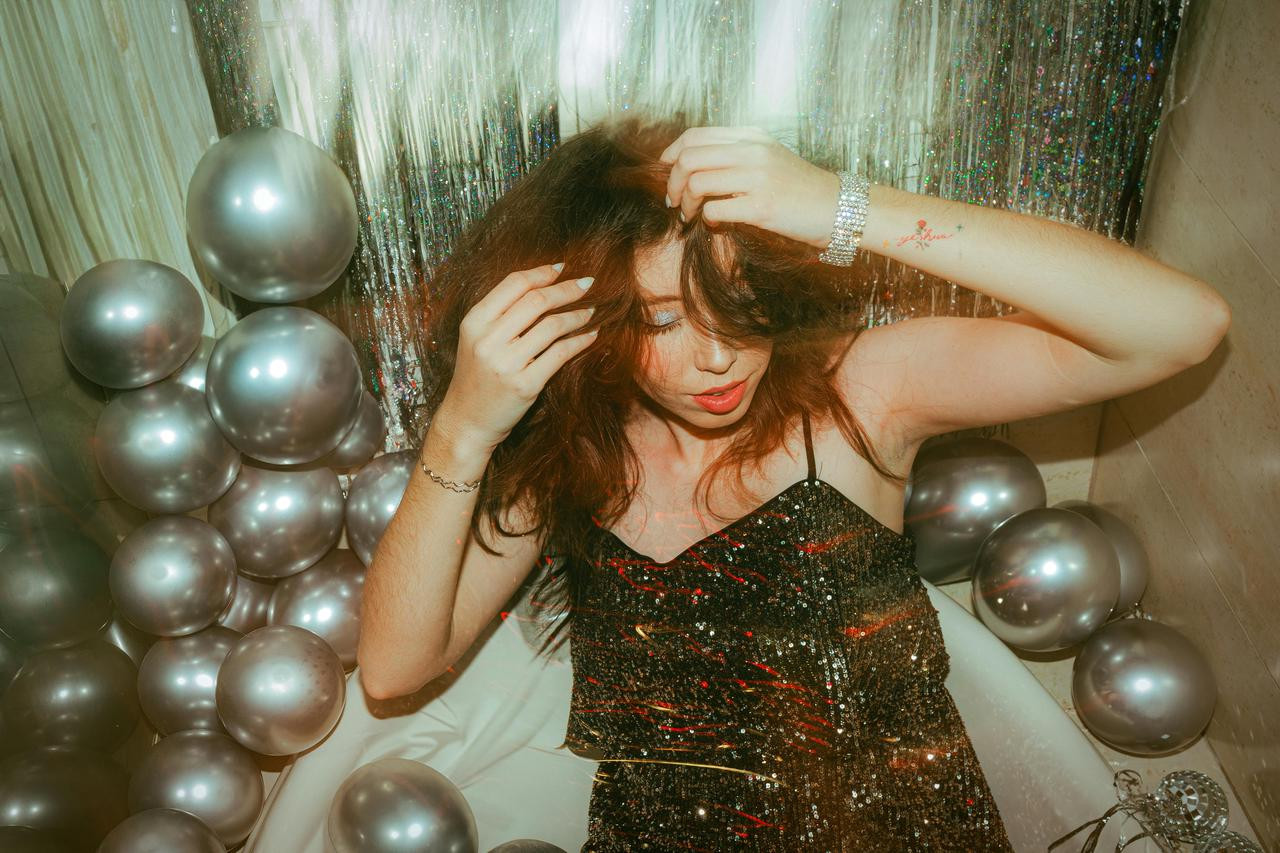 A girl poses in front of the silver balloon disco backdrop.
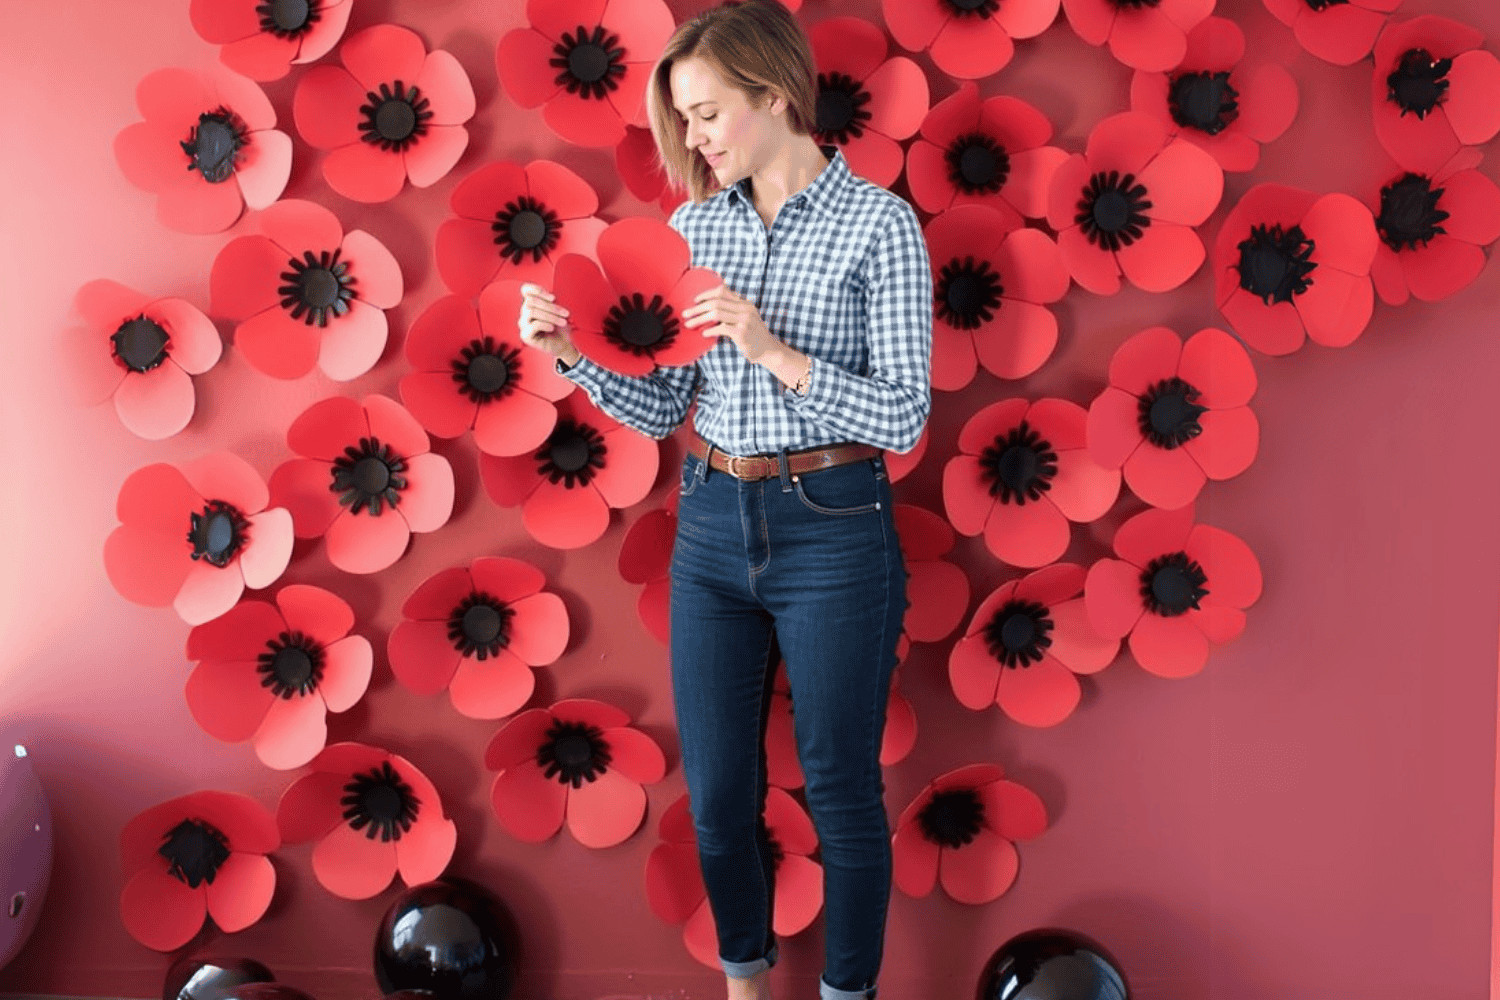
4.11. Party Anemone DIY Backdrop
Create a cute and appealing backdrop with a party anemone theme. This creative option is perfect for adding a touch of whimsy.
How to create:
- Buy some red card paper and cut out large petals.
- Glue five red petals together and add black wool pom poms in the middle.
- Attach these paper blossom flowers on a red, black, or white surface.
- Frame your backdrop with black balloons.
 The Party Anemone DIY Backdrop
5. Step-by-Step Guide to Creating a Fabric Photo Backdrop
Fabric backdrops are versatile and easy to customize. Follow these steps to create your own.
5.1. Choosing the Right Fabric
Selecting the appropriate fabric is essential for a successful backdrop. Consider the following:
- Material: Cotton, muslin, and velvet are popular choices. Cotton is affordable and easy to work with, muslin is lightweight and versatile, and velvet adds a luxurious feel.
- Color: Choose a color that complements your subjects. Neutral colors like white, gray, and black are versatile, while bold colors can add vibrancy.
- Texture: Consider the texture of the fabric. Smooth fabrics are less distracting, while textured fabrics can add depth.
5.2. Preparing the Fabric
Proper preparation ensures a smooth and professional-looking backdrop:
- Washing: Wash and dry the fabric to prevent shrinkage and remove wrinkles.
- Ironing: Iron the fabric to eliminate any remaining wrinkles. Use a steamer for delicate fabrics.
- Cutting: Cut the fabric to the desired size. Ensure it is large enough to cover the entire background area.
5.3. Creating the Backdrop
Follow these steps to assemble your fabric backdrop:
- Hemming: Hem the edges of the fabric to prevent fraying. This can be done with a sewing machine or fabric glue.
- Creating a Rod Pocket: If you plan to hang the backdrop from a stand, create a rod pocket at the top by folding over the fabric and sewing a seam.
- Attaching to the Stand: Slide the rod through the pocket and attach it to your backdrop stand. Alternatively, use clamps to secure the fabric to the stand.
5.4. Adding Personal Touches
Customize your fabric backdrop with paint, stencils, or appliques:
- Painting: Use fabric paint to add designs, patterns, or solid colors.
- Stenciling: Create intricate patterns using stencils and fabric paint.
- Appliques: Attach fabric cutouts or embellishments to add texture and visual interest.
6. Maximizing Your DIY Photo Backdrop
To maximize the impact of your DIY photo backdrop, consider the following tips and techniques.
6.1. Lighting Techniques
Proper lighting is crucial for showcasing your backdrop effectively. Experiment with different lighting setups to achieve the desired effect:
- Three-Point Lighting: Use a key light, fill light, and back light to create balanced and well-lit images.
- Natural Light: Utilize natural light from windows or outdoor settings to create soft and flattering illumination.
- Artificial Light: Use studio lights or speedlights to control the intensity and direction of the light.
6.2. Posing and Composition
Effective posing and composition can enhance the overall impact of your photos:
- Posing: Guide your subjects into flattering poses that complement the backdrop.
- Composition: Use the rule of thirds, leading lines, and symmetry to create visually appealing compositions.
- Angles: Experiment with different camera angles to add depth and interest to your photos.
6.3. Color Coordination
Coordinating colors between your subject, backdrop, and props can create harmonious and visually appealing images:
- Complementary Colors: Use colors that are opposite each other on the color wheel to create contrast and visual interest.
- Analogous Colors: Use colors that are next to each other on the color wheel to create a harmonious and cohesive look.
- Monochromatic Colors: Use different shades and tints of the same color to create a subtle and elegant effect.
6.4. Maintenance and Storage
Proper maintenance and storage ensure your backdrop remains in good condition:
- Cleaning: Clean your backdrop regularly to remove dust, dirt, and stains.
- Storage: Store your backdrop in a clean, dry place to prevent damage.
- Wrinkle Removal: Iron or steam your backdrop before each use to remove wrinkles and creases.
7. The Impact of Backdrops on Different Photography Genres
Backdrops play a significant role in various photography genres, enhancing the story and mood of each image.
7.1. Portrait Photography
In portrait photography, backdrops help to isolate the subject and create a specific mood.
- Solid Colors: Solid-colored backdrops, like gray or black, are commonly used to keep the focus on the subject’s face and expression.
- Textured Backdrops: Textured backdrops add depth and visual interest, enhancing the overall aesthetic of the portrait.
7.2. Product Photography
Product photography relies on backdrops to showcase items clearly and attractively.
- White Backgrounds: White backdrops are often used to create clean and professional images, ideal for e-commerce.
- Themed Backdrops: Themed backdrops that complement the product can enhance its appeal and highlight its features.
7.3. Food Photography
Food photography uses backdrops to create appetizing and visually appealing images.
- Natural Textures: Wooden surfaces, rustic fabrics, and stone textures are popular choices for adding warmth and authenticity to food photos.
- Neutral Colors: Neutral-colored backdrops prevent distraction and allow the food to be the main focus.
7.4. Event Photography
Event photography utilizes backdrops to create fun and memorable photo opportunities for guests.
- Themed Backdrops: Backdrops that match the event’s theme, such as weddings or birthday parties, enhance the overall experience.
- Interactive Backdrops: Backdrops with props and interactive elements encourage guests to engage and create fun photos.
8. Professional Insights and Recommendations
Gain insights from professional photographers to elevate your backdrop game.
8.1. Expert Tips for Backdrop Design
Here are some expert tips for designing effective backdrops:
- Keep It Simple: Avoid overly complex designs that can distract from the subject.
- Consider the Lighting: Choose colors and textures that work well with your lighting setup.
- Test Your Backdrop: Take test shots to ensure the backdrop looks good on camera.
8.2. Recommended Tools and Resources
Explore these recommended tools and resources for creating high-quality backdrops:
| Tool/Resource | Description |
|---|---|
| Adobe Photoshop | For creating and editing digital backdrops. |
| Canva | For designing custom backdrops and graphics. |
| Fabric Stores | For purchasing a wide variety of fabrics for DIY backdrops. |
| Art Supply Stores | For purchasing paints, brushes, and other art materials for customizing backdrops. |
| Online Tutorials | For learning new techniques and getting inspiration for backdrop design. |
8.3. Common Mistakes to Avoid
Avoid these common mistakes when creating and using photo backdrops:
- Wrinkled Backdrops: Always iron or steam your backdrop before use to remove wrinkles.
- Poor Lighting: Ensure your backdrop is well-lit to avoid shadows and uneven exposure.
- Distracting Backgrounds: Choose a backdrop that complements your subject without being too distracting.
8.4. Staying Updated with Trends
Stay current with the latest trends in photography backdrops by:
- Following Industry Blogs: Read photography blogs and magazines to stay informed about new trends and techniques.
- Attending Workshops: Participate in photography workshops and seminars to learn from experts.
- Networking with Photographers: Connect with other photographers to share ideas and inspiration.
9. Case Studies: Successful DIY Photo Backdrops
Explore real-world examples of successful DIY photo backdrops and learn from their design and execution.
9.1. Case Study 1: Geometric Portrait Backdrop
A photographer created a striking geometric backdrop using cardboard shapes painted with vibrant colors. The backdrop added a modern and artistic touch to the portraits, enhancing the subject’s personality.
9.2. Case Study 2: Floral Wedding Photo Booth
A couple created a beautiful floral photo booth for their wedding using paper flowers and greenery. The backdrop provided a romantic and whimsical setting for guests to capture memorable photos.
9.3. Case Study 3: Rustic Product Photography Backdrop
A small business owner created a rustic backdrop for product photography using reclaimed wood. The backdrop added a natural and authentic feel to the product images, enhancing their appeal to customers.
10. Frequently Asked Questions (FAQs) About Photo Backdrops
Get answers to common questions about creating and using photo backdrops.