Making a sketch from a photo in Photoshop is a creative and rewarding process, and at dfphoto.net, we’re excited to guide you through the steps. This technique, blending digital art with photography, offers a unique way to transform your images into artistic renderings, appealing to both photography enthusiasts and graphic designers. With Photoshop, you can easily convert your photos into stunning pencil sketches, charcoal drawings, or watercolor paintings.
1. Understanding the Basics of Photo to Sketch Conversion
Before diving into the how-to, let’s explore the fundamental ideas that make this process possible.
1.1. What Is Photo to Sketch Conversion?
Photo to sketch conversion refers to the process of altering a photograph to resemble a hand-drawn sketch. This can be achieved through various digital techniques, primarily using photo editing software like Adobe Photoshop. The goal is to mimic the look and feel of traditional drawing methods, such as pencil, charcoal, or ink sketches.
1.2. Why Convert Photos to Sketches?
- Artistic Expression: Transforming photos into sketches allows for creative expression beyond realistic photography.
- Unique Visual Appeal: Sketches offer a distinct aesthetic that can make images stand out.
- Versatility: Suitable for various projects, including digital art, graphic design, and personal keepsakes.
- Emotional Impact: Sketches can convey a sense of nostalgia, simplicity, or drama.
1.3. Key Elements of a Good Photo to Sketch Conversion
- Edge Detail: Preserving and enhancing edges to define shapes and forms.
- Contrast: Balancing light and dark areas to create depth and dimension.
- Texture: Adding subtle textures to simulate the feel of paper or canvas.
- Stylization: Choosing a specific sketching style (e.g., pencil, charcoal, watercolor) and applying it consistently.
2. Preparing Your Photo in Photoshop
The preparation stage is crucial for achieving a high-quality sketch effect.
2.1. Choosing the Right Photo
- High Resolution: Start with a high-resolution image to retain details during the conversion.
- Good Lighting: Photos with well-defined highlights and shadows work best.
- Sharp Focus: Ensure the main subject is in sharp focus for clear sketch lines.
- Simple Composition: Less cluttered photos tend to produce better results.
2.2. Opening Your Photo in Photoshop
- Launch Adobe Photoshop on your computer.
- Go to
File > Openand select the photo you want to convert. - The photo will open in a new Photoshop document.
2.3. Converting to Grayscale
- Why Grayscale?: Converting the photo to grayscale removes color distractions and focuses on tonal values, which are essential for creating a realistic sketch effect.
- How to Convert:
- Go to
Image > Mode > Grayscale. - Photoshop may ask if you want to discard color information. Click
Discard.
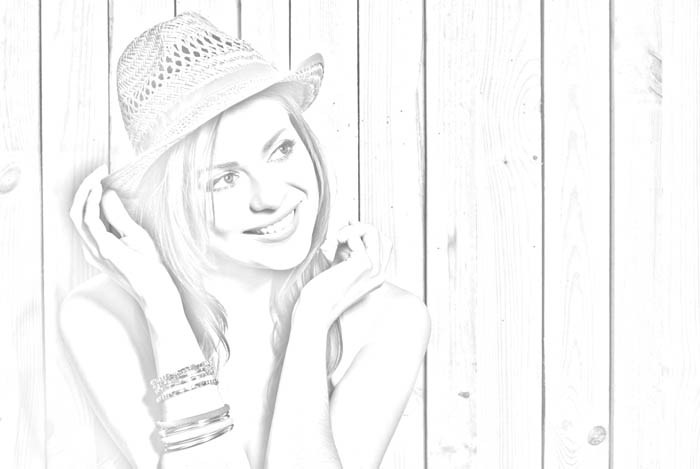
 Grayscale Conversion in Photoshop
- Go to
2.4. Adjusting Levels and Contrast
- Why Adjust Levels?: Adjusting levels ensures that the image has a good range of tones, from dark blacks to bright whites, which enhances the sketch effect.
- How to Adjust:
- Go to
Image > Adjustments > Levels. - Adjust the black, gray, and white sliders to achieve a balanced tonal range.
- Increase the contrast slightly to make the details stand out.
- Go to
3. Creating the Basic Sketch Effect
Here’s where the magic begins – turning your grayscale photo into a sketch.
3.1. Duplicating the Layer
- Why Duplicate?: Duplicating the layer allows you to work non-destructively, preserving the original image.
- How to Duplicate:
- In the Layers panel, select the Background layer.
- Press
Ctrl+J(Windows) orCmd+J(Mac) to duplicate the layer. - Rename the new layer to something descriptive, like “Sketch Layer.”
3.2. Inverting the Layer
-
Why Invert?: Inverting the layer creates a negative image, which is a crucial step in achieving the sketch effect.
-
How to Invert:
- Select the “Sketch Layer.”
- Go to
Image > Adjustments > Invertor pressCtrl+I(Windows) orCmd+I(Mac).
Inverting the layer is a critical step in creating the sketch effect.
3.3. Changing the Blend Mode
- Why Change Blend Mode?: Changing the blend mode to
Linear Dodge (Add)orColor Dodgemakes the layer interact with the layer below in a way that creates the initial sketch look. - How to Change:
- In the Layers panel, select the “Sketch Layer.”
- Change the blend mode from
NormaltoLinear Dodge (Add)orColor Dodge. - The image should now appear mostly white or very bright.
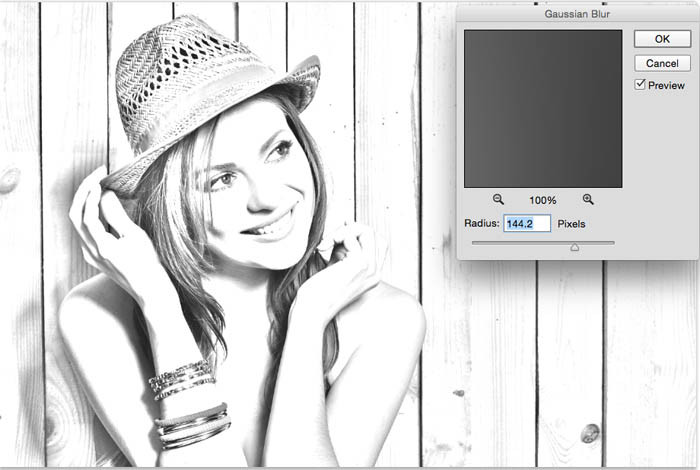
3.4. Applying Gaussian Blur
- Why Gaussian Blur?: Applying Gaussian Blur softens the inverted layer, creating the light, airy look of a sketch.
- How to Apply:
- Select the “Sketch Layer.”
- Go to
Filter > Blur > Gaussian Blur. - Adjust the Radius slider until you achieve the desired sketch effect. The amount of blur will vary depending on the image resolution and desired look. A radius between 5 and 15 pixels is a good starting point.
 Applying Gaussian Blur to the Inverted Layer
4. Refining the Sketch Effect
Once you have the basic sketch effect, you can refine it further to achieve a more polished and detailed result.
4.1. Adjusting Layer Opacity
- Why Adjust Opacity?: Adjusting the layer opacity allows you to control the intensity of the sketch effect, blending it subtly with the original photo.
- How to Adjust:
- Select the “Sketch Layer.”
- Adjust the Opacity slider in the Layers panel to fine-tune the effect. A lower opacity will make the sketch more subtle, while a higher opacity will make it more pronounced.
4.2. Using Blend Modes for Different Effects
- Experiment with Different Blend Modes:
- Color Dodge: Creates sharper, more defined edges.
- Linear Dodge (Add): Produces a softer, more subtle sketch.
- Overlay: Combines the sketch with the original image for a textured look.
- Soft Light: Adds a gentle sketch effect while preserving the original colors.
 Blend Mode Variations for Sketch Effects
4.3. Adding a Levels Adjustment Layer
- Why Add a Levels Adjustment Layer?: A Levels adjustment layer allows you to fine-tune the contrast and brightness of the sketch without directly altering the layers below.
- How to Add:
- Click the
Create New Adjustment Layericon at the bottom of the Layers panel. - Select
Levels. - Adjust the black, gray, and white sliders to enhance the contrast and brightness of the sketch.
- Click the
5. Adding Details and Enhancements
To make your sketch even more realistic, consider adding additional details and enhancements.
5.1. Using the Unsharp Mask Filter
- Why Unsharp Mask?: The Unsharp Mask filter sharpens the edges and details in the sketch, making it look more defined and realistic.
- How to Use:
- Select the “Sketch Layer.”
- Go to
Filter > Sharpen > Unsharp Mask. - Adjust the Amount, Radius, and Threshold sliders to achieve the desired sharpness. Be careful not to over-sharpen, as this can create unwanted artifacts.
5.2. Adding Texture
- Why Add Texture?: Adding texture simulates the look of paper or canvas, enhancing the realism of the sketch.
- How to Add:
- Find a high-resolution texture image (e.g., paper, canvas, grunge).
- Open the texture image in Photoshop.
- Copy and paste the texture image onto a new layer above the “Sketch Layer.”
- Change the blend mode of the texture layer to
OverlayorMultiply. - Adjust the opacity of the texture layer to fine-tune the effect.
5.3. Adding Color Accents
- Why Add Color Accents?: Adding subtle color accents can make the sketch more visually appealing and unique.
- How to Add:
- Create a new layer above the “Sketch Layer.”
- Select a soft brush and choose a color.
- Paint subtle color accents on the sketch.
- Change the blend mode of the color layer to
ColororSoft Light. - Adjust the opacity of the color layer to fine-tune the effect.
 Adding Color Accents to the Sketch
5.4. Using the Smudge Tool
- Why Use the Smudge Tool?: The Smudge Tool can be used to soften harsh lines and create a more hand-drawn look.
- How to Use:
- Select the Smudge Tool from the toolbar.
- Choose a soft brush and adjust the Strength setting.
- Gently smudge areas of the sketch to soften the lines and create a more natural look.
6. Exploring Different Sketch Styles
Photoshop offers various techniques to achieve different sketch styles. Here are a few to explore.
6.1. Pencil Sketch Effect
- Technique: Use the basic steps outlined above, focusing on fine lines and subtle shading.
- Settings: Use a smaller Gaussian Blur radius and a higher Unsharp Mask amount.
 Pencil Sketch Effect
6.2. Charcoal Sketch Effect
- Technique: Emphasize dark tones and dramatic shading.
- Settings: Use a larger Gaussian Blur radius and adjust the Levels to create deeper blacks and brighter whites.
6.3. Watercolor Sketch Effect
- Technique: Add soft colors and textures to simulate the look of watercolor paint.
- Settings: Use a soft brush to add color accents and experiment with different blend modes.
7. Saving and Exporting Your Sketch
Once you’re satisfied with your sketch, it’s time to save and export it.
7.1. Saving Your Photoshop File
- Go to
File > Save As. - Choose a location on your computer.
- Save the file as a
.PSDto preserve all the layers and adjustments.
7.2. Exporting for Web
- Go to
File > Export > Save for Web (Legacy). - Choose the appropriate file format (JPEG for photos, PNG for graphics).
- Adjust the quality and size settings as needed.
- Click
Save.
7.3. Exporting for Print
- Go to
File > Save As. - Choose the
.TIFFformat for high-quality printing. - Make sure the resolution is set to 300 DPI.
- Click
Save.
8. Advanced Techniques and Tips
Elevate your photo to sketch conversions with these advanced techniques.
8.1. Using Smart Objects
- Why Use Smart Objects?: Converting layers to Smart Objects allows you to apply filters non-destructively, meaning you can adjust the filter settings at any time without losing image quality.
- How to Use:
- Select the layer you want to convert.
- Right-click on the layer and choose
Convert to Smart Object.
8.2. Creating Custom Brushes
- Why Create Custom Brushes?: Custom brushes allow you to add unique textures and details to your sketches.
- How to Create:
- Find or create a texture image.
- Go to
Edit > Define Brush Preset. - Adjust the brush settings in the Brush panel (e.g., Size, Spacing, Angle).
8.3. Using Actions
- Why Use Actions?: Actions automate repetitive tasks, saving you time and effort.
- How to Use:
- Open the Actions panel (
Window > Actions). - Click the
Create New Actionicon. - Record the steps you want to automate.
- Click the
Stop Recordingicon. - To play the action, select it and click the
Playicon.
- Open the Actions panel (
9. Common Mistakes to Avoid
- Over-Sharpening: Avoid over-sharpening, which can create unwanted artifacts and make the sketch look unnatural.
- Excessive Blurring: Be careful not to blur the image too much, as this can result in a loss of detail.
- Ignoring Tonal Range: Pay attention to the tonal range of the image and adjust the Levels accordingly.
- Using Low-Resolution Images: Always start with high-resolution images to ensure the best possible results.
10. Inspiring Examples and Case Studies
Explore these examples to ignite your creativity:
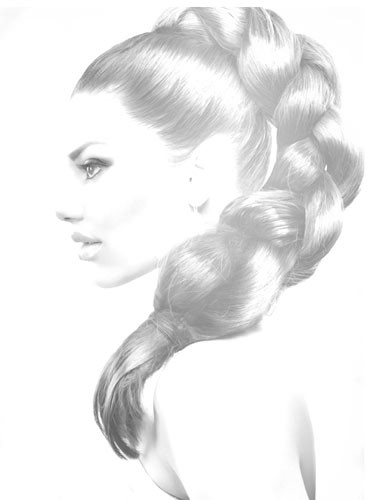
10.1. Example 1: Portrait Sketch
Convert a portrait photo into a pencil sketch to highlight facial features and create an intimate, artistic feel.
10.2. Example 2: Landscape Sketch
Transform a landscape photo into a charcoal sketch to emphasize textures, shadows, and natural elements.
10.3. Example 3: Architectural Sketch
Convert an architectural photo into a detailed line drawing to showcase the structure’s design and intricate details.
11. The Role of dfphoto.net in Your Photography Journey
At dfphoto.net, we are dedicated to providing you with the resources and inspiration you need to excel in photography and digital art.
11.1. Explore Our Tutorials
Access a wide range of tutorials covering various photography techniques, post-processing tips, and creative effects.
11.2. Join Our Community
Connect with fellow photographers and artists, share your work, and receive valuable feedback.
11.3. Stay Updated with the Latest Trends
Keep up-to-date with the latest trends in photography, digital art, and technology.
11.4. Discover New Inspiration
Find inspiration from stunning photography examples, artist profiles, and creative ideas.
12. Understanding Search Intent
Understanding what users are looking for when they search for “How To Make Sketch From Photo In Photoshop” can help you tailor your content to meet their needs. Here are five possible search intents:
12.1. Learning the Basics
- Intent: Users want a step-by-step guide on how to convert a photo into a sketch using Photoshop.
- Content: Provide a detailed, beginner-friendly tutorial with clear instructions and visuals.
12.2. Exploring Different Styles
- Intent: Users want to learn how to create different types of sketches, such as pencil, charcoal, or watercolor.
- Content: Offer multiple techniques and variations, showcasing different sketch styles and their unique settings.
12.3. Troubleshooting Issues
- Intent: Users are encountering problems during the conversion process and need solutions.
- Content: Include a troubleshooting section addressing common issues and providing practical solutions.
12.4. Seeking Advanced Techniques
- Intent: Users are looking for advanced methods to refine and enhance their sketch effects.
- Content: Share advanced techniques, such as using Smart Objects, custom brushes, and actions, to elevate the sketch quality.
12.5. Finding Inspiration
- Intent: Users want to see examples of photo to sketch conversions to inspire their own projects.
- Content: Showcase inspiring examples and case studies, highlighting different styles and creative applications.
13. Optimizing Your Workflow
Efficient workflows can save time and improve the quality of your photo to sketch conversions. Here are some tips to optimize your workflow:
13.1. Keyboard Shortcuts
- Why Use Keyboard Shortcuts?: Keyboard shortcuts speed up your workflow by allowing you to perform actions quickly without navigating through menus.
- Common Shortcuts:
Ctrl+J(Windows) /Cmd+J(Mac): Duplicate LayerCtrl+I(Windows) /Cmd+I(Mac): InvertCtrl+Shift+D(Windows) /Cmd+Shift+D(Mac): Convert to GrayscaleCtrl+Z(Windows) /Cmd+Z(Mac): Undo
13.2. Creating Presets
- Why Create Presets?: Presets allow you to save your favorite settings and apply them quickly to other images.
- How to Create:
- Adjust the settings for a filter or adjustment layer.
- Click the menu icon in the panel and choose
Save Preset. - Name the preset and click
Save.
13.3. Using Actions for Repetitive Tasks
- Automate Your Workflow: Actions can automate repetitive tasks, such as converting to grayscale, duplicating layers, and applying filters.
- Record and Play: Record the steps you want to automate and play the action to apply the same steps to other images.
14. Legal and Ethical Considerations
Be mindful of copyright and ethical issues when working with photos and sketches.
14.1. Copyright
- Respect Copyright Laws: Ensure you have the right to use the photos you convert into sketches.
- Use Your Own Photos: Whenever possible, use your own photos to avoid copyright issues.
- Attribution: If you use someone else’s photo, give proper attribution to the photographer.
14.2. Ethical Considerations
- Transparency: Be transparent about using digital techniques to create sketches.
- Authenticity: Avoid misrepresenting digital sketches as hand-drawn artwork.
- Permission: Obtain permission from the subject if you are creating sketches of people.
15. Staying Updated with Photoshop
Adobe Photoshop is constantly evolving, with new features and updates being released regularly. Here’s how to stay updated:
15.1. Adobe Creative Cloud
- Automatic Updates: Keep your Photoshop software up-to-date through the Adobe Creative Cloud app.
- New Features: Explore new features and enhancements to improve your workflow and creativity.
15.2. Online Resources
- Adobe Tutorials: Access a wealth of tutorials and resources on the Adobe website.
- Photography Blogs: Follow photography blogs and websites to stay informed about the latest trends and techniques.
- Online Forums: Participate in online forums and communities to exchange tips and ideas with other Photoshop users.
16. The Future of Photo to Sketch Conversion
The field of photo to sketch conversion is constantly evolving, with new technologies and techniques emerging. Here are some trends to watch:
16.1. AI-Powered Sketching
- Artificial Intelligence: AI-powered algorithms are making it easier than ever to convert photos into realistic sketches with minimal effort.
- Machine Learning: Machine learning models are being trained to mimic different sketching styles and techniques.
16.2. Real-Time Conversion
- Live Sketching: Real-time conversion tools allow you to see the sketch effect as you adjust the settings.
- Interactive Adjustments: Interactive adjustments provide immediate feedback, making it easier to fine-tune the sketch effect.
16.3. Mobile Apps
- Sketching on the Go: Mobile apps are making it possible to convert photos into sketches on your smartphone or tablet.
- Convenience: Mobile apps offer convenience and portability, allowing you to create sketches anytime, anywhere.
17. Frequently Asked Questions (FAQ)
17.1. Can I use other software besides Photoshop to create a sketch from a photo?
Yes, while Photoshop is a popular choice, other software like GIMP, Corel Painter, and online tools can also be used.
17.2. What type of photos works best for sketch conversion?
Photos with high resolution, good lighting, sharp focus, and simple composition work best.
17.3. How can I make the sketch effect more realistic?
Add texture, adjust contrast, and use the Unsharp Mask filter to enhance details and realism.
17.4. What is the best blend mode to use for the sketch layer?
Linear Dodge (Add) and Color Dodge are popular choices, but experiment with other blend modes for different effects.
17.5. How can I add color to my sketch?
Create a new layer, use a soft brush to add color accents, and change the blend mode to Color or Soft Light.
17.6. Can I automate the sketch conversion process?
Yes, you can use actions in Photoshop to automate repetitive tasks and speed up your workflow.
17.7. What should I do if the sketch looks too blurry?
Adjust the Gaussian Blur radius and use the Unsharp Mask filter to sharpen the details.
17.8. How can I create different sketch styles?
Experiment with different settings, such as the Gaussian Blur radius, blend modes, and adjustment layers, to achieve various sketch styles.
17.9. Is it legal to convert other people’s photos into sketches?
Ensure you have the right to use the photos and give proper attribution to the photographer if necessary.
17.10. How do I keep my Photoshop software up-to-date?
Keep your Photoshop software up-to-date through the Adobe Creative Cloud app to access the latest features and enhancements.
18. Call to Action
Ready to transform your photos into stunning sketches? Visit dfphoto.net today to explore more tutorials, discover beautiful photography, and connect with a vibrant community of photographers and artists. Whether you’re looking to master new techniques, find inspiration for your next project, or stay updated with the latest trends, dfphoto.net has everything you need to elevate your photography journey.
Address: 1600 St Michael’s Dr, Santa Fe, NM 87505, United States.
Phone: +1 (505) 471-6001.
Website: dfphoto.net.