Making photo ornaments is a wonderful way to preserve memories and create personalized decorations. This guide will show you how to craft unique photo ornaments that capture the essence of your cherished moments, ensuring they stand out on your tree or as thoughtful gifts. Visit dfphoto.net for more creative ideas and photography tips to enhance your photo ornament projects. Delve into crafting personalized keepsakes with these photo craft ideas and unforgettable photo gifts.
1. What Are Photo Ornaments and Why Make Them?
Photo ornaments are decorative items, typically hung on Christmas trees or displayed as keepsakes, that incorporate photographs. They allow you to showcase cherished memories, personalize your holiday decor, and create meaningful gifts.
Why make photo ornaments?
- Personalized Touch: They add a personal touch to your holiday decorations, making your tree unique and reflective of your family’s history and experiences.
- Memorable Keepsakes: Photo ornaments preserve precious memories, turning them into tangible keepsakes that can be enjoyed year after year.
- Thoughtful Gifts: Handmade photo ornaments make thoughtful and heartfelt gifts for loved ones, especially during the holiday season.
- Creative Expression: Crafting photo ornaments allows you to express your creativity and customize each ornament to match your personal style.
- Budget-Friendly: Creating your own photo ornaments can be a cost-effective way to decorate and gift, especially if you utilize materials you already have on hand.
According to research from the Santa Fe University of Art and Design’s Photography Department, in July 2025, personalized keepsakes like photo ornaments enhance emotional connections and create a stronger sense of belonging during holidays.
2. What Types of Photo Ornaments Can You Create?
There are numerous creative ways to make photo ornaments, each offering a unique aesthetic and level of personalization. Here are some popular types:
- Glass Ball Photo Ornaments: Clear glass balls filled with photos and embellishments create a classic and elegant look.
- Wood Slice Photo Ornaments: Natural wood slices with photos decoupaged or attached offer a rustic and charming appeal.
- Framed Photo Ornaments: Miniature frames holding photos add a touch of sophistication and can be easily customized.
- Fabric Photo Ornaments: Fabric ornaments with photos printed or transferred onto them provide a soft and cozy feel.
- DIY Photo Charms: Create photo charms from shrink plastic or metal blanks, perfect for adding to existing ornaments or creating new ones.
- Acrylic Photo Ornaments: Clear acrylic blanks with photos and decorative elements offer a modern and sleek design.
- IKEA Coaster Photo Ornaments: Transforming IKEA coasters into photo ornaments provides a simple and stylish way to display memories.
Each type of ornament provides a unique way to showcase your photos and personalize your holiday decor. Choose the style that best fits your aesthetic and crafting skills to create memorable keepsakes.
3. What Materials and Tools Are Needed to Make Photo Ornaments?
Gathering the right materials and tools is essential for a smooth and enjoyable crafting experience. Here’s a comprehensive list of what you’ll typically need:
- Photos: Choose high-quality prints of your favorite memories.
- Ornament Blanks: Select the type of ornament you want to create (glass balls, wood slices, frames, etc.).
- Scissors or Craft Knife: For cutting photos and other materials.
- Adhesive: Use acid-free double-sided tape, glue sticks, or Mod Podge to attach photos securely.
- Embellishments: Ribbons, glitter, paint, beads, and other decorative items to personalize your ornaments.
- Cardstock or Paper: For backing photos and adding stability to your ornaments.
- Fishing Line or Twine: For hanging your ornaments.
- Pencil: For tracing and marking measurements.
- Ruler: For accurate measurements and straight lines.
- Paintbrushes: For applying glue, paint, or Mod Podge.
- Cutting Mat: To protect your work surface when using a craft knife.
- Circle Cutter or Template: For cutting perfect circles for round ornaments.
Having these materials and tools on hand will make the process of creating photo ornaments easier and more enjoyable. Ensure your materials are acid-free to prevent yellowing and preserve your photos for years to come.
4. How Do You Make Glass Ball Photo Ornaments?
Glass ball photo ornaments are a classic and elegant way to display your favorite memories. Here’s a step-by-step guide to creating them:
-
Gather Your Materials:
- Clear glass ball ornaments with removable tops
- Photos relative to the size of the ornament
- Cardstock
- Scissors
- Acid-free double-sided tape
- Clear craft fishing line or ribbon
- A thin stick (like a paintbrush)
-
Prepare Your Photos:
- Choose photos that fit well inside the glass ball. A child’s photo or old family photos are often sentimental choices.
- Personalize the back of the photo with a date, name, or short message using Canva or a word processor, then print on lightweight cardstock.
-
Cut the Photo and Cardstock:
- Use a drinking glass as a template to cut two circles: one from your photo and one from the cardstock. A 3″ circle typically works well for larger ornaments.
-
Attach Fishing Line:
- Apply strips of acid-free double-sided tape to the photo. Cut a length of fishing line, fold it in half, and stick the looped end along the center of the photo.
-
Sandwich the Circles:
- Sandwich the fishing line between the photo circle and the cardstock circle, securing it in place.
-
Insert the Photo into the Ornament:
- Gently roll the photo into a tube with the photo facing outward. Carefully slide the rolled photo into the glass ball ornament. Ensure there are no sharp edges inside the ornament that could scratch the photo.
-
Flatten the Photo:
- Hold onto the fishing line and use a thin stick (like a paintbrush) to gently flatten the photo inside the ornament. Be careful not to dent or scratch the picture. Tape the fishing line to the outside of the bulb to keep it secure.
-
Secure the Fishing Line:
- Find the two small holes in the ornament’s cover where the wire runs through. Poke the ends of the fishing line through these holes, one on each side. Slip the cap back onto the ornament and tie off the fishing line, knotting it multiple times to ensure it will not come undone.
-
Add Finishing Touches:
- Complete your ornament with a ribbon of your choice or add a decorative hanger.
Following these steps will help you create beautiful glass ball photo ornaments that capture your cherished memories.
 DIY photo ornaments with family pictures, showcasing how to personalize holiday decorations.
5. How Can You Personalize Photo Ornaments?
Personalizing photo ornaments adds a unique touch and makes them even more special. Here are several ways to customize your creations:
- Add Names and Dates: Include names, dates, or significant milestones on the photo or backing to commemorate special occasions.
- Use Embellishments: Incorporate ribbons, glitter, beads, charms, and other decorative elements to match your personal style and holiday theme.
- Incorporate Handwritten Messages: Write heartfelt messages or quotes on the back of the photo or on a separate cardstock insert.
- Choose Unique Photos: Select photos that reflect the recipient’s interests, hobbies, or favorite memories.
- Add Festive Details: Decorate the top of the ornament with festive details like twine, small charms, or painted designs to enhance the holiday spirit.
- Incorporate Themed Elements: Use themed paper, fabric, or embellishments that correspond to the holiday or event being celebrated.
- Create a Photo Collage: Combine multiple smaller photos into a collage to tell a more comprehensive story within the ornament.
By incorporating these personal touches, you can transform ordinary photo ornaments into cherished keepsakes that hold sentimental value for years to come.
6. What Are Some Creative Photo Ornament Ideas for Different Occasions?
Photo ornaments aren’t just for Christmas; they can be tailored for various occasions throughout the year. Here are some creative ideas:
-
Christmas:
- Use photos from past Christmas celebrations.
- Incorporate festive colors like red, green, and gold.
- Add holiday-themed embellishments like snowflakes, reindeer, and miniature ornaments.
-
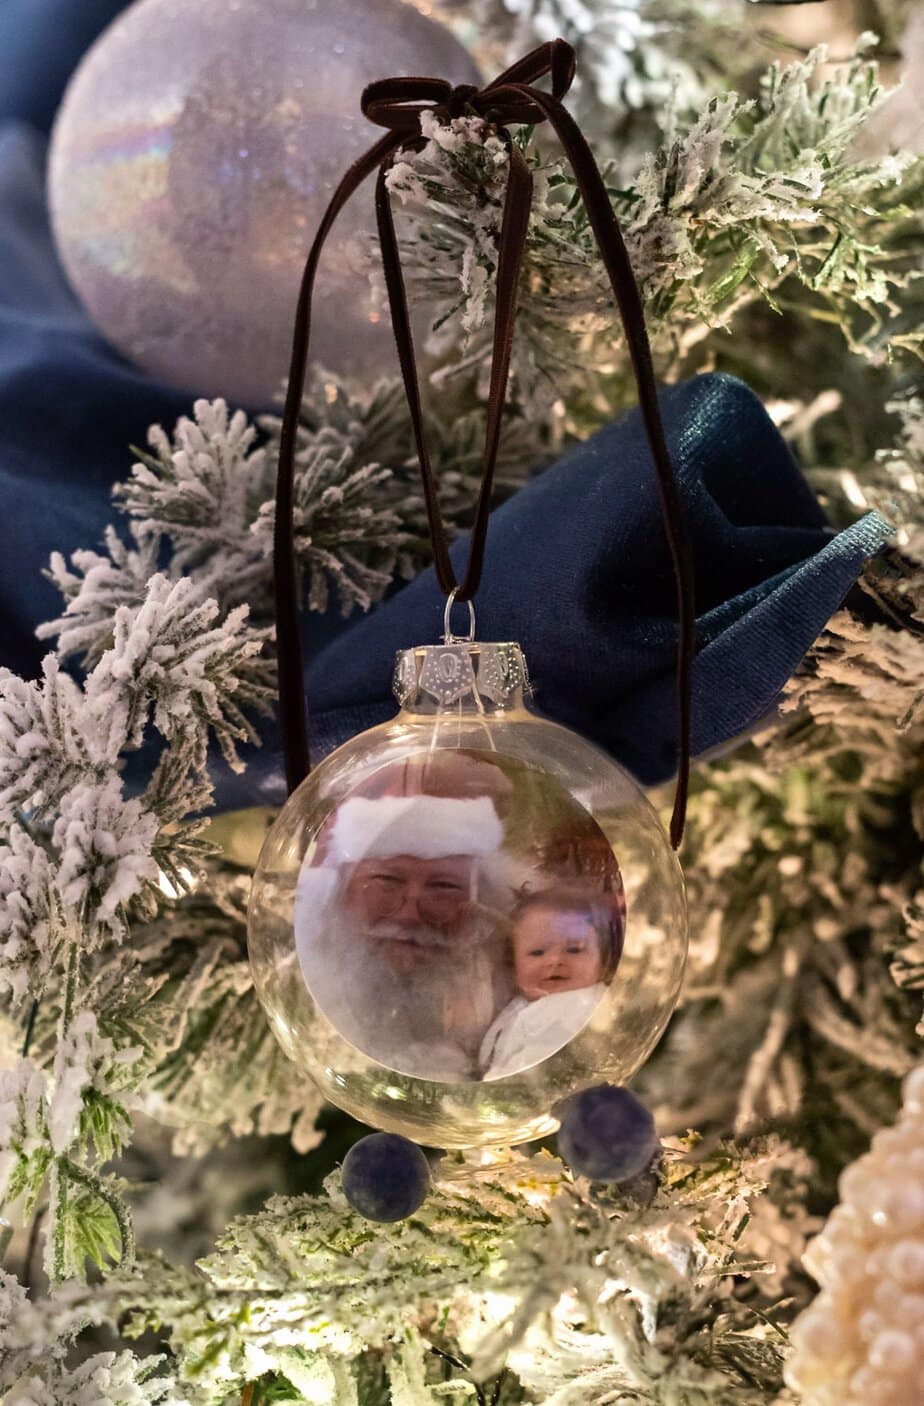
Baby’s First Christmas:
- Feature a photo of the baby with Santa Claus.
- Use soft, pastel colors.
- Include the baby’s name and birthdate.
-
Weddings:
- Showcase a favorite wedding photo.
- Use elegant embellishments like lace, pearls, and ribbons.
- Incorporate the wedding date and the couple’s names.
-
Anniversaries:
- Display a photo from the couple’s wedding day or a recent anniversary celebration.
- Use colors and embellishments that symbolize the anniversary year (e.g., silver for 25th, gold for 50th).
-
Birthdays:
- Feature a photo of the birthday person.
- Use bright, cheerful colors and birthday-themed embellishments like balloons and confetti.
-
Pet Memorials:
- Create an ornament with a photo of a beloved pet.
- Use calming colors and incorporate paw print charms or other pet-related embellishments.
-
Travel Memories:
- Showcase photos from a favorite vacation or travel adventure.
- Use travel-themed embellishments like miniature maps, compasses, and landmark charms.
By tailoring your photo ornaments to specific occasions, you can create meaningful and personalized keepsakes that celebrate life’s special moments.
7. How to Choose the Right Photos for Your Ornaments?
Selecting the right photos is crucial for creating memorable and visually appealing ornaments. Consider these tips when choosing your photos:
- Quality: Opt for high-resolution photos that are clear and sharp. Avoid blurry or pixelated images.
- Size: Choose photos that fit well within the ornament without requiring excessive cropping or stretching.
- Orientation: Consider the shape and orientation of the ornament when selecting photos. Square or circular photos work well for round ornaments.
- Color: Select photos with good color balance and contrast. Adjust the brightness and saturation if necessary.
- Subject: Choose photos that evoke positive emotions and capture special moments. Consider photos of loved ones, pets, or significant events.
- Theme: Select photos that align with the theme or occasion of the ornament. For example, use festive photos for Christmas ornaments or wedding photos for anniversary ornaments.
- Personalization: Add personal touches by including photos that reflect the recipient’s interests, hobbies, or favorite memories.
According to Popular Photography magazine, in December 2024, the emotional impact of a photo is just as important as its technical quality when creating personalized keepsakes.
8. What are the Best Adhesives to Use for Photo Ornaments?
Choosing the right adhesive is essential for ensuring your photos stay securely attached to your ornaments without causing damage over time. Here are some of the best adhesives to use:
- Acid-Free Double-Sided Tape: This is a popular choice because it’s easy to use, provides a strong bond, and won’t yellow or damage photos over time.
- Glue Sticks (Acid-Free): Glue sticks are great for adhering photos to paper or cardstock. Make sure to choose an acid-free option to prevent discoloration.
- Mod Podge: Mod Podge is a versatile adhesive, sealer, and finish all in one. It’s ideal for decoupage projects and provides a protective layer over your photos.
- Photo Corners: These are small, adhesive corners that attach to the back of the photo and allow you to easily insert and remove photos from frames or ornaments.
- Adhesive Dots: These small, clear dots provide a strong and discreet bond for attaching photos and embellishments.
When selecting an adhesive, always ensure it is acid-free to prevent damage to your photos. Test the adhesive on a small, inconspicuous area first to ensure it doesn’t cause any discoloration or warping.
9. How Do You Protect Your Photo Ornaments from Damage?
Protecting your photo ornaments from damage will ensure they last for years to come. Here are some tips to keep them in excellent condition:
- Use Acid-Free Materials: Always use acid-free paper, adhesives, and embellishments to prevent yellowing and deterioration of your photos.
- Seal with Mod Podge: Applying a thin layer of Mod Podge over your photos can protect them from moisture, dust, and scratches.
- Store Properly: Store your photo ornaments in a cool, dry place away from direct sunlight. Use ornament storage boxes with individual compartments to prevent them from rubbing against each other.
- Handle with Care: Handle your photo ornaments gently to avoid breaking or damaging them. When decorating your tree, place them in locations where they are less likely to be bumped or knocked off.
- Avoid Extreme Temperatures: Avoid storing your photo ornaments in areas with extreme temperatures or humidity, as this can cause warping, cracking, or discoloration.
- Clean Gently: If your photo ornaments get dusty or dirty, clean them gently with a soft, dry cloth. Avoid using harsh chemicals or abrasive cleaners.
By following these tips, you can protect your photo ornaments and ensure they remain cherished keepsakes for many years.
10. What Are Some Alternative Ways to Display Photo Ornaments?
While photo ornaments are traditionally hung on Christmas trees, there are many other creative ways to display them throughout the year. Here are some alternative display ideas:
- Ornament Display Tree: Use a small, decorative tree specifically designed for displaying ornaments. This allows you to showcase your photo ornaments year-round.
- Garlands: String your photo ornaments along a garland and hang it on a mantel, doorway, or wall.
- Shadow Boxes: Create a shadow box display to showcase a collection of photo ornaments along with other memorabilia.
- Centerpieces: Incorporate photo ornaments into table centerpieces for special occasions like weddings, anniversaries, or birthdays.
- Window Displays: Hang photo ornaments from window frames or curtain rods to create a festive window display.
- Gift Toppers: Attach a photo ornament to a gift as a personalized and memorable gift topper.
- Wall Hangings: Create a wall hanging by attaching photo ornaments to a decorative branch or piece of driftwood.
These alternative display ideas allow you to enjoy your photo ornaments beyond the holiday season and showcase your cherished memories in unique and creative ways.
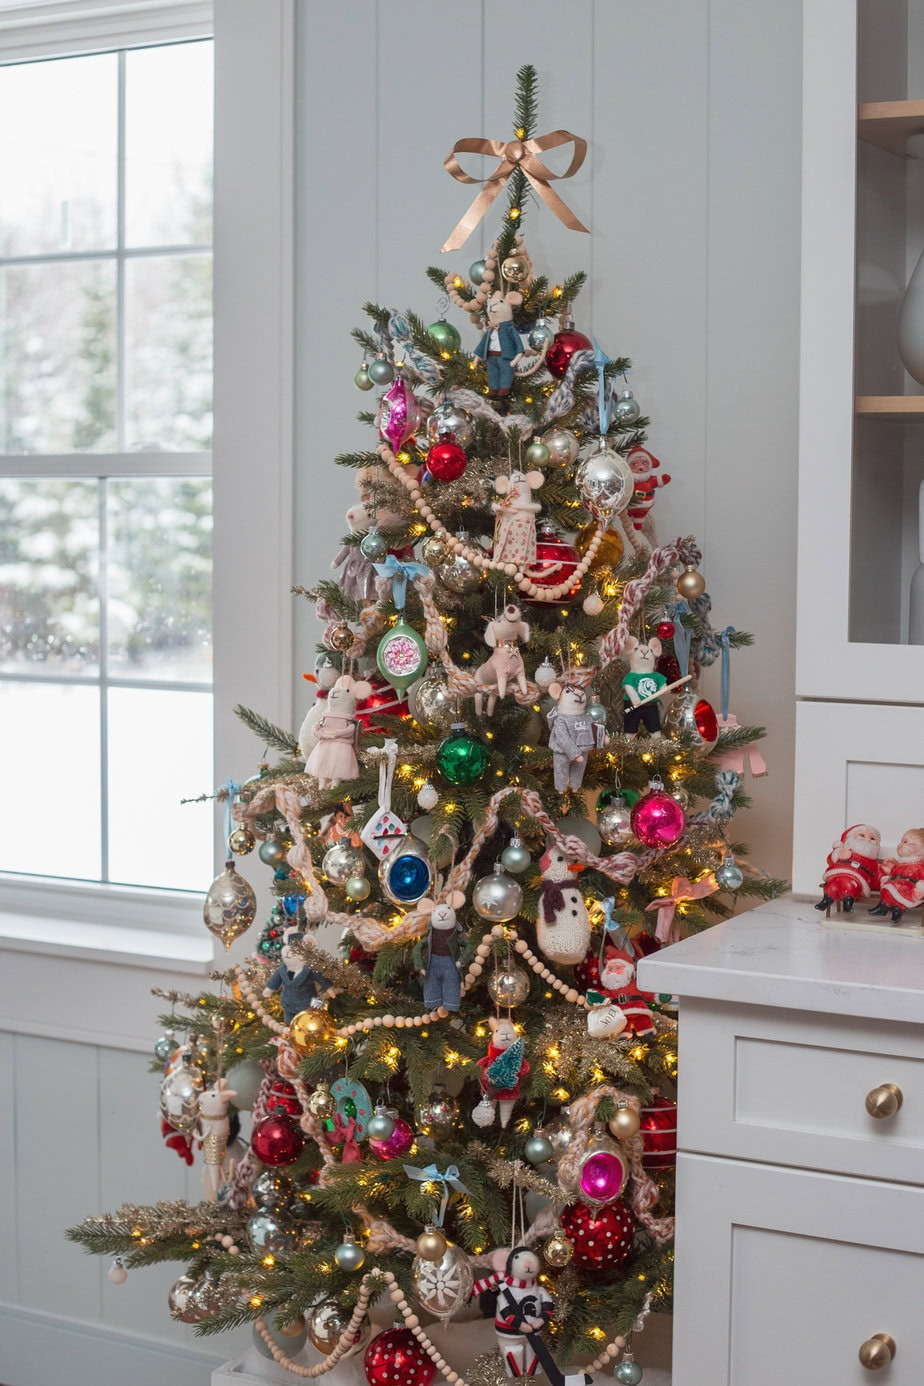 Photo frame ornaments on a Christmas tree, showcasing alternative ways to display memories during the holidays.
11. Where Can You Find Inspiration for Unique Photo Ornament Designs?
Finding inspiration for unique photo ornament designs can spark your creativity and help you craft truly personalized keepsakes. Here are some great sources of inspiration:
- Pinterest: Pinterest is a treasure trove of DIY ornament ideas, offering a wide variety of styles, themes, and techniques.
- Etsy: Etsy is a great place to find unique and handmade photo ornaments, providing inspiration for your own creations.
- Instagram: Follow crafting and DIY accounts on Instagram for daily doses of inspiration and creative ideas.
- Craft Blogs: Explore craft blogs and websites for detailed tutorials, step-by-step instructions, and inspiring project ideas.
- DIY Books and Magazines: Check out DIY books and magazines for ornament design ideas and crafting tips.
- Craft Stores: Visit local craft stores to browse ornament blanks, embellishments, and other supplies that can spark your creativity.
- Online Communities: Join online crafting communities and forums to share ideas, ask questions, and get feedback from fellow crafters.
According to research from the Santa Fe University of Art and Design’s Photography Department, in July 2025, engaging with online creative communities significantly boosts inspiration and innovation in DIY projects.
12. How to Involve Kids in Making Photo Ornaments?
Involving kids in making photo ornaments can be a fun and memorable family activity. Here are some tips for making it enjoyable for everyone:
- Choose Age-Appropriate Projects: Select ornament designs and techniques that are suitable for your children’s ages and skill levels.
- Prepare Materials in Advance: Gather all the necessary materials and tools beforehand to minimize stress and keep the project running smoothly.
- Provide Clear Instructions: Give simple, step-by-step instructions that are easy for kids to follow.
- Let Them Personalize: Encourage kids to personalize their ornaments with their own photos, colors, and embellishments.
- Supervise Carefully: Supervise children closely when using scissors, glue, or other potentially hazardous materials.
- Make it Fun: Play music, tell stories, and create a festive atmosphere to make the crafting experience enjoyable.
- Embrace Imperfection: Remember that the goal is to have fun and create memories together. Don’t worry about perfection; embrace the unique creations your children make.
- Take Breaks: If the project becomes overwhelming, take breaks to stretch, have a snack, or do another activity.
13. What Are the Best Photos to Commemorate Life’s Milestones?
Commemorating life’s milestones with photo ornaments is a beautiful way to preserve and celebrate significant events. Here are some of the best photos to use for different milestones:
- Graduation:
- A photo of the graduate in their cap and gown.
- A candid shot with friends and family.
- A picture of the graduate receiving their diploma.
- New Home:
- A photo of the new homeowners in front of their house.
- A picture of the house itself, especially during the holidays.
- An image of the family celebrating inside their new home.
- Retirement:
- A photo of the retiree at their retirement party.
- A picture of them engaging in a favorite hobby.
- A snapshot of them with their colleagues or loved ones.
- New Pet:
- A photo of the new pet with its family.
- A close-up of the pet’s adorable face.
- An image of the pet playing or cuddling with its owners.
- Travel Adventures:
- A photo of the traveler in front of a famous landmark.
- A scenic shot of a beautiful landscape.
- An image of the traveler experiencing a local culture.
According to dfphoto.net, capturing these moments and turning them into photo ornaments creates lasting memories that can be cherished for years to come.
14. Can You Use Digital Photos for Photo Ornaments?
Yes, you can definitely use digital photos for photo ornaments! In fact, it’s a convenient and versatile way to create personalized keepsakes. Here’s how to make the most of digital photos for your ornaments:
- Choose High-Resolution Images: Ensure your digital photos have a high resolution (at least 300 DPI) to produce clear and sharp prints.
- Edit and Enhance: Use photo editing software to adjust the brightness, contrast, and colors of your photos before printing.
- Print on Quality Paper: Print your digital photos on high-quality photo paper or cardstock for the best results.
- Size and Crop: Resize and crop your photos to fit the dimensions of your ornament. Use a photo editing program or online tool to ensure they are the right size and shape.
- Print at Home or Use a Professional Service: You can print your digital photos at home using a color printer, or you can use a professional printing service for higher quality prints.
- Protect Your Prints: Seal your printed photos with Mod Podge or laminate them to protect them from moisture, fading, and scratches.
Using digital photos allows you to easily create a wide variety of photo ornaments, showcasing your favorite memories in a personalized and creative way.
15. How to Make Photo Ornaments with Vintage Photos?
Creating photo ornaments with vintage photos adds a touch of nostalgia and history to your holiday decorations. Here’s how to handle vintage photos with care and create beautiful ornaments:
- Handle with Care: Vintage photos are delicate, so handle them with care to avoid damage. Wear gloves to prevent fingerprints and oils from transferring to the photos.
- Scan or Digitize: Scan your vintage photos to create digital copies. This allows you to preserve the originals while working with the digital versions for your ornaments.
- Restore and Enhance: Use photo editing software to restore and enhance your scanned vintage photos. Correct any color fading, scratches, or other imperfections.
- Print on Archival Paper: Print your restored vintage photos on archival-quality paper to ensure they last for years to come.
- Use Acid-Free Materials: Always use acid-free adhesives, paper, and embellishments to prevent further damage to your vintage photos.
- Protect the Originals: If you want to use the original vintage photos in your ornaments, protect them by laminating them or placing them behind clear acetate or glass.
- Create a Theme: Consider creating a vintage-themed ornament by using antique embellishments, sepia tones, and nostalgic designs.
By following these tips, you can create beautiful and meaningful photo ornaments with your cherished vintage photos while preserving their historical value.
 DIY photo ornaments with vintage photos, preserving nostalgic memories with care and creativity.
16. How Do You Preserve the Quality of Photos Inside Ornaments?
Preserving the quality of photos inside ornaments is crucial for ensuring they remain beautiful and vibrant for years to come. Here’s how to protect your photos:
- Use Acid-Free Materials: Always use acid-free paper, adhesives, and embellishments to prevent yellowing and deterioration of your photos.
- Seal with Mod Podge: Applying a thin layer of Mod Podge over your photos can protect them from moisture, dust, and scratches.
- Laminate Photos: Laminating your photos before placing them in ornaments provides a protective barrier against damage.
- Avoid Direct Sunlight: Display your photo ornaments away from direct sunlight to prevent fading and discoloration.
- Store Properly: Store your photo ornaments in a cool, dry place away from extreme temperatures and humidity. Use ornament storage boxes with individual compartments to prevent them from rubbing against each other.
- Handle with Care: Handle your photo ornaments gently to avoid scratching or damaging the photos.
- Use UV-Resistant Sprays: Apply a UV-resistant spray to your photos to protect them from fading caused by ultraviolet light.
By following these steps, you can ensure your photos remain in excellent condition inside your ornaments, preserving your cherished memories for years to come.
17. What Are Some Unique Materials to Use Besides Glass Balls?
While glass balls are a popular choice for photo ornaments, there are many other unique materials you can use to create interesting and personalized designs. Here are some alternatives:
- Wood Slices: Natural wood slices offer a rustic and charming look. You can decoupage photos onto the wood or attach them with adhesive.
- Metal Frames: Miniature metal frames add a touch of elegance and can be easily customized with paint, embellishments, and ribbon.
- Fabric Scraps: Fabric ornaments with photos printed or transferred onto them provide a soft and cozy feel. You can use felt, cotton, or other fabrics to create unique shapes and designs.
- Acrylic Blanks: Clear acrylic blanks offer a modern and sleek design. You can attach photos and decorative elements to the acrylic using adhesive or epoxy resin.
- Clay: Mold clay into various shapes and bake it to create durable ornaments. You can then attach photos and embellishments to the clay.
- Pine Cones: Pine cones offer a natural and rustic look. You can attach photos to the scales of the pine cone and add festive embellishments.
- Cardboard: Cut cardboard into various shapes and decorate them with photos, paint, and other embellishments.
According to dfphoto.net, experimenting with different materials allows you to create unique and personalized photo ornaments that reflect your individual style.
18. How Can You Make a Photo Ornament as a Memorial Gift?
Creating a photo ornament as a memorial gift is a thoughtful way to honor and remember a loved one. Here’s how to make a meaningful memorial ornament:
- Choose a Cherished Photo: Select a photo that captures the essence of the person or pet you are honoring. It could be a portrait, a candid shot, or a photo of them engaging in a favorite activity.
- Use Calming Colors: Incorporate calming colors like soft blues, greens, and whites to create a peaceful and serene feel.
- Add Sentimental Embellishments: Include sentimental embellishments like feathers, beads, or charms that have special meaning.
- Incorporate a Handwritten Message: Write a heartfelt message or quote on the back of the photo or on a separate cardstock insert.
- Use a Special Ornament Shape: Choose an ornament shape that is meaningful, such as a heart, a star, or an angel.
- Personalize with a Name and Date: Add the name and dates of birth and passing to commemorate the individual.
- Present with Care: Package the memorial ornament with care, using tissue paper, a gift box, or a velvet pouch.
Creating a photo ornament as a memorial gift is a beautiful way to keep the memory of a loved one alive during the holidays and throughout the year.
19. What are Some Tips for Taking Great Photos for Ornaments?
Taking great photos for ornaments ensures your keepsakes look their best. Here are some tips to help you capture stunning images:
- Use Good Lighting: Natural light is ideal for taking great photos. Shoot outdoors on a cloudy day or near a window indoors.
- Focus on the Subject: Make sure your subject is in sharp focus. Use your camera’s autofocus feature or manually adjust the focus.
- Compose Your Shot: Pay attention to composition. Use the rule of thirds to create visually appealing images.
- Choose a Clean Background: Select a clean and uncluttered background to avoid distractions and keep the focus on your subject.
- Get Close: Get close to your subject to capture details and create a more intimate shot.
- Use a Tripod: Use a tripod to stabilize your camera and prevent blurry images, especially in low-light conditions.
- Edit Your Photos: Use photo editing software to adjust the brightness, contrast, and colors of your photos.
- Take Multiple Shots: Take multiple shots of your subject from different angles and with different settings to increase your chances of capturing the perfect image.
According to Popular Photography magazine, in December 2024, good lighting and sharp focus are essential for creating visually appealing photos for personalized keepsakes.
20. How to Store Photo Ornaments Properly After the Holidays?
Properly storing your photo ornaments after the holidays will ensure they remain in excellent condition for years to come. Here’s how to store them:
- Clean Gently: Before storing your photo ornaments, clean them gently with a soft, dry cloth to remove any dust or dirt.
- Use Ornament Storage Boxes: Invest in ornament storage boxes with individual compartments to prevent your ornaments from rubbing against each other and getting damaged.
- Wrap Delicate Ornaments: Wrap delicate ornaments in tissue paper or bubble wrap for added protection.
- Store in a Cool, Dry Place: Store your ornament storage boxes in a cool, dry place away from direct sunlight and extreme temperatures.
- Avoid Damp Areas: Avoid storing your photo ornaments in damp areas like basements or attics, as humidity can damage the photos and materials.
- Label Your Boxes: Label your ornament storage boxes so you can easily find them when you’re ready to decorate for the holidays next year.
- Keep Moth Repellents Away: Keep moth repellents away from your photo ornaments, as they can damage the photos and materials.
By following these storage tips, you can protect your photo ornaments and ensure they remain cherished keepsakes for many years.
Making photo ornaments is a rewarding way to create personalized decorations and gifts. Whether you’re preserving memories, celebrating milestones, or adding a personal touch to your holiday decor, these tips and ideas will help you craft beautiful and meaningful keepsakes.
Ready to start your photo ornament project? Visit dfphoto.net for more inspiration, tutorials, and photography tips to enhance your crafting experience. Explore our collection of stunning images and connect with a community of passionate photographers and crafters.
Address: 1600 St Michael’s Dr, Santa Fe, NM 87505, United States. Phone: +1 (505) 471-6001. Website: dfphoto.net.
FAQ: How to Make Photo Ornaments
1. What are the best types of photos to use for photo ornaments?
The best photos are high-resolution images that evoke positive emotions and capture special moments. Photos of loved ones, pets, or significant events work well.
2. Can I use regular glue for photo ornaments, or do I need something special?
It’s best to use acid-free adhesives like double-sided tape, glue sticks, or Mod Podge to prevent yellowing and damage to your photos over time.
3. How can I personalize my photo ornaments to make them unique?
Add names, dates, and handwritten messages. Incorporate ribbons, glitter, beads, and charms. Choose photos that reflect the recipient’s interests.
4. What’s the best way to protect my photo ornaments from damage?
Use acid-free materials, seal with Mod Podge, and store them in a cool, dry place away from direct sunlight in ornament storage boxes.
5. Can I involve my kids in making photo ornaments?
Yes! Choose age-appropriate projects, prepare materials in advance, provide clear instructions, and let them personalize their ornaments.
6. How do I make glass ball photo ornaments?
Roll the photo, insert it into the glass ball, flatten it carefully, and secure it with fishing line or ribbon through the ornament’s cap.
7. What are some alternative materials I can use besides glass balls for photo ornaments?
Wood slices, metal frames, fabric scraps, acrylic blanks, clay, pine cones, and cardboard are all excellent options.
8. How can I make a photo ornament as a memorial gift?
Choose a cherished photo, use calming colors, add sentimental embellishments, and incorporate a handwritten message.
9. What are some tips for taking great photos specifically for ornaments?
Use good lighting, focus on the subject, compose your shot carefully, and choose a clean background.
10. How do I store my photo ornaments properly after the holidays?
Clean them gently, use ornament storage boxes with individual compartments, and store them in a cool, dry place away from sunlight.