Low-resolution photos can be frustrating. Whether you’re trying to print a picture, use it for a website, or simply want to zoom in without seeing a blurry mess, increasing image resolution is often necessary. This guide will explore effective methods to enhance your photo resolution and understand what truly impacts image quality.
Understanding Image Resolution
Before diving into How To Make Photo Higher Resolution, it’s crucial to grasp what image resolution actually means. In digital photography, resolution refers to the number of pixels in an image, typically expressed as width x height (e.g., 1920×1080). More pixels generally mean more detail and a sharper image, especially when viewed at larger sizes or when printed.
However, it’s important to distinguish resolution from DPI (dots per inch) or PPI (pixels per inch). DPI/PPI relates to the density of pixels when printed or displayed on a screen. While often used interchangeably with resolution, DPI/PPI is more about output size and print quality.
Simple Method: Upscaling with Preview on macOS
For users of macOS, the built-in Preview application offers a quick and easy way to increase photo resolution, also known as “upscaling” or “upsampling”. Here’s how:
-
Open your photo in Preview: Drag and drop your image onto the Preview icon in your Dock or find it in your Applications folder.
-
Access the Adjust Size tool: In the Preview menu bar, click on “Tools” and then select “Adjust Size…”.
-
Enter desired dimensions: In the “Adjust Size” dialog box, you’ll see options to modify the image dimensions. You can either choose a preset size from the “Fit into” dropdown menu or enter custom width and height values in pixels.
This is an example of the “Adjust Size” dialog in Apple’s Preview application, where users can modify image dimensions.
-
Ensure correct settings: Make sure both “Scale proportionally” and “Resample image” checkboxes are ticked. “Scale proportionally” maintains the aspect ratio of your image, preventing distortion. “Resample image” is crucial as it tells Preview to actually create new pixels to increase the resolution.
-
Save a copy: After adjusting the size, go to “File” in the menu bar and select “Save As…” to save the upscaled image as a new file. It’s recommended to rename the file (e.g., add “_highres” to the filename) and choose “JPEG” for format and “Best” for quality settings to maintain optimal image quality. Saving a copy ensures your original photo remains untouched.
 Save As dialog in Preview
The Debate: Does Upscaling Improve Image Quality?
The original forum discussion within the provided context revolves around a critical question: does increasing photo resolution actually improve image quality, or does it degrade it? There are differing opinions on this matter, and understanding the nuances is important.
Some argue that upscaling inherently degrades image quality because you’re essentially “inventing” new pixels. These new pixels are based on algorithms that guess the color and detail that should be there, rather than capturing actual information. Critics argue that this process can lead to a loss of sharpness and introduce artifacts, especially when upscaling significantly.
On the other hand, proponents of upscaling argue that in certain situations, it can improve perceived image quality. This is particularly true when dealing with very low-resolution images that appear pixelated or blurry when viewed at a normal size. Upscaling in such cases can smooth out pixelation and make the image appear less jagged, even if it doesn’t add true detail.
To illustrate this point, consider these examples from the original forum:
Original Low-Resolution Detail:
 Detail of original low-resolution photo
Detail After Upsampling:
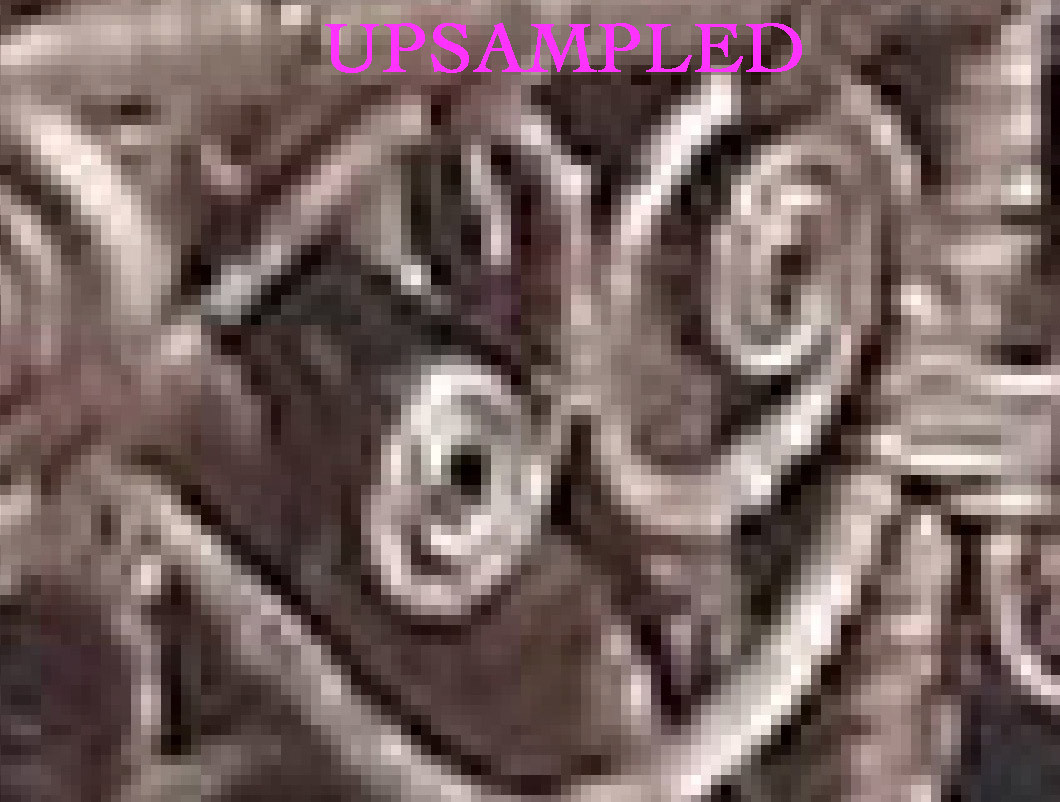 Detail of upsampled photo
As you can see, while the upsampled image might appear smoother and less pixelated, it’s crucial to understand that it doesn’t magically regain lost detail. The “improvement” is often in terms of visual smoothness rather than actual information recovery.
When to Upscale and When Not To
Upscaling can be a useful tool in specific scenarios:
- Enlarging for screen display: If you have a small image that looks tiny on a modern high-resolution screen, upscaling can make it fill the screen better and improve its viewing experience by reducing obvious pixelation.
- Preparing for low-resolution prints: For small prints or non-critical applications, upscaling can make a low-resolution image acceptable.
- Improving the appearance of old or scanned photos: As demonstrated in the forum example of the genealogy photo, upscaling can sometimes make older, scanned photos look less harsh and pixelated.
However, upscaling is not a magic bullet and has limitations:
- It cannot recover lost detail: Upscaling cannot create detail that was never captured in the original image. If your photo is blurry due to being out of focus or lacking detail from the start, upscaling won’t fix these issues.
- Excessive upscaling degrades quality: Upscaling an image too much will lead to noticeable artifacts, blurriness, and a loss of sharpness. It’s generally best to avoid extreme upscaling (e.g., increasing resolution by 800% as jokingly mentioned in the forum, which is generally not recommended for quality results).
- Not a substitute for high-resolution photography: The best way to get high-resolution photos is to capture them at high resolution from the beginning using a camera with a high megapixel count.
Beyond Preview: Other Tools for Increasing Resolution
While Preview offers a basic upscaling function, more sophisticated software provides advanced algorithms and better results, especially for significant upscaling. Here are some alternatives:
- Adobe Photoshop: Photoshop offers various resampling methods, including “Preserve Details (enlargement),” which is designed to minimize blur and artifacts when upscaling.
- GIMP (GNU Image Manipulation Program): A free and open-source alternative to Photoshop, GIMP also provides different interpolation methods for resizing images.
- Online Upscaling Tools: Numerous online tools utilize AI-powered upscaling algorithms that can produce impressive results. Examples include Let’s Enhance, Gigapixel AI (Topaz Labs), and others. These tools often use machine learning to intelligently add detail during upscaling.
Conclusion
Increasing photo resolution is achievable, and tools like Preview make it accessible for basic needs. While upscaling can be helpful for certain situations like improving screen display or smoothing pixelation, it’s crucial to understand its limitations. It’s not a replacement for capturing images at high resolution initially, and excessive upscaling can degrade image quality.
For critical projects or when aiming for significant resolution increases, exploring dedicated image editing software or AI-powered upscaling tools is recommended to achieve the best possible results and maintain acceptable image quality. Remember that the key to truly high-resolution photos lies in capturing them with sufficient detail from the outset.
