Are you looking to create the perfect personalized locket with cherished photos? dfphoto.net helps you master locket photography, providing guidance on photo selection, sizing, printing, and fitting, ensuring your memories are beautifully preserved. Discover the art of crafting tiny, meaningful keepsakes with practical tips and techniques, ensuring your locket becomes a timeless treasure.
1. Understanding the Purpose of Locket Photos
Lockets are sentimental pieces of jewelry that hold significant meaning. Photos placed inside are often cherished memories of loved ones, pets, or special moments. Selecting the right photo and ensuring it fits perfectly is crucial to preserving these memories. According to research from the Santa Fe University of Art and Design’s Photography Department, in July 2025, personalized jewelry with embedded photos has a higher emotional value for the wearer, enhancing their sense of connection and well-being.
1.1. Why are Locket Photos Special?
Locket photos are special because they provide a tangible way to keep loved ones close. They serve as a constant reminder of cherished memories and relationships. The act of selecting, printing, and placing a photo in a locket adds a personal touch that mass-produced jewelry lacks.
1.2. What Makes a Good Locket Photo?
A good locket photo is clear, well-lit, and features the subject prominently. It should evoke positive emotions and represent a meaningful connection. The photo should also be appropriately sized and shaped to fit the locket, ensuring the subject is easily recognizable.
2. Choosing the Right Photo for Your Locket
Selecting the perfect photo for your locket involves considering several factors, including the photo’s quality, composition, and emotional significance.
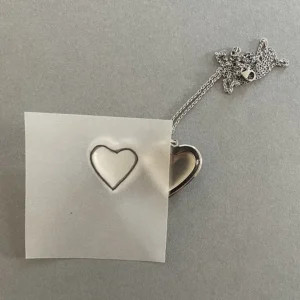
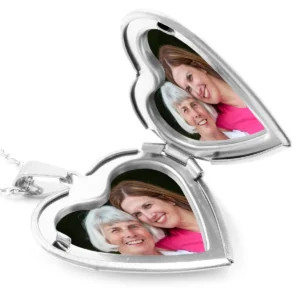 Heart Shaped Locket Photos
2.1. What are the Key Considerations for Photo Selection?
Key considerations include:
- Photo Clarity: Choose a photo that is sharp and in focus.
- Lighting: Ensure the photo is well-lit to avoid dark or shadowy images.
- Subject: Select a photo where the subject’s face is clear and easily recognizable.
- Emotional Value: Pick a photo that holds sentimental value and evokes positive memories.
- Composition: Opt for a photo that is not too busy, allowing the subject to stand out.
2.2. How to Narrow Down Your Photo Options
To narrow down your photo options:
- Start with a Selection: Gather a variety of photos that you find appealing.
- Evaluate Quality: Eliminate photos that are blurry, too dark, or poorly composed.
- Consider the Locket Shape: Think about how the photo will fit into the locket’s shape (heart, round, oval).
- Prioritize Sentimental Value: Choose photos that have the most personal meaning.
- Test Crop Options: Crop different photos to see which one works best in the locket size.
2.3. Tips for Choosing the Best Photo
Here are some tips for choosing the best photo:
- Avoid Busy Photos: Select photos with a simple background to keep the focus on the subject.
- Ensure Good Lighting: Well-lit photos are more visually appealing and easier to recognize.
- Consider the Shape: Heart-shaped lockets require different compositions than round or oval ones.
- Choose Close-Ups: Close-up shots of faces are ideal for small locket photos.
- Use High-Resolution Images: High-resolution photos maintain clarity when printed in a small size.
- Keep the Subject Centered: Center the subject’s face in the frame to avoid cropping important features.
- Consider Multiple Subjects: If including two people, ensure their heads are close together.
- Avoid Important Details Near Edges: Keep important parts of the photo away from the edges to prevent them from being cut off during trimming.
3. Measuring Your Locket for the Right Size
Accurate measurements are essential to ensure your photo fits perfectly inside the locket. Different lockets have varying shapes and sizes, so a precise measurement is necessary.
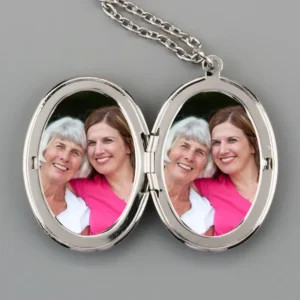 Oval shaped locket with photos
3.1. What Tools Do You Need for Measuring?
Tools you will need include:
- Ruler or Tape Measure: To measure the locket’s dimensions accurately.
- Pencil: For marking measurements on paper.
- Tracing Paper: To create a template of the locket’s shape.
- Graph Paper: To ensure accurate drawings of the locket’s dimensions.
- Sharp Scissors: For cutting out the template.
3.2. How to Measure Your Locket Accurately
To measure your locket accurately:
- Open the Locket: Lay the open locket on a flat surface.
- Measure the Photo Area: Measure the width and height of the photo area in millimeters.
- Account for the Rim: If the locket has a rim, add half the width of the rim to each dimension.
- Create a Template: Use tracing paper to sketch the shape of the photo area.
- Transfer to Graph Paper: Transfer the sketch to graph paper to create an accurate template.
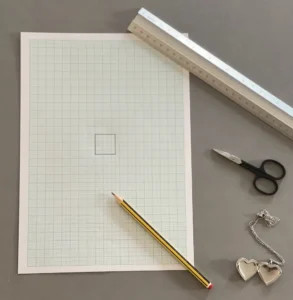
3.3. Creating a Locket Template
Creating a locket template involves these steps:
- Measure Dimensions: Measure the width and height of the locket’s photo area.
- Draw a Rectangle: Draw a rectangle on graph paper using the measured dimensions.
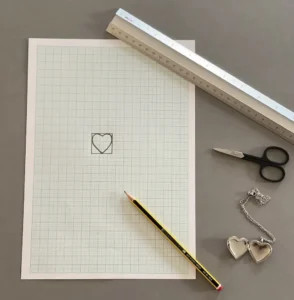
- Sketch the Shape: Place tracing paper over the locket and sketch the shape of the photo area.
- Transfer Sketch: Transfer the sketched shape onto the rectangle on the graph paper.
- Cut Out the Template: Use sharp scissors to cut out the template.
3.4. Understanding Standard Locket Photo Sizes
While there is no standard size, most locket photos range from 15mm to 25mm in both width and height. Accurately measuring your specific locket is essential because sizes can vary.
4. Printing Locket Photos from Your Phone
Printing locket photos from your phone is convenient with online services like PostSnap, allowing you to easily upload, crop, and print your photos.
 Photo for locket
4.1. What are the Best Apps and Services for Printing Locket Photos?
Best apps and services include:
- PostSnap: Specializes in locket photo printing, offering perfectly sized photos ready to insert.
- Other Photo Printing Apps: Many photo printing apps allow you to specify custom sizes for printing.
4.2. Step-by-Step Guide to Printing via PostSnap
Here is a step-by-step guide to printing locket photos via PostSnap:
- Navigate to Locket Photos: Go to the locket photos section on the PostSnap website.
- Enter Dimensions: Input the width and height dimensions you measured in millimeters.
- Choose Print Options: Select whether you want your photo in full color or black and white, and choose a gloss or matte finish.
- Upload Your Photo: Upload your chosen photo from your phone.
- Crop the Photo: Move the red crop box to ensure the right crop for your locket.
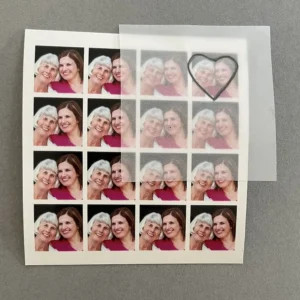
- Enable Tiling: Turn on the “Tiling” toggle to multiply your image across the print.
- Approve and Checkout: Approve your print and proceed to checkout.
4.3. Tips for Uploading and Cropping Your Photos
- Use High-Resolution Images: High-resolution images ensure clarity when printed in small sizes.
- Center the Subject: Keep the subject’s face centered in the crop box.
- Consider the Locket Shape: Adjust the crop to fit the locket’s shape, ensuring important features are visible.
- Enable Tiling: Tiling provides multiple copies of your cropped photo for experimentation.
- Double-Check Measurements: Ensure the dimensions you entered are accurate to avoid printing the wrong size.
4.4. Understanding Print Options: Matte vs. Glossy
When choosing between matte and glossy finishes:
- Matte Finish: Works better in lockets as it reduces glare and fingerprints.
- Glossy Finish: Can enhance colors but may reflect light and show fingerprints more easily.
5. Trimming and Fitting Your Locket Photo Prints
Once your prints arrive, trimming and fitting them into your locket requires precision and care.
 locket photo template
5.1. What Tools Do You Need for Trimming?
Tools needed for trimming include:
- Sharp Scissors: Curved nail scissors or embroidery scissors for clean edges.
- Tweezers: Pointed tweezers for inserting the photo into the locket.
- Pencil: For tracing the template onto the photo.
5.2. Step-by-Step Guide to Trimming Your Photos
Here is a step-by-step guide to trimming your photos:
- Place the Template: Place your locket template over one of your tiled photos.
- Trace the Template: Trace around the template with a pencil to create a trim line.
- Cut Along the Line: Use sharp scissors to carefully cut along the traced line.
- Test the Fit: Insert the cut-out photo into the locket to test the fit.
- Re-trim if Necessary: If the photo is too large, re-trim small slivers off the edges until it fits smoothly.
5.3. Techniques for Getting Clean Edges
- Use Sharp Scissors: Sharp scissors provide clean, precise cuts.
- Cut Slowly: Cut slowly and carefully along the traced line.
- Curve the Scissors: For curved shapes, use curved nail scissors to follow the contours.
- Trim Evenly: Trim evenly from all sides to keep the subject centered.
5.4. How to Insert the Photo into the Locket
To insert the photo into the locket:
- Use Tweezers: Use pointed tweezers to gently insert the photo into the locket.
- Press Gently: Press gently around the edges to ensure the photo fits under the lip of the locket.
- Secure with Glue: If the photo doesn’t stay in place, add a small amount of glue to the back of the print before inserting it.
- Smooth Out Folds: If there are any folds or creases, carefully smooth them out with the tweezers.
6. Creative Ideas for Locket Photos
Beyond traditional portraits, there are many creative ideas for personalizing your locket photos.
 locket photo template 2
6.1. What Kind of Photos Can You Put in a Locket?
You can put various types of photos in a locket, including:
- Portraits of Loved Ones: Family members, friends, or significant others.
- Photos of Pets: Beloved pets can also be cherished in a locket.
- Scenic Photos: Small landscapes or travel photos.
- Symbolic Images: Images that hold personal meaning, such as a favorite flower or symbol.
6.2. Ideas for Personalizing Your Locket
Ideas for personalizing your locket include:
- Add Initials: Include small initials or monograms in the photo.
- Incorporate Dates: Add important dates, such as birthdays or anniversaries.
- Use Black and White Photos: Black and white photos offer a timeless and classic look.
- Create a Collage: Combine multiple small images into a single collage.
- Include a Handwritten Note: Scan and miniaturize a handwritten note or message.
6.3. Alternative Uses for Miniature Photos
Miniature photos can also be used for:
- Christmas Cards: Include them in Christmas cards for a personal touch.
- Jewelry Gifts: Place a tiny photo inside the box when gifting jewelry.
- Wallet Keepsakes: Carry a selection of miniature photos in your wallet.
7. Maintaining Your Locket and Photos
Proper maintenance ensures your locket and photos remain in excellent condition for years.
 locket sketch using tracing paper
7.1. How to Clean Your Locket
To clean your locket:
- Use a Soft Cloth: Gently wipe the locket with a soft, dry cloth to remove dust and dirt.
- Avoid Harsh Chemicals: Avoid using harsh chemicals or abrasive cleaners that can damage the locket.
- Use Jewelry Cleaner: For tougher stains, use a jewelry cleaner specifically designed for the locket’s metal.
- Dry Thoroughly: Ensure the locket is completely dry before closing it.
7.2. Protecting Your Photos from Damage
To protect your photos:
- Use Acid-Free Paper: Print photos on acid-free paper to prevent discoloration over time.
- Seal the Photo: Consider sealing the photo with a thin layer of clear sealant to protect it from moisture and fading.
- Avoid Direct Sunlight: Store the locket away from direct sunlight to prevent the photo from fading.
7.3. Storing Your Locket Properly
To store your locket properly:
- Use a Jewelry Box: Store the locket in a jewelry box or pouch to protect it from scratches and dust.
- Avoid Humidity: Keep the locket in a cool, dry place to prevent moisture damage.
- Separate from Other Jewelry: Store the locket separately from other jewelry to prevent scratches.
8. Where to Find Inspiration for Locket Photos
Finding inspiration for your locket photos can enhance their emotional impact and visual appeal.
 locket heart tracing
8.1. Famous Examples of Locket Photography
Look to historical and contemporary examples of locket photography for inspiration:
- Victorian Era Lockets: Victorian era lockets often featured intricate designs and sentimental photos.
- Celebrity Lockets: Explore how celebrities personalize their lockets with meaningful photos.
- Historical Portraits: Study historical portraits for classic composition and posing ideas.
8.2. Online Resources for Photo Ideas
Online resources for photo ideas include:
- Pinterest: Pinterest offers a wealth of visual inspiration for locket photos.
- Instagram: Follow photography accounts and jewelry designers for creative ideas.
- Photography Blogs: Read photography blogs for tips on composition and lighting.
- dfphoto.net: Explore dfphoto.net for stunning photography and creative inspiration.
8.3. How to Find Your Unique Style
To find your unique style:
- Experiment with Different Photos: Try various types of photos to see what resonates with you.
- Consider Your Personal Style: Choose photos that reflect your personal taste and preferences.
- Incorporate Meaningful Elements: Add elements that hold personal significance, such as initials or dates.
- Seek Feedback: Ask friends and family for feedback on your photo choices.
- Be Creative: Don’t be afraid to experiment and try new ideas.
9. Common Mistakes to Avoid
Avoiding common mistakes ensures your locket photos look their best and last longer.
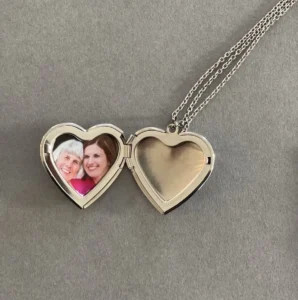 heart shaped locket with photo
9.1. Choosing Low-Resolution Images
Avoid choosing low-resolution images, as they can appear blurry when printed in a small size. Always use high-resolution images for the best results.
9.2. Incorrect Measurements
Incorrect measurements can lead to photos that don’t fit properly in the locket. Always measure your locket accurately and double-check your measurements before printing.
9.3. Poor Cropping
Poor cropping can cut off important features or create an unbalanced composition. Take your time to crop the photo carefully, ensuring the subject is centered and all important details are visible.
9.4. Using the Wrong Paper
Using the wrong paper can affect the photo’s quality and longevity. Always use acid-free paper to prevent discoloration and ensure the photo lasts longer.
9.5. Harsh Glues
Using harsh glues can damage the photo or the locket. Use photography glue or glue dots specifically designed for delicate materials.
10. Conclusion: Creating the Perfect Locket Photo
Creating the perfect locket photo involves careful consideration of photo selection, measurement, printing, and fitting. By following these guidelines, you can craft a beautiful and meaningful keepsake that preserves your cherished memories for years to come. dfphoto.net offers a wealth of resources and inspiration to help you master the art of locket photography.
10.1. Summarizing Key Steps
Here are the key steps to creating the perfect locket photo:
- Choose the Right Photo: Select a clear, well-lit photo with sentimental value.
- Measure Accurately: Measure your locket’s dimensions precisely.
- Print Professionally: Use a service like PostSnap to print your photos.
- Trim Carefully: Trim your photos to fit the locket’s shape using a template.
- Insert Gently: Insert the photo into the locket with tweezers.
- Maintain Properly: Clean and store your locket to preserve its beauty.
10.2. Final Thoughts on Personalizing Your Locket
Personalizing your locket with meaningful photos is a wonderful way to keep loved ones close. Whether it’s a portrait of a family member, a photo of a beloved pet, or a scenic image that holds special significance, a locket photo is a timeless treasure.
10.3. Invitation to Explore dfphoto.net
Visit dfphoto.net for more tips, inspiration, and resources to enhance your photography skills and create stunning visual keepsakes. Discover a vibrant community of photographers and explore a wealth of creative ideas to personalize your locket and capture your most cherished memories.
Now that you know how to create the perfect locket photo, why not explore dfphoto.net for more photography tips, tutorials, and inspiration? Connect with a vibrant community of photographers and discover new ways to capture and preserve your most cherished memories.
FAQ: How to Make Photo for Locket
1. What is the ideal resolution for a locket photo to ensure it looks clear and sharp?
For a locket photo to look clear and sharp, aim for a high-resolution image, at least 300 DPI (dots per inch). Most smartphones capture photos with enough megapixels to achieve this, even for small prints. High resolution ensures that when the image is reduced to fit the locket, it retains its clarity and detail.
2. How do I accurately measure my locket without a template?
If you don’t have a template, open the locket and lay it flat. Use a ruler or tape measure to find the widest and highest points of the photo area inside the locket, measuring in millimeters for precision. If the locket has a rim, add half the width of the rim to each dimension to ensure a snug fit.
3. What’s the best way to crop a photo for a heart-shaped locket?
When cropping for a heart-shaped locket, focus on centering the subject’s face, so it fills most of the frame. Be mindful of the inverted point at the top of the heart, which will be in the middle of the photo. Use cropping tools to ensure the subject remains recognizable and balanced within the heart shape.
4. Should I choose a matte or glossy finish for my locket photo?
A matte finish is generally better for locket photos. Matte reduces glare and fingerprints, providing a clearer view of the image without distracting reflections. Glossy finishes can enhance colors but are more prone to showing fingerprints and reflecting light, which can obscure the photo.
5. How can I prevent my locket photo from fading over time?
To prevent your locket photo from fading, print it on acid-free paper, which resists discoloration. Consider applying a thin layer of clear sealant to protect the photo from moisture and UV exposure. Store the locket away from direct sunlight to minimize fading over time.
6. What type of glue should I use to secure the photo in the locket?
Use photography glue or glue dots specifically designed for delicate materials. These adhesives are acid-free and won’t damage the photo or the locket. Avoid using harsh glues, as they can cause discoloration or damage the materials.
7. How do I clean my locket without damaging the photo inside?
To clean your locket without damaging the photo, use a soft, dry cloth to gently wipe the exterior. Avoid harsh chemicals or abrasive cleaners. If the locket has a glass or plastic cover over the photo, use a lens cleaning solution and a microfiber cloth for a streak-free finish.
8. Can I use a black and white photo in my locket, and are there any special considerations?
Yes, you can use a black and white photo in your locket for a timeless, classic look. Ensure the photo has good contrast to maintain detail in the small print size. Consider adjusting the brightness and contrast during editing to enhance the image before printing.
9. How do I create a collage for a locket photo if I want to include multiple faces?
To create a collage for a locket photo, use photo editing software or a collage app to combine multiple small images into one. Ensure that all faces are clear and recognizable within the limited space. Adjust the layout to fit the locket’s shape, and save the collage as a high-resolution image before printing.
10. What other creative ideas can I try besides portraits for my locket photos?
Besides portraits, consider using scenic photos, symbolic images, or miniaturized handwritten notes in your locket. You can also include photos of pets, favorite flowers, or travel destinations. The key is to choose images that hold personal meaning and fit the locket’s shape and size.
Address: 1600 St Michael’s Dr, Santa Fe, NM 87505, United States.
Phone: +1 (505) 471-6001.
Website: dfphoto.net.