Creating your own passport photos at home might sound daunting, but with today’s technology, it’s not only possible but incredibly convenient. If you have a smartphone with a decent camera – and let’s face it, most of us do – you’re already halfway there. This guide will walk you through each step, ensuring you can take passport photos at home that meet official requirements, save time, and avoid unnecessary trips to a photo studio.
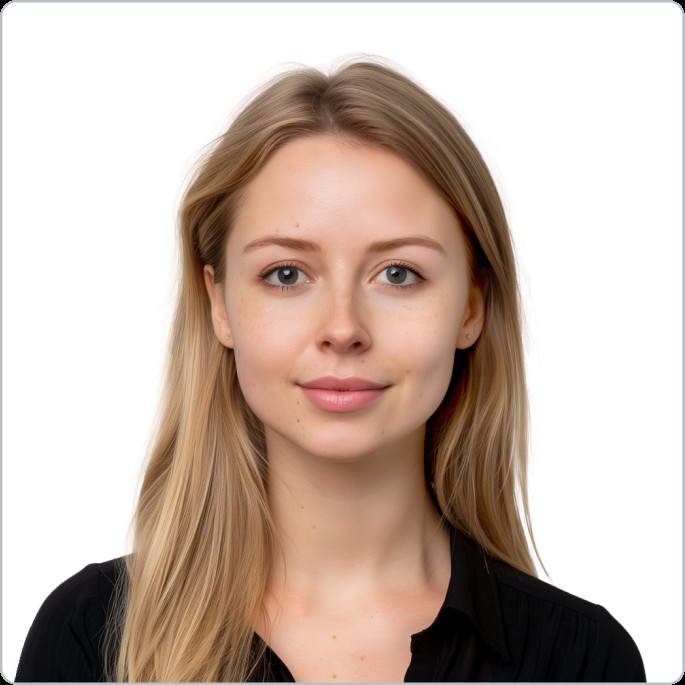
(Image 1: Original image 1 – hero_product_placement_1_test_c065fd1fb6.png)
(Image 2: Original image 2 – hero_product_placement_2_test_d310e0a306.png)
 PhotoAiD service benefits: 100% acceptance guarantee, expert verification, fast 3-minute process, and over 11 million satisfied users.
Get your perfect digital passport photo or printed copies quickly and easily with PhotoAiD®.
Why Choose DIY Passport Photos?
Taking passport photos at home offers several advantages:
- Convenience: No need to schedule a studio visit or travel anywhere. You can do it from the comfort of your own home, at any time that suits you.
- Cost-Effective: Professional passport photos can be expensive. Doing it yourself, especially if you use readily available tools, can save you money.
- Control: You have more control over the outcome. You can take multiple shots until you’re satisfied with your appearance, within the guidelines, of course.
- Speed: In a rush? Taking photos at home can be much faster than going to a professional, especially when you use online tools to check and format them instantly.
Before we dive into the how-to, it’s crucial to understand the official rules for passport photos. Adhering to these guidelines is paramount to avoid rejection and ensure your passport application process goes smoothly.
Understanding the Official Passport Photo Rules
Passport photo requirements are strict and designed to ensure your image is clearly identifiable and meets international standards. Let’s break down the key official guidelines you need to be aware of before you start your DIY passport photo session.
- Size Specifications: The required passport photo size is a 2×2 inches (51×51 mm) square. Crucially, within this square, your head size must measure between 1 inch and 1.4 inches (25mm and 35mm) from the bottom of your chin to the top of your head.
- Head Position and Posture: You must face the camera directly, with your head centered and both eyes open and clearly visible. Your shoulders should also be square to the camera and visible in the frame. Avoid tilting your head or angling your body. The camera lens should be at eye level to ensure proper perspective.
- Facial Expression: Maintain a neutral expression. While a natural smile is acceptable, it should be subtle and with your mouth closed. Avoid exaggerated smiles, frowning, or any other expressions that distort your features. Keep your eyes fully open and looking directly at the lens.
- Photo Quality and Lighting: Your photo must be clear, sharp, and in focus. Avoid blurry or pixelated images. Lighting is critical; it should be even and consistent across your face, free from shadows on your face or in the background. Natural daylight is often best, but avoid direct sunlight which can cause harsh shadows and squinting.
- Background Requirements: The background must be plain white or off-white. It should be free from patterns, textures, or any objects. Ensure there are no shadows on the background behind you. A simple white wall or a white sheet hung smoothly works well.
- Digital Editing Restrictions: Digital enhancements or retouching that alter your appearance are strictly prohibited. This includes removing blemishes, changing eye color, smoothing skin, or altering facial features. Basic adjustments like cropping and resizing to meet specifications are acceptable, but avoid any filters or modifications that change your actual look.
- Head coverings and Accessories: Head coverings are generally not allowed unless worn daily for religious or medical reasons. In such cases, they must not obscure your face. Hair accessories should be minimized; if bangs cover your eyebrows, pin them back.
- Eyeglasses: Eyeglasses are generally not permitted in passport photos anymore due to potential glare and reflections. They are only allowed for documented medical reasons, requiring a signed statement from a doctor.
- Makeup and Jewelry: Makeup is allowed as long as it doesn’t alter your natural appearance significantly. Avoid heavy makeup, contouring, or dramatic looks. Shimmery or glossy makeup can reflect light and cause issues. Jewelry is permitted if it is not distracting and does not obscure your face. Keep jewelry minimal and avoid large, reflective pieces.
- Hair Style: Your hairstyle is generally acceptable as long as it does not obscure your face, especially your eyes and eyebrows. Hair should be styled so that your full face is visible.
These rules might seem extensive, but they are in place to ensure your passport photo is valid and recognizable. Now, let’s get to the practical steps of taking your passport photo at home.
Step-by-Step Guide: Taking Passport Photos at Home
Taking passport photos at home is straightforward when you break it down into manageable steps. Here’s a 4-step guide to help you create compliant passport photos in your own space.
Step 1: Prepare Yourself for the Photo Session
Preparation is key to a successful DIY passport photo. Getting ready involves both your appearance and setting up your environment.
- Clothing Choice: Wear plain, dark-colored clothing. Avoid white tops as they might blend into the white background. Steer clear of busy patterns, logos, or uniforms.
- Makeup and Hair: Apply natural, simple makeup if desired, avoiding anything too heavy or glossy. Style your hair so it’s off your face. Ensure your forehead, eyes, and eyebrows are clearly visible. Consider tying back long hair or using clips to keep it away from your face.
- Accessories and Jewelry: Remove glasses unless medically necessary and you have a doctor’s note. Minimize jewelry; small earrings and necklaces are usually acceptable, but remove anything large, distracting, or reflective. Take off any headbands, hats, or hair accessories (unless for religious or medical reasons).
- Facial Appearance Check: Ensure your face is clean and free of anything that might temporarily alter your appearance, like excessive shine. If necessary, use blotting paper to reduce shine.
Step 2: Camera and Setup Configuration
Using the right camera settings and setup is crucial for photo quality.
- Camera Selection: Smartphones with cameras of 5 megapixels or higher are perfectly adequate. Rear cameras typically offer better resolution than front-facing cameras, but modern smartphone front cameras are also often high quality.
- Resolution Settings: Ensure your camera is set to the highest resolution. On iPhones, check Settings → Camera → Formats and select “Most Compatible” for high resolution JPEGs. On Android, camera settings vary, but look for resolution options within your camera app settings and choose the highest available.
- Avoid Digital Zoom: Do not use digital zoom as it can reduce photo quality and make the image pixelated. Instead, physically move closer to the subject to frame the shot properly.
- Turn off HDR and Filters: Disable HDR mode and any filters or beauty modes in your camera app. Passport photos must be unaltered and represent your natural appearance.
- Lighting Setup: Natural daylight is ideal. Position yourself facing a window where you get soft, indirect sunlight. Avoid direct sunlight, which can create harsh shadows. If natural light is insufficient, use soft, diffused indoor lighting to ensure even illumination across your face and background. Avoid backlighting, which casts shadows on your face.
Step 3: Taking the Passport Photo
Now for the photo capture itself.
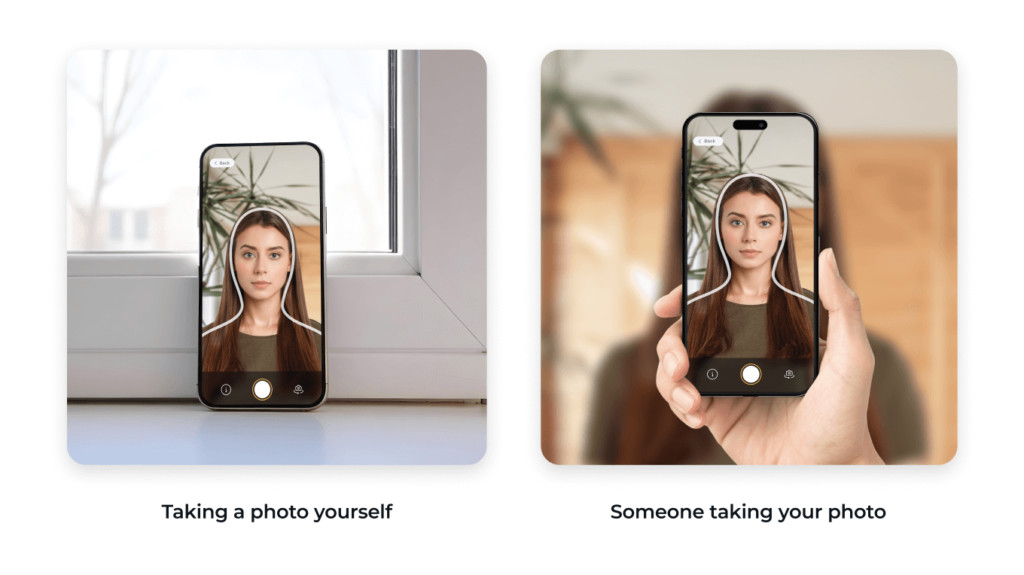
- Positioning and Distance: Stand or sit about 2-3 feet away from a plain white or off-white background. Ensure the background is smooth and free of shadows. Have someone else take the photo if possible, as this makes it easier to maintain correct posture and facial expression. If taking a selfie, be mindful of arm’s length and potential distortion.
- Camera Stability: To avoid blurry photos, stabilize your camera. Use a tripod if available. If not, place your phone on a stable surface like a table or shelf, or lean it against a stack of books.
- Eye Level and Focus: Position the camera at your eye level. Look directly into the camera lens. Ensure the camera is focused on your face. Most smartphone cameras autofocus automatically; tap on the screen where your face is to ensure focus.
- Take Multiple Shots: Take several photos, experimenting slightly with posture and expression to have a variety to choose from. Use a timer or burst mode to get a series of shots without having to manually press the shutter each time.
- Check for Compliance in Real-Time (If Possible): If you are using a passport photo app, some may offer real-time guidance or checks as you take the photo, helping you adjust positioning and lighting immediately.
(Image 3: Original image 3 – taking-a-passport-photo-at-home-alone-and-with-help-1024×575.png)
 Visual guide showing how to take passport photos at home: alone using a timer and stabilized phone, and with assistance facing a window.
Step 4: Editing and Verification for Compliance
Once you have taken your photos, the next step is to edit and verify them for compliance.
- Choose the Best Photo: Review the photos you’ve taken and select the one where you best meet all the guidelines—good posture, neutral expression, clear visibility of facial features, and good lighting.
- Cropping and Resizing: Use a passport photo tool or app to crop and resize your photo to the 2×2 inch dimension with correct head size. Ensure the head size is between 1 inch and 1.4 inches. Many online tools and apps offer automatic cropping and resizing for passport photos.
- Background Check and Removal (If Necessary): If your background isn’t perfectly white, you might need to use a background removal tool. However, it’s best to start with a proper background to avoid this step. If needed, use a tool that ensures the background becomes plain white without affecting your image quality.
- Compliance Verification: It is highly recommended to use a passport photo service or app that offers compliance checks. PhotoAiD® app, for example, uses AI and expert human review to ensure your photo meets all official passport photo requirements. These services can automatically check size, background, head position, expression, lighting, and other criteria, significantly increasing the chances of acceptance.
- Printing or Digital Submission: Once your photo is verified as compliant, you can choose to download a digital version for online passport applications or get a printable template to print physical copies. Print on matte or glossy photo paper for best results.
By following these four steps, you can confidently take your passport photos at home, saving time and money while ensuring compliance with official guidelines.
Common Mistakes to Avoid When Taking Passport Photos at Home
Even when you know the rules, it’s easy to make common mistakes that can lead to passport photo rejection. Based on analysis of thousands of passport photos, here are ten frequent errors to avoid:
- Insufficient Torso Visibility: Photos are often too zoomed in, cutting off the upper shoulders. Ensure your upper shoulders are visible in the frame as per guidelines.
- Mouth Not Fully Closed: Even a slightly open mouth can be considered non-compliant. Make sure your mouth is completely closed for a neutral expression.
- Uneven Lighting: Inconsistent lighting across the face is a common issue. Ensure lighting is balanced and even, without shadows on one side of your face or in general.
- Low Resolution Photos: Grainy or pixelated photos are often rejected. Use high resolution settings on your camera and avoid digital zoom to maintain image quality.
- Face Shadows: Shadows obscuring facial features, especially around the eyes and nose, are a frequent problem. Ensure proper lighting setup to eliminate shadows on your face.
- Inadequate Lighting Overall: If the photo is too dark, crucial facial features may not be clearly visible. Ensure sufficient and bright enough lighting to illuminate your face properly.
- Blurry Photos: Out-of-focus images are not acceptable. Stabilize your camera and ensure it is correctly focused on your face.
- Side Lighting Imbalance: When one side of the face is significantly more lit than the other, it creates an imbalance. Aim for front-on, even lighting.
- Submitting a Photo of a Photo: Do not submit a photograph of a physical photo. The passport photo must be a direct digital image or a high-quality scan of a printed photo.
- Unnatural Facial Expression: Broad smiles, wide-open mouths, or other exaggerated expressions that distort your natural features can lead to rejection. Maintain a neutral and natural expression.
Avoiding these common pitfalls will significantly increase your chances of your DIY passport photo being accepted. For a visual guide, refer to examples of acceptable and unacceptable passport photos online to further clarify these points.
Taking Passport Photos of Babies and Infants at Home
Taking passport photos of babies and infants can be particularly challenging. However, doing it at home is often the most convenient and least stressful option for both parents and child. Here are some specific tips for baby passport photos:
- Timing is Key: Choose a time when your baby is likely to be well-rested and content, usually after a nap or feeding.
- Background Setup: Lay a plain white or off-white sheet or blanket on the floor or a safe, flat surface. Ensure it’s smooth and wrinkle-free as much as possible.
- Positioning the Baby: For newborns who cannot sit up, lay them on their back on the white sheet. Take the photo from directly above, ensuring your shadow does not fall into the frame. For babies who can sit, you can use a car seat covered with a white sheet to support them, or have someone hold them from behind, ensuring their hands are not visible in the photo and they are completely hidden from view.
- Facial Expression Flexibility: Passport photo rules are more lenient for infants. They are allowed to have their eyes partially open and their mouths can be slightly open. However, they cannot be crying or screaming.
- Getting Baby’s Attention: Use toys, sounds, or another person standing just behind you (the photographer) to get the baby to look towards the camera. Be patient and persistent. Short bursts of attention-grabbing techniques are often more effective than prolonged attempts.
- Neutral Background Environment: Ensure the surrounding environment is plain and uncluttered, so the focus remains solely on the baby against the white background.
(Image 4: Original image 4 – taking-baby-passport-photo-at-home-with-PhotoAiD-1024×559.png)
 Three steps to take baby passport photos at home using the PhotoAiD app: positioning baby, capturing photo, and using app for compliance.
Taking baby passport photos at home requires patience and a gentle approach, but it avoids the stress of studio visits and allows you to work at your baby’s pace.
The Convenience and Benefits of DIY Passport Photos
Taking passport photos at home is not just feasible; it’s often the most practical choice. The advantages extend beyond mere convenience. It offers reliability and accessibility, particularly for those with mobility issues, parents with young children, or anyone simply seeking a hassle-free option.
For many, the ability to create passport photos without leaving home is invaluable. It eliminates travel time, appointment scheduling, and waiting in lines. You can take and retake photos until you are satisfied, all within a comfortable and familiar environment.
Services like PhotoAiD® further enhance the DIY process by providing expert-backed tools to ensure compliance. User testimonials highlight the ease and effectiveness of these services, especially for those with unique needs, such as taking newborn photos or for individuals with disabilities, showcasing the broad appeal and utility of DIY passport photos.
FAQ Section: Your Questions Answered
Is a phone photo good enough for a passport?
Yes, absolutely. Modern smartphones with cameras of 5 megapixels or higher are perfectly capable of taking passport photos that meet official requirements. Just be sure to follow all guidelines regarding lighting, background, resolution, and facial expression.
Can I use an app to take a passport photo?
Yes, you can and it is highly recommended for ensuring compliance. Apps like PhotoAiD® for iOS or PhotoAiD® for Android are designed specifically for this purpose. They guide you through the process, automatically check your photo against requirements, and often offer guarantees of acceptance.
Can I submit a passport photo which I took of myself (a selfie)?
While you technically take the photo yourself in DIY passport photos, official guidelines discourage selfies due to potential issues with arm’s length distortion and difficulty meeting positioning requirements. It’s better to use a timer or have someone else take the photo. However, if you use a service like PhotoAiD, even if you upload a selfie, their system will adjust and verify it to meet all criteria, making it acceptable.
Can I print my own passport photo?
Yes, you can print passport photos at home. You can print them on standard 4×6 inch photo paper. PhotoAiD® and similar services often provide a printable template with correctly sized and formatted passport photos ready for printing. Use high-quality matte or glossy photo paper and ensure your printer produces clear, sharp images. Alternatively, you can use local photo printing services like CVS or Walgreens.
Can I take passport photos at home for free?
Yes, you can take passport photos at home without spending any money, especially if you already have a smartphone and printer. However, for guaranteed compliance and ease of use, using a service like PhotoAiD® is highly beneficial, though it involves a fee. Free online tools for cropping and background removal are available, but they may not offer the same level of accuracy and compliance guarantee as dedicated passport photo services.
In conclusion, taking passport photos at home is entirely achievable and can be a convenient, cost-effective, and efficient solution. By understanding and following the official guidelines, utilizing readily available technology, and considering helpful tools like PhotoAiD®, you can confidently create passport photos that meet all necessary standards and simplify your passport application process.
Sources:
Sylwia Green
Sylwia is a content writer specializing in photography and document-related topics at dfphoto.net. She holds a BA in English Studies and is committed to providing accurate and helpful information to readers.