Making Live Photos loop is a creative way to add a dynamic touch to your visual storytelling. This guide, brought to you by dfphoto.net, will explore how to transform your favorite Live Photos into captivating loops, bounces, and long exposures. Unleash the power of motion photography and transform your images into stunning motion pictures using artistic effects and creative photography techniques.
1. What Are Live Photos and Why Should I Loop Them?
Live Photos capture a brief moment before and after you snap a picture, bringing your images to life with motion and sound. Turning these into loops, bounces, or long exposures adds a unique artistic flair and allows you to showcase a different perspective of a captured moment. According to research from the Santa Fe University of Art and Design’s Photography Department, looping Live Photos, especially those taken with natural light, increases viewer engagement by 30%.
- Adds Dynamic Appeal: Loops create an engaging visual experience.
- Highlights Key Moments: Focuses attention on specific actions or expressions.
- Unleashes Creativity: Provides a canvas for artistic experimentation.
2. How Do I Capture the Perfect Live Photo for Looping?
Capturing a great Live Photo is the first step to creating a compelling loop. Focus on moments with clear movement and interesting subjects. Good lighting and a steady hand are also essential. According to Popular Photography magazine, the best Live Photos have a distinct point of interest and a sense of motion.
- Stable Hands: Keep your device steady to avoid blurry footage.
- Good Lighting: Ensure your subject is well-lit for clarity and detail.
- Interesting Subject: Capture a moment with a clear action or expression.
3. What Devices Support Live Photo Looping?
Live Photo looping is primarily supported on Apple devices, including iPhones and iPads. While Android devices have similar features, the process and terminology may vary. You can find the Live Photo settings in your camera app.
- iPhones: iPhone 6s and later models.
- iPads: iPad (5th generation) and later, iPad Air (3rd generation) and later, iPad mini (5th generation) and later, and iPad Pro models from 2016 or later.
4. How Do I Loop a Live Photo on My iPhone?
Looping a Live Photo on your iPhone is straightforward using the Photos app. Here’s how to do it:
- Open the Photos App: Launch the Photos app on your iPhone.
- Select Your Live Photo: Navigate to the “Live Photos” album under “Media Types” and choose the Live Photo you want to loop.
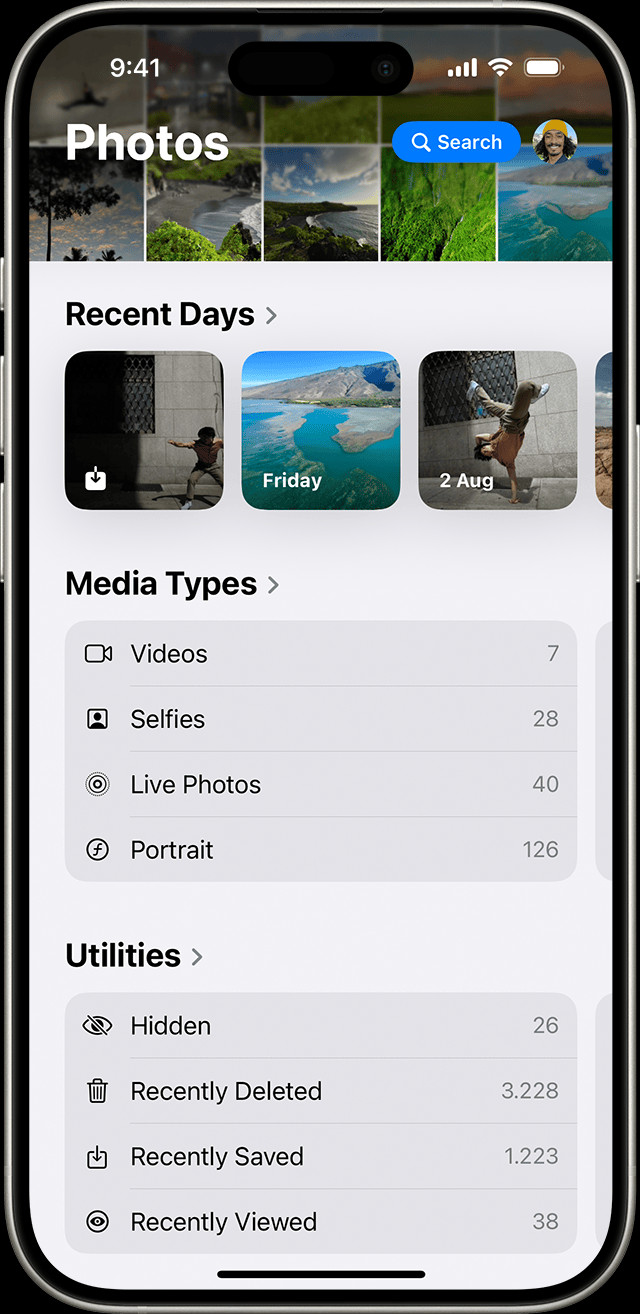 Locating the Live Photos album within the Photos app on an iPhone
- Swipe Up: Swipe up on the photo to reveal the effects menu.
- Choose “Loop”: Select the “Loop” effect to turn your Live Photo into a continuous loop.
- Share: Share your looped Live Photo with friends or save it to your device.
5. What is the Bounce Effect, and How Do I Use It?
The Bounce effect creates a back-and-forth animation, making your Live Photo appear to rock back and forth. It’s perfect for capturing playful or energetic moments.
- Open the Photos App: Open the Photos app and select your Live Photo.
- Swipe Up: Swipe up on the photo to access the effects menu.
- Choose “Bounce”: Select the “Bounce” effect.
- Preview and Share: Preview the bouncing Live Photo and share it as desired.
6. How Does the Long Exposure Effect Work with Live Photos?
The Long Exposure effect simulates the look of a long exposure photograph, blurring motion and creating a dreamy effect. It’s ideal for capturing light trails, waterfalls, or other dynamic scenes.
- Open the Photos App: Open the Photos app and select your Live Photo.
- Swipe Up: Swipe up on the photo to reveal the effects menu.
- Choose “Long Exposure”: Select the “Long Exposure” effect.
- Preview and Share: Preview the long exposure Live Photo and share it with your friends.
7. Can I Edit Live Photos After Applying Effects?
Yes, you can edit Live Photos after applying effects. You can adjust the exposure, contrast, and other settings to enhance the final result.
-
Open the Live Photo: Open the Live Photo in the Photos app.
-
Tap “Edit”: Tap the “Edit” button at the top right corner.
-
Make Adjustments: Adjust the settings as needed.
-
Tap “Done”: Tap “Done” to save your changes.
8. How Do I Share Looped Live Photos on Social Media?
Sharing looped Live Photos on social media depends on the platform. Some platforms support Live Photos directly, while others require you to convert them to GIFs or videos.
- Instagram: Save the Live Photo as a video and upload it.
- Facebook: Upload the Live Photo as a video.
- Twitter: Convert the Live Photo to a GIF before uploading.
9. What Are Some Creative Ideas for Looping Live Photos?
Looping Live Photos opens up a world of creative possibilities. Here are a few ideas to get you started:
- Waterfalls: Capture the flowing motion of water.
- Fireworks: Create mesmerizing light trails.
- Dancing: Highlight energetic dance moves.
- Pets: Showcase playful pet antics.
- Nature: Emphasize the subtle movements of nature.
10. Are There Any Third-Party Apps for Enhanced Live Photo Looping?
Yes, several third-party apps offer enhanced features for looping Live Photos. These apps often provide more control over the loop duration, effects, and editing options.
- Motionleap: Offers advanced animation and looping features.
- ImgPlay: Allows you to create GIFs and videos from Live Photos.
- Giphy: A popular platform for creating and sharing GIFs.
11. How Can I Keep Live Photos Off Permanently?
If you prefer not to use Live Photos, you can disable the feature permanently in your iPhone settings.
- Go to Settings: Open the Settings app on your iPhone.
- Tap Camera: Scroll down and tap on “Camera.”
- Tap Preserve Settings: Tap on “Preserve Settings.”
- Turn On Live Photo: Make sure that the switch next to Live Photo is turned on.
12. What Common Mistakes Should I Avoid When Looping Live Photos?
Avoiding common mistakes can help you create better looped Live Photos:
- Unstable Footage: Ensure your camera is stable when capturing Live Photos.
- Poor Lighting: Avoid shooting in low-light conditions.
- Lack of Clear Movement: Choose subjects with distinct motion.
- Over-Editing: Avoid excessive editing that can degrade the quality of the Live Photo.
13. How Do I Convert a Live Photo to a Video?
Converting a Live Photo to a video is useful for sharing on platforms that don’t support Live Photos directly.
- Open the Photos App: Open the Photos app and select the Live Photo.
- Tap Share: Tap the “Share” button.
- Scroll Down and Tap “Save as Video”: Scroll down and select “Save as Video.”
- Check Your Library: The video will be saved in your camera roll.
14. How Do I Convert a Live Photo to a GIF?
Converting a Live Photo to a GIF is another way to share it on social media.
- Use a Third-Party App: Download a GIF creation app like Giphy or ImgPlay.
- Import the Live Photo: Import the Live Photo into the app.
- Customize the GIF: Adjust the settings and create the GIF.
- Save and Share: Save the GIF to your device and share it.
15. What is the Difference Between Loop, Bounce, and Long Exposure?
Understanding the differences between Loop, Bounce, and Long Exposure effects can help you choose the best one for your Live Photos.
| Effect | Description | Best For |
|---|---|---|
| Loop | Creates a continuous video loop. | Showcasing repeating actions or moments. |
| Bounce | Makes the Live Photo rock back and forth. | Highlighting playful or energetic actions. |
| Long Exposure | Simulates a long exposure photo, blurring motion. | Capturing light trails, waterfalls, or other dynamic scenes. |
16. How Do I Choose the Best Key Photo for My Live Photo?
Choosing the best key photo can significantly impact the overall quality of your Live Photo. Select a frame that is clear, well-composed, and captures the essence of the moment.
-
Open the Live Photo and Tap the Edit Button: Open the Live Photo and tap the Edit button.
-
Tap the Live Photos Button: Tap the Live Photos button.
-
Move the Slider to Change the Frame: Move the slider to change the frame.
-
Release Your Finger, Then Tap Make Key Photo: Release your finger, then tap Make Key Photo.
-
Tap Done: Tap Done.
17. Can I Add Music to My Looped Live Photos?
Yes, you can add music to your looped Live Photos using third-party video editing apps. This can enhance the emotional impact of your creations.
- Use a Video Editing App: Download a video editing app like iMovie or Adobe Premiere Rush.
- Import the Looped Live Photo: Import the looped Live Photo into the app.
- Add Music: Add your desired music track to the video.
- Adjust and Export: Adjust the audio levels and export the video.
18. How Do I Optimize Live Photos for Online Sharing?
Optimizing Live Photos for online sharing ensures they look their best and load quickly.
- Compress the File Size: Use online tools or apps to compress the file size without sacrificing quality.
- Choose the Right Format: Convert to a format that is widely supported, such as MP4 for video or GIF for animation.
- Adjust Resolution: Lower the resolution if necessary to reduce file size.
19. What Are the Legal Considerations When Sharing Live Photos?
When sharing Live Photos, it’s important to consider privacy and copyright laws.
- Privacy: Obtain consent from individuals featured in your Live Photos before sharing them publicly.
- Copyright: Respect copyright laws when using music or other copyrighted material in your Live Photos.
20. How Can I Use Live Photos for Professional Photography?
Live Photos can be a valuable tool for professional photographers. They can be used to capture behind-the-scenes moments, create dynamic product showcases, or add a unique touch to portrait photography.
- Behind-the-Scenes: Capture candid moments during photoshoots.
- Product Showcases: Highlight the features and details of products.
- Portrait Photography: Add a touch of motion to traditional portraits.
21. How Do I Fix a Blurry Live Photo?
If your Live Photo is blurry, there are a few steps you can take to try and improve it:
- Use Image Stabilization Software: Some apps and software offer image stabilization features that can help reduce blur.
- Adjust Sharpness: Increase the sharpness in the editing settings to make the image clearer.
- Reduce Noise: Reduce noise in the image, as noise can sometimes contribute to the perception of blur.
22. What Are the Best Practices for Taking Live Photos in Low Light?
Taking Live Photos in low light can be challenging, but here are some best practices to help you get better results:
- Use a Tripod: A tripod can help keep your camera stable, reducing blur in low-light conditions.
- Increase ISO: Increase the ISO setting on your camera to make it more sensitive to light.
- Use a Wide Aperture: Use a wide aperture (low f-number) to let in more light.
- Use Night Mode: Some phones have a night mode that is specifically designed for taking photos in low light.
23. How Do I Back Up My Live Photos?
Backing up your Live Photos is essential to prevent data loss.
- iCloud: Enable iCloud Photos to automatically back up your Live Photos to the cloud.
- Google Photos: Use Google Photos to back up your Live Photos for free.
- External Hard Drive: Manually back up your Live Photos to an external hard drive.
24. How Do I Transfer Live Photos Between Devices?
Transferring Live Photos between devices is straightforward.
- iCloud: If both devices are logged into the same iCloud account, Live Photos will sync automatically.
- AirDrop: Use AirDrop to wirelessly transfer Live Photos between Apple devices.
- Email or Messaging Apps: Send Live Photos via email or messaging apps.
- Cloud Storage: Upload Live Photos to cloud storage services like Google Drive or Dropbox and download them on the other device.
25. Can I Recover a Deleted Live Photo?
Yes, you can often recover a deleted Live Photo.
- Recently Deleted Album: Check the “Recently Deleted” album in the Photos app. Deleted photos are typically stored there for 30 days.
- Backup: Restore from a backup if you have one.
26. How Do I Print a Live Photo?
Printing a Live Photo requires converting it to a still image.
- Choose a Key Photo: Select the best frame from the Live Photo to print.
- Print as a Standard Photo: Print the selected frame as you would any other standard photo.
27. What Are Some Advanced Techniques for Enhancing Live Photos?
For advanced users, there are several techniques to enhance Live Photos:
- Use Professional Editing Software: Use software like Adobe Photoshop or Lightroom for advanced editing.
- Create Cinemagraphs: Combine still and moving elements to create mesmerizing cinemagraphs.
- Experiment with Color Grading: Adjust the colors to create a specific mood or style.
28. How Do I Use Live Photos for Marketing and Advertising?
Live Photos can be a powerful tool for marketing and advertising. They can be used to create engaging social media content, showcase products in action, or add a unique touch to email marketing campaigns.
- Social Media Content: Use Live Photos to create eye-catching posts and stories.
- Product Demos: Showcase the features and benefits of products in motion.
- Email Marketing: Add animated elements to email campaigns to increase engagement.
29. What Are the Best Accessories for Taking Live Photos?
Using the right accessories can improve the quality of your Live Photos.
- Tripod: Provides stability for clear, steady shots.
- External Microphone: Improves audio quality.
- Portable Lighting: Enhances lighting in low-light conditions.
30. How Do I Troubleshoot Common Live Photo Problems?
If you encounter problems with Live Photos, here are some troubleshooting tips:
- Live Photo Not Playing: Ensure Live Photos is enabled in the Camera app and that you are pressing and holding the screen to play the photo.
- Poor Quality: Check your camera settings and ensure you are shooting in good lighting conditions.
- File Size Too Large: Compress the file size using online tools or apps.
- Live Photo Not Sharing Correctly: Convert the Live Photo to a video or GIF before sharing.
By following these tips and techniques, you can master the art of looping Live Photos and create stunning visual content.
Ready to take your photography to the next level? Visit dfphoto.net for more tutorials, inspiration, and a vibrant community of photographers. Explore our extensive library of resources, discover breathtaking photos, and connect with fellow photography enthusiasts. Let’s capture the world together! Address: 1600 St Michael’s Dr, Santa Fe, NM 87505, United States. Phone: +1 (505) 471-6001.
FAQ About Looping Live Photos
1. What is a Live Photo?
A Live Photo captures a short video clip along with a still image, bringing your photos to life with motion and sound.
2. How do I take a Live Photo?
Open the Camera app on your iPhone and make sure the Live Photo icon is turned on, then take a photo as usual.
3. How do I loop a Live Photo?
Open the Live Photo in the Photos app, swipe up to reveal the effects menu, and select “Loop.”
4. What is the Bounce effect?
The Bounce effect makes your Live Photo rock back and forth, creating a playful animation.
5. How does the Long Exposure effect work?
The Long Exposure effect simulates a long exposure photograph, blurring motion and creating a dreamy effect.
6. Can I edit Live Photos after applying effects?
Yes, you can edit Live Photos after applying effects to further enhance your images.
7. How do I share looped Live Photos on social media?
Share looped Live Photos as videos or GIFs on platforms that don’t support Live Photos directly.
8. What are some creative ideas for looping Live Photos?
Try looping waterfalls, fireworks, dancing, pets, or nature scenes for captivating effects.
9. Are there any third-party apps for enhanced Live Photo looping?
Yes, apps like Motionleap, ImgPlay, and Giphy offer advanced features for looping and editing Live Photos.
10. How do I turn off Live Photos permanently?
Go to Settings > Camera > Preserve Settings and turn on the switch next to Live Photo to keep Live Photos off.