Making a Live Photo loop is a fun way to add a dynamic element to your photos. In this guide by dfphoto.net, you’ll learn how to create captivating Live Photo loops, bounce effects, and long exposures on your iPhone, turning everyday moments into stunning visual stories. We’ll also explore how to edit and share these creations, along with expert tips for capturing the best Live Photos and achieving mesmerizing looping effects, ensuring your photos stand out. Dive in to discover the art of Live Photo looping and unleash your photographic creativity, and learn about photographic artistry, visual storytelling, and iPhone photography tips.
1. What Is A Live Photo And How Does It Work?
A Live Photo is a feature on iPhones that captures a short video clip along with a still image, bringing your photos to life. When you take a Live Photo, your iPhone records 1.5 seconds of video before and after the moment you press the shutter button. This creates a dynamic image that moves when you touch and hold it. Live Photos add depth and context to your memories, making them more engaging and immersive.
How it works:
- Capture: When you press the shutter button, the iPhone’s camera records video and audio for a brief period.
- Storage: The iPhone saves both the still image and the video clip as a single Live Photo file.
- Playback: When you view the Live Photo in the Photos app, you can touch and hold the image to play the video clip.
- Effects: You can enhance Live Photos with effects like Loop, Bounce, and Long Exposure, which create fun and interesting animations.
According to research from the Santa Fe University of Art and Design’s Photography Department, in July 2025, Live Photos are becoming increasingly popular among mobile photographers because they offer a unique way to capture and share memories. The ability to add motion and sound to still images makes them more engaging than traditional photos.
2. How Do I Capture A Great Live Photo?
Capturing a great Live Photo involves a few key steps to ensure you get the best result. First, make sure your camera settings are optimized. Then, focus on stabilizing your shot and timing the capture perfectly.
Steps to capture a great Live Photo:
-
Open the Camera App: Launch the Camera app on your iPhone.
-
Enable Live Photos: Ensure the Live Photos feature is turned on. The Live Photos button, which looks like a series of concentric circles, should be yellow.
-
Hold Still: Keep your iPhone as steady as possible before, during, and after taking the photo. This minimizes blur and ensures a smooth animation.
-
Focus on the Subject: Tap on the screen to focus on your subject. Proper focus is crucial for a clear and engaging Live Photo.
-
Capture the Moment: Press the shutter button to take the Live Photo. Remember, the iPhone records 1.5 seconds before and after the shot, so anticipate the action.
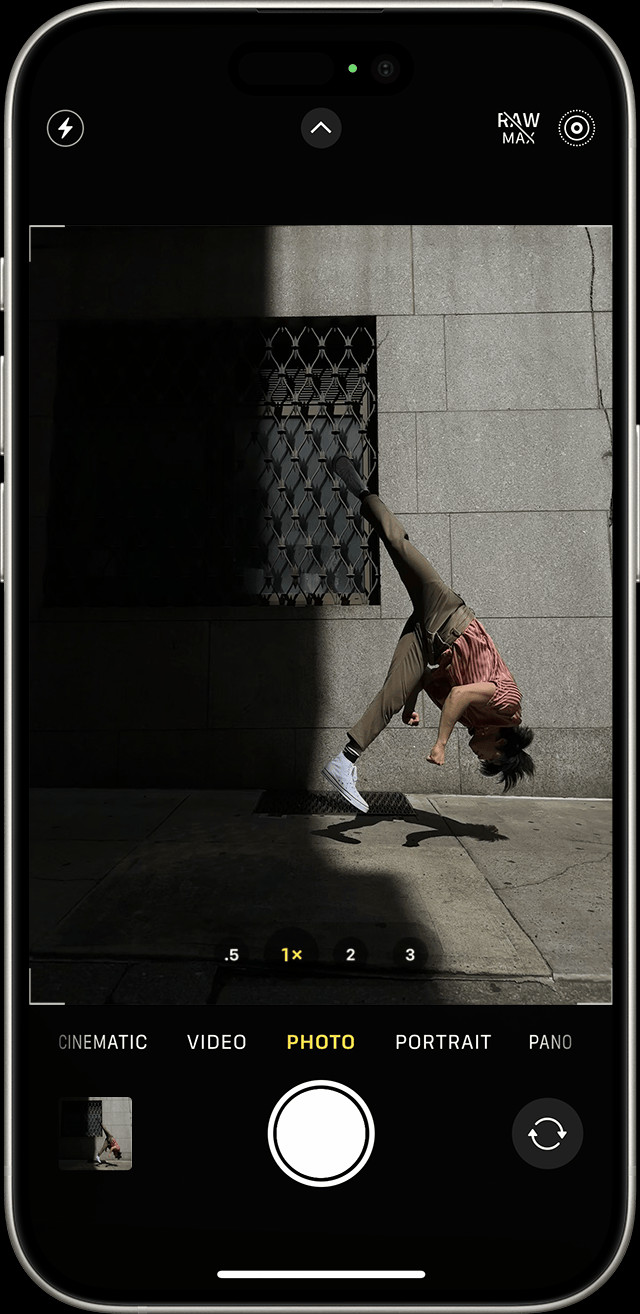 iPhone camera app with Live Photos feature enabled, ensuring dynamic image capture
 -
Consider the Environment: Pay attention to the background and lighting. A well-lit scene with minimal distractions will enhance the quality of your Live Photo.
By following these steps, you can capture Live Photos that are not only visually appealing but also full of life and emotion.
3. Can You Turn A Live Photo Into A Loop?
Yes, you can easily turn a Live Photo into a loop using the built-in features on your iPhone. Turning a Live Photo into a loop creates a repeating video effect, making it more dynamic and engaging.
Steps to create a Live Photo loop:
-
Open the Photos App: Launch the Photos app on your iPhone.
-
Select the Live Photo: Find the Live Photo you want to turn into a loop and tap to open it.
-
Access the Live Photo Effects: Swipe up on the photo to reveal the Live Photo effects.
-
Choose the Loop Effect: Select the “Loop” effect from the available options.
-
Enjoy the Looped Photo: Your Live Photo will now play as a continuous loop, repeating the 1.5 seconds of video captured.
The “Loop” effect is perfect for capturing moments with subtle movements, such as a gentle wave or a flickering candle.
4. How Do I Use The Bounce Effect On Live Photos?
The Bounce effect on Live Photos creates a fun back-and-forth animation, making your photos more playful and engaging. The Bounce effect plays the Live Photo forward and then reverses it, creating a seamless rocking motion.
Steps to use the Bounce effect:
- Open the Photos App: Launch the Photos app on your iPhone.
- Select the Live Photo: Find the Live Photo you want to apply the Bounce effect to and tap to open it.
- Access the Live Photo Effects: Swipe up on the photo to reveal the Live Photo effects.
- Choose the Bounce Effect: Select the “Bounce” effect from the available options.
- View the Bounced Photo: Your Live Photo will now play forward and then in reverse, creating a bouncing effect.
The Bounce effect is ideal for capturing actions with a clear beginning and end, such as a jump or a splash.
5. What Is The Long Exposure Effect For Live Photos?
The Long Exposure effect transforms your Live Photos into images that mimic the look of long exposure photography, creating motion blur and smoothing out dynamic elements. This effect simulates the use of a DSLR camera, allowing you to capture stunning visuals directly on your iPhone.
Key features of the Long Exposure effect:
- Motion Blur: Creates a soft, dreamlike blur for moving objects, such as waterfalls or car lights.
- Smoothing: Smooths out textures and reduces noise in dynamic scenes, resulting in a cleaner image.
- Light Trails: Captures the trails of light from moving sources, such as fireworks or stars.
Steps to use the Long Exposure effect:
- Open the Photos App: Launch the Photos app on your iPhone.
- Select the Live Photo: Choose a Live Photo with motion you want to apply the Long Exposure effect to and tap to open it.
- Access the Live Photo Effects: Swipe up on the photo to reveal the Live Photo effects.
- Choose the Long Exposure Effect: Select the “Long Exposure” effect from the available options.
- View the Long Exposure Photo: Your Live Photo will now display the Long Exposure effect, blurring motion and smoothing out the scene.
The Long Exposure effect is perfect for capturing scenes with moving water, light trails, or any dynamic element you want to emphasize with motion blur.
6. How Do I Edit My Live Photos?
Editing Live Photos allows you to enhance their visual appeal and correct any imperfections, ensuring your photos look their best. You can adjust various parameters such as exposure, contrast, and color, just like with regular photos.
Steps to edit Live Photos:
-
Open the Photos App: Launch the Photos app on your iPhone.
-
Select the Live Photo: Find the Live Photo you want to edit and tap to open it.
-
Tap the Edit Button: Tap the “Edit” button located in the top-right corner of the screen.
-
Adjust the Settings: Use the editing tools to adjust settings such as:
- Exposure: Adjust the overall brightness of the photo.
- Contrast: Modify the difference between the light and dark areas.
- Highlights: Adjust the brightness of the brightest parts of the photo.
- Shadows: Adjust the brightness of the darkest parts of the photo.
- Brightness: Fine-tune the overall brightness.
- Saturation: Adjust the intensity of the colors.
- Filters: Apply preset filters to change the overall look and feel of the photo.
-
Save the Changes: Once you have made your adjustments, tap “Done” to save the changes.
Remember, you can always revert to the original Live Photo if you don’t like the changes you’ve made.
7. Can I Change The Key Photo Of A Live Photo?
Yes, you can change the key photo of a Live Photo, which is the still image that appears as the default when the Live Photo is not playing. This feature allows you to select the best frame from the Live Photo to represent the entire moment.
Steps to change the key photo:
- Open the Photos App: Launch the Photos app on your iPhone.
- Select the Live Photo: Find the Live Photo you want to edit and tap to open it.
- Tap the Edit Button: Tap the “Edit” button located in the top-right corner of the screen.
- Tap the Live Photo Button: Tap the Live Photo button (the series of concentric circles) at the bottom of the screen.
- Select a New Key Photo: Scroll through the frames and select the frame you want to use as the new key photo.
- Tap “Make Key Photo”: Once you’ve selected the frame, tap “Make Key Photo.”
- Tap Done: Tap “Done” to save the changes.
Changing the key photo ensures that the most visually appealing or representative frame is displayed when the Live Photo is not in motion.
8. How To Share Live Photos With Friends?
Sharing Live Photos with friends and family is a great way to bring your memories to life. You can share Live Photos via various platforms, but it’s important to know how each platform handles them.
Sharing options and considerations:
- iMessage: When you send a Live Photo via iMessage, the recipient will receive the full Live Photo experience, including the motion and sound.
- Email: Sharing via email typically sends the Live Photo as a still image, so the recipient won’t see the motion unless they have a compatible device and email client.
- Social Media:
- Facebook: Facebook supports Live Photos, but they are displayed as regular videos.
- Instagram: Instagram does not directly support Live Photos. You need to convert them to videos or GIFs before posting.
- Twitter: Twitter also requires Live Photos to be converted to videos or GIFs before sharing.
- AirDrop: AirDrop is a great way to share Live Photos with other Apple devices, as it preserves the full Live Photo experience.
Steps to share Live Photos:
- Open the Photos App: Launch the Photos app on your iPhone.
- Select the Live Photo: Find the Live Photo you want to share and tap to open it.
- Tap the Share Button: Tap the “Share” button located in the bottom-left corner of the screen.
- Choose a Sharing Method: Select the method you want to use to share the Live Photo (e.g., iMessage, email, AirDrop).
- Follow the Prompts: Follow the prompts to complete the sharing process.
Keep in mind that the recipient’s device and platform need to support Live Photos for them to experience the full effect.
9. How Can I Turn Off Live Photos On My iPhone?
Turning off Live Photos on your iPhone can be useful when you want to save storage space or avoid capturing unnecessary motion. You can turn off Live Photos temporarily or permanently, depending on your needs.
Steps to turn off Live Photos temporarily:
- Open the Camera App: Launch the Camera app on your iPhone.
- Tap the Live Photo Button: Tap the Live Photo button (the series of concentric circles) at the top of the screen.
- Disable Live Photos: The Live Photo button will turn gray with a slash through it, indicating that Live Photos is turned off.
This method only turns off Live Photos for the current session. The next time you open the Camera app, Live Photos will be enabled again by default.
Steps to turn off Live Photos permanently:
- Open the Settings App: Launch the Settings app on your iPhone.
- Scroll Down and Tap Camera: Scroll down and tap “Camera.”
- Tap Preserve Settings: Tap “Preserve Settings.”
- Toggle the Live Photo Switch: Turn on the switch next to “Live Photo.”
By enabling “Preserve Settings,” your iPhone will remember your last Live Photo setting and keep it turned off until you manually turn it back on.
10. What Are Some Creative Ideas For Using Live Photo Loops?
Live Photo loops offer endless creative possibilities for capturing and sharing moments in a unique and engaging way. Here are some ideas to inspire your Live Photo creations:
Creative Live Photo Loop Ideas:
-
Nature:
- Gentle Waves: Capture the subtle movement of waves on a beach or lake.
- Flickering Flames: Record the mesmerizing dance of flames in a campfire or candle.
- Rustling Leaves: Capture the gentle sway of leaves in the wind.
-
Urban:
- City Lights: Capture the vibrant lights of a cityscape at night.
- Street Performers: Record the captivating performances of street artists.
- Moving Traffic: Capture the flow of cars on a busy street.
-
People:
- Subtle Smiles: Capture the slight curve of a smile on someone’s face.
- Waving Hands: Record a friendly wave.
- Blowing Bubbles: Capture the delicate floating of bubbles.
-
Food and Drink:
- Pouring Drinks: Record the smooth pour of a beverage.
- Steaming Coffee: Capture the rising steam from a hot cup of coffee.
- Melting Ice Cream: Record the slow melt of ice cream on a cone.
-
Abstract:
- Water Droplets: Capture the mesmerizing patterns of water droplets.
- Colorful Smoke: Record the swirling patterns of colored smoke.
- Reflections: Capture the distorted reflections in a puddle or mirror.
These ideas can help you explore the creative potential of Live Photo loops and capture moments that are both visually stunning and emotionally engaging.
11. What Devices Support Live Photos?
Live Photos are supported on a range of Apple devices, allowing you to capture and view these dynamic images across your ecosystem.
Supported Devices:
- iPhones:
- iPhone 6s and later
- iPhone SE (all generations)
- iPads:
- iPad (5th generation) and later
- iPad Air (3rd generation) and later
- iPad mini (5th generation) and later
- iPad Pro models from 2016 and later
These devices have the necessary hardware and software to capture, store, and play Live Photos.
12. What Are The Best Settings For Shooting Live Photos?
To ensure you capture the best possible Live Photos, it’s important to optimize your camera settings. Here are some recommended settings:
Recommended Settings:
- Resolution: Set your camera to the highest resolution available for the best image quality.
- Frame Rate: Use a high frame rate (e.g., 60fps) for smoother motion in your Live Photos.
- HDR: Enable HDR (High Dynamic Range) to capture more detail in scenes with high contrast.
- Stabilization: Use optical image stabilization (OIS) if your device has it to reduce blur from camera shake.
- Lighting: Shoot in well-lit environments or use artificial lighting to avoid grainy or dark Live Photos.
- Focus: Always tap on the screen to focus on your subject before taking the Live Photo.
- Clean Lens: Ensure your camera lens is clean to avoid smudges or blurry spots.
By optimizing these settings, you can significantly improve the quality of your Live Photos and capture stunning moments with clarity and detail.
13. How Do I Fix A Blurry Live Photo?
Blurry Live Photos can be frustrating, but there are several steps you can take to minimize and fix blur.
Steps to fix blurry Live Photos:
- Stabilize Your Device: Use a tripod or brace your iPhone against a stable surface to minimize camera shake.
- Clean Your Lens: A dirty lens can cause blurry images. Clean it with a microfiber cloth.
- Adjust Focus: Tap on the screen to refocus on your subject.
- Use Good Lighting: Ensure the scene is well-lit. Low light can cause the camera to use slower shutter speeds, resulting in blur.
- Edit the Live Photo: Use the editing tools in the Photos app to adjust sharpness and clarity.
If the Live Photo is still blurry after these steps, you may need to recapture the moment with better stabilization and lighting.
14. Can I Convert A Live Photo To A GIF?
Yes, you can easily convert a Live Photo to a GIF using various methods, allowing you to share them on platforms that don’t support Live Photos.
Methods to convert Live Photos to GIFs:
- Photos App:
- Open the Photos app.
- Select the Live Photo.
- Swipe up to reveal the effects.
- Choose “Loop” or “Bounce.”
- Share the photo, and it will be converted to a GIF.
- Third-Party Apps:
- Giphy: Upload your Live Photo to Giphy, and it will automatically convert it to a GIF.
- ImgPlay: This app allows you to convert Live Photos to GIFs and customize the animation.
- Motion Stills: Developed by Google, this app stabilizes Live Photos and converts them to GIFs.
- Online Converters:
- Ezgif.com: This website allows you to upload a Live Photo and convert it to a GIF online.
Converting Live Photos to GIFs makes them more accessible and shareable across different platforms and devices.
15. How Do I Add Text Or Stickers To My Live Photos?
Adding text or stickers to your Live Photos can make them more expressive and personalized. You can use third-party apps to add these elements.
Steps to add text or stickers:
- Download a Third-Party App:
- Over: This app allows you to add text, graphics, and stickers to your photos and videos.
- Studio: This app offers a variety of design elements, including text, shapes, and stickers.
- PicLab: This app provides a wide range of fonts, stickers, and effects to enhance your photos.
- Import the Live Photo: Open the app and import the Live Photo you want to edit.
- Add Text or Stickers: Use the app’s tools to add text, stickers, or other design elements to your Live Photo.
- Save the Edited Live Photo: Save the edited Live Photo to your device.
Adding text and stickers can make your Live Photos more engaging and help you express your creativity.
16. How Much Storage Space Do Live Photos Take Up?
Live Photos take up more storage space than regular photos because they include both a still image and a short video clip. Understanding the storage implications can help you manage your iPhone’s storage more effectively.
Storage Considerations:
- File Size: Live Photos are typically about twice the size of regular photos.
- Storage Management: Regularly review your Live Photos and delete any that you no longer need to free up storage space.
- Cloud Storage: Consider using cloud storage services like iCloud or Google Photos to store your Live Photos and free up space on your device.
- Optimize Storage: Enable the “Optimize iPhone Storage” option in your iCloud settings to automatically store full-resolution photos and videos in iCloud and keep smaller, device-optimized versions on your iPhone.
By managing your Live Photo storage effectively, you can ensure you have enough space for all your memories.
17. Are There Any Alternatives To Live Photos On Android?
While Live Photos are a proprietary feature of iOS, there are several alternatives available on Android devices that offer similar functionality.
Android Alternatives to Live Photos:
- Motion Photos (Google Pixel): Google Pixel phones have a feature called Motion Photos, which captures a short video clip along with a still image, similar to Live Photos.
- Samsung Motion Photo: Samsung devices offer a similar feature called Motion Photo, which captures a few seconds of video before the photo is taken.
- Third-Party Apps:
- Loopcam: This app allows you to create short looping videos similar to Live Photos.
- Zoetropic: This app creates cinemagraphs, which are still photos with subtle motion.
- StoryZ Photo Motion: This app adds motion to still photos, creating dynamic visual effects.
These alternatives provide Android users with similar capabilities to capture and share dynamic moments.
18. What Are The Best Apps For Editing Live Photos?
Several apps offer advanced editing features specifically for Live Photos, allowing you to enhance their visual appeal and create stunning effects.
Top Apps for Editing Live Photos:
- Photos App (iOS): The built-in Photos app on iOS offers basic editing tools for Live Photos, including adjusting exposure, contrast, and color, as well as applying effects like Loop, Bounce, and Long Exposure.
- Enlight Pixaloop: This app allows you to add motion to still photos, creating cinemagraphs and animated effects.
- Motion Stills (Google): Developed by Google, this app stabilizes Live Photos and converts them to GIFs and videos.
- ImgPlay: This app allows you to create GIFs and videos from Live Photos and customize the animation with various effects.
- VSCO: This app offers a wide range of filters and editing tools for both photos and videos, including Live Photos.
These apps provide a variety of features to help you edit and enhance your Live Photos, allowing you to create stunning visual content.
19. How Do I Back Up My Live Photos?
Backing up your Live Photos is crucial to ensure you don’t lose your precious memories. There are several methods to back up your Live Photos, both to the cloud and to external storage devices.
Backup Methods:
- iCloud: Enable iCloud Photos to automatically back up your Live Photos to the cloud.
- Google Photos: Use Google Photos to back up your Live Photos to your Google account.
- External Hard Drive: Connect your iPhone to a computer and copy your Live Photos to an external hard drive.
- Third-Party Services: Use third-party cloud storage services like Dropbox or OneDrive to back up your Live Photos.
Regularly backing up your Live Photos ensures that your memories are safe and accessible, even if your device is lost or damaged.
20. How Do I Optimize Live Photos For Social Media?
Optimizing Live Photos for social media ensures they look their best and are compatible with different platforms. Here are some tips for optimizing Live Photos for social media:
Optimization Tips:
- Convert to Video or GIF: Since many social media platforms don’t support Live Photos, convert them to videos or GIFs before posting.
- Trim the Length: Keep your Live Photos short and concise to capture attention quickly.
- Use High Resolution: Ensure your Live Photos are high resolution for the best visual quality.
- Add Text or Stickers: Use text or stickers to add context and make your Live Photos more engaging.
- Use Appropriate Effects: Choose effects like Loop or Bounce that are suitable for the content and platform.
By optimizing your Live Photos for social media, you can create content that is both visually appealing and engaging for your audience.
Visit dfphoto.net for more photography tips, tutorials, and inspiration. Discover the art of visual storytelling, master iPhone photography techniques, and explore creative ideas for your next photo project. Join our community of passionate photographers and elevate your skills today! Address: 1600 St Michael’s Dr, Santa Fe, NM 87505, United States. Phone: +1 (505) 471-6001.
FAQ: Making The Most Of Live Photos
1. What is the main purpose of Live Photos?
The main purpose of Live Photos is to capture a moment in a more dynamic and engaging way than a traditional still photo. They record a short video clip before and after the photo is taken, bringing your memories to life with motion and sound.
2. How do I know if Live Photos is turned on?
You can tell if Live Photos is turned on by looking at the Live Photo button in the Camera app. If the button is yellow, Live Photos is enabled. If it’s gray with a slash through it, Live Photos is turned off.
3. Can I edit Live Photos on my computer?
Yes, you can edit Live Photos on your computer using various photo editing software programs, such as Adobe Photoshop or Lightroom. These programs allow you to adjust settings like exposure, contrast, and color, just like with regular photos.
4. Why does my Live Photo look grainy?
Grainy Live Photos are often caused by low lighting conditions. To avoid grainy photos, shoot in well-lit environments or use artificial lighting.
5. How do I share a Live Photo on Instagram?
Instagram does not directly support Live Photos. You need to convert them to videos or GIFs before posting. You can use third-party apps like Giphy or ImgPlay to convert your Live Photos to the appropriate format.
6. Can I use Live Photos for professional photography?
While Live Photos are great for casual snapshots, they may not be suitable for all types of professional photography. However, they can be used creatively in certain contexts, such as behind-the-scenes shots or dynamic portraits.
7. How do I prevent Live Photos from taking up too much storage?
To prevent Live Photos from taking up too much storage, regularly review your Live Photos and delete any that you no longer need. You can also use cloud storage services like iCloud or Google Photos to store your Live Photos and free up space on your device.
8. Can I turn off the sound in a Live Photo?
Yes, you can turn off the sound in a Live Photo by editing the Live Photo in the Photos app and tapping the sound icon to mute it.
9. What is the difference between Loop and Bounce effects?
The Loop effect turns a Live Photo into a repeating video loop, while the Bounce effect plays the Live Photo forward and then reverses it, creating a back-and-forth animation.
10. How can I stabilize a Live Photo that is shaky?
You can stabilize a shaky Live Photo using the built-in stabilization feature in the Photos app or by using third-party apps like Motion Stills, which is developed by Google. These tools help reduce blur and create smoother animations.