Creating GIFs from photos is a fantastic way to bring still images to life, whether you want to create a fun meme, a captivating social media post, or a simple animation to illustrate a point. With the right online tools, turning your photos into engaging GIFs is easier than ever. This guide will walk you through the process of how to make a GIF from photos quickly and efficiently using a free online GIF maker.
Step-by-Step Guide to Creating GIFs from Photos
Making a GIF from your photos involves a few simple steps. Here’s a detailed breakdown to help you through the process:
-
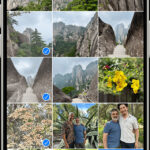
Gather Your Photos: The first step is to select the series of photos you want to use for your GIF. Ensure that the photos tell a story or create the animation effect you desire. Organize them in the sequence you want them to appear in your GIF.
-
Access an Online GIF Maker: Navigate to a free online GIF maker tool. A simple search for “online GIF maker” will provide you with numerous options. Look for a tool that supports various image formats and offers customization options.
-
Upload Your Images: Once you are on the GIF maker website, locate the upload section. You can typically drag and drop your image files directly into the upload box, or use the “Choose files” button to select images from your computer. Most tools support common image formats like JPG, PNG, and GIF. You can upload multiple images at once to form the frames of your GIF.
-
Adjust the Animation Speed: After uploading your photos, you will usually find settings to control the animation speed. This is often represented as “Delay time” or “Frame duration.” This setting determines how long each image frame is displayed. Measured in hundredths of a second, a higher delay time value will result in a slower GIF, while a lower value makes it faster. Experiment with different values to achieve the desired pace for your animation.
-
Customize Frame Order and Effects (Optional): Most online GIF makers allow you to rearrange the order of your uploaded images by dragging and dropping them. This is useful if you need to refine the sequence of your animation. Additionally, some tools offer features like “Crossfade frames” to create smoother transitions between images. Enabling this option can produce a fading effect between frames, ideal for photo slideshow GIFs.
-
Generate Your GIF: Once you are satisfied with your settings, click the button to “Make a GIF!” or a similarly labeled command. The online tool will then process your images based on your chosen settings and generate the animated GIF.
-
Download and Share: After the GIF is generated, you will be provided with a preview and a download link. Review your GIF to ensure it meets your expectations. If you’re happy with the result, download the GIF to your device. You can then share your newly created GIF on social media, websites, or anywhere you want to use it.
Tips for Optimizing Your Photo GIFs
To make your GIFs even better, consider these helpful tips:
-
Control Animation Speed Precisely: Pay close attention to the “Delay time” setting. For a faster animation, decrease the delay; for a slower one, increase it. Avoid setting the delay too low (below 2 hundredths of a second), as some browsers might not render it correctly, potentially slowing down your GIF unexpectedly.
-
Rearrange Frames for Storytelling: Take advantage of the frame reordering feature. By arranging your photos thoughtfully, you can create a more compelling narrative or a smoother animation flow. Simply drag and drop frames within the GIF maker interface to adjust their sequence.
-
Use Crossfade for Smooth Transitions: The “Crossfade frames” option can significantly enhance the visual appeal of your GIF, especially for slideshows. Experiment with the “Frame count” and “Fader delay” settings associated with crossfading to achieve the right balance between animation smoothness and file size. Remember that more frames and shorter delays typically mean smoother animation but larger file sizes.
-
Handle Different Image Sizes Effectively: If your uploaded photos have varying dimensions, most GIF makers offer options to manage them. You can usually choose to automatically resize and crop all images to match the smallest dimensions, ensuring a consistent frame size throughout your GIF. Alternatively, you might have alignment options to control how larger images are positioned within the frame (e.g., top-left, center).
-
Consider GIF File Size: Be mindful of the final GIF file size, especially if you plan to use it online. Larger GIFs can take longer to load, which might impact user experience. Optimize your GIFs by using only the necessary frames, keeping the color palette limited if possible, and finding the right balance with crossfade settings.
By following these steps and tips, you can easily learn how to make a GIF from photos and create engaging animated content for various purposes. Experiment with different photos and settings to unleash your creativity and produce unique and eye-catching GIFs!