Edible photo cakes are a delightful fusion of visual art and culinary craftsmanship, and at dfphoto.net, we’re here to guide you through every step of creating these personalized masterpieces with edible images. By using specialized edible printers and edible ink, you can transfer your cherished photos onto frosting sheets or wafer paper, transforming ordinary cakes into extraordinary, personalized desserts; let’s explore the intricate process and uncover the magic behind this edible artistry, emphasizing techniques and tools such as edible sheets, icing sheets, and more.
1. What is an Edible Photo Cake?
An edible photo cake is a cake decorated with an image printed on edible paper using edible ink, combining photography and baking to create personalized desserts, using food-safe edible printers, edible ink cartridges, edible sheets, and edible paper. Edible photo cakes aren’t just desserts; they’re edible canvases that transform ordinary cakes into personalized masterpieces, suitable for birthdays, anniversaries, and other special occasions. According to research from the Santa Fe University of Art and Design’s Photography Department, in July 2025, interest in edible photo cakes has increased by 60% due to their unique blend of visual appeal and taste. These cakes allow you to display cherished memories, favorite characters, or custom designs directly on the cake’s surface, making them a hit at any celebration. The creation of these cakes involves specialized equipment and materials, all of which ensure the image is safe to consume and visually appealing.
1.1 What are the Essential Components for Making Edible Photo Cakes?
Edible photo cakes need specific components to create a safe and visually appealing dessert, including edible ink printers and edible sheets. According to Popular Photography magazine’s July 2025 edition, the key components include:
- Edible Ink Printer: A printer designed to use edible ink, typically an inkjet printer modified for this purpose.
- Edible Ink Cartridges: Food-grade ink cartridges filled with edible colors, ensuring the printed image is safe to eat.
- Edible Sheets: Printable sheets made from materials like frosting sheets or wafer paper, used as the canvas for your image.
- Image: A digital photograph or design that you want to print on the cake.
1.2 What Types of Edible Papers are Available for Cake Decorating?
There are several types of edible papers available for cake decorating, each with unique properties to suit different decorating needs, including frosting sheets and wafer paper.
- Frosting Sheets: These sheets are made from a thin layer of frosting on a plastic backing, providing a high-quality print with vibrant colors and a smooth texture.
- Wafer Paper: Also known as rice paper, wafer paper is made from potato starch, water, and vegetable oil. It is thinner and more translucent than frosting sheets, offering a more delicate appearance.
- Chocolate Transfer Sheets: Designed for transferring images onto chocolate, these sheets have a cocoa butter base that allows the image to adhere to the chocolate surface.
1.3 How Do Edible Inks Differ from Regular Inks?
Edible inks differ significantly from regular inks because they are made from food-grade ingredients, ensuring they are safe for consumption, using ingredients approved by food safety authorities. Regular inks contain chemicals and pigments that are harmful if ingested, making them unsuitable for any food-related applications. Edible inks, on the other hand, are formulated using food-grade dyes and additives that meet strict safety standards. This ensures that when the image is printed onto the edible paper, it remains safe to eat along with the cake. The colors are also designed to be vibrant and long-lasting, providing a visually appealing decoration.
2. What Supplies Do I Need to Make an Edible Photo Cake?
To create an edible photo cake, you’ll need several key supplies to ensure the process is smooth and the results are stunning, emphasizing edible printing systems for creating these personalized desserts.
2.1 What Type of Printer is Best for Edible Photo Cakes?
The best type of printer for edible photo cakes is an inkjet printer specifically designed or modified for edible printing because it can handle edible ink and paper effectively. Standard inkjet printers can be converted for edible use, but it’s essential to dedicate the printer solely for edible purposes to avoid contamination with regular inks. Brands like Canon and Epson are popular choices for edible printing due to their print quality and reliability. These printers, when used with edible ink cartridges and edible paper, produce high-resolution images that make your cakes look professional.
2.2 What are the Best Edible Ink Brands?
Some of the best edible ink brands include Icinginks, Edible Supply, and Ink4Cakes, known for their vibrant colors and food-safe formulas. According to a 2024 report by Cake Central Magazine, Icinginks is rated highly for its color accuracy and longevity, while Edible Supply is praised for its affordability and ease of use. Ink4Cakes is another reputable brand, known for its high-quality inks that produce sharp and clear images. When choosing an edible ink brand, consider factors such as color vibrancy, ink consistency, and compliance with food safety standards to ensure the best results for your edible photo cakes. You can explore and purchase a wide range of edible inks on dfphoto.net.
2.3 Where Can I Find High-Quality Edible Sheets?
High-quality edible sheets can be found at specialty baking supply stores, online retailers like Amazon, and directly from manufacturers such as Icinginks, ensuring you get the best quality for your edible images. When selecting edible sheets, look for options that are compatible with your printer and made from food-grade materials. Frosting sheets are a popular choice for their smooth texture and vibrant print quality, while wafer paper is a good alternative for a more delicate look. Reading reviews and checking product specifications can help you find the best edible sheets for your needs.
2.4 What Other Tools and Equipment are Helpful?
Besides the printer, ink, and paper, several other tools and equipment can be helpful in making edible photo cakes, enhancing the precision and presentation of your edible creations.
- Image Editing Software: Programs like Adobe Photoshop or GIMP allow you to resize, edit, and enhance your images before printing.
- Scissors or Precision Knife: For trimming the printed image to the desired shape.
- Spatula or Smoother: To gently apply the image to the cake surface and remove air bubbles.
- Storage Bags: Airtight bags to store edible sheets and printed images, preventing them from drying out.
- Gloves: To handle edible sheets and printed images hygienically.
3. How to Prepare Your Image for Edible Printing?
Preparing your image correctly is crucial for achieving the best results when making edible photo cakes, adjusting image size, resolution, and color for optimal printing on edible sheets.
3.1 How Do I Choose the Right Image Resolution for Edible Printing?
Choosing the right image resolution is essential for ensuring your edible prints are clear and detailed, using a resolution of at least 300 DPI for optimal print quality. Low-resolution images can appear pixelated or blurry when printed, while excessively high resolutions can slow down the printing process and waste ink. Aim for an image resolution of 300 DPI (dots per inch) to strike a balance between quality and efficiency. You can adjust the resolution using image editing software like Adobe Photoshop or GIMP.
3.2 What Image Editing Techniques Improve Edible Prints?
Several image editing techniques can significantly improve the quality of your edible prints, enhancing colors, adjusting brightness, and removing imperfections for the best results.
- Color Correction: Adjust the color balance to ensure the printed image matches the original colors.
- Brightness and Contrast: Optimize the brightness and contrast to make the image pop.
- Sharpening: Apply a slight sharpening filter to enhance details.
- Background Removal: Remove unwanted backgrounds to focus on the main subject.
- Resizing: Ensure the image is the correct size for your cake to prevent distortion.
3.3 How Can I Customize My Image with Text or Designs?
You can easily customize your image with text or designs using image editing software, adding personalized messages or decorative elements to your edible photo cake. Programs like Adobe Photoshop or GIMP offer a wide range of tools for adding text, shapes, and other design elements to your image. You can choose from various fonts, colors, and styles to create a unique and personalized design. Consider adding a birthday message, a congratulatory note, or a decorative border to enhance the visual appeal of your edible photo cake.
4. Step-by-Step Guide to Printing Edible Images
Printing edible images involves a series of steps that require precision and care, ensuring high-quality prints for your edible photo cakes, from loading the edible sheet to troubleshooting common issues.
4.1 How to Load Edible Sheets into Your Printer?
Loading edible sheets into your printer correctly is essential to prevent jams and ensure proper printing, placing the sheet with the frosting side up in the printer’s paper tray. Before loading, make sure your hands are clean and dry to avoid damaging the sheet. Adjust the printer’s paper settings to match the type of edible sheet you are using, such as frosting sheet or wafer paper. Gently place the sheet in the paper tray, ensuring it is aligned properly. Always refer to your printer’s manual for specific instructions on loading special types of paper.
4.2 What Printer Settings Should I Use for Edible Printing?
Using the correct printer settings is crucial for achieving the best print quality on edible sheets, adjusting settings for paper type, print quality, and color management. Set the paper type to “glossy photo paper” or a similar setting that provides a high-quality print. Choose the highest print quality setting to ensure the image is sharp and detailed. Adjust the color settings to match the edible ink you are using, and consider running a test print to fine-tune the settings before printing your final image.
4.3 How to Print Your Image on Edible Paper?
Printing your image on edible paper is a straightforward process once your printer is set up correctly, sending the image to the printer and monitoring the printing process for any issues. First, open the image in your computer’s photo viewer or editing software. Select the print option and choose your edible printer from the list of available printers. Adjust the print settings as needed, and then click “Print” to start the printing process. Monitor the printer to ensure the image is printing correctly and without any issues.
4.4 What are Common Printing Issues and How to Resolve Them?
Common printing issues include smudging, streaking, and uneven colors. To resolve smudging, ensure the edible sheet is dry before handling it. For streaking, clean the printer heads using the printer’s maintenance function. If you notice uneven colors, adjust the color settings or replace the edible ink cartridges. Also, make sure the edible sheets are stored properly in an airtight bag to prevent them from drying out.
5. How to Apply Edible Images to Cakes
Applying edible images to cakes requires a delicate touch to ensure a seamless and professional-looking finish, preparing the cake surface, positioning the image, and smoothing out any imperfections.
5.1 How to Prepare the Cake Surface for Edible Images?
Preparing the cake surface properly is crucial for ensuring the edible image adheres smoothly and looks its best, creating a smooth, even surface with frosting or fondant. The ideal surface is a freshly frosted cake with a thin layer of buttercream or fondant. Ensure the frosting is still slightly moist to help the edible image adhere properly. If the frosting has dried, lightly mist the surface with water before applying the image.
5.2 How to Carefully Remove the Edible Image from the Backing?
Carefully removing the edible image from its backing is essential to prevent tearing or damage, using a gentle technique to peel the image away from the backing sheet. If the image is sticking to the backing, try placing it in the freezer for a few seconds to help loosen it. Alternatively, you can use a hairdryer on low heat to warm the backing slightly. Gently peel the image from one corner, working slowly and carefully to avoid tearing.
5.3 How to Position and Smooth the Edible Image on the Cake?
Positioning and smoothing the edible image correctly ensures a flawless finish, aligning the image precisely and using a gentle smoothing tool to remove air bubbles. Carefully place the edible image on the prepared cake surface, aligning it as desired. Use a spatula or cake smoother to gently press the image onto the cake, working from the center outwards to remove any air bubbles. Be careful not to press too hard, as this can damage the image.
5.4 What are Tips for a Seamless Application?
For a seamless application, consider these tips.
- Use a Thin Layer of Piping Gel: Applying a thin layer of piping gel to the back of the edible image can help it adhere better to the cake.
- Work Quickly: Edible images can become brittle if left exposed to air for too long, so work quickly to apply the image to the cake.
- Store the Cake Properly: After applying the edible image, store the cake in an airtight container in the refrigerator to prevent the image from drying out or becoming sticky.
- Avoid Direct Sunlight: Keep the cake away from direct sunlight, as this can cause the colors in the edible image to fade.
6. Troubleshooting Common Issues When Making Edible Photo Cakes
Even with careful preparation, you may encounter some common issues when making edible photo cakes. Here’s how to troubleshoot them.
6.1 Why is My Edible Image Cracking or Tearing?
Edible images may crack or tear due to dryness or improper handling, ensuring proper hydration and gentle handling to prevent damage. If the edible image is too dry, it can become brittle and prone to cracking. Try rehydrating the image by placing it in a room with high humidity or lightly misting it with water. When handling the image, be gentle and avoid bending or folding it.
6.2 How to Prevent Bubbles Under the Edible Image?
Bubbles under the edible image can detract from the overall appearance, using a smoothing tool and proper application techniques to minimize air pockets. To prevent bubbles, use a cake smoother or spatula to gently press the edible image onto the cake surface, working from the center outwards. If bubbles do appear, use a needle or pin to prick them and then smooth the area again.
6.3 What to Do if the Colors are Fading or Bleeding?
Fading or bleeding colors can be caused by exposure to moisture or sunlight, storing the cake properly and avoiding direct sunlight to maintain vibrant colors. Store the cake in an airtight container in the refrigerator to protect the edible image from moisture. Keep the cake away from direct sunlight, as this can cause the colors to fade.
6.4 How to Store Edible Photo Cakes Properly?
Proper storage is essential for maintaining the quality of your edible photo cakes, using airtight containers and refrigeration to prevent drying or damage. Store the cake in an airtight container in the refrigerator to prevent the edible image from drying out or becoming sticky. Avoid placing the cake near strong odors, as the edible image can absorb them. Do not freeze the cake, as this can damage the edible image.
7. Creative Ideas for Edible Photo Cakes
Edible photo cakes offer endless possibilities for creative expression, using various themes, designs, and techniques to create personalized masterpieces.
7.1 Themed Cakes for Birthdays, Weddings, and Anniversaries
Themed cakes are a great way to personalize your edible photo cakes for different occasions, incorporating specific colors, characters, or designs to match the event’s theme. For birthdays, consider using images of the birthday person’s favorite characters or hobbies. For weddings, incorporate photos of the couple or elegant floral designs. Anniversaries can be celebrated with photos from the couple’s wedding day or images representing their shared memories.
7.2 Photo Collages and Multiple Image Designs
Creating photo collages and using multiple images can add depth and interest to your edible photo cakes, combining several images to tell a story or create a visually stunning design. Use image editing software to create a collage of your favorite photos, and then print it onto an edible sheet. Arrange the images in a creative way to tell a story or highlight different aspects of the theme.
7.3 Incorporating Edible Decorations and Embellishments
Enhance your edible photo cakes by incorporating edible decorations and embellishments, adding depth, texture, and visual interest to your creations. Use edible glitter, sprinkles, fondant decorations, and edible paint to add extra flair to your cake. Consider creating edible flowers, borders, or other decorative elements to complement the printed image.
7.4 Using Edible Photo Cakes for Business and Marketing
Edible photo cakes can also be used for business and marketing purposes, creating personalized cakes with company logos, product images, or promotional messages. Use edible photo cakes to promote your brand at corporate events, trade shows, or product launches. Offer personalized cakes as gifts to clients or employees. Edible photo cakes are a unique and memorable way to showcase your brand and make a lasting impression.
8. The Science Behind Edible Printing
Understanding the science behind edible printing can help you appreciate the technology and techniques involved, exploring the composition of edible inks, the properties of edible papers, and the printing process itself.
8.1 What are Edible Inks Made Of?
Edible inks are made from food-grade ingredients, including water, sugar, glycerin, food coloring, and other additives that meet strict safety standards. The specific ingredients may vary depending on the brand and color of the ink. All ingredients must be approved by food safety authorities to ensure they are safe for consumption.
8.2 How Do Edible Papers Interact with Ink?
Edible papers interact with ink by absorbing the ink into their surface, creating a clear and vibrant image. The paper’s composition is designed to allow the ink to adhere properly and prevent it from smudging or bleeding. Frosting sheets have a smooth, frosting-like surface that provides excellent print quality, while wafer paper is more porous and may require special printing techniques.
8.3 What is the Shelf Life of Edible Prints?
The shelf life of edible prints depends on several factors, including the type of edible paper, the storage conditions, and the humidity levels. Generally, edible prints can last for several months if stored properly in an airtight container in a cool, dry place. Avoid exposing the prints to direct sunlight or moisture, as this can cause the colors to fade or bleed.
8.4 Are Edible Photo Cakes Safe to Eat?
Edible photo cakes are safe to eat as long as they are made with food-grade materials and handled properly, ensuring all components meet safety standards and are free from contamination. Always use edible ink and edible paper from reputable brands that comply with food safety regulations. Follow proper hygiene practices when handling the materials and preparing the cake. Store the cake properly to prevent bacterial growth or contamination.
9. Expert Tips and Tricks for Making Amazing Edible Photo Cakes
To elevate your edible photo cake creations, consider these expert tips and tricks from professional bakers and decorators.
9.1 Working with Different Types of Frosting
Different types of frosting can affect the appearance and adhesion of edible images, choosing the right frosting and adjusting your techniques accordingly. Buttercream frosting is a popular choice for its smooth texture and ease of use. Fondant provides a smooth, even surface that is ideal for edible images. Whipped cream frosting is light and airy, but it may not provide the best adhesion for edible images. Experiment with different types of frosting to find the one that works best for you.
9.2 Achieving Vibrant Colors and Sharp Images
Achieving vibrant colors and sharp images requires attention to detail and the use of high-quality materials, optimizing your printer settings, using high-resolution images, and selecting the right edible paper. Use the highest print quality setting on your printer to ensure the image is sharp and detailed. Choose high-resolution images to prevent pixelation. Select edible paper that is designed to produce vibrant colors, such as frosting sheets.
9.3 Preventing Common Mistakes
Preventing common mistakes can save you time and frustration, double-checking your settings, handling the materials carefully, and following the instructions closely. Always double-check your printer settings before printing. Handle the edible images and materials carefully to prevent damage. Follow the instructions closely to ensure the best results.
9.4 Exploring Advanced Techniques
Explore advanced techniques to take your edible photo cakes to the next level, experimenting with different designs, textures, and embellishments. Try creating 3D edible decorations using fondant or gum paste. Experiment with different edible painting techniques to add details to your images. Use edible stencils to create intricate designs on your cake.
10. Resources for Learning More About Edible Photo Cakes
To continue your learning journey about edible photo cakes, here are some valuable resources to explore, including online tutorials, books, and workshops.
10.1 Online Tutorials and Courses
Numerous online tutorials and courses offer step-by-step instructions and expert tips for making edible photo cakes, exploring platforms like YouTube, Skillshare, and Udemy. Search for tutorials on YouTube to learn basic techniques and advanced tips. Enroll in online courses on Skillshare or Udemy to gain in-depth knowledge and personalized instruction.
10.2 Books and Magazines
Books and magazines dedicated to cake decorating often feature articles and tutorials on edible photo cakes, providing valuable insights and inspiration, check out popular titles like “Cake Central Magazine” and “American Cake Decorating.”
10.3 Workshops and Classes
Attending workshops and classes can provide hands-on experience and personalized instruction from professional cake decorators, learning from experts and connecting with other enthusiasts.
10.4 Online Communities and Forums
Joining online communities and forums can connect you with other edible photo cake enthusiasts, sharing tips, asking questions, and getting feedback on your creations.
Remember, creating edible photo cakes is a delightful blend of art and science, offering endless opportunities for personalization and creativity. Whether you’re a beginner or an experienced baker, the right knowledge and resources can help you create stunning edible masterpieces that are sure to impress.
Visit dfphoto.net for more in-depth guides, tips, and resources to elevate your photography and cake decorating skills. Explore our collections of stunning photos for inspiration and connect with a vibrant community of fellow enthusiasts.
FAQ: Edible Photo Cakes
1. Can I use a regular printer for edible images?
No, it’s not recommended to use a regular printer for edible images due to the risk of contamination.
2. What is the best edible paper to use?
Frosting sheets are generally considered the best for vibrant colors and smooth texture.
3. How do I prevent the edible image from cracking?
Ensure the edible image is properly hydrated and handle it gently to prevent cracking.
4. How long do edible prints last?
Edible prints can last for several months if stored properly in an airtight container.
5. Are edible inks safe to eat?
Yes, edible inks are made from food-grade ingredients and are safe to consume.
6. How do I remove air bubbles from under the edible image?
Use a cake smoother or a needle to gently remove air bubbles.
7. Can I freeze an edible photo cake?
Freezing is not recommended as it can damage the edible image.
8. What frosting works best with edible images?
Buttercream and fondant are excellent choices for their smooth surfaces.
9. How do I store an edible photo cake?
Store the cake in an airtight container in the refrigerator.
10. Where can I buy edible ink and paper?
You can purchase edible ink and paper from specialty baking supply stores or online retailers. For a wide selection, visit dfphoto.net.
 Edible cake printing technique
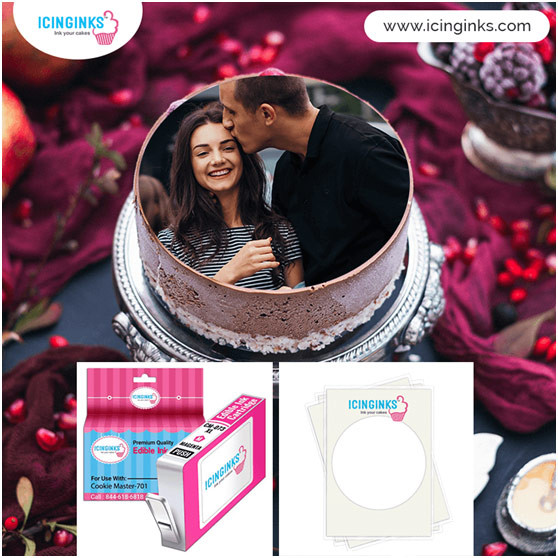 Printed frosting sheet