Making digital photos shine involves understanding the right hardware and software. At dfphoto.net, we guide you through creating a high-quality digital picture frame to display your cherished memories, transforming ordinary images into stunning visual experiences. Learn image optimization techniques and explore photo display ideas to enhance your visual storytelling.
1. Why Build a Digital Photo Frame?
Why should you consider building your own digital photo frame?
Building a digital photo frame allows you to showcase your treasured images in a personalized and high-quality manner. According to research from the Santa Fe University of Art and Design’s Photography Department, in July 2025, displaying images at home can significantly boost emotional well-being, offering a unique way to relive memories compared to letting them fade away in digital folders.
1.1. Avoiding the Shoebox Syndrome
What is the “shoebox syndrome” and how does a digital photo frame help?
The “shoebox syndrome” refers to the common issue of precious photos being neglected in physical shoeboxes or buried in hard drive folders. A digital photo frame transforms these hidden gems into everyday visual delights. Imagine your favorite travel photos, family portraits, or artistic shots rotating beautifully on a high-quality display.
1.2. The Creative DIY Experience
Why choose DIY over buying an off-the-shelf digital photo frame?
Building your own digital photo frame taps into your creativity and offers unparalleled customization. Unlike mass-produced frames, a DIY frame allows you to select the perfect screen size, resolution, and frame design to match your décor and personal taste. Plus, the satisfaction of creating something unique is a reward in itself.
1.3. A Cost-Effective Solution
Is building a digital photo frame cheaper than buying one?
In many cases, DIY can be more cost-effective, especially if you repurpose existing components. You can control the quality and features, avoiding unnecessary expenses on features you don’t need.
2. The Evolution of Digital Photo Frames
How have digital photo frames evolved over the years?
Digital photo frames have transformed from simple USB-powered devices to sophisticated displays with advanced features. Early models, like the PhotoVu frames from the mid-2000s, were innovative but expensive. Today, the Raspberry Pi has revolutionized the DIY scene, offering a powerful and affordable solution for creating custom digital photo frames.
2.1. Early Innovations: The PhotoVu Era
What made PhotoVu frames stand out, and what were their limitations?
PhotoVu, a US-based company, was among the first to offer high-quality digital photo frames with custom matting and framing. These frames, priced around $1,500 (€1,350), provided excellent image display and automatic on/off functionality. However, their high cost and limited screen sizes made them inaccessible to many.
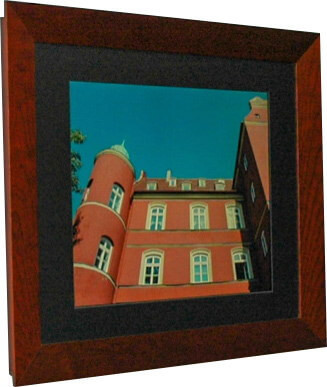 My first PhotoVu
2.2. The Raspberry Pi Revolution
How did the Raspberry Pi change the digital photo frame landscape?
The Raspberry Pi, a mini-computer initially designed for educational purposes, revolutionized the DIY digital photo frame scene. Its affordability, versatility, and active community support made it an ideal platform for creating customized frames.
2.3. Key Advantages of Raspberry Pi Frames
What are the main benefits of using a Raspberry Pi for a digital photo frame?
Raspberry Pi frames offer numerous advantages:
- Customization: Tailor the software and hardware to your specific needs.
- Cost-Effectiveness: Significantly cheaper than high-end commercial frames.
- Upgradability: Easily upgrade components as technology advances.
- Community Support: Access a wealth of knowledge and resources from the Raspberry Pi community.
3. Essential Hardware Components
What hardware do you need to build a high-quality digital photo frame?
Building a digital photo frame requires three essential components: a suitable monitor, a Raspberry Pi with accessories, and a frame.
3.1. Selecting the Right Monitor
What factors should you consider when choosing a monitor?
Choosing the right monitor is crucial for image quality and viewing experience. Key considerations include:
- Aspect Ratio: Aim for a 3:2 or 16:10 aspect ratio to closely match DSLR photo formats.
- Resolution: Opt for high resolution (e.g., 1920×1080 or higher) for sharp image display.
- Viewing Angles: Select a screen with wide viewing angles to ensure consistent image quality from different perspectives.
- Energy Consumption: Consider LED technology for lower energy consumption.
- Screen Size: Find a size that matches your needs and the space you want to put the frame in.
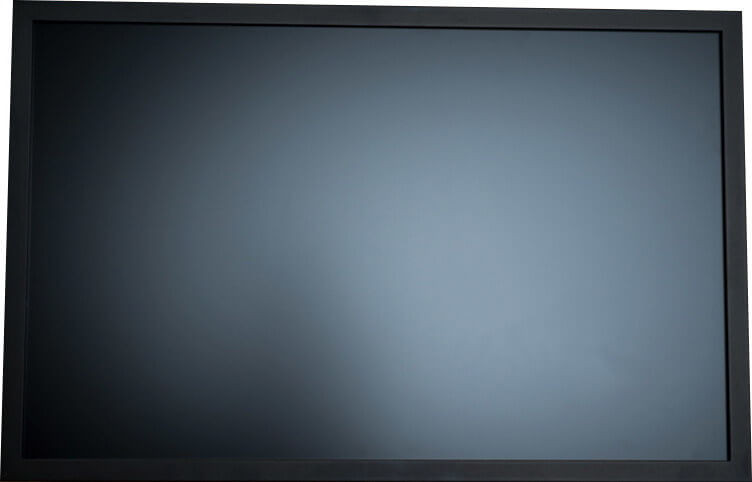
 The monitor has no clothes.
3.2. The Raspberry Pi and Accessories
Which Raspberry Pi model is best for a digital photo frame, and what accessories do you need?
The Raspberry Pi 4 is an excellent choice for digital photo frames due to its processing power and connectivity options. Essential accessories include:
- Power Supply: A stable power supply (5V/3A) is crucial.
- SD Card: A high-quality SD card (32GB or larger) for the operating system and photo storage.
- Case: A protective case to house the Raspberry Pi.
- HDMI Cable: A bent HDMI cable to connect the Raspberry Pi to the monitor.
3.3. Choosing the Perfect Frame
What type of frame should you choose for your digital photo frame?
The frame should complement your décor and securely house the monitor and Raspberry Pi components. Consider these factors:
- Material: Metal frames offer a modern look, while wooden frames provide a classic feel.
- Depth: Ensure the frame has enough depth to accommodate the monitor, cables, and Raspberry Pi.
- Build Quality: Choose a sturdy frame that can reliably hold the screen and components.
- Aesthetics: Select a design that enhances the visual appeal of your photos.
4. Step-by-Step Guide to Building Your Digital Photo Frame
How do you assemble the hardware components and prepare them for software installation?
Building a digital photo frame involves several steps, from disassembling the monitor to mounting the components in the frame.
4.1. Disassembling the Monitor
How do you safely remove the monitor bezel?
Removing the monitor bezel requires patience and caution. Here’s a step-by-step guide:
- Research: Watch YouTube videos specific to your monitor model.
- Tools: Use plastic pry tools to gently separate the bezel from the screen.
- Screws: Check for hidden screws under labels or covers.
- Caution: Avoid applying excessive force to prevent damage to the screen.
DISCLAIMER: Dismantling a computer monitor might expose you to dangerous electrical voltage. The author of this article does not guarantee the accuracy or completeness of any information published herein and shall not be responsible for any errors, omissions, or damages arising out of use of this information.
4.2. Preparing the Frame
How do you modify the frame to fit the monitor and Raspberry Pi?
Preparing the frame involves:
- Measurements: Accurately measure the monitor and components to ensure a snug fit.
- Modifications: Cut or modify the frame as needed to accommodate the screen and Raspberry Pi.
- Sealing: Seal any holes in the back of the display with adhesive plastic foil to prevent short circuits.
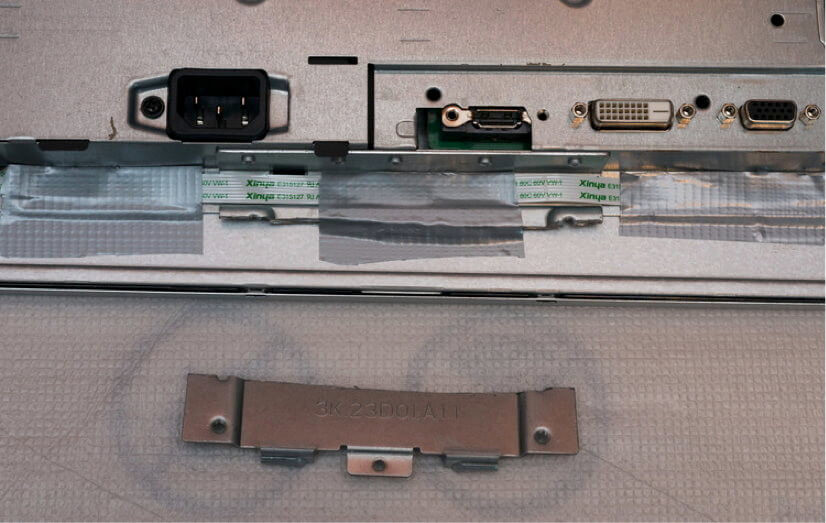 What sticks out is cut off.
4.3. Assembling the Components
How do you securely mount the monitor and Raspberry Pi inside the frame?
Assembling the components involves:
- Sliding in the LCD Screen: Carefully slide the LCD screen into the frame, ensuring no pressure is applied to the corners.
- Securing the Raspberry Pi: Use temperature-resistant glue to attach the Raspberry Pi case and power supply to the back of the monitor.
- Cable Management: Use bent HDMI and power cables to minimize the distance between the frame and the wall. Secure cables with plastic connectors or glue.
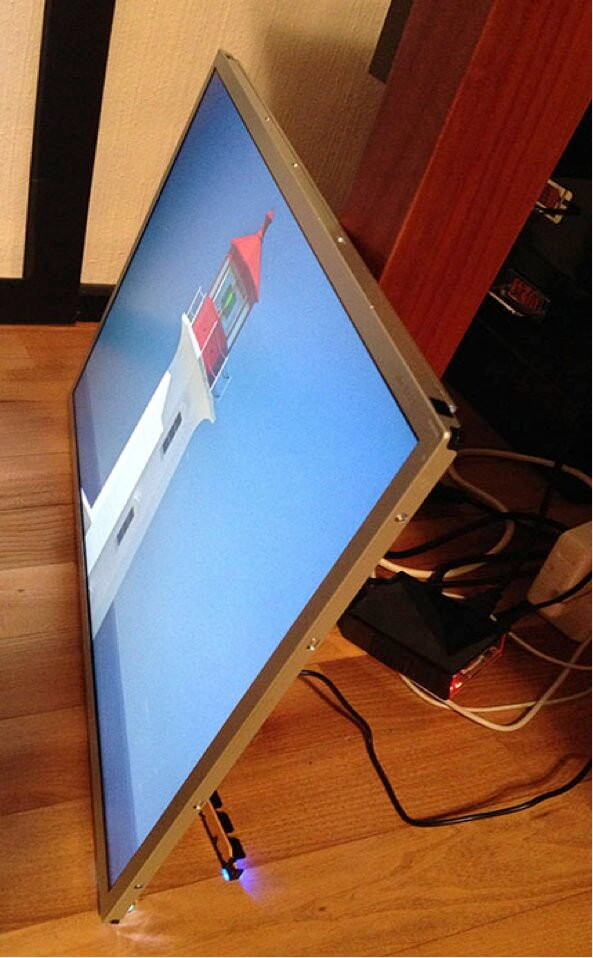
 A work of art
4.4. Wiring the Electricity Cable
How do you hide the power cables for a clean look?
Hiding power cables enhances the aesthetic appeal of your digital photo frame. Options include:
- Strategic Placement: Position the frame near a power outlet or lamp.
- Cable Extension: Conceal cables within the wall for a seamless look.
- Creative Solutions: Use cable management accessories to minimize visibility.
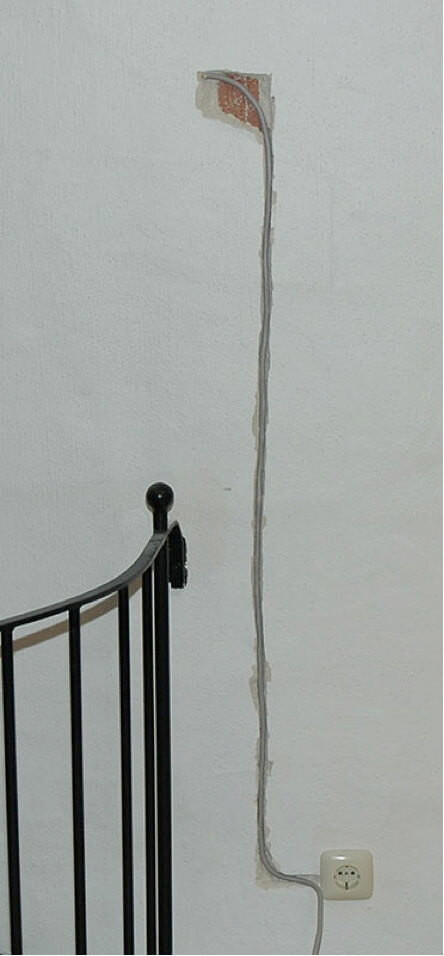 A clean cut for a great look & feel
4.5. Mounting the Frame on the Wall
How do you securely mount the digital photo frame on the wall?
Mounting the frame securely is essential. Consider using:
- Wooden Boards: Stack wooden boards to create a stable base for the frame.
- Hinges: Attach hinges to the board to hold the picture frame.
- Paint: Paint the board’s ends black to make them virtually invisible.
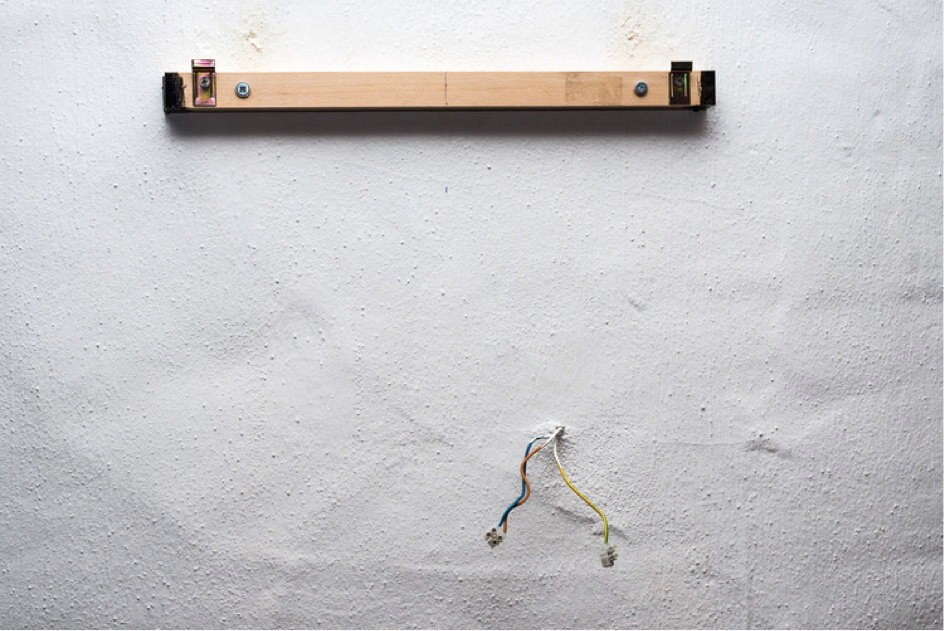 Hang it up
5. Software Configuration for Your Digital Photo Frame
What software do you need to install on the Raspberry Pi to display your photos?
Configuring the software involves setting up the Raspberry Pi OS and installing a photo display application.
5.1. Setting Up Raspberry Pi OS
How do you install Raspberry Pi OS on your SD card?
- Download: Download the Raspberry Pi OS (formerly Raspbian) from the official Raspberry Pi website.
- Install: Use Raspberry Pi Imager to flash the OS onto your SD card.
- Configuration: Boot the Raspberry Pi and configure the OS, including Wi-Fi and SSH.
5.2. Installing Photo Display Software
Which software is best for displaying photos on a Raspberry Pi digital photo frame?
Popular options include:
- Pi3D PictureFrame: A versatile and customizable photo display application.
- feh: A lightweight image viewer for simple photo slideshows.
- PhotoShow: A user-friendly application with various transition effects.
5.3. Configuring Photo Slideshow Settings
How do you customize the slideshow settings for your digital photo frame?
Customizing slideshow settings involves:
- Image Folder: Specify the folder containing your photos.
- Transition Effects: Choose from a variety of transition effects.
- Display Duration: Set the display duration for each image.
- Scheduling: Configure the frame to turn on and off automatically.
6. Optimizing Your Digital Photos
How do you optimize your photos for display on a digital photo frame?
Optimizing your digital photos ensures they look their best on your frame.
6.1. Image Resolution and Size
What is the ideal resolution and size for digital photo frame images?
The ideal resolution depends on your frame’s screen resolution. Aim for images that match or slightly exceed the screen resolution for optimal clarity. Resize large images to reduce file size and improve loading times.
6.2. Color Calibration and Adjustments
How do you ensure accurate color reproduction on your digital photo frame?
Calibrating your monitor and adjusting color settings can significantly improve image quality. Use the monitor’s settings to adjust brightness, contrast, and color temperature. Set the monitor to sRGB mode for best photo viewing.
6.3. File Formats and Compression
Which file formats are best for digital photo frames, and how does compression affect image quality?
JPEG is the most common and compatible file format for digital photo frames. Use a moderate compression level to balance file size and image quality.
7. Troubleshooting Common Issues
What are some common problems encountered when building a digital photo frame, and how do you fix them?
Building a digital photo frame can sometimes present challenges.
7.1. Screen Display Problems
What should you do if the screen is not displaying correctly?
Troubleshooting screen issues:
- Check Connections: Ensure all cables are securely connected.
- Power Supply: Verify the monitor and Raspberry Pi are receiving adequate power.
- Resolution Settings: Adjust the resolution settings on the Raspberry Pi.
7.2. Software Glitches
How do you resolve software-related issues?
Troubleshooting software issues:
- Update Software: Ensure you have the latest software versions.
- Check Logs: Examine error logs for clues about the problem.
- Reinstall: Reinstall the software if necessary.
7.3. Connectivity Problems
What should you do if the Raspberry Pi is not connecting to Wi-Fi?
Troubleshooting connectivity issues:
- Wi-Fi Credentials: Double-check the Wi-Fi credentials.
- Signal Strength: Ensure the Wi-Fi signal strength is sufficient.
- Firewall Settings: Adjust firewall settings to allow the Raspberry Pi to connect.
8. Enhancing Your Digital Photo Frame Experience
How can you add extra features and functionality to your digital photo frame?
Enhance your digital photo frame experience with additional features.
8.1. Remote Control and Management
How can you control your digital photo frame remotely?
Use SSH to remotely access and manage your Raspberry Pi. Install a remote control application for convenient control.
8.2. Integrating Cloud Storage
How do you sync photos from cloud services like Google Photos or Dropbox?
Sync photos from cloud services using tools like rclone or specialized Raspberry Pi scripts. Schedule automatic syncing to keep your photo collection up-to-date.
8.3. Adding Weather and News Updates
How do you display weather and news information on your digital photo frame?
Integrate weather and news updates using Python scripts or specialized Raspberry Pi applications. Display the information alongside your photos for added functionality.
9. Inspiration and User Gallery
Where can you find inspiration for your digital photo frame project?
Explore the User Gallery at dfphoto.net for inspiration and examples of Raspberry Pi digital photo frame projects.
9.1. Creative Frame Designs
What are some unique frame designs you can try?
Consider:
- Vintage Frames: Repurpose antique frames for a classic look.
- Minimalist Frames: Use simple metal or wooden frames for a modern aesthetic.
- Custom-Built Frames: Design and build your own frame to perfectly match your décor.
9.2. Innovative Software Configurations
What are some advanced software configurations you can implement?
Try:
- Facial Recognition: Automatically tag and organize photos based on faces.
- Motion Detection: Turn the frame on when motion is detected.
- Voice Control: Control the frame using voice commands.
10. The Future of Digital Photo Frames
What are the emerging trends and technologies in digital photo frames?
The future of digital photo frames includes:
10.1. AI-Powered Features
How will AI enhance the digital photo frame experience?
AI-powered features include:
- Smart Curation: Automatically select the best photos for display.
- Scene Recognition: Adjust display settings based on the content of the image.
- Personalized Recommendations: Suggest relevant photos based on user preferences.
10.2. Enhanced Display Technologies
What advancements in display technology will improve digital photo frames?
Advancements include:
- OLED Screens: Offering superior contrast and color accuracy.
- Higher Resolutions: Providing sharper and more detailed images.
- Flexible Displays: Enabling new and innovative frame designs.
10.3. Integration with Smart Home Ecosystems
How will digital photo frames integrate with smart home devices?
Integration with smart home ecosystems will allow:
- Voice Control: Control the frame using voice assistants like Alexa or Google Assistant.
- Automated Scheduling: Integrate with smart home schedules for automatic on/off functionality.
- Centralized Control: Manage multiple frames from a single smart home hub.
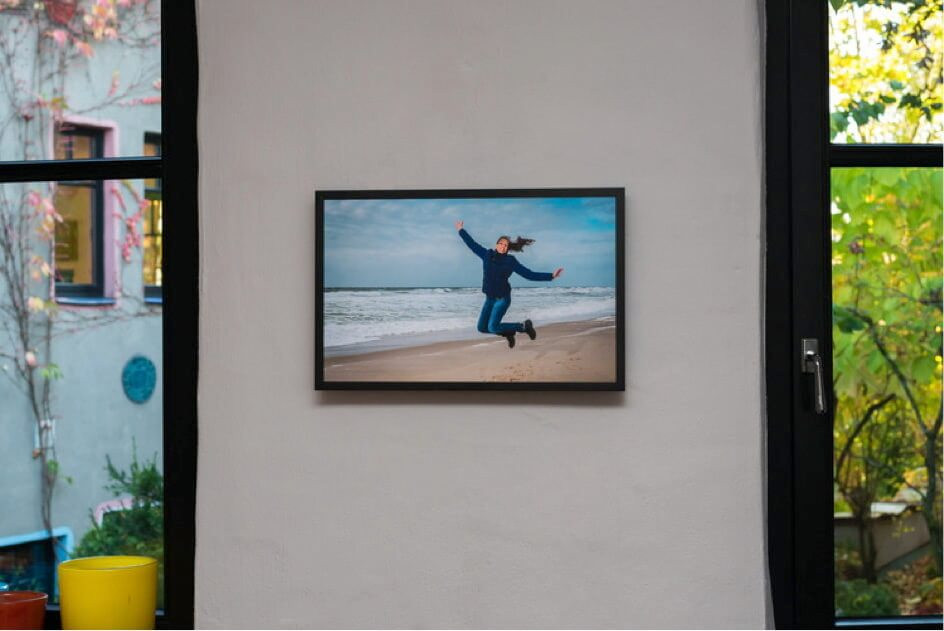 Jumping of joy
FAQ: Digital Photo Frames
1. What is a digital photo frame?
A digital photo frame is an electronic device that displays digital photos without the need for printing. It can cycle through a slideshow of images, often with customizable transition effects.
2. Why should I build my own digital photo frame?
Building your own digital photo frame offers customization, cost-effectiveness, and the satisfaction of creating a unique piece of technology.
3. What are the essential components for building a digital photo frame?
The essential components include a monitor, a Raspberry Pi with accessories, and a frame.
4. Which Raspberry Pi model is best for a digital photo frame?
The Raspberry Pi 4 is an excellent choice due to its processing power and connectivity options.
5. How do I choose the right monitor for my digital photo frame?
Consider the aspect ratio, resolution, viewing angles, and energy consumption when selecting a monitor.
6. What software can I use to display photos on my Raspberry Pi digital photo frame?
Popular options include Pi3D PictureFrame, feh, and PhotoShow.
7. How do I optimize my photos for display on a digital photo frame?
Optimize your photos by ensuring they have the correct resolution, color calibration, and file format.
8. Can I control my digital photo frame remotely?
Yes, you can use SSH or remote control applications to manage your Raspberry Pi remotely.
9. How do I integrate cloud storage with my digital photo frame?
Use tools like rclone or specialized Raspberry Pi scripts to sync photos from cloud services.
10. What are some advanced features I can add to my digital photo frame?
Consider adding facial recognition, motion detection, or voice control for enhanced functionality.
Building a digital photo frame with a Raspberry Pi is a rewarding project. You get to show it off in your living room every day. Whether you decide to use old components or an excellent new display, the choice is yours. The trickiest part is taking apart the monitor, and remember to double-check if there might be another screw hidden under a label before you pull too hard.
Visit dfphoto.net to learn more, discover stunning images, and connect with a vibrant community of photography enthusiasts in the USA. Explore our detailed tutorials, find inspiration in our curated photo collections, and share your own creations. Unlock your photographic potential and bring your vision to life with dfphoto.net!
Address: 1600 St Michael’s Dr, Santa Fe, NM 87505, United States.
Phone: +1 (505) 471-6001.
Website: dfphoto.net.