Are you looking for a simple way to create a white background for your passport photo? With advancements in technology, it’s now easier than ever to achieve the perfect passport photo background using AI-powered solutions. At dfphoto.net, we’ll guide you through the process and show you how to make a passport photo with a white background quickly and efficiently. Discover how to create professional-looking passport photos with a white background and explore the benefits of using digital tools for photo editing, ensuring compliance and enhancing your photo’s appearance.
1. Why is a White Background Important for Passport Photos?
Is a white background really that important for passport photos? Absolutely! A white background is a crucial requirement for passport photos in many countries, including the United States. The purpose of this requirement is to ensure clarity and consistency, which helps in the facial recognition process. A consistent background eliminates shadows and distractions, allowing for accurate identification. According to the U.S. Department of State, passport photos must have a plain white or off-white background to be accepted. Failing to meet this standard can lead to rejection of your passport application.
- Clarity: A white background ensures that the focus remains solely on the applicant’s face.
- Consistency: Standardizes photos for easier processing and identification.
- Compliance: Meets the specific requirements set by passport agencies.
2. What are the Official Requirements for Passport Photos in the USA?
Do you know all the official requirements for passport photos in the USA? It’s not just about the white background! The U.S. Department of State has strict guidelines for passport photos to ensure they are suitable for identification purposes. Here’s a quick rundown:
- Size: The photo must be 2×2 inches (51×51 mm).
- Head Size: The head must be between 1 inch and 1 3/8 inches (25-35 mm) from the bottom of the chin to the top of the head.
- Background: The photo must have a plain white or off-white background.
- Expression: You must have a neutral facial expression or a natural smile with both eyes open.
- Attire: No uniforms or clothing that resembles a uniform.
- Accessories: No hats or head coverings unless worn daily for religious reasons. A signed statement is required to verify this.
- Eyeglasses: As of November 1, 2016, eyeglasses are no longer allowed in U.S. passport photos, with very rare medical exceptions.
Adhering to these guidelines ensures that your photo meets the necessary standards, preventing delays or rejection of your passport application. The U.S. Department of State provides a detailed checklist on their website, which is a valuable resource for anyone preparing to submit a passport photo.
3. How to Take a Passport Photo at Home?
Can you really take a professional-quality passport photo at home? Absolutely! With the right setup and a few tips, you can create a compliant passport photo without leaving your house.
- Find a Suitable Location: Choose a well-lit room with a white or off-white wall. Natural light is best, but avoid direct sunlight, which can cause harsh shadows.
- Set Up Your Camera: Use a digital camera or a smartphone with a high-resolution camera. Place the camera on a tripod or stable surface to ensure the photo is sharp and clear.
- Position Yourself: Stand about 2-3 feet away from the wall. Have someone take the photo for you, or use a self-timer.
- Follow the Guidelines: Make sure your head is centered and your face is fully visible. Maintain a neutral expression and keep both eyes open.
- Check the Photo: Review the photo to ensure it meets all the requirements. The head size should be correct, the background should be plain white, and there should be no shadows or glare.
According to experts at the Santa Fe University of Art and Design’s Photography Department, using a smartphone with a good camera and following these steps can yield excellent results.
4. What Tools Can Help Change the Background to White?
What are the best tools for changing a photo background to white? Several excellent options are available, ranging from online services to professional software. Here are a few of the most popular and effective tools:
- Erase.bg: An AI-powered tool that automatically removes the background from an image, allowing you to replace it with a white background. It’s user-friendly and requires no technical skills.
- Adobe Photoshop: A professional-grade image editing software that offers precise control over background removal and replacement. It’s more complex but provides the highest quality results.
- GIMP (GNU Image Manipulation Program): A free, open-source alternative to Photoshop. It offers many of the same features and is a great option for those on a budget.
- Online Passport Photo Editors: Many websites offer specific tools for creating passport photos, including background removal and replacement features.
5. How to Use Erase.bg to Make Background White for Passport Photo?
How can you use Erase.bg to effortlessly transform your passport photo background? It’s simple! Erase.bg is an AI-powered tool designed to make background removal and editing quick and easy. Here’s a step-by-step guide:
- Go to Erase.bg: Visit the Erase.bg website or download the mobile app, available for Android and iOS devices.
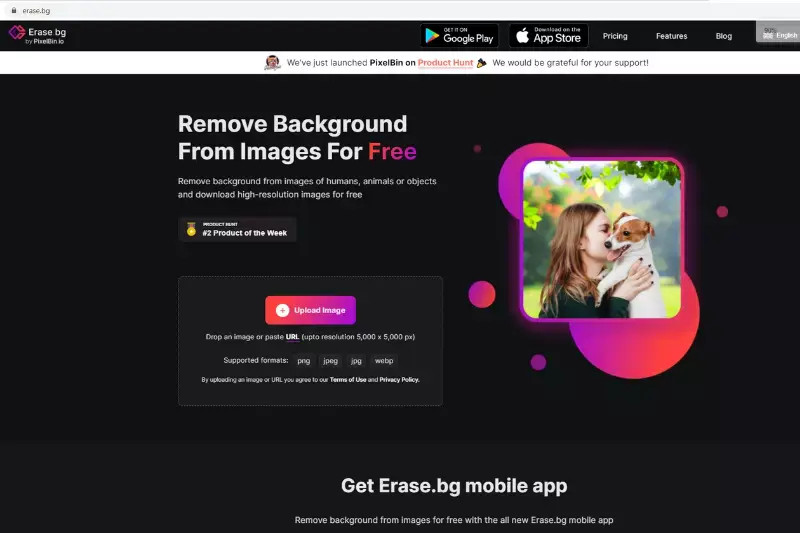 Erase.bg Home Page
- Upload Your Photo: Use the “Upload Image” option or drag and drop your passport photo onto the site.
 Upload Image Step
- Edit the Background: After Erase.bg removes the background, click the “Edit” option, then select “Color”.
- Choose White: Pick white as your background color.
- Download Your Photo: Click the “Download Image” button to save your new passport photo with a white background.
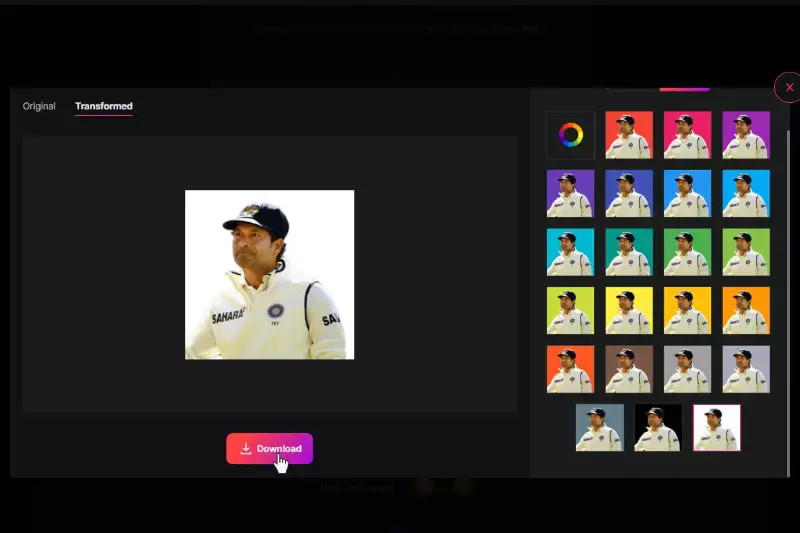 Download Image Step
With these simple steps, you can easily create a compliant passport photo with a perfect white background using Erase.bg.
6. How to Use Adobe Photoshop to Make Background White for Passport Photo?
Want to use Adobe Photoshop to create a pristine white background for your passport photo? While it’s a more advanced tool, Photoshop offers precision and control. Here’s how to do it:
- Open Your Photo: Launch Adobe Photoshop and open the passport photo you want to edit.
- Select the Subject: Use a selection tool like the Quick Selection Tool or the Pen Tool to accurately select the person in the photo.
- Refine the Selection: Go to “Select” > “Select and Mask” to refine the edges of your selection, ensuring a clean separation between the subject and the background.
- Create a New Layer: Once you have a precise selection, create a new layer by going to “Layer” > “New” > “Layer.”
- Fill the Background with White: Fill the new layer with white. You can do this by selecting the Paint Bucket Tool, setting the color to white, and clicking within the selected background area.
- Adjust and Refine: Adjust the blending options and refine the edges as needed to ensure a seamless transition between the subject and the white background.
- Save Your Photo: Save the edited photo in the correct size and format for passport photos.
While Photoshop requires some technical skills, it offers the best control over the final result, ensuring a professional-looking passport photo.
7. What are the Benefits of Using a White Background for Passport Photos?
Why should you bother ensuring a white background for your passport photo? The benefits extend beyond mere compliance!
- Compliance with Regulations: Ensures your photo meets the specific requirements set by passport agencies, avoiding rejection.
- Professional Appearance: A clean, white background makes the subject stand out, enhancing the overall quality of the photo.
- Easy Editing: A white background makes it easier to edit and adjust the photo as needed.
- Standardization: Consistent backgrounds help maintain a uniform and orderly appearance when submitting multiple photos.
8. What Common Mistakes to Avoid When Taking Passport Photos?
Taking passport photos can be tricky! What are some common pitfalls to watch out for? Here are a few:
- Shadows: Avoid shadows on the face or background, as they can cause the photo to be rejected.
- Glare: Make sure there is no glare on your glasses (if worn) or face.
- Incorrect Size: Ensure the photo is the correct size (2×2 inches) and the head size is within the specified range.
- Unnatural Expression: Maintain a neutral expression or a natural smile. Avoid exaggerated expressions or poses.
- Non-White Background: The background must be plain white or off-white. Avoid colored or patterned backgrounds.
- Head Coverings: Do not wear hats or head coverings unless required daily for religious reasons.
- Eyeglasses: As of November 1, 2016, eyeglasses are generally not allowed in U.S. passport photos.
9. How to Ensure Your Passport Photo is Accepted?
Want to make absolutely sure your passport photo gets the green light? Here’s a checklist to follow:
- Review the Guidelines: Carefully review the U.S. Department of State’s guidelines for passport photos.
- Use a Checklist: Use a checklist to ensure you have met all the requirements.
- Check the Size and Head Size: Measure the photo to ensure it is 2×2 inches and the head size is within the specified range.
- Verify the Background: Ensure the background is plain white or off-white.
- Check the Lighting: Make sure the photo is evenly lit, with no shadows or glare.
- Maintain a Neutral Expression: Keep a neutral expression or a natural smile with both eyes open.
- Avoid Accessories: Remove hats, head coverings, and eyeglasses (unless medically necessary).
- Use Professional Tools: Use reliable tools like Erase.bg or Adobe Photoshop to edit the background if necessary.
According to the U.S. Department of State, double-checking these elements can significantly increase the chances of your passport photo being accepted.
10. What Are the Best Practices for Lighting in Passport Photos?
What’s the secret to perfect lighting in passport photos? Good lighting is crucial for a compliant and high-quality passport photo. Here are some best practices:
- Natural Light: Use natural light whenever possible. Position yourself near a window, but avoid direct sunlight, which can create harsh shadows.
- Even Lighting: Ensure the light is evenly distributed across your face. Avoid shadows or bright spots.
- Avoid Backlighting: Do not stand with your back to a light source, as this can create silhouettes.
- Use a Reflector: If necessary, use a reflector to bounce light onto your face and fill in any shadows.
- Avoid Flash: If using artificial light, avoid using the camera’s flash, as it can cause glare and red-eye.
- Soft Lighting: Use soft, diffused lighting to minimize shadows and create a more flattering look.
Following these lighting practices can help you capture a passport photo that meets all the necessary requirements and looks great.
11. Can I Use My Smartphone to Take a Passport Photo?
Thinking of using your smartphone for your passport photo? You absolutely can! Modern smartphones have high-quality cameras that can produce excellent results. However, you need to follow certain guidelines:
- Use a High-Resolution Camera: Ensure your smartphone has a high-resolution camera that can capture clear and detailed images.
- Stable Positioning: Use a tripod or stable surface to keep the camera steady and avoid blurry photos.
- Good Lighting: Take the photo in a well-lit room with natural light. Avoid direct sunlight, which can cause harsh shadows.
- Follow the Guidelines: Make sure to follow all the official guidelines for passport photos, including size, head size, background, and expression.
- Edit the Photo: Use editing tools to adjust the background, crop the photo, and ensure it meets all the requirements.
The Santa Fe University of Art and Design’s Photography Department recommends using a smartphone with at least a 12-megapixel camera and following these tips for the best results.
12. What If I Need a Different Background Color?
What if you need a passport photo with a background color other than white? While most countries require a white background, there may be instances where a different color is needed.
- Check the Requirements: Always check the specific requirements of the organization or country you are submitting the photo to.
- Use Editing Tools: Use photo editing tools like Adobe Photoshop or Erase.bg to change the background color to the required color.
- Professional Services: If you are unsure, consider using a professional passport photo service that can ensure the photo meets all the necessary requirements.
13. How to Print Your Passport Photo?
Ready to print your passport photo? Here are some tips to ensure it meets the required standards:
- Use High-Quality Paper: Print the photo on high-quality photo paper to ensure it is clear and durable.
- Check the Size: Make sure the printed photo is the correct size (2×2 inches).
- Print at the Correct Resolution: Print the photo at the correct resolution (300 DPI or higher) to ensure it is sharp and detailed.
- Use a Color Printer: Use a color printer to ensure the colors are accurate and vibrant.
- Cut Carefully: Cut the photo carefully along the edges to ensure it is the correct size and shape.
14. What are the Alternatives to DIY Passport Photos?
DIY passport photos not your thing? What other options are available?
- Professional Photo Services: Many pharmacies, post offices, and photo studios offer passport photo services. These services ensure the photo meets all the necessary requirements and can save you time and hassle.
- Online Photo Services: Several online services allow you to upload a photo and have it printed and mailed to you. These services often include editing tools to adjust the background and ensure compliance.
15. How Much Does It Cost to Get a Passport Photo?
Worried about the cost of passport photos? Here’s a breakdown:
- DIY Photos: Taking passport photos at home can be the most cost-effective option, especially if you already have a camera and printer. The cost is primarily for photo paper and ink.
- Professional Services: Professional passport photo services typically charge between $10 and $20 for two photos.
- Online Services: Online photo services may charge a similar amount, including printing and shipping.
16. What if My Passport Photo is Rejected?
Oh no, your passport photo was rejected! What now?
- Review the Reason: Review the reason for the rejection and identify the issue.
- Retake the Photo: Retake the photo, making sure to address the issue that caused the rejection.
- Seek Professional Help: If you are unsure, seek help from a professional passport photo service.
17. How to Store Your Passport Photos?
Don’t forget to keep your passport photos safe and sound! Here are some storage tips:
- Digital Storage: Store digital copies of your passport photos on your computer or in the cloud.
- Physical Storage: Store physical copies of your passport photos in a safe and dry place, away from direct sunlight and heat.
18. How Often Should I Update My Passport Photo?
How often should you update your passport photo? The general rule is:
- Every 10 Years: Passport photos are typically valid for 10 years for adults and 5 years for children.
- Significant Changes: If you have undergone significant changes in appearance (such as major facial surgery or significant weight loss or gain), you may need to update your passport photo sooner.
19. What are the Emerging Trends in Passport Photo Technology?
What’s new in the world of passport photo technology?
- AI-Powered Tools: AI-powered tools like Erase.bg are making it easier than ever to create compliant passport photos with minimal effort.
- Mobile Apps: Mobile apps are becoming more sophisticated, offering advanced editing features and real-time feedback to ensure compliance.
- Biometric Analysis: Some services are using biometric analysis to verify that the photo meets all the necessary requirements.
20. How Can dfphoto.net Help You with Passport Photos?
Are you looking for more guidance on creating the perfect passport photo? At dfphoto.net, we provide comprehensive resources and expert tips to help you succeed. Whether you’re looking for detailed tutorials, equipment reviews, or creative inspiration, our website offers a wealth of information for photographers of all levels.
Address: 1600 St Michael’s Dr, Santa Fe, NM 87505, United States
Phone: +1 (505) 471-6001
Website: dfphoto.net
Ready to take the next step? Visit dfphoto.net today to discover a world of photography knowledge and inspiration. Explore our guides, view stunning photos, and connect with a vibrant community of photographers in the USA. Don’t miss out – start your journey with dfphoto.net now!
FAQ: Making Your Passport Photo Perfect
1. Can I wear makeup in my passport photo?
Yes, you can wear makeup in your passport photo, but it should be natural-looking and not alter your facial features significantly.
2. Can I smile in my passport photo?
Yes, a natural smile is acceptable. The U.S. Department of State allows a natural smile, but avoid exaggerated expressions.
3. What should I wear in my passport photo?
Wear everyday attire. Avoid uniforms or clothing that resembles a uniform.
4. Can I wear jewelry in my passport photo?
Yes, you can wear jewelry, but it should not obscure your face or create shadows.
5. How do I crop my passport photo to the correct size?
Use photo editing tools or online services to crop the photo to 2×2 inches, ensuring the head size is within the specified range.
6. How do I remove red-eye from my passport photo?
Use photo editing tools to remove red-eye. Most tools have a red-eye removal feature.
7. Can I wear a wig in my passport photo?
Wearing a wig is generally discouraged unless it is worn daily for medical reasons.
8. What if I have a medical condition that affects my appearance?
Provide documentation from a medical professional explaining the condition.
9. Can I take a passport photo of my baby?
Yes, but it can be challenging. Lay the baby on a white sheet and take the photo from above.
10. How long is a passport photo valid?
Passport photos are typically valid for 10 years for adults and 5 years for children.