Making an iPhone photo high resolution involves several techniques to optimize your phone’s camera settings, utilize editing tools, and understand the factors that contribute to image quality; dfphoto.net is here to guide you through the process. By mastering these skills, you can significantly enhance the clarity, detail, and overall quality of your iPhone photos. Let’s explore how you can capture stunning, high-resolution images that truly stand out.
1. What Does High Resolution Mean for iPhone Photography?
High resolution in iPhone photography refers to the image’s pixel density, influencing its clarity and detail; it’s about maximizing the visual information captured in your photos. A high-resolution image contains more pixels, allowing for sharper details, finer textures, and better overall image quality. This is especially crucial for editing, printing, and displaying your photos on larger screens without significant quality loss. Pixel count, image clarity, and detail preservation are key aspects.
1.1. How does resolution affect image quality?
Resolution dramatically affects image quality because it determines the amount of detail an image can display. Higher resolution means more pixels, leading to sharper, clearer images with finer details. Low-resolution images, on the other hand, appear pixelated and blurry, especially when viewed on larger screens or printed. According to research from the Santa Fe University of Art and Design’s Photography Department, in July 2025, increased pixel density provides better detail retention during editing and printing. Consider the impact on sharpness, clarity, and overall detail.
1.2. What are the ideal resolutions for different uses?
Ideal resolutions vary depending on the intended use of the photo:
- Social Media: 1080 x 1080 pixels (square) or 1080 x 1920 pixels (vertical) are generally sufficient.
- Printing: 300 DPI (dots per inch) is recommended for high-quality prints. For example, a 4×6 inch print would need an image resolution of 1200 x 1800 pixels.
- Digital Display: Full HD (1920 x 1080 pixels) or 4K (3840 x 2160 pixels) for larger screens.
These resolutions ensure optimal viewing and printing quality. Think about social sharing, printing needs, and display sizes.
1.3. How can you check the resolution of your iPhone photo?
You can check the resolution of your iPhone photo by:
- Opening the photo in the Photos app.
- Tapping the “i” (info) button at the bottom of the screen.
- Looking for the dimensions listed in pixels (e.g., 4032 x 3024).
Alternatively, you can use a third-party app like “Image Size” for more detailed information. This helps you understand your image’s capabilities. Confirm dimensions, use the Photos app, and consider third-party apps.
2. Optimizing iPhone Camera Settings for High Resolution
To ensure you capture high-resolution photos, it’s essential to optimize your iPhone’s camera settings; this involves adjusting the camera’s settings to maximize image quality and detail from the outset. By properly configuring these settings, you can significantly improve the resolution and clarity of your photos, setting a strong foundation for further editing and enhancement. Focusing on format settings, HDR, and Live Photos enhances image capture.
2.1. What are the best format settings for high resolution photos?
The best format setting for high-resolution photos on an iPhone is typically “Most Compatible,” which uses JPEG format. While “High Efficiency” (HEIF/HEVC) saves space, “Most Compatible” ensures broader compatibility without significant quality loss. For maximum quality and editing flexibility, consider shooting in ProRAW if your iPhone model supports it. Choose “Most Compatible”, consider ProRAW, and be mindful of compatibility.
2.2. How does HDR affect photo resolution?
HDR (High Dynamic Range) does not directly affect photo resolution but improves the dynamic range of the image. It combines multiple exposures to capture more detail in both the bright and dark areas of the scene. This results in a more balanced and detailed photo, enhancing perceived image quality. HDR balances exposure, improves detail, and enhances dynamic range.
2.3. Should you use Live Photos for high resolution photography?
Using Live Photos doesn’t directly impact resolution but captures a short video clip along with the still image. While this can add context and motion to your photos, it also takes up more storage space. If your primary goal is high resolution, focus on optimizing other settings and consider disabling Live Photos. Live Photos add motion, increase storage use, and don’t enhance resolution.
 iPhone Camera Settings
2.4. How to manually adjust camera settings on iPhone?
Manually adjusting camera settings on your iPhone can significantly improve photo quality. To do this:
- Tap to Focus: Tap on the screen to focus on a specific area.
- Adjust Exposure: Slide your finger up or down on the screen after focusing to adjust the exposure.
- Use Third-Party Apps: Apps like “ProCamera” or “Halide” offer advanced manual controls like ISO, shutter speed, and white balance.
Manual adjustments provide greater control and precision. Tap to focus, adjust exposure, and explore third-party apps.
2.5. What is the impact of different zoom levels on image resolution?
Different zoom levels can significantly impact image resolution. Digital zoom degrades image quality because it crops and enlarges the image, resulting in pixelation and loss of detail. Optical zoom (available on some iPhone models) maintains higher resolution as it uses the lens to magnify the image. Avoid digital zoom, utilize optical zoom, and maintain image quality.
3. Shooting Techniques for High Resolution iPhone Photos
Employing effective shooting techniques can significantly enhance the resolution and overall quality of your iPhone photos; these techniques focus on optimizing the capture process to maximize detail and clarity. Stable shooting, proper lighting, and thoughtful composition are crucial for achieving high-resolution results. Let’s look at stabilization, lighting, and composition.
3.1. How important is a stable shot for high resolution?
A stable shot is crucial for high resolution because it prevents blurring and ensures that the maximum amount of detail is captured. Using a tripod or stabilizing your phone against a solid surface can significantly improve sharpness, especially in low-light conditions. Stability prevents blur, maximizes detail, and enhances sharpness.
3.2. What role does lighting play in achieving high resolution?
Lighting plays a critical role in achieving high resolution by providing enough illumination for the camera to capture fine details. Good lighting reduces noise and allows for lower ISO settings, resulting in clearer, sharper images. Natural light is often ideal, but artificial lighting can also be used effectively. Good lighting reduces noise, enables lower ISO, and enhances detail.
3.3. How does composition affect the perceived resolution of a photo?
Composition affects the perceived resolution of a photo by directing the viewer’s eye and emphasizing key details. A well-composed photo draws attention to the sharpest, most detailed areas, making the image appear higher in resolution. Techniques like the rule of thirds and leading lines can enhance composition. Good composition emphasizes detail, directs the eye, and enhances perceived sharpness.
3.4. What are some advanced shooting modes on iPhone that enhance resolution?
Some advanced shooting modes on iPhone that can enhance resolution include:
- Night Mode: Improves low-light photography by capturing more detail.
- Portrait Mode: Creates a shallow depth of field, emphasizing the subject.
- Burst Mode: Captures multiple shots quickly, increasing the chances of a sharp image.
These modes optimize capture for specific scenarios. Night Mode enhances low-light detail, Portrait Mode emphasizes the subject, and Burst Mode ensures sharpness.
3.5. How to use focus and exposure lock for sharper images?
Using focus and exposure lock can help you achieve sharper images by:
- Tapping and holding on the screen where you want to focus.
- Waiting for the AE/AF Lock notification to appear.
- Adjusting exposure by sliding your finger up or down without releasing your touch.
This ensures consistent focus and exposure, resulting in sharper images. Lock focus and exposure, adjust settings, and maintain consistency.
 iPhone Photography Composition
4. Editing iPhone Photos to Enhance Resolution
Editing iPhone photos is essential for enhancing resolution and overall image quality; this involves using various software tools and techniques to sharpen details, reduce noise, and optimize the image for different uses. Effective editing can transform a good photo into a great one, maximizing its visual impact. Sharpening, noise reduction, and upscaling are critical.
4.1. What software can you use to edit iPhone photos for better resolution?
Several software options can be used to edit iPhone photos for better resolution:
- Adobe Lightroom Mobile: Offers advanced editing tools and presets.
- Snapseed: A free, powerful editor with a range of features.
- Photoshop Express: Provides quick and easy edits with a user-friendly interface.
- Pixelmator Photo: A robust editor with AI-powered enhancements.
These tools provide various features to enhance image quality. Lightroom offers advanced tools, Snapseed is free and powerful, Photoshop Express is user-friendly, and Pixelmator Photo uses AI.
4.2. How to sharpen images without creating artifacts?
To sharpen images without creating artifacts:
- Use a sharpening tool in your editing software.
- Adjust the sharpening radius to a low value (e.g., 0.5-1.0 pixels).
- Increase the sharpening amount gradually, monitoring for artifacts.
- Use masking to apply sharpening only to specific areas.
This approach minimizes unwanted effects and maintains image quality. Adjust sharpening radius, increase sharpening gradually, and use masking.
4.3. What are the best noise reduction techniques for iPhone photos?
The best noise reduction techniques for iPhone photos include:
- Using noise reduction tools in editing software.
- Adjusting the noise reduction amount to reduce graininess without blurring details.
- Applying noise reduction selectively to areas with high noise levels.
- Shooting in well-lit conditions to minimize noise in the first place.
Effective noise reduction balances clarity and detail. Adjust noise reduction amount, apply selectively, and shoot in good lighting.
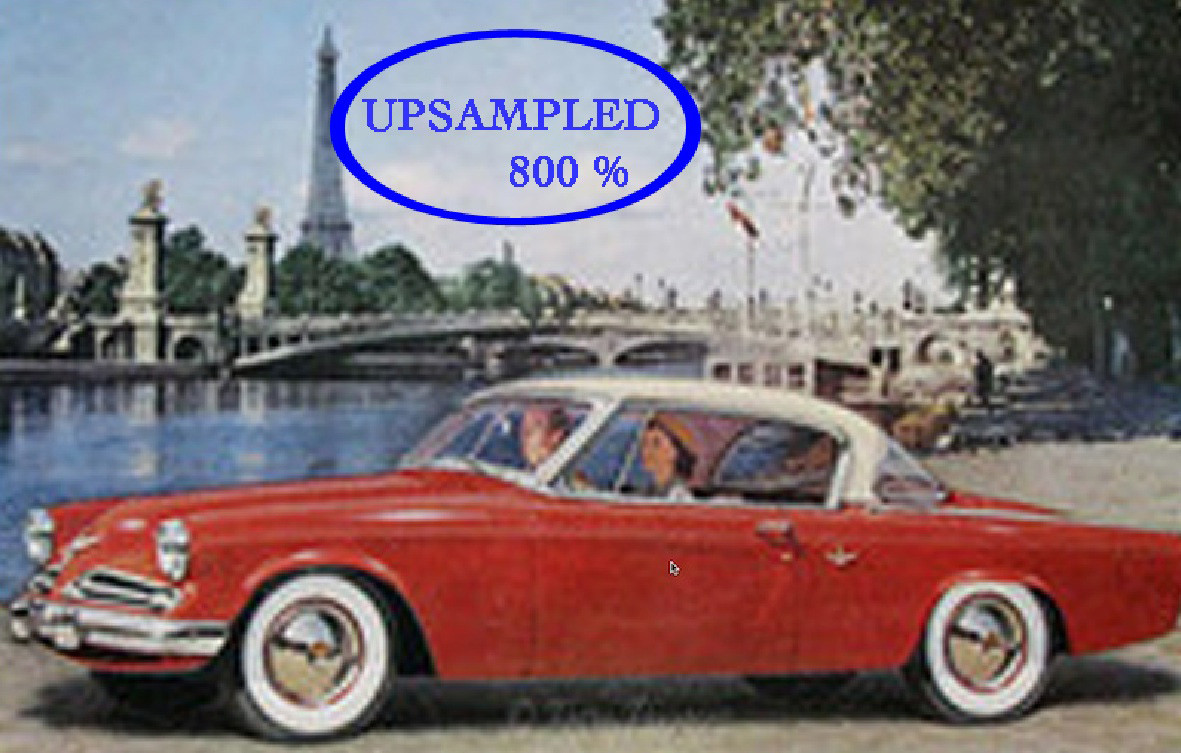
4.4. How can you upscale an iPhone photo without losing quality?
Upscaling an iPhone photo without losing quality can be challenging, but here are some tips:
- Use AI-powered upscaling tools like Gigapixel AI or Topaz Photo AI.
- Increase the resolution in small increments rather than large jumps.
- Sharpen the image after upscaling to restore some detail.
- Accept that some quality loss is inevitable and manage expectations.
AI tools minimize quality loss during upscaling. Use AI tools, increase resolution gradually, and sharpen the image.
4.5. How to correct colors and improve dynamic range in post-processing?
To correct colors and improve dynamic range in post-processing:
- Adjust white balance to correct color casts.
- Use the “Highlights” and “Shadows” sliders to recover detail in bright and dark areas.
- Increase contrast to enhance the overall dynamic range.
- Use color grading to fine-tune the color palette of the image.
These adjustments can significantly enhance the visual appeal of your photos. Adjust white balance, use Highlights and Shadows, increase contrast, and use color grading.
5. Understanding iPhone Camera Limitations and Workarounds
Understanding the limitations of the iPhone camera is essential for achieving high-resolution results and employing effective workarounds; while the iPhone camera is powerful, it has inherent constraints in terms of sensor size, lens quality, and processing capabilities. Knowing these limitations helps you optimize your shooting and editing techniques to produce the best possible images. Sensor size, lens quality, and processing capabilities are key factors.
5.1. What are the main limitations of the iPhone camera in terms of resolution?
The main limitations of the iPhone camera in terms of resolution include:
- Smaller Sensor Size: Limits the amount of light captured, affecting detail and dynamic range.
- Fixed Aperture: Restricts control over depth of field and light intake.
- Digital Zoom: Can degrade image quality significantly.
- Limited Optical Zoom: Available only on certain models.
These limitations affect overall image quality and detail. Smaller sensor size limits light capture, fixed aperture restricts control, digital zoom degrades quality, and optical zoom is limited.
5.2. How does sensor size affect the resolution and quality of iPhone photos?
Sensor size affects the resolution and quality of iPhone photos because a larger sensor captures more light and detail. This results in better dynamic range, lower noise levels, and improved overall image quality, especially in low-light conditions. Smaller sensors, like those in iPhones, are more prone to noise and may struggle to capture fine details. Larger sensors capture more light, improve dynamic range, and reduce noise.
5.3. What is the role of the lens in determining image resolution?
The lens plays a critical role in determining image resolution by focusing light onto the sensor. A high-quality lens can capture sharper, more detailed images with less distortion and aberrations. The iPhone’s lens, while advanced, is still limited compared to those found in professional cameras. Lens quality affects sharpness, detail, and distortion.
5.4. How to overcome low-light limitations for high resolution shots?
To overcome low-light limitations for high-resolution shots:
- Use Night Mode: Available on newer iPhone models.
- Use a tripod: To stabilize the phone for longer exposures.
- Increase exposure time: Manually, if possible.
- Use noise reduction in post-processing.
- Shoot in RAW format: For more editing flexibility.
These techniques help capture more light and reduce noise. Use Night Mode, use a tripod, increase exposure time, use noise reduction, and shoot in RAW.
5.5. Are there any hardware accessories that can improve iPhone photo resolution?
Yes, several hardware accessories can improve iPhone photo resolution:
- External Lenses: Like those from Moment or Olloclip, can improve sharpness and field of view.
- Tripods: Ensure stability for sharper images.
- External Lighting: Provides better illumination for more detailed shots.
- Gimbal Stabilizers: Help reduce camera shake for smoother videos and sharper photos.
Accessories enhance lens quality, stability, and lighting. External lenses improve sharpness, tripods ensure stability, external lighting provides better illumination, and gimbal stabilizers reduce camera shake.
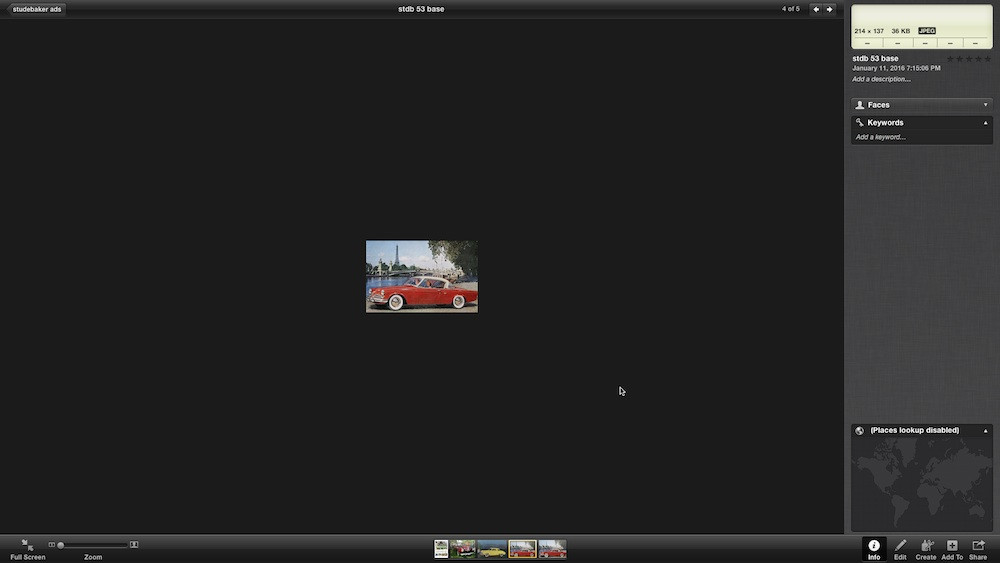
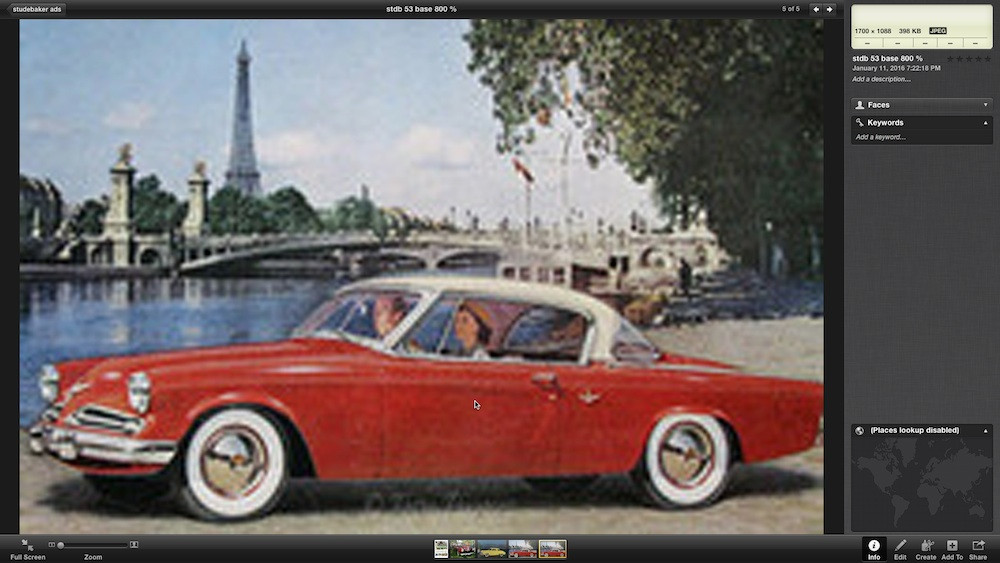
 Upscaling iPhone Photos
6. Printing High Resolution iPhone Photos
Printing high-resolution iPhone photos involves understanding the relationship between image resolution and print size, as well as optimizing your images for the printing process; the goal is to produce prints that retain the detail and clarity of the original image, whether you’re creating small snapshots or large-format displays. Proper preparation and understanding of printing requirements are essential. Image resolution, print size, and optimization are crucial.
6.1. What resolution is needed for different print sizes?
The resolution needed for different print sizes depends on the desired print quality:
- 4×6 inches: 1200 x 1800 pixels (300 DPI)
- 5×7 inches: 1500 x 2100 pixels (300 DPI)
- 8×10 inches: 2400 x 3000 pixels (300 DPI)
- 11×14 inches: 3300 x 4200 pixels (300 DPI)
These resolutions ensure high-quality prints with sharp details. Higher DPI ensures better print quality.
6.2. How to prepare your iPhone photo for printing?
To prepare your iPhone photo for printing:
- Edit the photo to optimize colors, contrast, and sharpness.
- Resize the image to the desired print dimensions at 300 DPI.
- Convert the color profile to sRGB for accurate color reproduction.
- Save the image as a high-quality JPEG or TIFF file.
Proper preparation ensures optimal print quality. Edit the photo, resize the image, convert the color profile, and save in high quality.
6.3. What are the best printing services for high quality iPhone prints?
Some of the best printing services for high-quality iPhone prints include:
- Professional Labs: Services like Bay Photo Lab or White House Custom Colour offer excellent print quality.
- Online Services: Companies like Shutterfly or Printique provide good quality and convenience.
- Local Print Shops: Often offer personalized service and high-quality prints.
Choose a service based on your specific needs and budget. Professional labs offer excellent quality, online services provide convenience, and local print shops offer personalized service.
6.4. How to choose the right paper for printing iPhone photos?
To choose the right paper for printing iPhone photos:
- Consider the finish: Glossy paper enhances colors, while matte paper reduces glare.
- Choose the weight: Heavier paper feels more substantial and durable.
- Select the texture: Textured paper can add depth and character to the print.
- Match the paper to the image: Certain papers complement specific types of photos.
The right paper enhances the visual impact of your prints. Consider the finish, choose the weight, select the texture, and match the paper to the image.
6.5. How to calibrate your monitor for accurate print previews?
To calibrate your monitor for accurate print previews:
- Use a monitor calibration tool like X-Rite i1Display or SpyderX.
- Follow the instructions to adjust brightness, contrast, and color temperature.
- Create a custom color profile for your monitor.
- Regularly recalibrate your monitor to maintain accuracy.
Accurate calibration ensures that what you see on screen matches the final print. Use a calibration tool, follow the instructions, create a custom profile, and recalibrate regularly.
 Printing iPhone Photos
7. Exploring Third-Party Camera Apps for Enhanced Resolution
Exploring third-party camera apps can significantly enhance the resolution and capabilities of your iPhone photography; these apps often provide advanced features and manual controls that are not available in the native Camera app. By leveraging these tools, you can capture higher-quality images and achieve greater creative control. Manual controls, advanced features, and enhanced capabilities are key.
7.1. What are some popular third-party camera apps that offer better resolution?
Some popular third-party camera apps that offer better resolution and features include:
- ProCamera: Offers extensive manual controls and RAW capture.
- Halide Camera: Known for its intuitive interface and advanced features.
- Camera+ 2: Provides a range of shooting modes and editing tools.
- FiLMiC Pro: Primarily for video, but also offers high-quality photo capture.
These apps provide enhanced control and quality. ProCamera offers manual controls, Halide Camera has an intuitive interface, Camera+ 2 provides various modes, and FiLMiC Pro offers high-quality photo capture.
7.2. How do these apps enhance image quality compared to the native camera app?
These apps enhance image quality compared to the native camera app by:
- Providing manual controls: Over ISO, shutter speed, and white balance.
- Offering RAW capture: Which preserves more image data for editing.
- Using advanced algorithms: For improved noise reduction and sharpening.
- Allowing for greater customization: Of camera settings and shooting modes.
Manual controls, RAW capture, and advanced algorithms improve image quality.
7.3. What are the benefits of shooting in RAW format with these apps?
The benefits of shooting in RAW format with these apps include:
- More image data: Preserves more detail and dynamic range.
- Greater editing flexibility: Allows for more extensive adjustments without quality loss.
- Better noise reduction: Facilitates cleaner images in low-light conditions.
- Non-destructive editing: Changes can be reverted without affecting the original file.
RAW format provides greater flexibility and quality in post-processing. More image data, greater editing flexibility, better noise reduction, and non-destructive editing are key benefits.
7.4. How to set up and use third-party camera apps for maximum resolution?
To set up and use third-party camera apps for maximum resolution:
- Download and install a reputable camera app like ProCamera or Halide.
- Configure the settings to shoot in RAW format and maximum resolution.
- Familiarize yourself with the manual controls and advanced features.
- Practice shooting in different conditions to optimize your settings.
Proper setup and practice maximize the app’s capabilities. Download and install the app, configure settings, familiarize yourself with controls, and practice shooting.
7.5. What additional features do these apps offer for professional photography?
These apps offer several additional features for professional photography:
- Manual Focus Control: For precise focusing.
- Histogram Display: To monitor exposure levels.
- Zebra Stripes: To highlight overexposed areas.
- Focus Peaking: To assist with manual focusing.
- Customizable Presets: For quick and consistent editing.
These features enhance control and precision for professional results.
 Third-Party Camera Apps
8. Optimizing Storage and Transfer of High Resolution Photos
Optimizing the storage and transfer of high-resolution photos is crucial for maintaining image quality and managing your iPhone’s storage effectively; as you capture more high-resolution images, it’s important to have strategies for storing, backing up, and transferring these files without compromising their quality. Cloud storage, external drives, and efficient transfer methods are essential. Let’s explore storage solutions, backup strategies, and transfer methods.
8.1. What are the best storage solutions for high resolution iPhone photos?
The best storage solutions for high-resolution iPhone photos include:
- Cloud Storage: Services like iCloud, Google Photos, and Dropbox offer convenient and accessible storage.
- External Hard Drives: Provide local storage and control over your files.
- NAS (Network Attached Storage): Offers a centralized storage solution for multiple devices.
- iCloud Photo Library: Seamlessly integrates with your Apple devices.
Choose a solution based on your needs for accessibility and control.
8.2. How to back up your high resolution photos to avoid data loss?
To back up your high-resolution photos to avoid data loss:
- Enable iCloud Photo Library: To automatically back up your photos to the cloud.
- Use a computer: To create a local backup on an external hard drive.
- Employ a third-party backup service: Like Backblaze or Carbonite for offsite backups.
- Regularly verify your backups: To ensure they are working correctly.
Regular backups protect your valuable photos. Enable iCloud Photo Library, use a computer for local backups, employ a third-party service, and regularly verify backups.
8.3. What are the most efficient methods for transferring high resolution photos from your iPhone?
The most efficient methods for transferring high-resolution photos from your iPhone include:
- AirDrop: For quick transfers to other Apple devices.
- USB Cable: For direct transfer to a computer.
- Cloud Services: Like Google Drive or Dropbox for easy sharing.
- Email: For sending smaller batches of photos.
Choose a method based on speed, convenience, and file size. AirDrop is quick, USB cable is direct, cloud services are easy for sharing, and email is suitable for smaller batches.
8.4. How to manage iCloud storage effectively for high resolution photos?
To manage iCloud storage effectively for high-resolution photos:
- Optimize iPhone Storage: To store smaller, optimized versions on your device.
- Upgrade your iCloud plan: If you need more storage space.
- Remove unwanted photos and videos: To free up storage.
- Use Shared Albums: To share photos without taking up storage space.
Effective management ensures you have enough space for your photos. Optimize iPhone storage, upgrade your iCloud plan, remove unwanted files, and use Shared Albums.
8.5. How to compress high resolution photos for easier sharing without significant quality loss?
To compress high-resolution photos for easier sharing without significant quality loss:
- Use image compression tools: Like TinyPNG or ImageOptim.
- Adjust the compression settings: To balance file size and image quality.
- Resize the image: To reduce the overall pixel dimensions.
- Save the compressed image: In JPEG format with a high-quality setting.
Compression reduces file size while maintaining acceptable quality. Use compression tools, adjust settings, resize the image, and save in JPEG format.
 Storing iPhone Photos
9. Common Mistakes to Avoid When Trying to Achieve High Resolution Photos
Avoiding common mistakes is crucial when trying to achieve high-resolution photos with your iPhone; these mistakes can undermine your efforts to capture detailed, high-quality images. Understanding these pitfalls and how to avoid them will help you consistently produce better results. Digital zoom usage, improper lighting, and lack of stability are key areas to address. Let’s look at digital zoom, poor lighting, and instability.
9.1. Why is using digital zoom detrimental to high resolution?
Using digital zoom is detrimental to high resolution because it crops and enlarges the image, effectively reducing the number of pixels and creating a blurry, pixelated result. Unlike optical zoom, digital zoom does not capture more detail; it simply stretches the existing pixels. Digital zoom reduces pixels, creates blur, and stretches existing data.
9.2. How does improper lighting affect image resolution?
Improper lighting affects image resolution by introducing noise and reducing detail. In low-light conditions, the iPhone camera increases ISO, which amplifies the signal but also introduces graininess. Overexposed images lose detail in the highlights, while underexposed images lose detail in the shadows. Improper lighting introduces noise, reduces detail, and affects dynamic range.
9.3. Why is stability important and what happens when you don’t have it?
Stability is important because it prevents blurring and ensures sharpness. When you don’t have stability, even slight movements can cause motion blur, reducing the overall resolution and detail of the image. Using a tripod or stabilizing your phone against a solid surface is crucial for sharp photos. Instability causes blur, reduces sharpness, and compromises detail.
9.4. What are the dangers of over-editing photos in post-processing?
The dangers of over-editing photos in post-processing include:
- Introducing artifacts: Such as halos or banding.
- Losing detail: Due to excessive sharpening or smoothing.
- Creating unnatural colors: That look unrealistic.
- Compromising image quality: Overall, by pushing adjustments too far.
Subtle adjustments yield better results. Over-editing introduces artifacts, loses detail, creates unnatural colors, and compromises overall quality.
9.5. How does neglecting lens cleanliness affect photo resolution?
Neglecting lens cleanliness affects photo resolution because smudges, dust, or fingerprints on the lens can scatter light, reducing sharpness and contrast. This results in softer images with less detail. Regularly cleaning your iPhone’s lens is essential for maintaining image quality. A dirty lens scatters light, reduces sharpness, and lowers contrast.
 Mistakes in iPhone Photography
10. Advanced Techniques and Tips for Maximizing iPhone Photo Resolution
Employing advanced techniques and tips can further maximize the resolution of your iPhone photos, pushing the boundaries of what’s possible with mobile photography; these techniques build upon the fundamental principles discussed earlier and involve more sophisticated approaches to capturing and processing images. Focus stacking, panoramic shots, and using external lenses are critical.
10.1. What is focus stacking and how can it improve resolution?
Focus stacking is a technique that combines multiple images taken at different focus distances to create a final image with increased depth of field and sharpness. By merging the sharpest parts of each image, you can achieve a higher overall resolution and clarity. Focus stacking combines images, increases depth of field, and enhances sharpness.
10.2. How to capture high resolution panoramic shots on your iPhone?
To capture high-resolution panoramic shots on your iPhone:
- Open the Camera app and select the “Pano” mode.
- Hold your iPhone vertically for a wider vertical field of view.
- Move the camera slowly and steadily along the desired path.
- Maintain a consistent height to avoid distortion.
Panoramic mode captures wide scenes with detail. Open Camera app, hold vertically, move slowly and steadily, and maintain consistent height.
10.3. Can external lenses really improve iPhone photo resolution?
Yes, external lenses can significantly improve iPhone photo resolution by enhancing sharpness, reducing distortion, and providing different focal lengths. Lenses from reputable brands like Moment or Olloclip can noticeably improve image quality. External lenses enhance sharpness, reduce distortion, and provide different focal lengths.
10.4. How to use computational photography features on iPhone to enhance resolution?
To use computational photography features on iPhone to enhance resolution:
- Enable Smart HDR: To capture more detail in highlights and shadows.
- Use Deep Fusion: Available on newer models, to enhance detail and texture.
- Utilize Night Mode: To improve low-light performance.
- Take advantage of Portrait Mode: To create shallow depth of field effects.
These features optimize image quality through advanced processing. Enable Smart HDR, use Deep Fusion, utilize Night Mode, and take advantage of Portrait Mode.
10.5. What are some creative techniques to overcome iPhone camera limitations and get high resolution results?
Some creative techniques to overcome iPhone camera limitations and get high-resolution results include:
- Using perspective and composition: To emphasize detail and create visual interest.
- Shooting in optimal lighting conditions: To minimize noise and maximize detail.
- Employing burst mode: To capture multiple shots and select the sharpest one.
- Experimenting with different editing techniques: To enhance resolution and clarity.
Creativity and technique can overcome hardware limitations. Use perspective and composition, shoot in optimal lighting, employ burst mode, and experiment with editing.
By implementing these strategies and understanding the nuances of iPhone photography, you can consistently achieve high-resolution images that showcase your creativity and capture the world around you in stunning detail. Explore the possibilities, experiment with different techniques, and continue to refine your skills to unlock the full potential of your iPhone camera.
Ready to take your iPhone photography to the next level? Visit dfphoto.net for more in-depth tutorials, gear reviews, and a vibrant community of photographers just like you. Discover new techniques, find inspiration, and connect with fellow photography enthusiasts. Don’t just take photos; create art.
Address: 1600 St Michael’s Dr, Santa Fe, NM 87505, United States. Phone: +1 (505) 471-6001. Website: dfphoto.net.
 Advanced iPhone Photography Techniques
FAQ: How to Make an iPhone Photo High Resolution
1. How can I increase the resolution of an existing iPhone photo?
You can increase the resolution of an existing iPhone photo using upscaling techniques with software like Adobe Lightroom or Topaz Photo AI; however, note that while upscaling can increase the pixel dimensions, it cannot add detail that wasn’t originally captured.
2. Does shooting in ProRAW automatically make my photos high resolution?
Shooting in ProRAW captures more detail and dynamic range, but the initial resolution depends on your iPhone’s camera sensor; ProRAW files provide more flexibility for editing and can result in higher-quality final images.
3. How does the iPhone’s Night mode affect the resolution of photos?
Night mode improves the detail and clarity of low-light photos by using longer exposures and computational photography; while it doesn’t directly increase resolution, it enhances the perceived quality by reducing noise and capturing more detail.
4. Is it better to zoom in while taking a photo or crop later for higher resolution?
It’s generally better to crop later rather than use digital zoom while taking the photo; digital zoom degrades image quality, while cropping allows you to maintain the original image data and make a cleaner enlargement.
5. What is the ideal DPI for printing iPhone photos?
The ideal DPI (dots per inch) for printing iPhone photos is 300 DPI; this ensures high-quality prints with sharp details and accurate color reproduction.
6. How can I reduce noise in my iPhone photos to improve perceived resolution?
You can reduce noise in your iPhone photos using noise reduction tools in editing software like Adobe Lightroom or Snapseed; adjust the settings carefully to minimize noise without sacrificing detail.
7. Does using a tripod really make a difference in iPhone photo resolution?
Yes, using a tripod can make a significant difference in iPhone photo resolution, especially in low-light conditions; a tripod eliminates camera shake, allowing for longer exposures and sharper images with more detail.
8. What are the best iPhone camera settings for landscape photography with high resolution?
For landscape photography with high resolution, use the following iPhone camera settings: shoot in RAW format, enable Smart HDR, use a low ISO, stabilize your phone with a tripod, and focus carefully on the key elements of the scene.
9. How do external lenses affect the resolution of iPhone portrait photos?
External lenses can enhance the resolution of iPhone portrait photos by providing better sharpness, reduced distortion, and improved depth of field; lenses like those from Moment or Olloclip can noticeably improve image quality.
10. Can I use AI-powered apps to enhance the resolution of my old iPhone photos?
Yes, you can use AI-powered apps like Topaz Photo AI or Remini to enhance the resolution of your old iPhone photos; these apps use advanced algorithms to upscale images and restore detail.