Picture frames are essential for displaying cherished memories, artwork, or inspirational quotes. While store-bought frames are readily available, crafting your own wooden photo frame adds a personal touch and allows for complete customization. Learning How To Make A Wooden Photo Frame is a rewarding DIY project that’s easier than you might think. In just a short amount of time, you can create rustic, charming frames that perfectly complement your photos and home decor.
You can never truly have enough picture frames, especially when you discover how quick and simple they are to create yourself. Instead of a store run for new frames, your garage or workshop can become your personal frame-making factory. In under an hour, you can produce a couple of beautiful rustic picture frames, and that includes the time to capture your crafting process to share with others.
These DIY picture frames are not only incredibly easy to make but also versatile for countless uses around your home. They also make thoughtful, personalized gifts for friends and family!
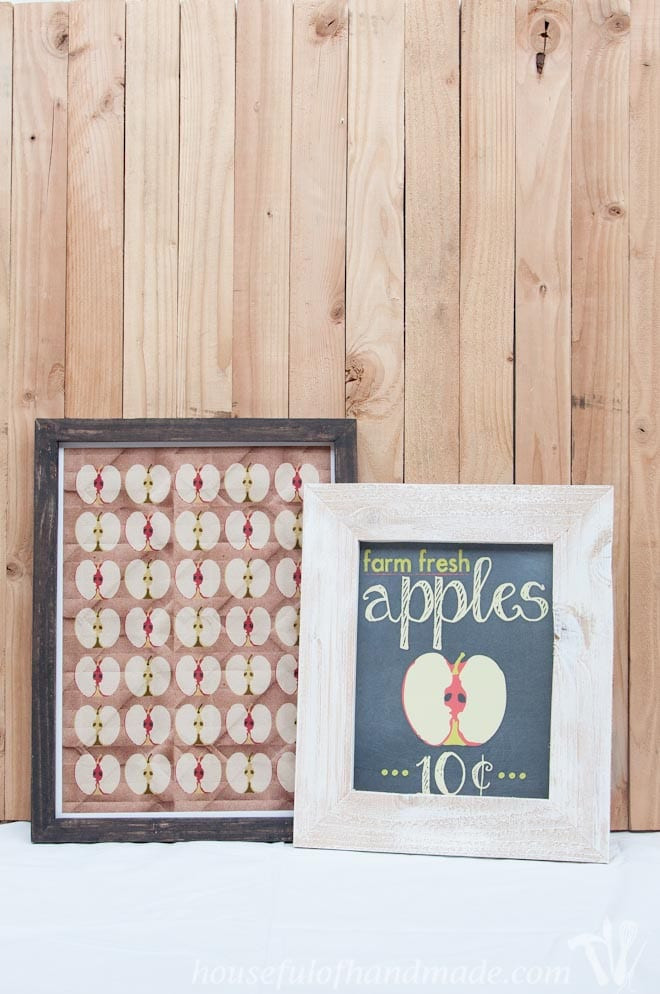 Two finished DIY rustic picture frames displaying fall apple designs, enhancing the seasonal decor on a mantelpiece.
Why DIY a Wooden Photo Frame?
Opting for a DIY wooden photo frame offers numerous advantages. Firstly, it allows for complete personalization. You control the size, wood type, finish, and style, ensuring the frame perfectly matches your photo and décor. Secondly, it’s often more cost-effective than buying pre-made frames, especially if you have scrap wood available. Thirdly, the process of crafting a photo frame can be incredibly satisfying and therapeutic. Finally, homemade frames possess a unique rustic charm that mass-produced frames often lack, adding character and warmth to your displayed photos.
Tools & Materials
Before you begin, gather the necessary tools and materials. Having everything on hand will streamline the process and make your frame-making experience more enjoyable.
Recommended Tools:
- Miter Saw or Hand Saw with Miter Box: For making accurate 45-degree angle cuts. A miter saw is ideal for speed and precision, but a hand saw and miter box will also work effectively.
- Table Saw or Router (Optional): To cut a groove for the photo to sit in. A table saw makes quick work of this, but a router with a groove bit is another excellent option. Alternatively, you can use trim.
- Pocket Hole Jig (Optional): If using thicker boards, a pocket hole jig simplifies frame assembly by creating strong, hidden joints.
- Brad Nailer (Optional): For thinner boards, a brad nailer provides quick and secure fastening.
- Clamps: Essential for holding frame pieces together while glue dries. Face clamps are particularly useful for keeping surfaces flush.
- Measuring Tape & Pencil: For accurate measurements and marking cuts.
- Safety Glasses & Ear Protection: Always prioritize safety when working with power tools.
- Paint Brushes & Sandpaper (Optional): For finishing your frame to your desired look.
Supplies:
- 1x Boards: The width is your choice, depending on the desired frame thickness. Pine, fir, or reclaimed wood are excellent choices for a rustic look.
- 1 1/4″ Pocket Hole Screws or Brad Nails: For assembling the frame corners. Choose screws if using a pocket hole jig and thicker boards, or brad nails for thinner boards.
- Wood Glue: Provides a strong and durable bond for the frame joints.
- Chipboard, Cardboard, or Foam Board: To use as backing for your photo within the frame.
- Tape, Turn Button Fasteners, or Glazing Points: To secure the photo and backing in the frame. Turn button fasteners or glazing points offer a more professional and reusable option compared to tape.
- Optional: 1/4″ – 1/2″ Trim or Moulding: If you don’t have a table saw or router, trim can be used to create the groove for the photo.
- Optional: Keyhole Hangers or D-Ring Hangers: For hanging your finished frame on a wall. Keyhole hangers offer a streamlined look, while D-ring hangers are robust for larger frames.
 Close-up of wood being cut with a table saw, demonstrating the process of creating grooves for DIY rustic picture frames.
Step-by-Step Guide: Making Your Wooden Photo Frame
These instructions provide a clear and adaptable method for crafting wooden photo frames of any size. The formulas and steps ensure you can calculate wood requirements and cut pieces accurately for any frame dimensions you envision.
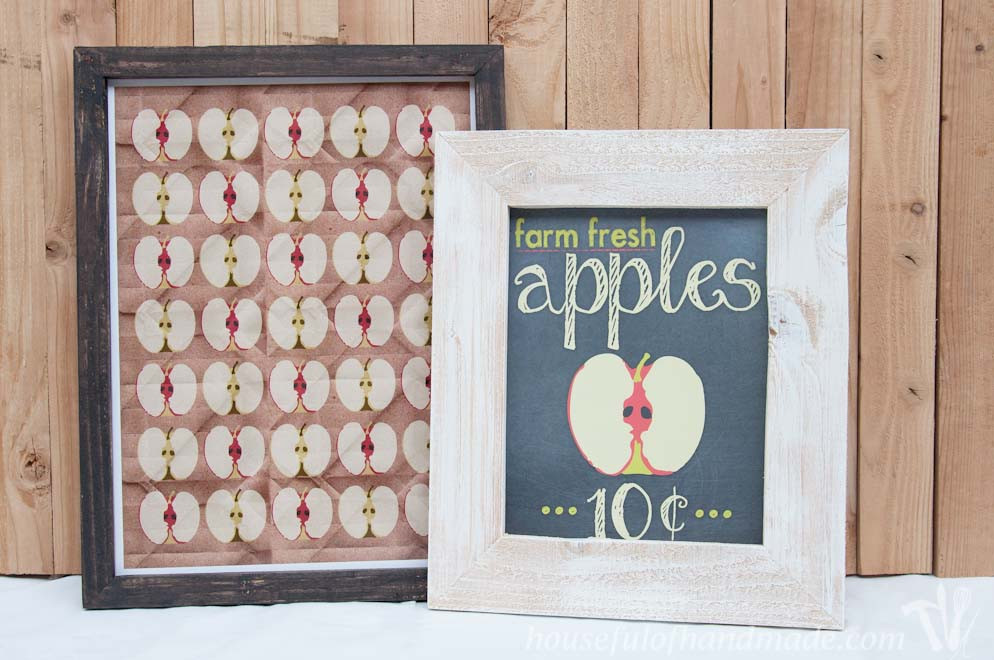 Rustic wooden picture frame DIY project showcasing fall apples, perfect for adding a seasonal touch to home decorations.
How Much Wood Do You Need to Buy?
Calculating the necessary wood depends on your desired frame size and the width of your chosen boards. Once you decide on these factors, determining your shopping list is straightforward.
You need two key measurements to calculate your wood needs:
- Picture Height (PH) and Picture Width (PW): Measure the photo you intend to frame.
- Width of the 1x Board (BW): Measure the actual width of your 1x boards (e.g., a 1×3 board is actually 2.5 inches wide).
Use this formula to determine the total board length required:
(PH + (2 x BW) + PW + (2 x BW)) x 2
For instance, to build an 8×10 inch picture frame using 1×3 boards (actual width 2.5 inches):
(10 + (2 x 2.5) + 8 + (2 x 2.5)) x 2 = 56 inches
It’s always wise to buy a little extra, so purchasing 60 inches, or 5 feet, of 1×3 would be recommended for this example.
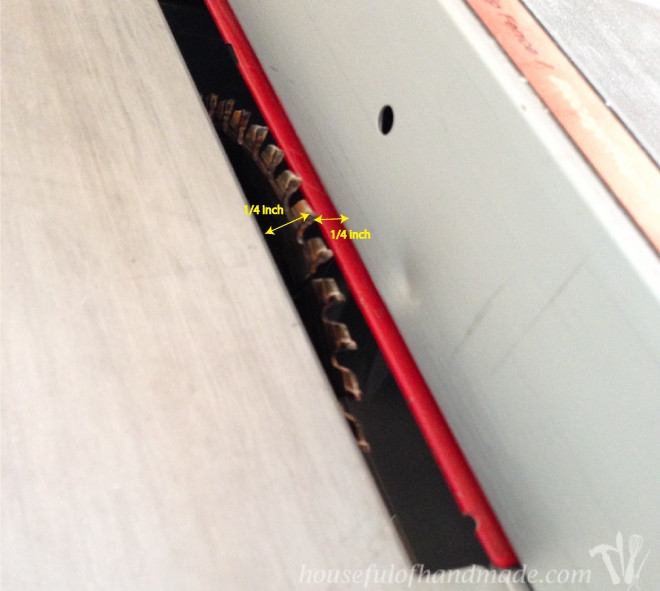
STEP 1: Cut a Groove
Creating a groove on the inside back of the frame provides a recess for the photo, glass (if used), and backing.
Cut a 1/4 inch deep by 1/4 inch wide groove along one edge of your boards, on what will be the back inside edge of the frame. You can use a router or table saw for this step.
- Table Saw Method: Set the blade height to 1/4 inch and position the fence 1/4 inch from the blade. Run each board through twice, once with the back face against the fence and then with the side face against the fence to create the groove.
- Alternative Method (Using Trim): If you don’t have a table saw or router, you can glue 1/4 inch to 1/2 inch trim or square dowels to the edge of your board. Set the trim approximately 1/4 inch from the back edge to form the groove. Use painter’s tape to hold the trim in place while the glue dries completely. This method also allows for decorative trim to enhance your frame’s design.
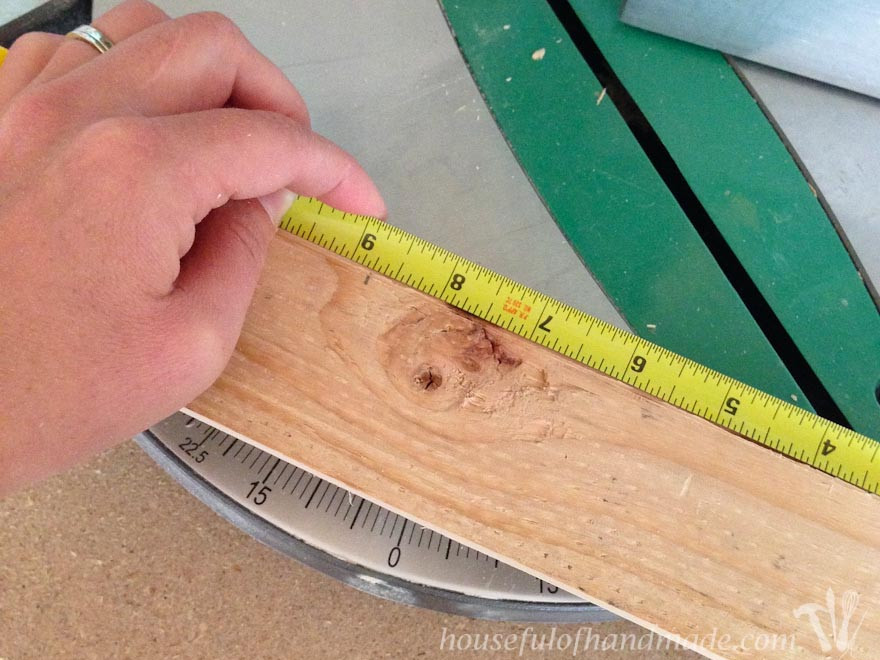
STEP 2: Cut Your Pieces
The frame’s “window” should be slightly smaller than the photo, and the groove slightly larger to allow for some flexibility. Measure from the inside edge of the groove to ensure accurate cuts.
- Mark the First Angle: On one end of your board, draw a line at a 45-degree angle, sloping towards the groove side of the board.
- Measure for Length: From the point where this angled line intersects the groove, measure out the picture height plus 1/4 inch. Make a mark. For an 8 1/2 x 11 inch paper, measure 8 3/4 inches inside the groove, resulting in an opening of approximately 8 1/4 inches.
 Rustic wood being measured with a tape measure, preparing for cuts in the DIY picture frame construction process.
- Mark the Second Angle: Draw another 45-degree angled line at your measured mark, again angled towards the groove side.
- Cut the Side Pieces: Cut along these angled lines to create your first side piece. Repeat to create a second side piece of the same length.
- Cut the Top/Bottom Pieces: Repeat the process for the top and bottom pieces, this time using the picture width measurement instead of the height. Remember to measure from the inside edge of the groove and add 1/4 inch.
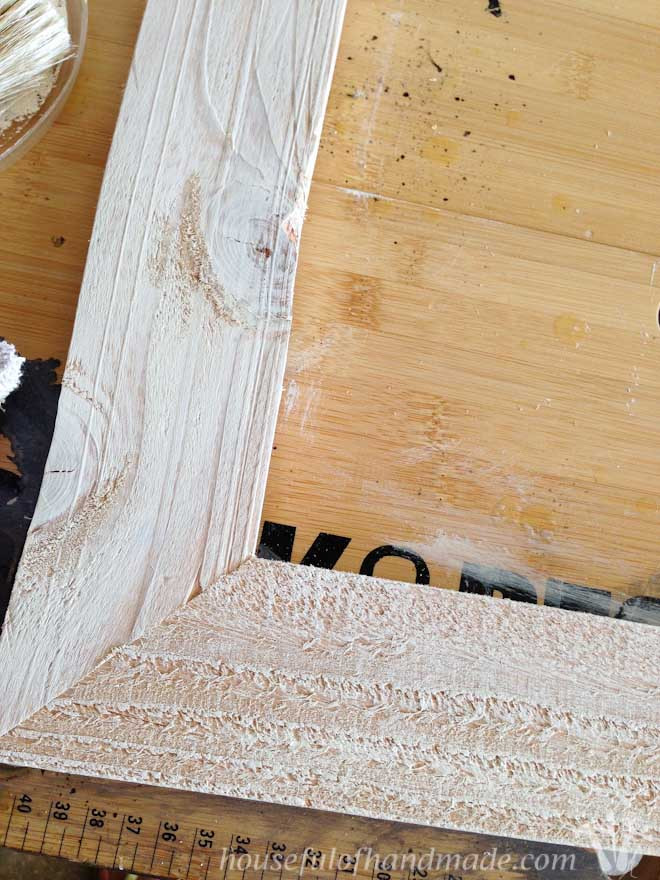
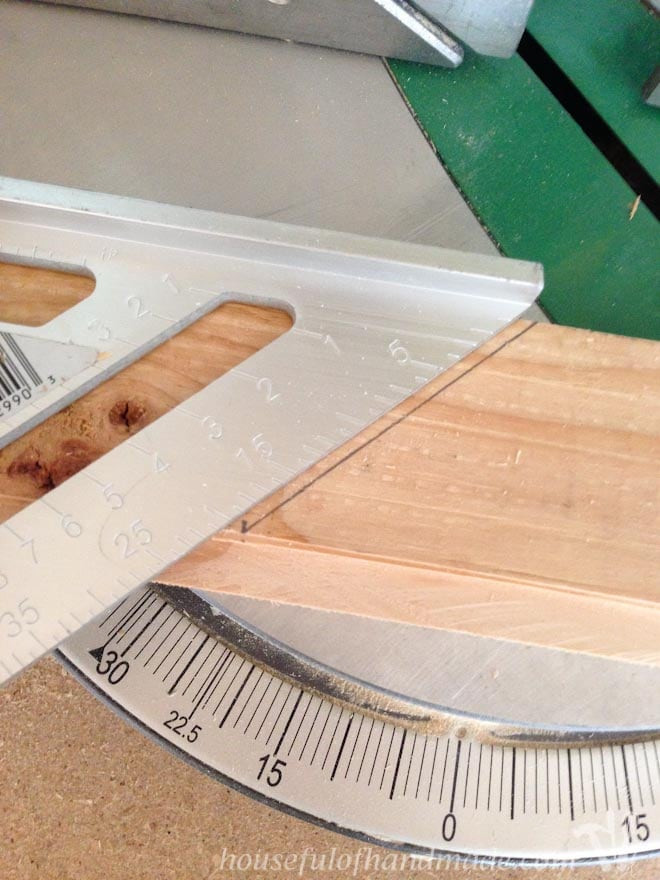 A rafter square positioned on rustic wood, used for marking angles in the construction of wooden picture frames.
STEP 3: Assemble Picture Frame
For frames made with 1×3 boards or wider, pocket holes provide a strong and clean joint. For thinner boards (1×2 or 1×1), use a brad nailer. Thinner boards lack the space for pocket holes without them being visible from the sides.
- Drill Pocket Holes (Optional): If using pocket holes, drill 1 or 2 pocket holes into the angled ends of the top and bottom pieces. Ensure the pocket holes are positioned to be completely within the board’s thickness and won’t protrude into the frame opening or groove.
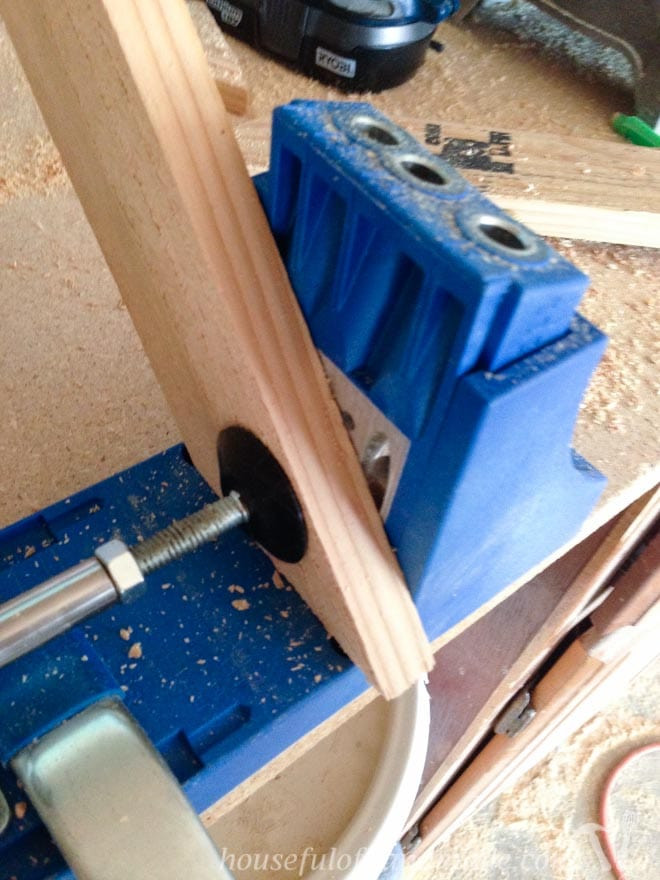 Wood being prepared with a Kreg jig, used for creating pocket holes in DIY wood frame construction.
- Apply Wood Glue: Apply wood glue to the angled edge of a top or bottom piece.
- Clamp and Secure: Clamp the glued piece to a side piece, ensuring the front and back surfaces are flush. Face clamps are ideal for this. Secure the joint with 1 1/4 inch pocket hole screws or brad nails through the sides.
 Natural wood being clamped together, showcasing the assembly stage of making a wooden picture frame.
- Repeat for All Corners: Repeat steps 2 and 3 for all four corners until the frame is fully assembled.
- Clamp While Drying: If using only one pocket hole per corner, the joint might twist. To prevent this, keep the frame clamped flat until the glue is completely dry.
 DIY wood frame with wood glue applied in the corners, resting on a workbench during the assembly process.
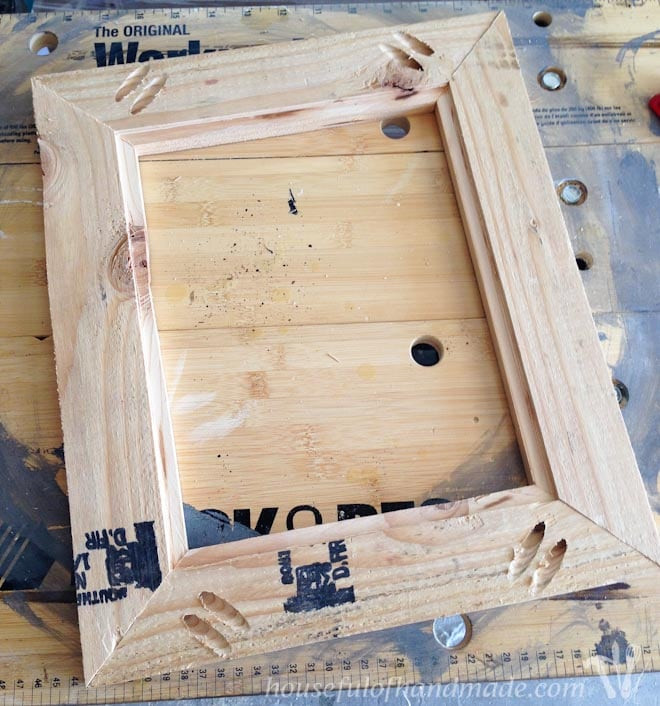
Your frame structure is now complete and ready for finishing!
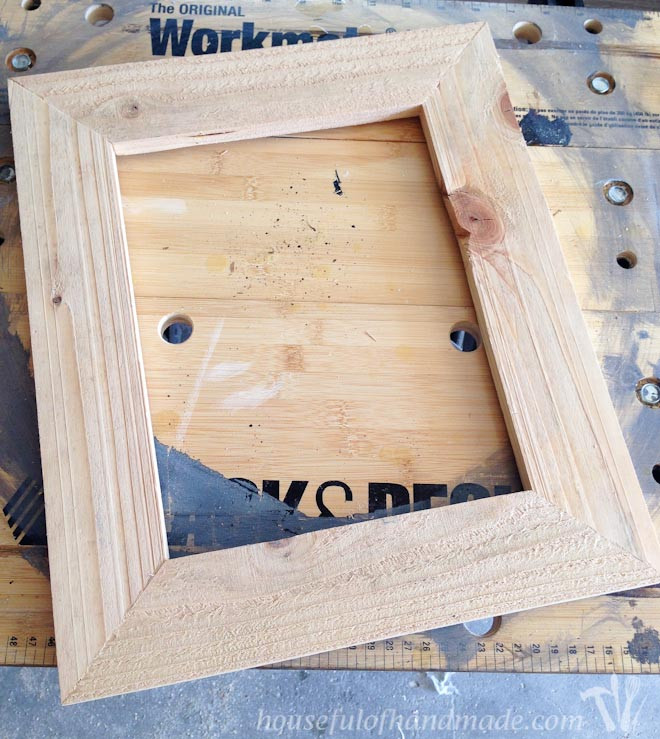 A completed DIY wood frame before painting, ready for the finishing touches to enhance its rustic appeal.
STEP 4: Finishing
Sand and finish your picture frames to your preference with paint, sealant, or stain.
For a rustic aesthetic, skipping sanding allows the wood’s natural texture to enhance the finish. The “dry brush” technique is perfect for highlighting this texture.
- Dry Brushing: Apply a minimal amount of paint to the tip of your brush. Quickly brush the paint lightly over the unsanded wood. Use an old rag to gently rub off any excess paint before it dries, allowing the wood texture to show through.
 Rustic frames being painted with a dry brush technique, emphasizing the wood's texture for a rustic finish.
This technique creates a beautifully rustic look, and the thin paint layer dries quickly, often in about an hour. For a bolder look, use darker paints like black and apply the same dry brush technique for a charcoal stain effect.
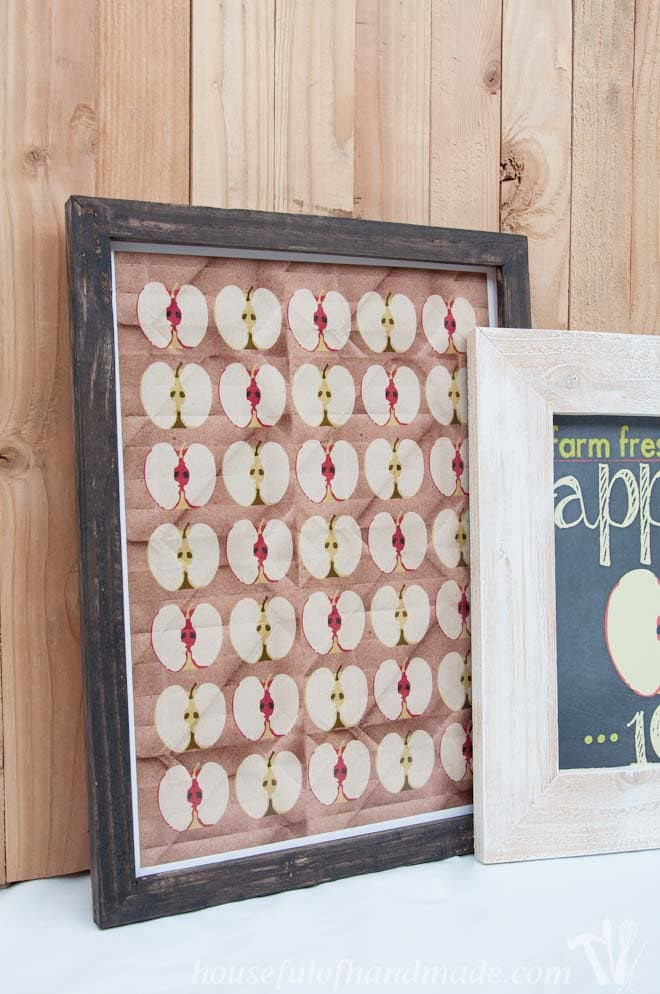 Two DIY rustic picture frames with apple printables displayed on a mantel, showcasing the completed fall-themed decor.
STEP 5: Add Photo
- Insert Glass (Optional): If using glass, carefully slide it into the groove from the back of the frame.
- Place Photo: Position your photo inside the frame, fitting it snugly within the groove.
- Add Backing: Place a piece of chipboard, cardboard, or foam board behind the photo to provide support and keep it in place.
- Secure Backing: Secure the backing using tape for a simple approach, or opt for turn button fasteners or glazing points for a more secure and professional finish.
For frames intended for wall mounting, you’ll need to attach hangers.
- Keyhole Hangers: If you have a router, a keyhole bit allows you to easily create a keyhole slot for hanging. Alternatively, purchase keyhole hangers that attach to the frame’s exterior.
- D-Ring Hangers: For larger frames, D-ring hangers are a robust option. Attach one D-ring hanger to each side of the frame. You can use a wire strung between them for hanging or hang the D-rings directly onto picture hooks in the wall.
 The back of a DIY rustic picture frame showing fabric.com cardboard taped as backing, a simple method for securing photos.
Now you have beautifully crafted DIY picture frames, ready to display your cherished photos!
Tips for a Perfect Wooden Photo Frame
- Wood Selection: Choose wood that complements your desired style. Pine and fir are excellent for rustic frames, while hardwoods like oak or maple offer a more refined look. Reclaimed wood adds unique character.
- Accurate Measurements: Precision in measuring and cutting is crucial for a well-fitting frame. Double-check your measurements before each cut.
- Clamping is Key: Proper clamping ensures tight, strong joints and prevents gaps. Use clamps at each corner and keep the frame flat while the glue dries.
- Finishing Wisely: Consider the overall aesthetic of your home when choosing a finish. Stain highlights wood grain, paint offers color versatility, and sealant protects the wood. Experiment with techniques like dry brushing for a rustic touch.
Conclusion
Learning how to make a wooden photo frame is a fulfilling and straightforward DIY project. By following these steps, you can create personalized, rustic frames that add warmth and character to your photos and home decor. Whether for yourself or as gifts, these homemade frames are a testament to your crafting skills and personal style. So gather your tools and materials, and start building your own beautiful wooden photo frames today!