Creating a clean, white background for your photos is a popular technique for showcasing subjects, whether for product photography, portraits, or simply to isolate an object. While professional photo editing software might come to mind, Apple’s built-in tools on Mac, specifically the Photos app and Preview, offer a surprisingly efficient way to achieve this effect without needing any extra applications. This guide will walk you through the simple steps to transform your photo and give it a crisp white background using just your Mac.
Step-by-Step Guide to a White Background
This method leverages the “Copy Subject” feature available on macOS 13 (Ventura) or later, and Preview, to isolate your subject and place it on a white background. Here’s how:
Step 1: Utilize “Copy Subject” in Photos
Begin by opening the image you want to edit in the Photos app on your Mac. The key is to use the “Copy Subject” command. To do this, Control-click (or right-click) directly on the subject of your photo within the Photos application. From the context menu that appears, select “Copy Subject”. This action intelligently isolates the main subject from the original background and copies it to your clipboard, effectively creating a cutout of your subject with a transparent background.
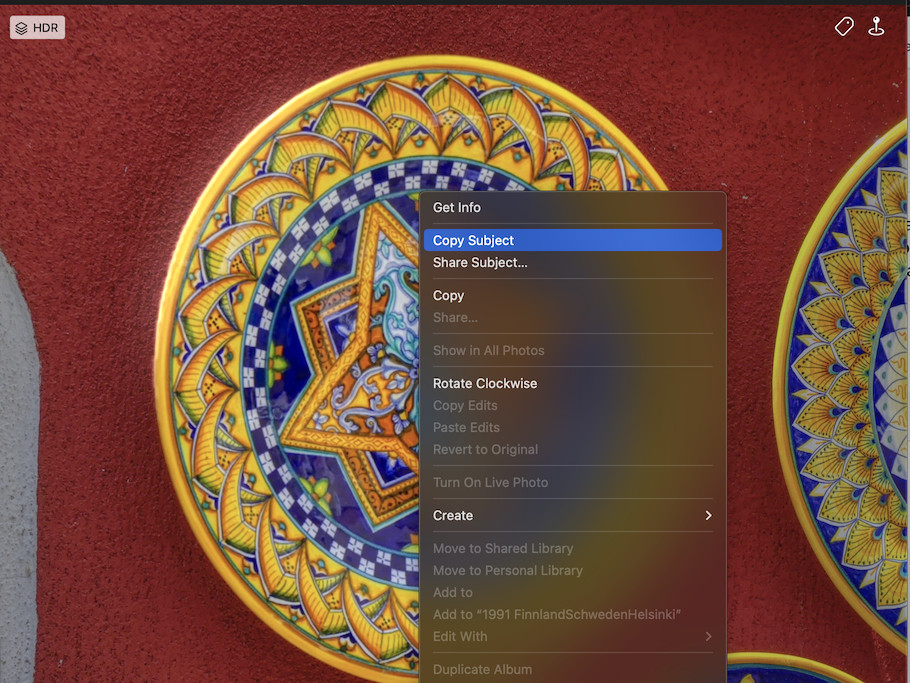 Control-clicking on a photo subject in Mac Photos to access the "Copy Subject" command
Step 2: Create a New Preview File from Clipboard
Next, launch the Preview application on your Mac. Once Preview is open, navigate to the “File” menu in the top menu bar. Select “New from Clipboard”. This command will create a new image file in Preview, using the subject you just copied from Photos. Because you used “Copy Subject”, the background of this new image in Preview will be transparent, showcasing only your isolated subject.
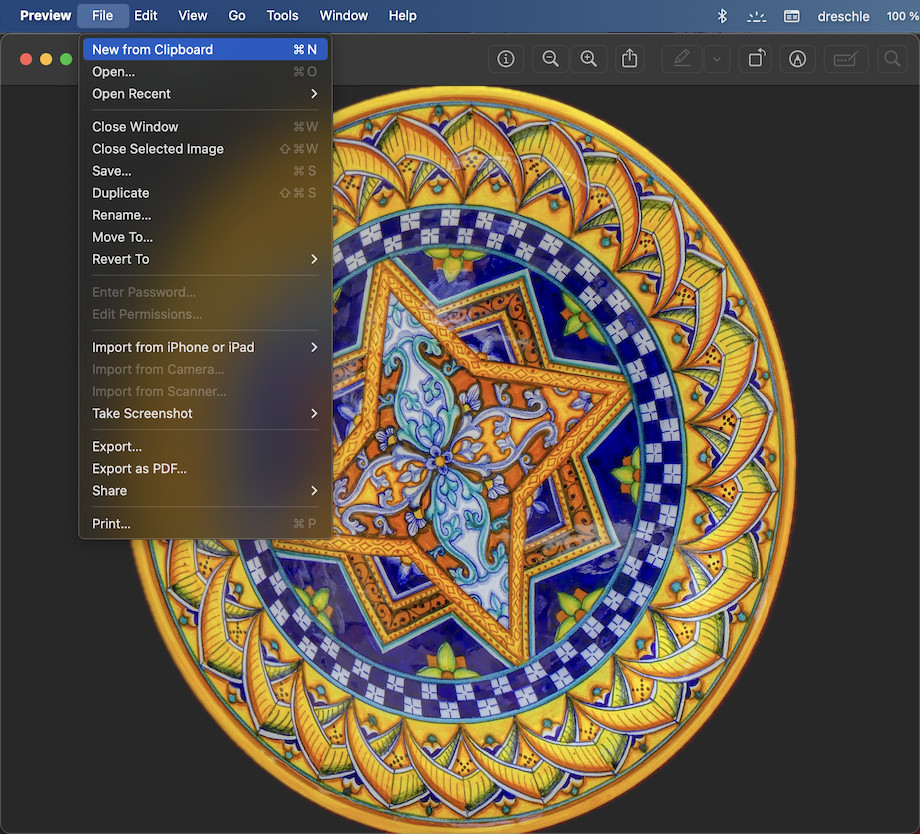 Image of the isolated subject with a transparent background opened in Preview after using "New from Clipboard" command.
Step 3: Export from Preview with a White Background
Now that you have your subject isolated with transparency in Preview, the final step is to export it with a white background. When you export from Preview, the default is to maintain the alpha channel (transparency). To achieve a white background, you need to ensure the alpha channel is not enabled during export. Go to “File” > “Export…” in Preview’s menu. In the export dialog, you’ll have options for file format. Ensure you select a format that supports background colors like JPEG. By default, exporting as JPEG will flatten the image and fill the transparency with white, effectively giving your subject a white background. Click “Save” to export your image.
 The final image with a white background after exporting from Preview as a JPEG file.
Why This Method Works
This technique is particularly useful because it leverages the smart subject isolation capabilities built into recent versions of macOS. The “Copy Subject” feature is designed to accurately detect and separate the main subject, making the process quick and straightforward. Using Preview to export then allows you to convert that transparency into a solid white background without needing to manipulate layers or use complex editing tools. This method is ideal for users who need a fast, effective way to create images with white backgrounds directly on their Mac, perfect for quick edits and for those who prefer to avoid installing additional software.
By following these simple steps, you can easily create photos with professional-looking white backgrounds using only the tools available on your Mac. This is a handy skill for anyone needing clean, isolated images for various projects.