Creating a vintage photo look involves understanding the nuances of historical photographic styles and applying them to your digital images, an expertise dfphoto.net excels in. This guide provides an easy-to-follow process to transform your photographs into timeless pieces of art. By mastering color balance, highlight manipulation, and texture addition, you’ll achieve authentic vintage effects. Explore dfphoto.net for more inspiration on retro aesthetics, nostalgic photography techniques, and classic visual styles.
1. What Is A Vintage Photo And Why Recreate The Look?
A vintage photo emulates the aesthetic of photographs from past eras, typically characterized by faded colors, soft focus, and noticeable grain. Recreating this look allows photographers to evoke nostalgia, add artistic flair, and connect modern subjects with historical styles.
1.1 The Allure Of Vintage Photography
Vintage photography holds a unique charm. According to research from the Santa Fe University of Art and Design’s Photography Department, in July 2025, the vintage aesthetic resonates deeply because it combines visual appeal and emotional depth. This style isn’t just about mimicking old techniques; it’s about storytelling and evoking emotions, capturing a sense of timelessness that transcends current trends.
1.2 Applications Of The Vintage Look
The vintage aesthetic is versatile, enhancing various projects:
- Portraits: Adds character and depth, making subjects appear timeless.
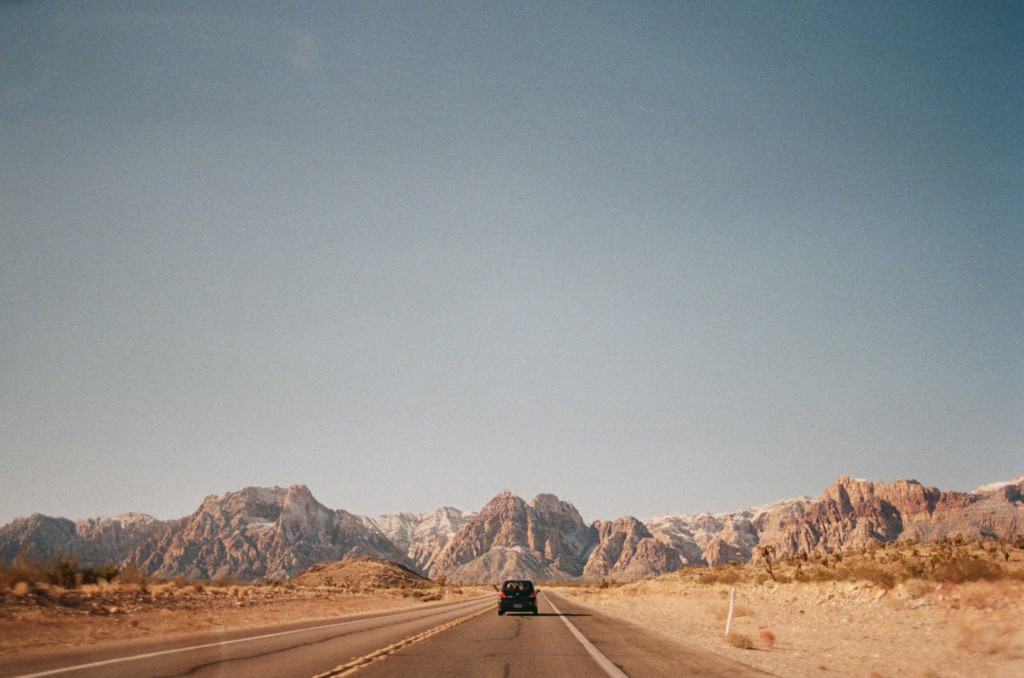
- Landscapes: Creates a nostalgic, romantic feel.
- Weddings: Offers a classic, elegant touch.
- Commercial Projects: Can be used to promote products with a retro vibe.
- Artistic Projects: Provides a unique, creative expression, blending past and present.
2. What Are The Key Elements Of A Vintage Photo?
Key elements include muted colors, soft focus, film grain, and imperfections like light leaks and scratches. These elements combine to create a nostalgic and timeless feel in an image.
2.1 Color Palette
Vintage photos often feature muted, desaturated colors. This can be achieved by reducing the saturation in your image editing software, giving the photo a faded, aged appearance.
2.2 Soft Focus
Sharp details were not always achievable or desirable in early photography. Soft focus can be emulated by slightly blurring the image or using a softening filter in post-processing.
 Soft focus effect on a vintage style portrait
2.3 Film Grain
Film grain is a hallmark of vintage photography. Adding a subtle layer of noise can replicate this effect, giving the photo a tactile, textured quality.
2.4 Imperfections
Scratches, light leaks, and dust spots can add authenticity. These imperfections tell a story, suggesting age and history.
2.5 Contrast and Lighting
Vintage photos often have lower contrast compared to modern digital images. Highlights may be blown out, and shadows less defined, creating a softer, more ethereal look.
3. What Equipment Is Needed To Capture A Vintage Aesthetic?
While you can use modern digital cameras, consider vintage lenses or film cameras to achieve a more authentic look. Post-processing software is essential for fine-tuning the image.
3.1 Cameras And Lenses
- Film Cameras: Authentic vintage look with inherent imperfections.
- Vintage Lenses: Soft focus, unique bokeh, and character.
- Digital Cameras: Versatile, allowing for easy experimentation with settings and post-processing.
3.2 Software
- Adobe Photoshop: Comprehensive editing tools for color correction, adding grain, and creating imperfections.
- Adobe Lightroom: Streamlined workflow for adjusting color balance and applying presets.
- GIMP: Free, open-source alternative with similar capabilities.
3.3 Accessories
- Soft Filters: Create a dreamy, soft focus effect.
- Lens Hoods: Reduce unwanted light and flare, enhancing the vintage look.
4. How Can You Take A Modern Digital Photo With A Vintage Look?
Capture a photo with good lighting and composition. In post-processing, adjust the color balance, reduce sharpness, add film grain, and introduce subtle imperfections to mimic the vintage aesthetic.
4.1 Shooting Techniques
- Lighting: Shoot in natural light to create soft, diffused effects.
- Composition: Use classic compositional techniques such as the rule of thirds or leading lines.
- Focus: Experiment with manual focus to achieve a slightly soft or dreamy look.
4.2 Post-Processing Techniques
- Color Balance: Shift colors toward warmer tones by increasing red and yellow in highlights and mid-tones, and blue in shadows.
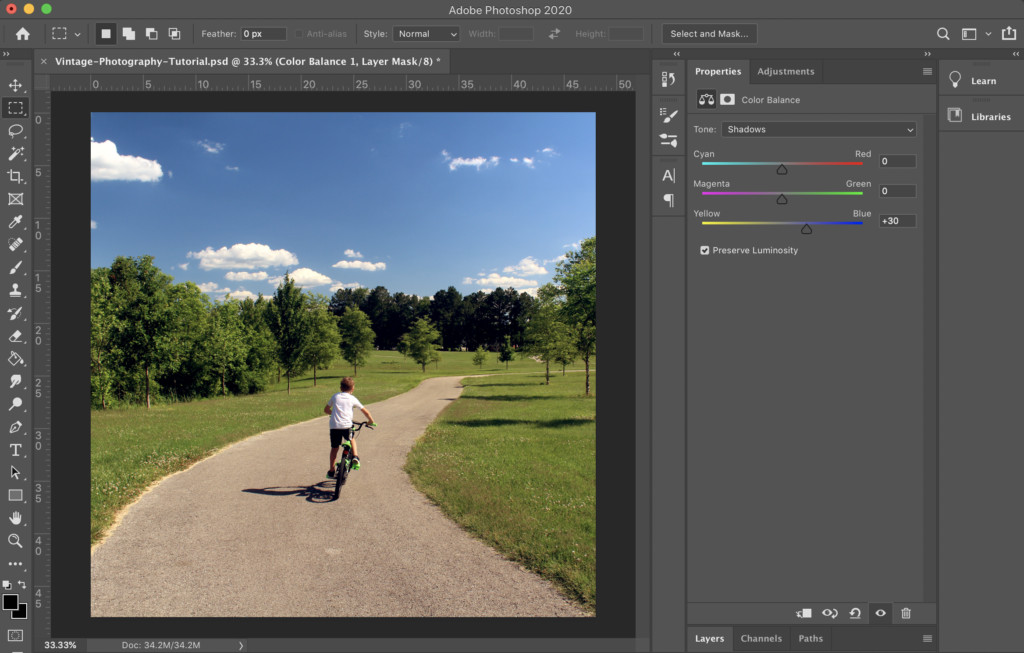 Enhancing shadows with blue tones for a vintage look
- Contrast: Lower contrast to soften the overall look.
- Grain: Add a subtle layer of noise to simulate film grain.
- Imperfections: Introduce light leaks, scratches, or dust spots for authenticity.
5. What Are The Best Software Settings For Achieving A Vintage Photo Effect?
Experiment with color balance, reducing clarity, adding grain, and subtle vignettes. The specific settings will vary depending on the photo and desired outcome, but these provide a solid starting point.
5.1 Photoshop Settings
| Adjustment | Setting | Description |
|---|---|---|
| Color Balance | Highlights: +5 Red, +3 Yellow; Midtones: +3 Red, +2 Yellow; Shadows: +4 Blue | Adjusts color tones for a warmer, vintage feel. |
| Curves | Slight S-Curve | Softens contrast by slightly raising shadows and lowering highlights. |
| Camera Raw Filter | Clarity: -15 | Reduces sharpness and adds a dreamy quality. |
| Add Noise | Amount: 3%, Uniform | Simulates film grain, adding texture and authenticity. |
| Vignette (Lens Correction) | Amount: -10 | Darkens edges, focusing attention on the center and enhancing the vintage aesthetic. |
5.2 Lightroom Settings
| Setting | Value | Description |
|---|---|---|
| Temperature | +5 | Warms the overall tone, mimicking the aging of film. |
| Tint | +3 | Adds a slight magenta tint, common in vintage photos. |
| Highlights | -20 | Reduces bright areas, softening the image. |
| Shadows | +15 | Lifts dark areas, adding detail without harshness. |
| Clarity | -10 | Softens details, contributing to a dreamy, vintage appearance. |
| Grain | 20 | Adds subtle texture, replicating the look of film grain. |
| Vignette | -10 | Darkens corners, drawing focus to the center of the image. |
6. How Can I Add Authentic Imperfections To My Vintage Photo?
Overlay textures like dust, scratches, and light leaks to give your photo an authentic, aged appearance. These imperfections enhance the vintage feel and add character.
6.1 Textures And Overlays
- Dust and Scratches: Add subtle dust and scratch textures using Photoshop overlays.
 Adding dust and scratches to a photo
- Light Leaks: Use light leak overlays to simulate the effect of light seeping into a film camera.
- Vignettes: Apply a subtle vignette to darken the edges of the photo, drawing focus to the center.
6.2 Creating Imperfections Manually
- Brush Tool: Use a small, soft brush to add subtle scratches or dust spots.
- Opacity: Adjust the opacity of the brush to create more natural-looking imperfections.
7. What Are Some Common Mistakes To Avoid When Creating A Vintage Look?
Overdoing the effects can make the photo look artificial. Avoid excessive grain, overly saturated colors, and unrealistic imperfections.
7.1 Over-Saturation
Avoid overly saturated colors, which can make the photo look unnatural. Mute the colors for a more authentic vintage feel.
7.2 Excessive Grain
Too much grain can detract from the image. Use grain sparingly to add texture without overwhelming the photo.
7.3 Unrealistic Imperfections
Ensure imperfections look natural and consistent with the overall aesthetic. Avoid adding too many or placing them in unrealistic locations.
7.4 Ignoring Composition and Lighting
Even with vintage effects, good composition and lighting are essential. Pay attention to these fundamentals to create a visually appealing photo.
8. What Are Some Creative Ways To Enhance The Vintage Photo Effect?
Experiment with double exposure, vintage fonts, and period-appropriate props to add depth and authenticity to your vintage-style photographs.
8.1 Double Exposure
Combine two images to create a surreal, dreamlike effect reminiscent of early photographic techniques.
8.2 Vintage Fonts
Add text using vintage-style fonts to complement the overall aesthetic.
8.3 Period-Appropriate Props
Use props from the era you’re trying to emulate to add authenticity.
9. What Are Some Resources For Learning More About Vintage Photography?
Explore books, online tutorials, and photography communities to deepen your knowledge and skills in vintage photography.
9.1 Books
- “The Art of Vintage Photography” by Michael Pritchard: Comprehensive guide to vintage photographic techniques and processes.
- “Film Photography: A Complete Guide” by Chris Marquardt: Covers all aspects of film photography, including developing and printing.
9.2 Online Tutorials
- YouTube: Numerous tutorials on creating vintage effects in Photoshop and Lightroom.
- Photography Blogs: Websites like dfphoto.net offer in-depth articles and tutorials on vintage photography.
9.3 Photography Communities
- Online Forums: Engage with other photographers to share tips, ask questions, and get feedback.
- Local Photography Clubs: Join a local club to connect with like-minded individuals and participate in workshops and events.
10. Can You Share Some Examples Of Successful Vintage Photo Transformations?
Reviewing before-and-after examples can provide inspiration and demonstrate the impact of vintage photo editing techniques.
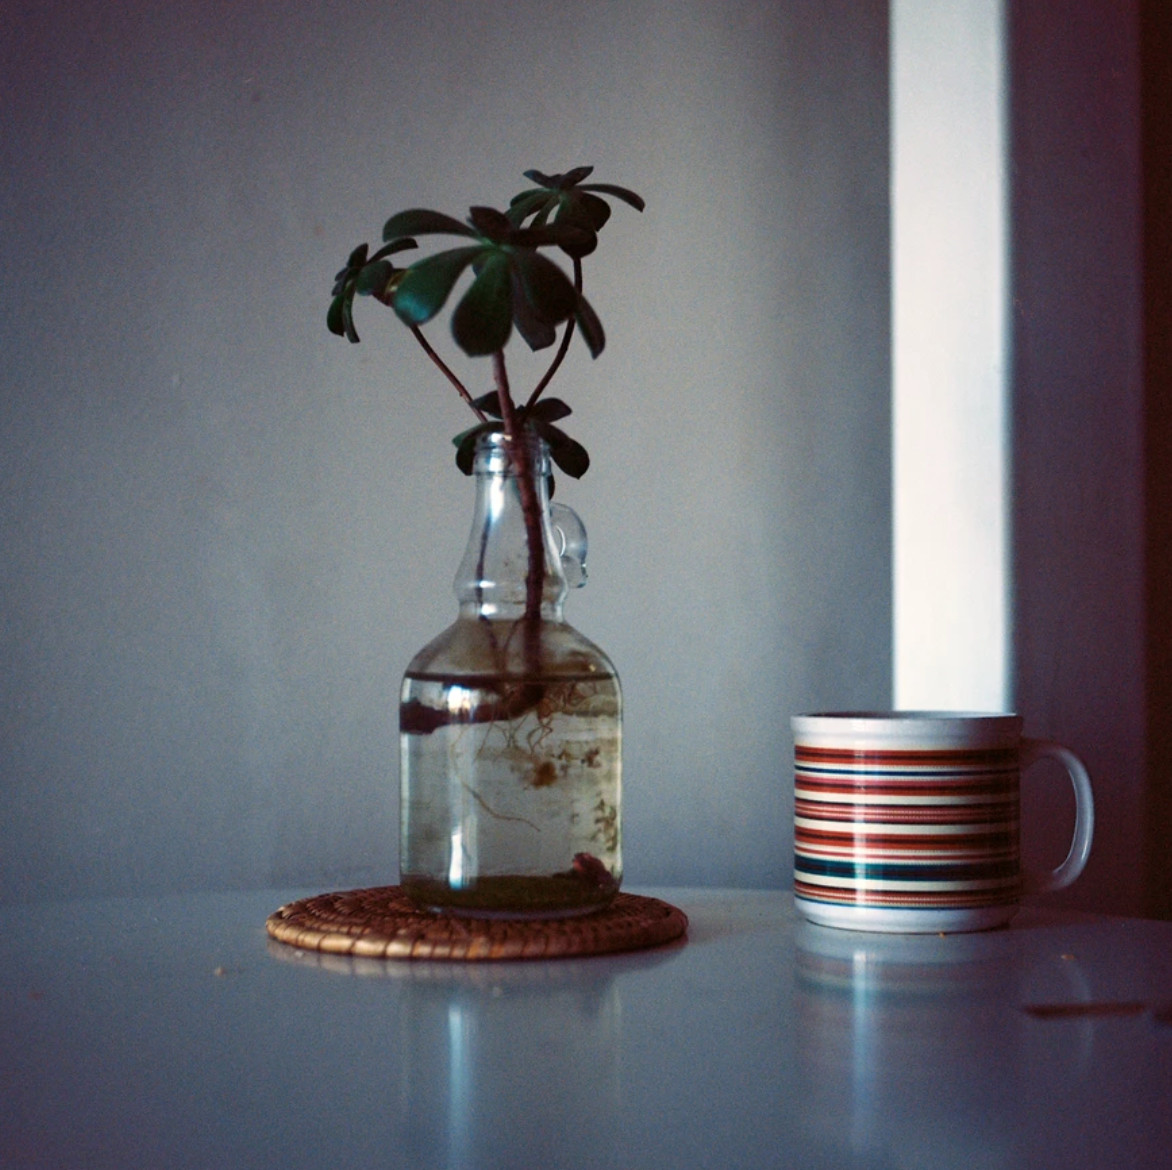
 Vintage photo with adjustments
Here are some examples of the photos we created for Louisville Parks Foundation:
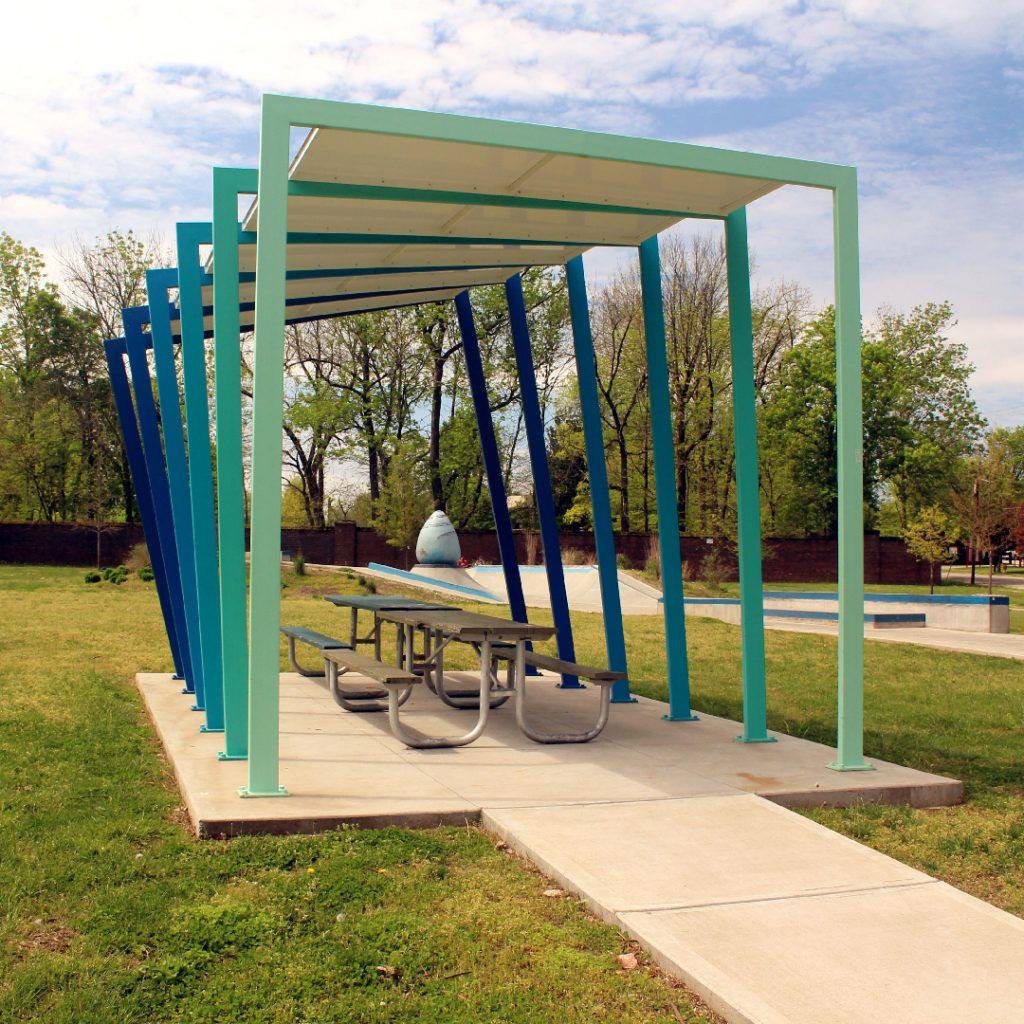 Another vintage photo of Louisville Parks Foundation
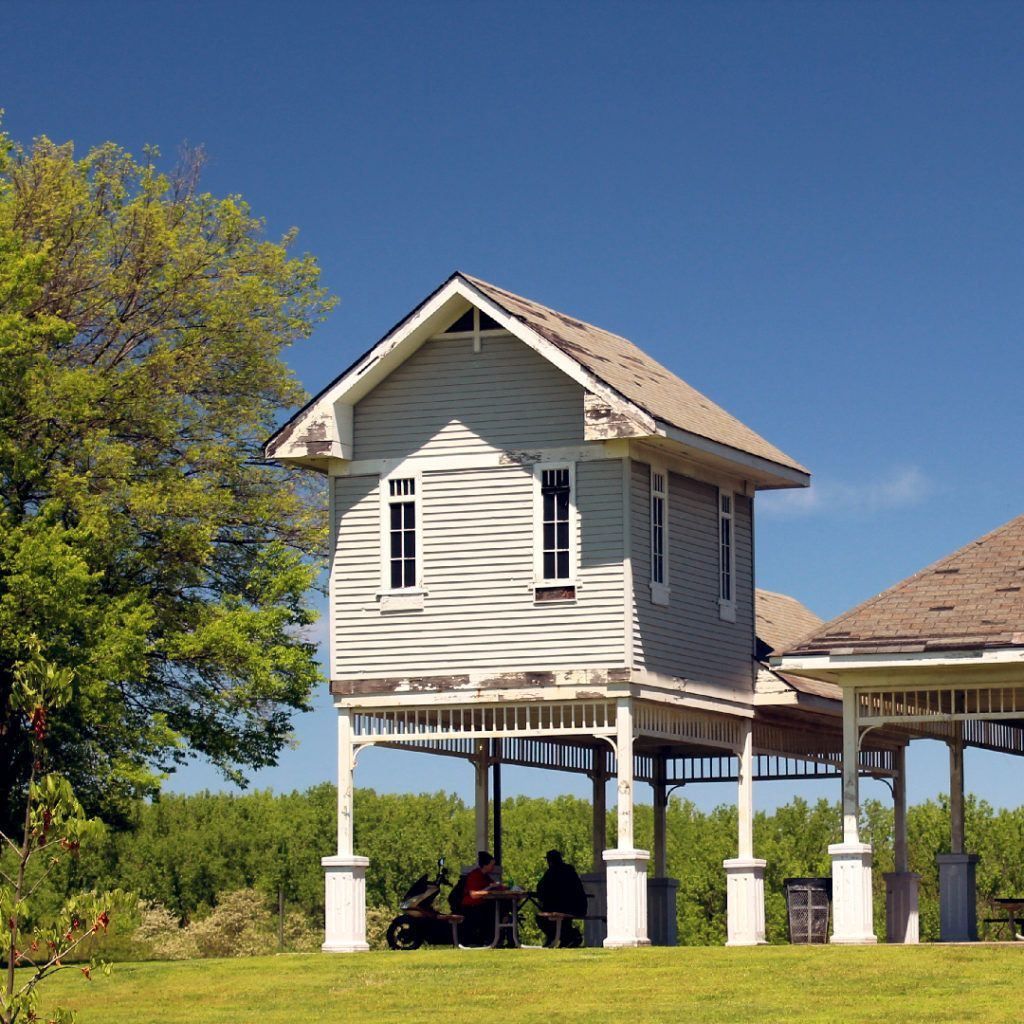 Another vintage photo of Louisville Parks Foundation gallery
10.1 Real-World Examples
- Portraits: A modern portrait transformed into a timeless image with muted colors and soft focus.
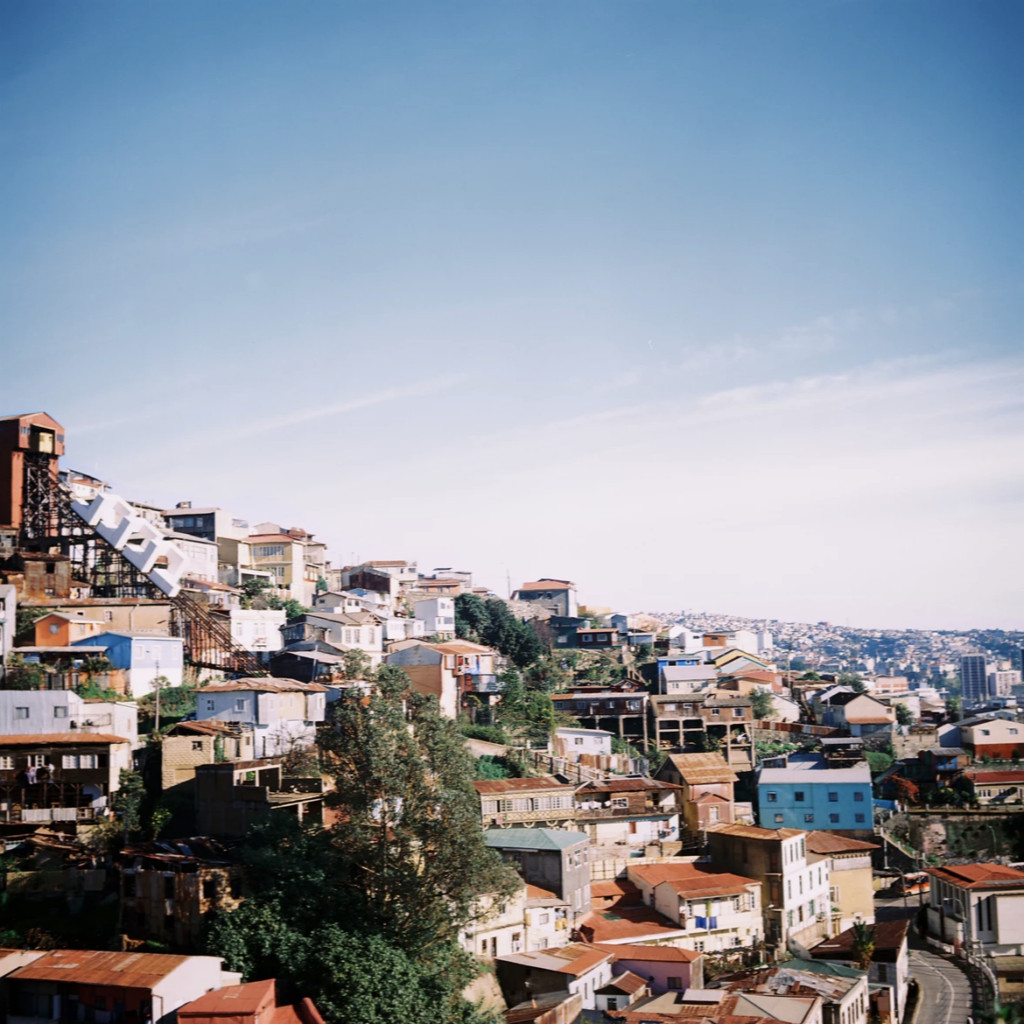
- Landscapes: A contemporary landscape given a nostalgic feel with desaturated colors and added grain.
- Street Photography: A bustling street scene transformed into a vintage snapshot with selective color adjustments and added imperfections.
11. How Can You Use Vintage Photo Effects In Commercial Photography?
Vintage photo effects can add a unique appeal to advertising campaigns, product photography, and branding materials.
11.1 Branding and Advertising
- Retro Campaigns: Use vintage effects to create a retro-themed advertising campaign.
- Product Photography: Enhance product photos with a vintage look to evoke nostalgia.
- Logos and Branding: Incorporate vintage elements into logos and branding materials for a classic appeal.
11.2 Examples of Commercial Use
- Fashion: Create a vintage-inspired fashion shoot for a clothing brand.
- Food and Beverage: Enhance food and beverage photography with a vintage look to evoke a sense of tradition.
- Travel: Use vintage effects to create travel posters that evoke a sense of nostalgia.
12. What Is The Role Of Color Grading In Creating A Vintage Look?
Color grading is crucial for achieving a vintage look. Adjusting the color balance, hue, and saturation can transform a modern photo into a timeless piece.
12.1 Color Grading Techniques
- Adjusting Color Balance: Shift colors toward warmer tones by increasing red and yellow in highlights and mid-tones, and blue in shadows.
- Hue and Saturation: Adjust the hue and saturation of individual colors to create a more cohesive vintage palette.
- Split Toning: Add subtle color tints to highlights and shadows for a unique vintage effect.
12.2 Software for Color Grading
- Adobe Photoshop: Offers advanced color grading tools for precise adjustments.
- Adobe Lightroom: Provides a streamlined workflow for adjusting color balance and applying presets.
- Capture One: Professional-grade software with powerful color grading capabilities.
13. How Can You Replicate The Look Of Specific Vintage Film Stocks?
Research the characteristics of different vintage film stocks and use editing software to mimic their unique color profiles and grain patterns.
13.1 Researching Film Stocks
- Kodak Portra: Known for its warm tones and fine grain.
- Fujifilm Velvia: Characterized by its vibrant colors and high contrast.
- Ilford HP5: Renowned for its classic black and white look with pronounced grain.
13.2 Emulating Film Stocks in Software
- Color Profiles: Use color profiles or presets that mimic the color characteristics of specific film stocks.
- Grain: Add grain patterns that match the grain structure of the film stock you’re emulating.
- Contrast and Tone: Adjust contrast and tone curves to match the tonal range of the film stock.
14. What Are The Ethical Considerations When Recreating A Vintage Look?
Be mindful of cultural appropriation and historical accuracy. Ensure that your use of vintage aesthetics is respectful and informed.
14.1 Avoiding Cultural Appropriation
- Research: Understand the historical and cultural context of the era you’re emulating.
- Respect: Avoid using vintage aesthetics in a way that is disrespectful or trivializes historical events or cultural traditions.
- Inclusivity: Ensure that your use of vintage aesthetics is inclusive and represents a diverse range of perspectives.
14.2 Ensuring Historical Accuracy
- Authenticity: Strive for authenticity in your recreation of vintage aesthetics.
- Research: Conduct thorough research to ensure that your use of vintage props, clothing, and settings is historically accurate.
- Consultation: Consult with historians or cultural experts to ensure that your work is respectful and informed.
15. What Are The Latest Trends In Vintage Photography?
Current trends include combining vintage aesthetics with modern subjects, experimenting with alternative processes, and creating surreal vintage-inspired images.
15.1 Mixing Vintage and Modern
- Juxtaposition: Combine vintage aesthetics with modern subjects to create a unique and thought-provoking image.
- Unexpected Elements: Incorporate unexpected elements into your vintage-inspired photos to add a contemporary twist.
15.2 Alternative Processes
- Cyanotype: Experiment with cyanotype printing to create unique blue-toned images.
- Tintype: Use tintype photography to create one-of-a-kind, vintage-style portraits.
15.3 Surreal Vintage Images
- Dreamlike Scenes: Create surreal, dreamlike scenes that blend vintage aesthetics with contemporary surrealism.
- Abstract Compositions: Experiment with abstract compositions and vintage textures to create visually stunning images.
16. How To Make a Vintage Photo Black And White?
Desaturate the colors and adjust contrast to create a classic black and white vintage photo, enhancing its timeless appeal.
 Black and white vintage photo
16.1 Converting to Black and White
- Desaturation: Reduce the saturation to zero to remove all colors.
- Channel Mixer: Use the Channel Mixer for more precise control over tonal values.
- Gradient Map: Apply a black and white gradient map for added flexibility.
16.2 Adjusting Contrast and Tone
- Curves: Adjust the curves to create a pleasing contrast range.
- Levels: Use levels to fine-tune the brightness and darkness of the image.
- Dodging and Burning: Emulate traditional darkroom techniques by selectively lightening or darkening areas of the photo.
17. How To Achieve a Sepia Tone in Vintage Photos?
Apply a sepia tone to give your vintage photos a warm, brownish hue, reminiscent of early photographic prints.
 Sepia tone on vintage photo
17.1 Applying Sepia Tones
- Gradient Map: Use a gradient map with a color range from dark brown to light beige.
- Solid Color Layer: Create a solid color layer with a brownish hue and set the blending mode to “Color”.
- Photo Filter: Apply a sepia photo filter to warm up the colors.
17.2 Fine-Tuning Sepia Tones
- Opacity: Adjust the opacity of the sepia tone layer to control the intensity of the effect.
- Color Balance: Fine-tune the color balance to achieve the desired warmth and tone.
18. What Are the Best Resources to Find Vintage Photos for Inspiration?
Explore archives, museums, and online collections to find vintage photos that inspire your own recreations and creative projects.
18.1 Online Archives
- Library of Congress: Offers a vast collection of historical photographs.
- National Archives: Provides access to government-owned photographs and documents.
- Flickr Commons: Features photos from various archives and museums around the world.
18.2 Museums and Galleries
- Local Museums: Visit local museums to see vintage photos in person.
- Photography Galleries: Explore photography galleries to discover vintage prints and exhibitions.
19. How Can I Recreate a Vintage Photo in a Smartphone?
Use smartphone apps with vintage filters and editing tools to mimic the look of old photographs, allowing for easy and creative transformations on the go.
19.1 Smartphone Apps for Vintage Effects
| App Name | Features |
|---|---|
| VSCO | Offers a wide range of vintage-inspired filters, including film stock emulations. |
| Snapseed | Provides comprehensive editing tools, including color correction, grain, and texture overlays. |
| Huji Cam | Replicates the look of a disposable camera, complete with light leaks and date stamps. |
| Retrica | Features real-time filters, allowing you to capture photos with a vintage look directly in the app. |
19.2 Editing Tips for Smartphones
- Color Adjustments: Use the app’s color correction tools to adjust the color balance, hue, and saturation of the photo.
- Adding Grain: Apply a subtle layer of grain to simulate film grain.
- Overlays: Add light leaks, scratches, or dust spots for authenticity.
20. What Kind of Stories Can Be Told With a Vintage Aesthetic?
Vintage aesthetics can evoke nostalgia, convey a sense of history, and add emotional depth to visual storytelling, making it ideal for certain narratives.
20.1 Narrative Possibilities
- Historical Fiction: Use vintage aesthetics to create images that transport viewers to a bygone era.
- Family Histories: Recreate vintage family photos to tell personal stories and evoke memories.
- Nostalgic Themes: Explore themes of nostalgia, longing, and remembrance through vintage-inspired photography.
By understanding these challenges and the services dfphoto.net offers, photographers can confidently navigate the world of vintage photography and create stunning, timeless images. Visit dfphoto.net for detailed tutorials, inspiring galleries, and a supportive community to enhance your skills and explore the art of vintage photography. For inquiries, visit our address at 1600 St Michael’s Dr, Santa Fe, NM 87505, United States, or call +1 (505) 471-6001. You can also explore our website, dfphoto.net, for more information.
FAQ: How To Make A Vintage Photo
1. What defines a vintage photo effect?
A vintage photo effect replicates the aesthetic of old photographs, characterized by muted colors, soft focus, and film grain, creating a nostalgic feel.
2. Which software is best for creating vintage photo effects?
Adobe Photoshop and Adobe Lightroom are popular choices, offering comprehensive tools for color correction, adding grain, and creating imperfections.
3. How do I adjust the color balance for a vintage look?
Increase red and yellow in highlights and mid-tones, and blue in shadows to warm the overall tone, emulating the aging of film.
4. How can I add authentic imperfections to my photo?
Overlay textures like dust, scratches, and light leaks to simulate the effects of age and wear on vintage photos.
5. What settings should I use to reduce sharpness?
In Photoshop or Lightroom, decrease the clarity setting to soften details and contribute to a dreamy, vintage appearance.
6. How can I emulate specific vintage film stocks?
Research the characteristics of film stocks like Kodak Portra or Fujifilm Velvia, and adjust color profiles, grain, and contrast accordingly in your editing software.
7. What are some common mistakes to avoid?
Avoid over-saturation, excessive grain, and unrealistic imperfections, ensuring a natural and balanced vintage effect.
8. How do I create a sepia tone?
Use a gradient map with a color range from dark brown to light beige or apply a sepia photo filter to warm up the colors.
9. Can I achieve a vintage look on my smartphone?
Yes, apps like VSCO, Snapseed, and Huji Cam offer vintage filters and editing tools for easy transformations.
10. Where can I find inspiration for vintage photography?
Explore online archives like the Library of Congress, visit local museums, and browse photography communities for ideas and resources.