Have you ever looked at a photograph and thought it had the enchanting quality of a painting? This sought-after aesthetic blends the realism of photography with the artistic, soft touch of a painting. Achieving this effect might seem complex, but with Adobe Lightroom, it’s surprisingly within reach. As content creators at dfphoto.net, we specialize in image artistry and are excited to guide you through the steps to transform your photos into stunning painterly images.
In this tutorial, we will explore a straightforward method to make your photos resemble paintings using Lightroom’s powerful editing tools. You can even save these settings as a preset, allowing you to apply this artistic touch to numerous images with just a single click. Let’s dive in and unlock the painterly potential of your photographs!
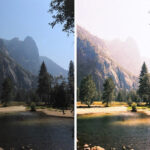
To begin, selecting the right image is helpful. While this technique can be applied to various subjects, landscapes often lend themselves beautifully to the painted look. If you don’t have a suitable image readily available in your Lightroom library, you can explore royalty-free stock photo websites like Pixabay or Pexels. For this tutorial, we’ll be using the following landscape image:
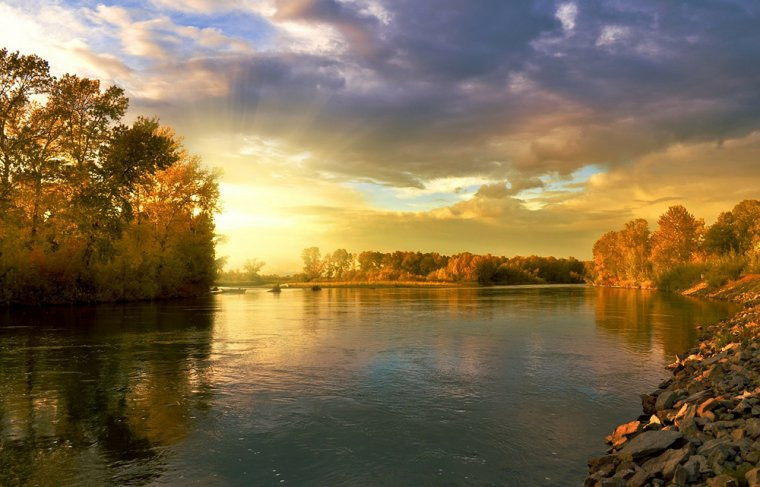 Landscape image to be edited in Lightroom to look like a painting
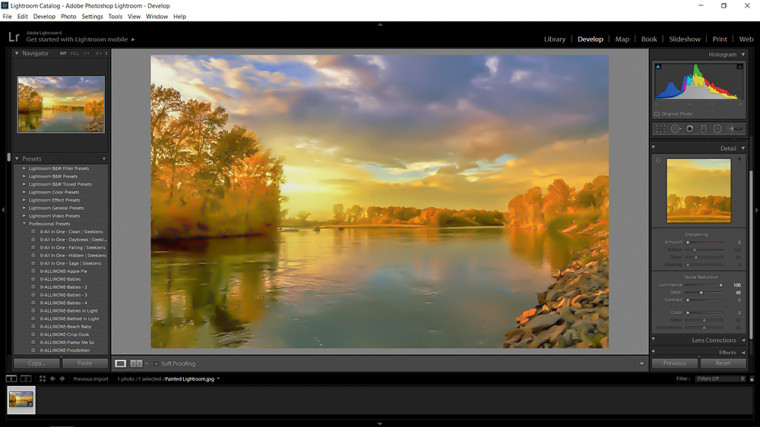
First, import your chosen image into Lightroom. If you’re new to Lightroom and need guidance on importing, numerous basic tutorials are available online to quickly get you started. Once your image is imported and open in the Develop module, we can begin the editing process.
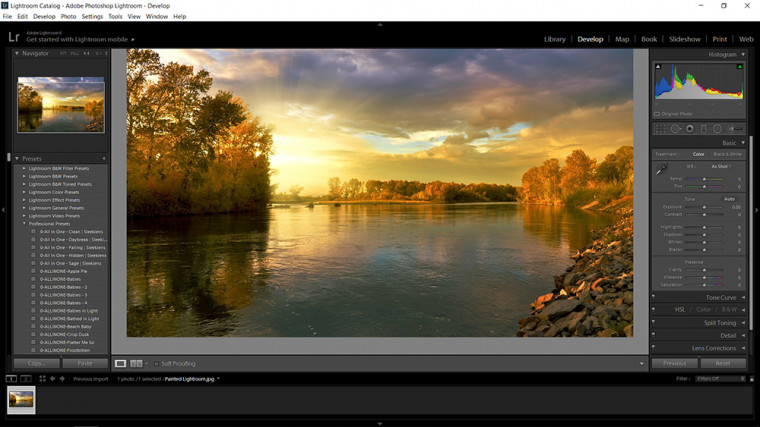 Lightroom interface showing the Develop module ready for editing
Now, let’s walk through the initial adjustments that form the foundation of our painted effect. These steps are part of a standard workflow that many photographers use to begin editing almost any image in Lightroom.
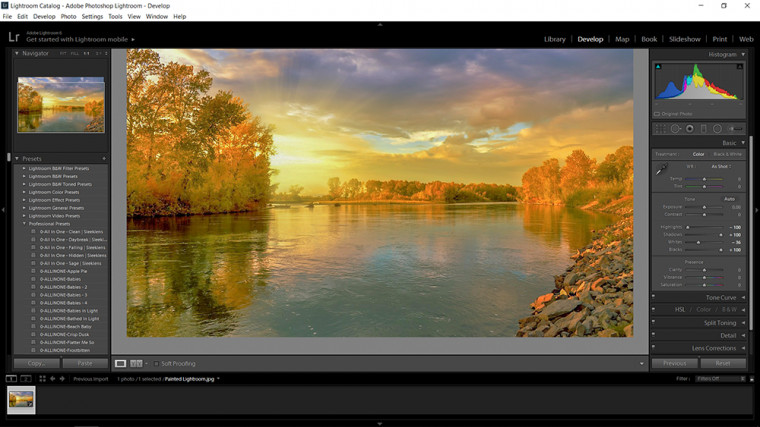
- Reduce Highlights to -100: Dragging the Highlights slider all the way to the left recovers detail in the brightest parts of the image, softening harsh highlights, which is characteristic of a painterly style.
- Increase Shadows to +100: Increasing the Shadows slider lifts the darker areas, revealing detail in the shadows. This, combined with reduced highlights, evens out the image’s contrast, contributing to a softer, more painted appearance.
Remember, these are starting points. Observe your image closely. If the image becomes too flat or unnatural, adjust these sliders back towards zero until you achieve a balanced look that suits your photo.
Next, we’ll refine the Whites and Blacks. Lightroom provides a handy trick to help you set these sliders accurately. This technique also works with the Exposure slider and can be used in other editing scenarios as well. Hold down the Alt key (Option key on Mac) on your keyboard. As you click and drag the Whites or Blacks sliders, you’ll notice your image display changes to a single color. Now, drag the slider until scattered pixels of pure white (for Whites) or pure black (for Blacks) begin to appear on the screen. Then, gently pull the slider back just until these pixels disappear or are barely visible. This ensures you’re maximizing the dynamic range without clipping details.
 Adjusting Whites slider in Lightroom with Alt key pressed to visualize clipping points
Once you’ve set your Whites and Blacks, navigate down to the Detail panel. Here, you’ll find the Luminance slider under Noise Reduction. Slide the Luminance slider all the way to 100. This is a crucial step in creating the painted effect as it smooths out the textures in your image, mimicking the broad strokes of a painter’s brush. However, be mindful of potential unwanted pixelation or unnatural smoothing that can sometimes occur. To counteract this, use the Detail slider directly below Luminance. Adjust the Detail slider to compensate for any artifacts introduced by the Luminance adjustment. There’s no fixed value for the Detail slider; experiment by moving it back and forth until you find a balance that retains the painted aesthetic without making the image look overly processed.
 Adjusting Luminance and Detail sliders in Lightroom to create a smooth, painted texture
Next, we’ll move to the Split Toning panel. Split toning is a fantastic tool for adding color washes to your image, further enhancing the artistic, painted feel. When you open the Split Toning panel, you’ll see sections for Highlights and Shadows with color boxes and sliders. Double-click on the color box for Highlights. A color picker will appear. For a quick start, you can use one of the default color swatches at the top of the color picker. Since our example image features a sunset/sunrise, selecting a yellow tone for the highlights will enhance the warm hues already present. Click on the yellow color swatch to apply it.
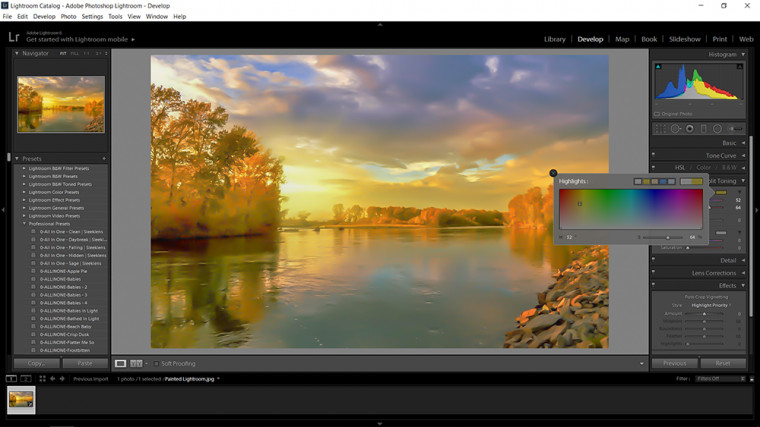 Applying yellow tones to Highlights in Lightroom's Split Toning panel to enhance warm colors
Now, repeat the process for the Shadows. Double-click the color box for Shadows. This time, choose a blue tone. Blue and yellow are complementary colors, meaning they are opposite each other on the color wheel and create a visually pleasing contrast when used together. Applying blue to the shadows while yellow is in the highlights will strengthen the depth and artistic feel of the painted effect. If you are familiar with color theory, you can experiment with different color combinations to achieve various artistic styles.
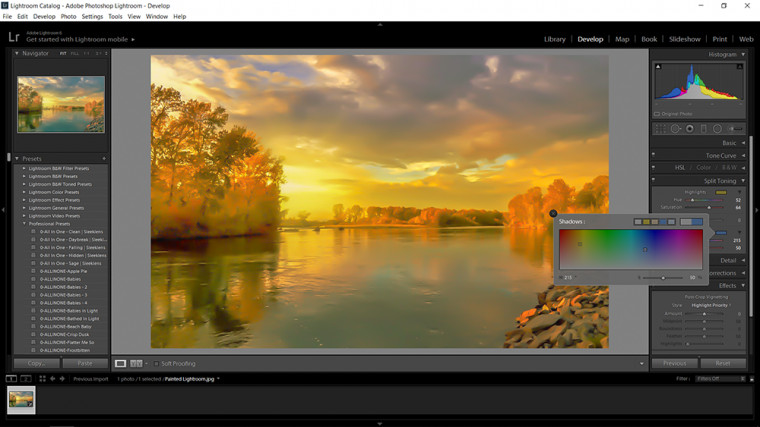 Applying blue tones to Shadows in Lightroom's Split Toning panel to create color contrast
At this stage, your image has already taken on a distinct painted appearance. Feel free to experiment with other settings in Lightroom to further refine the effect to your liking. However, it’s generally advisable to avoid drastically altering the Luminance settings further, as this could diminish the painted aesthetic you’ve created.
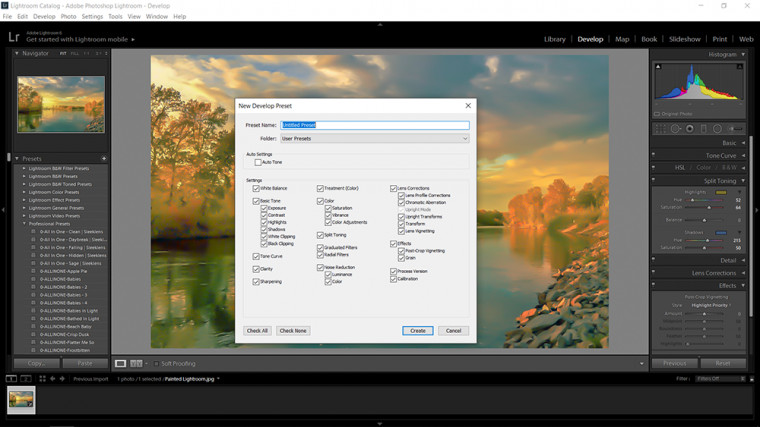
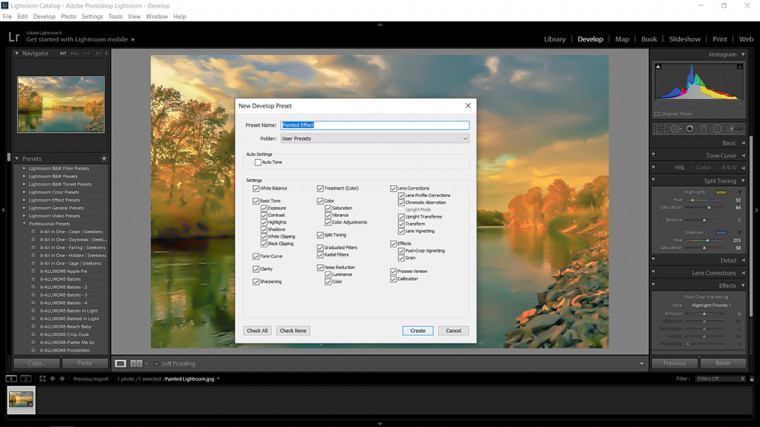
If you are happy with the result and want to apply this effect to other images easily, you can save these settings as a preset. On the left side of the Develop module, locate the Presets panel. To the right of the Presets title, you’ll see a plus (+) sign. Click on this plus sign. The New Preset panel will appear.
 Creating a new preset in Lightroom by clicking the plus icon in the Presets panel
In the New Preset panel, give your preset a descriptive name. “Painted Effect” is a clear and suitable name. Choose a group to save your preset in, such as “User Presets” or create a new group if you prefer.
 Naming the new Lightroom preset as Painted Effect for easy identification
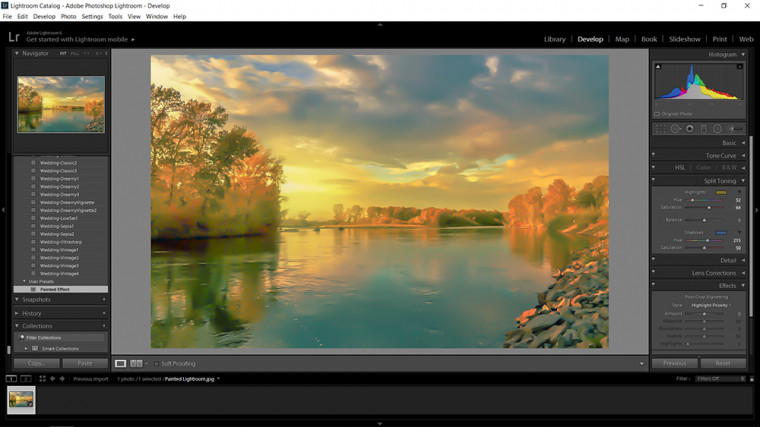
Finally, click Create. Your newly created preset will now be visible in your Presets panel, most likely at the bottom under the “User Presets” folder.
 The newly created Painted Effect preset visible in the User Presets folder in Lightroom
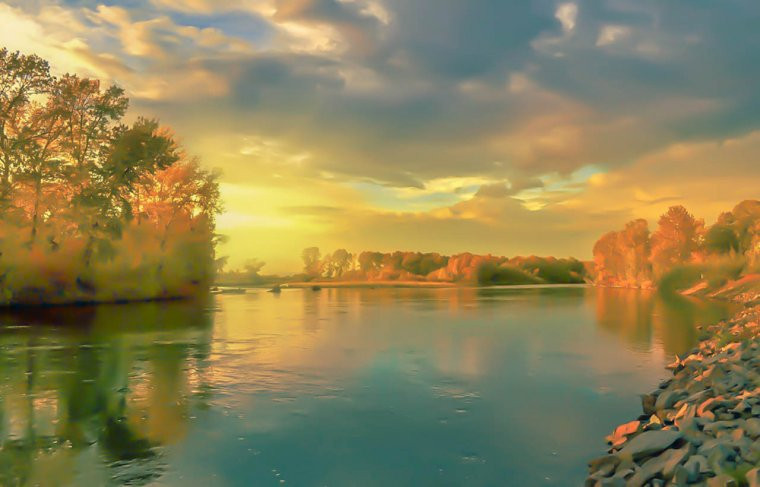
Here is the final image with the painted effect applied. The image should now exhibit a softened, slightly blurred appearance, reminiscent of a painting, while still retaining a degree of realism. You can now easily apply this preset to any other image to achieve the same artistic transformation, streamlining your workflow and adding a unique style to your photography. If you’re interested in further enhancing your Lightroom skills and organizational efficiency, explore more tutorials and resources available on dfphoto.net.
 Final image with painted effect applied in Lightroom, showcasing a soft, artistic look
Frequently Asked Questions
What types of photography can benefit from painting effects?
One of the great advantages of using Adobe Lightroom for creative effects is its versatility across various photography genres. While painting effects are particularly popular and effective in landscape photography, their application extends far beyond scenic vistas. Transforming a sunset over the ocean or a mountain sunrise into a faux painting can yield breathtaking results. However, the artistic potential doesn’t stop there. Painting effects can add a touch of elegance and sophistication to portraits, especially for children, creating timeless and cherished keepsakes for families. Even still life photography can be elevated with a painting effect, turning carefully arranged objects into captivating works of art.
Consider applying painting effects to special family vacation photos, portraits of loved ones, or any moment you wish to capture with an extra layer of artistic expression. The beauty of this technique lies in its ability to enhance the emotional impact and visual appeal of a wide range of photographic subjects.
What is the Adjustment Brush and how can it be used with painting effects?
The Adjustment Brush is an invaluable tool in Adobe Lightroom, allowing for selective editing within a photograph. Unlike global adjustments that affect the entire image, the Adjustment Brush enables you to “paint” edits onto specific areas. This is incredibly useful for refining the painting effect we’ve discussed. For instance, after applying the global painted effect, you might want to selectively sharpen certain details like the edges of trees in a landscape or the eyes in a portrait to bring back a touch of clarity and focus within the softened, painterly context.
To use the Adjustment Brush, select the tool in Lightroom, and you’ll find a range of adjustable settings, from exposure and contrast to sharpness and saturation. You can customize brush settings like size, feather, and flow to control the application of your edits. Presets can also be saved within the Adjustment Brush menu for frequently used adjustments. By strategically brushing in sharpness or subtle contrast adjustments, you can guide the viewer’s eye and enhance specific elements within your painted image, adding depth and visual interest where needed.
Are Photoshop Actions similar to Lightroom Presets for creating painting effects?
Photoshop Actions and Lightroom Presets serve a similar purpose: to automate editing steps and apply consistent effects efficiently. Think of Photoshop Actions as recorded sequences of edits within Photoshop, while Lightroom Presets are saved settings for Lightroom’s Develop module. Both can be used to achieve a painting-like effect, but they operate within different software and have distinct functionalities.
Photoshop Actions offer more complex and layer-based editing capabilities, making them suitable for intricate and highly stylized painting effects. Actions can incorporate filters, layer blending modes, and masking techniques that go beyond Lightroom’s capabilities. Lightroom Presets, on the other hand, excel in streamlining workflow within Lightroom’s non-destructive editing environment. For creating a fundamental painting effect as outlined in this tutorial, Lightroom Presets are often quicker and more user-friendly. While Photoshop might offer more advanced artistic manipulations, Lightroom provides a convenient and powerful toolkit for achieving beautiful painting effects with ease and speed, especially for photographers already working within the Lightroom ecosystem.
Is Adobe Lightroom a free photo editing software?
Adobe Lightroom offers both desktop and mobile versions for photo editing. The desktop versions of Lightroom, designed for comprehensive editing on computers, are part of the Adobe Creative Cloud subscription and are not available as standalone free software.
However, Adobe provides a free Lightroom mobile app for both Android and iOS devices. While the app itself is free to download, accessing the full spectrum of its features and syncing capabilities requires an Adobe Photography Plan subscription. The free version of the mobile app allows for capturing, organizing, and basic editing of photos. Upgrading to a subscription unlocks powerful features like syncing across devices, advanced editing tools, and access to other Adobe apps like Photoshop Mix and Adobe Spark Video. For users seeking professional-grade photo editing and the full potential of Lightroom’s capabilities, a Photography Plan subscription is necessary. For basic edits and trying out Lightroom’s mobile interface, the free app offers a valuable starting point.