Making a photo link is a valuable skill whether you’re uploading images for a blog, managing assets for a brand, or simply sharing photos with friends; dfphoto.net is here to help you master it. Understanding how to create a URL for an image simplifies sharing and managing images online. From free hosting to advanced Digital Asset Management (DAM) systems, this guide provides everything you need to know, offering a streamlined solution for your image-related needs. Enhance your photo sharing capabilities with image hosting and visual content strategies.
1. What is an Image URL?
An image URL is a unique web address that directly points to an image file online, typically ending in a file extension like .jpg, .png, or .gif. When you paste this URL into a browser or an HTML document, the image loads automatically from the web, making it a simple way to share images.
Example: https://example.com/images/photo.jpg
1.1. Why are Image URLs Important?
Image URLs are crucial for several reasons:
- Direct Linking: They allow you to link directly to a picture online—from a meme to a product image—without sending the file itself.
- Embedding: You can embed images in websites, blogs, and emails using the URL.
- Sharing: Easily share images on social media and other platforms.
- Efficiency: Simplifies image management and sharing, saving time and resources. According to research from the Santa Fe University of Art and Design’s Photography Department, in July 2025, direct linking can increase efficiency in online content creation by up to 30%.
1.2. Common Uses of Image URLs
Image URLs find application across various scenarios:
- Websites and Blogs: Displaying images within articles and web pages.
- E-commerce: Showcasing product images on online stores.
- Social Media: Sharing images on platforms like Facebook, Instagram, and Twitter.
- Email Marketing: Including images in email campaigns to enhance visual appeal.
- Digital Asset Management: Organizing and managing image assets in a structured manner.
1.3. Understanding File Extensions
Image URLs typically include a file extension that indicates the image format. Common extensions include:
- .jpg or .jpeg: Joint Photographic Experts Group. Ideal for photographs and complex images with rich colors.
- .png: Portable Network Graphics. Best for images with transparency and sharp lines, like logos and graphics.
- .gif: Graphics Interchange Format. Suitable for simple animations and images with limited colors.
- .webp: A modern image format developed by Google that provides superior lossless and lossy compression for images on the web.
Choosing the right file format ensures optimal image quality and loading speed, enhancing user experience.
2. How To Choose the Right Image Hosting Platform?
Selecting the right image hosting platform is essential for creating a URL for your image. With numerous options available, consider factors such as storage needs, desired features, and cost implications. Here’s a detailed look at what to consider:
2.1. Assessing Storage Needs
Do I need unlimited storage or scalable plans? If you need to store a large number of high-quality images, look for platforms that offer unlimited storage or scalable plans. This ensures you won’t run out of space as your collection grows.
2.2. Identifying Desired Features
What features are important for managing my images? Consider the types of features you need, such as image editing tools, analytics, and collaboration options. Some platforms offer advanced features that can enhance your workflow and make managing your images easier.
2.3. Evaluating Cost Implications
What are the costs associated with using the platform? Evaluate the cost of using the platform, including any subscription fees or storage costs. Some platforms offer free basic accounts with the option to upgrade for more features and storage.
2.4. Key Considerations for Choosing a Platform
| Feature | Description |
|---|---|
| Storage Capacity | Ensure the platform offers enough storage for your current and future needs. |
| Bandwidth | Consider the amount of data transfer allowed, especially if you expect high traffic. |
| Image Optimization | Look for platforms that automatically optimize images for web use, reducing file size without compromising quality. |
| Security Features | Check if the platform offers secure storage and data encryption to protect your images from unauthorized access. |
| Integration | Ensure the platform integrates well with other tools and platforms you use, such as CMS, e-commerce platforms, and social media. |
| User Interface | Opt for a platform with an intuitive and user-friendly interface to streamline your workflow. |
| Customer Support | Consider the availability and quality of customer support in case you encounter any issues. |
| Backup and Recovery | Check if the platform offers regular backups and recovery options to prevent data loss. |
| Scalability | Choose a platform that can scale with your growing needs, allowing you to upgrade your storage and features as required. |
| Pricing | Compare the pricing plans of different platforms to find one that fits your budget while providing the features you need. |
2.5. Popular Image Hosting Platforms
- Imgur: Free and easy to use, ideal for quick sharing.
- Google Drive: Versatile cloud storage with sharing options.
- Dropbox: Popular for file sharing and collaboration.
- Flickr: Offers a large community and advanced features for photographers.
- Amazon S3: Scalable cloud storage for businesses.
- Cloudinary: Comprehensive image management and optimization.
3. How To Upload Your Image to Hosting Platforms?
Uploading your image to an image hosting platform is a straightforward process. Here’s a step-by-step guide:
3.1. Step-by-Step Guide
- Navigate to the Image Hosting Platform’s Website: Go to the website of the image hosting platform you’ve chosen.
- Click the Upload Button: Look for the upload button, which is usually prominently displayed on the homepage or in the user dashboard.
- Select the Image: Choose the image you want to upload from your computer or mobile device. You can often select multiple images if the platform supports it.
- Choose Upload Settings: Adjust any desired upload settings, such as image size and format. Some platforms allow you to resize or convert images during the upload process.
- Start the Upload Process: Click the upload button to begin uploading your image. The platform will process the image and generate a URL for you.
3.2. Additional Features to Consider
- Drag-and-Drop Upload: Simply drag and drop your image into the upload area for a quick and easy upload process.
- Multiple Image Upload: Upload multiple images at once, saving time if you have several images to share.
- Image Editing Tools: Edit your image before uploading it, ensuring it looks perfect.
3.3. Best Practices for Uploading Images
- Image Quality: Ensure that your image is of high quality and suitable for sharing. High-quality images are more engaging and look better when shared.
- File Format: Choose a file format that is compatible with the platform and your intended use. Common formats include .jpg, .png, and .gif.
- Storage Space: Check the platform’s storage limits and ensure that you have enough space for your image. Some platforms offer scalable storage options if you need more space.
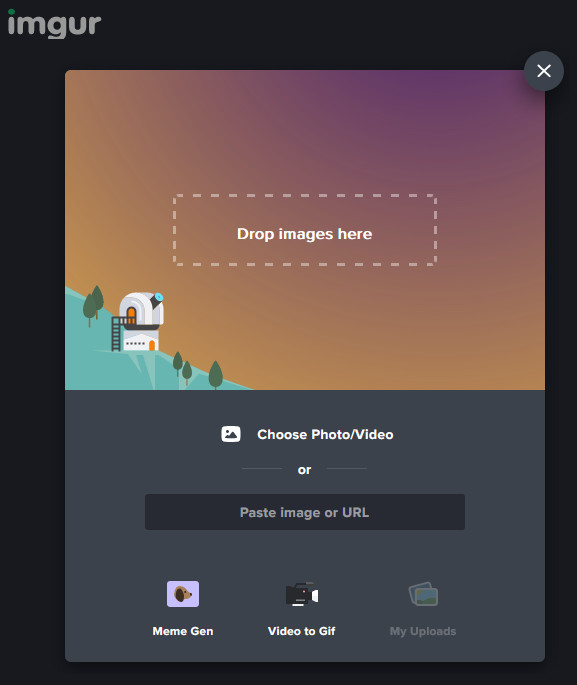 A computer user uploading an image to a file sharing service by dragging the image onto the upload target
3.4. Optimizing Images for Web Use
- Resize Images: Reduce the dimensions of your images to match the display size on your website or social media platform. This helps reduce file size and improve loading speed.
- Compress Images: Use image compression tools to reduce the file size without significant loss of quality. Tools like TinyPNG and ImageOptim can help.
- Use Responsive Images: Implement responsive images using the
<picture>element or thesrcsetattribute in the<img>tag. This allows the browser to load the appropriate image size based on the user’s device and screen resolution. - Lazy Loading: Implement lazy loading for images below the fold. This means the images are only loaded when they are about to come into view, improving initial page load time.
3.5. Common Issues and Troubleshooting
- Upload Errors: If you encounter upload errors, check your internet connection, file size limits, and file format compatibility.
- Image Quality Loss: If your images appear blurry or pixelated after uploading, ensure you are using the correct file format and compression settings.
- Storage Limits: If you run out of storage space, consider upgrading to a paid plan or using a different platform with more storage.
4. How To Create an Image URL on Different Platforms?
Creating an image URL involves a few straightforward steps, which can vary slightly depending on the platform you choose. Here’s a listicle to guide you through the process on different platforms:
4.1. General Steps
- Upload Your Image: Start by using the ‘upload image’ feature on your chosen hosting platform. This could be Imgur, Google Drive, Dropbox, or any other service that supports image hosting. Most image hosting platforms require users to upload images before obtaining a URL for sharing.
- Copy the Image Address: Once your image is uploaded, locate the URL or image address provided by the platform. This URL will serve as the direct link to your image.
- Share the URL: With the URL copied, you can now share it as needed, whether for personal use, social media, or embedding in web content.
4.2. Using Imgur
- Visit Imgur: Go to the Imgur image hosting site.
- Upload Image: Click on ‘New Post’ and upload your image by dragging it into the window or selecting a file from your computer.
- Copy Direct Link: After uploading, find the URL under ‘Direct Link’ and copy it for sharing.
4.3. Using Google Drive
- Log into Google Drive: Log into your Google account and upload the image stored on your computer to Google Drive.
- Get Link: Right-click the image file and select ‘Get link.’
- Adjust Sharing Settings: Adjust the link sharing settings to ‘Anyone with the link’ for easy access, then copy the shareable URL.
4.4. Using Dropbox
- Log into Dropbox: Log into your Dropbox account and upload the image.
- Share Button: Click the ‘Share’ button next to the file.
- Modify Link: Copy the generated link, then modify it from ‘www.dropbox.com’ to ‘dl.dropboxusercontent.com’ to create a direct URL. This process helps you convert image links for easier sharing and accessibility.
4.5. Additional Free Tools for Image Hosting
| Platform | Description |
|---|---|
| Flickr | Offers advanced features for photographers with a large community. |
| 500px | A platform for discovering and sharing incredible photos. |
| Postimage | Simple and free image hosting with options for resizing and direct linking. |
| ImageShack | Provides tools for image uploading, hosting, and sharing. |
Each platform differs slightly in how it creates URLs and how long the images are hosted, so pick what best fits your workflow. As long as you have an internet connection, you can access and share your images globally without the need for special permissions.
5. How To Create Image URLs for Business Projects?
Businesses need more than just the ability to share when it comes to creating image URLs. They need to ensure that they can upload and host the image directly on a web server. They rely on Digital Asset Management (DAM) systems and web servers, which offer powerful tools for handling extensive collections of images and producing secure URLs. These solutions enhance workflow efficiency by simplifying the organization and access of these assets.
5.1. Digital Asset Management (DAM) Systems
- Upload Images: Upload images to the DAM system.
- Set Access Permissions: Set up access permissions for the images. Users should review privacy settings on image hosting platforms to ensure they meet their requirements.
- Generate Image URLs: Generate image URLs using the system’s sharing capabilities and embed them using html code.
DAM systems improve the security of creating image URLs by offering regulated entry points and comprehensive control over extensive collections of images. This guarantees that only those with permission have visibility to the pictures housed within your digital assets repository, thus adding a reinforced tier of protection.
5.2. Benefits of Using DAM Systems
- Bulk Uploads: Upload multiple images at once.
- Metadata Tagging: Organize images with relevant metadata.
- Version Control: Track and manage different versions of images.
- Integrations: Integrate with CMS and e-commerce platforms.
5.3. Web Servers
- Upload Images: Upload images to a web server that supports direct linking.
- Store Images: Store images in directories open to public access.
- Create Direct Link: Combine the server’s domain name with the image file path to create a direct link.
This approach is particularly reliable for companies that manage their own web properties and are in search of tailored options. Web servers present a potent solution for generating URLs of images intended for business ventures, providing comprehensive command over both image files and their respective links while guaranteeing they remain accessible yet secure.
5.4. Best Practices for Using Web Servers
- Organize Files: Create a well-organized directory structure to easily manage and locate images.
- Secure Directories: Ensure that your image directories are properly secured to prevent unauthorized access.
- Optimize Images: Optimize images for web use to reduce file size and improve loading speed.
6. How To Share Image URLs on Social Media?
By streamlining the embedding process and augmenting visual appeal, sharing image URLs on social platforms can significantly enhance engagement. The use of superior quality images serves to elevate interaction levels, thereby rendering posts more captivating.
6.1. Enhancing Engagement
- Use High-Quality Images: Employ high-resolution images to make your posts visually appealing.
- Shorten URLs: Utilize shortened URLs to make links more attractive and easier to share.
- Optimize for Each Platform: Tailor your images and URLs for each social media platform to maximize engagement.
6.2. Leveraging Image Hosting Platforms
Image hosting platforms like Imgur and Flickr allow users to easily share URLs on social media. Employing high-quality images bolsters the likelihood that your posts will garner attention, be shared widely, and receive clicks—thereby amplifying your visibility on social media networks.
6.3. Tips for Sharing on Different Platforms
- Facebook: Use engaging captions and relevant hashtags to increase visibility.
- Instagram: Focus on visually appealing images and use relevant filters and editing tools.
- Twitter: Keep your captions concise and use relevant hashtags to reach a wider audience.
- Pinterest: Create visually appealing boards and pin high-quality images with detailed descriptions.
- LinkedIn: Share professional images and insights to engage with your network.
7. How To Customize Image Links with HTML?
HTML customization of image links provides the ability to dictate both the appearance and behavior of images on web pages. To create an image link, encase the <img> tag within an <a> tag, ensuring that the href attribute defines the URL. You can create a clickable image link in HTML by wrapping the <img> tag in an <a> tag. To display an image on a web page, use the <img> tag with the src attribute. Once uploaded, the image can be referenced in HTML using its URL.
7.1. Basic HTML Structure
<a href="https://example.com/image.jpg" target="_blank">
  <img alt="Description of the image" src="https://example.com/image.jpg">
</a>
7.2. Key Attributes
- href: Specifies the URL that the link points to.
- src: Specifies the URL of the image.
- alt: Provides alternative text for the image if it cannot be displayed.
- target: Specifies where to open the linked document (e.g.,
_blankfor a new tab).
7.3. Styling with CSS
Employing CSS allows for styling improvements of these image links, which can make your web pages not only look better but also more intuitive for users.
7.4. Examples of CSS Styling
- Removing Border: Remove the default border around linked images by setting
border: none;in the CSS. - Adding Hover Effects: Add hover effects to make the image link more interactive.
a img {
  border: none;
}

a:hover img {
  opacity: 0.8;
}
7.5. Advanced HTML Techniques
- Responsive Images: Use the
<picture>element or thesrcsetattribute to serve different image sizes based on screen size. - Lazy Loading: Implement lazy loading to improve page load time.
8. Image SEO Optimization: Best Practices
Optimizing images for search engines is crucial for improving website visibility and driving organic traffic. Here are some best practices to follow:
8.1. Alt Text Optimization
- Descriptive Alt Text: Write descriptive alt text for each image, providing context and relevance.
- Keyword Integration: Include relevant keywords in your alt text to improve search engine rankings.
- Accessibility: Ensure your alt text is descriptive enough for users with visual impairments.
8.2. File Name Optimization
- Descriptive File Names: Use descriptive file names that include relevant keywords.
- Avoid Generic Names: Avoid using generic file names like “image1.jpg” or “screenshot.png.”
- Use Hyphens: Separate words in the file name with hyphens instead of spaces.
8.3. Image Size and Compression
- Optimize Image Size: Reduce the file size of your images to improve page load time.
- Use Compression Tools: Use image compression tools to reduce file size without significant loss of quality.
- Choose the Right Format: Select the appropriate file format (e.g., JPEG, PNG, WebP) based on the image content.
8.4. Structured Data Markup
- Implement Schema Markup: Use schema markup to provide search engines with more information about your images.
- ImageObject Schema: Use the ImageObject schema to specify the image’s URL, name, and description.
8.5. Image Sitemap
- Create an Image Sitemap: Create an image sitemap to help search engines discover and index your images.
- Submit to Search Engines: Submit your image sitemap to search engines like Google and Bing.
8.6. Mobile Optimization
- Responsive Images: Use responsive images to ensure your images look good on all devices.
- Mobile-Friendly Design: Ensure your website has a mobile-friendly design to improve user experience.
8.7. Content Delivery Network (CDN)
- Use a CDN: Use a CDN to serve your images from multiple locations, reducing latency and improving load time.
- Global Availability: Ensure your CDN has a global presence to serve images quickly to users around the world.
9. Common Mistakes to Avoid
Creating and sharing image URLs is generally straightforward, but certain mistakes can hinder your efforts. Here are some common pitfalls to avoid:
9.1. Using Low-Quality Images
- Blurry or Pixelated Images: Avoid using low-resolution images that appear blurry or pixelated.
- Unprofessional Appearance: Ensure your images are professional and visually appealing.
9.2. Ignoring Image Optimization
- Large File Sizes: Avoid using images with large file sizes that slow down page load time.
- Uncompressed Images: Always compress your images to reduce file size without significant loss of quality.
9.3. Neglecting Alt Text
- Missing Alt Text: Ensure all your images have descriptive alt text for accessibility and SEO purposes.
- Generic Alt Text: Avoid using generic alt text that doesn’t provide context or relevance.
9.4. Overlooking Copyright Issues
- Unauthorized Use: Ensure you have the necessary rights to use the images you are sharing.
- Copyright Infringement: Avoid using copyrighted images without permission.
9.5. Using Insecure Hosting Platforms
- Unreliable Platforms: Avoid using unreliable hosting platforms that may compromise the security of your images.
- Lack of Security Features: Choose platforms with robust security features to protect your images from unauthorized access.
9.6. Not Testing Image URLs
- Broken Links: Always test your image URLs to ensure they are working correctly.
- Incorrect URLs: Double-check the URLs for accuracy before sharing them.
10. Frequently Asked Questions (FAQs)
10.1. What is the difference between a URL and a direct link?
A URL is a general web address, while a direct link points directly to a specific file, such as an image.
10.2. Can I create an image URL from my computer without uploading it to a hosting platform?
No, you need to upload the image to a hosting platform or web server to create a URL.
10.3. How do I ensure my image URL is secure?
Use a secure hosting platform with encryption and access controls to protect your images.
10.4. What file format is best for image URLs?
JPEG is suitable for photographs, PNG for graphics with transparency, and WebP for modern web use with better compression.
10.5. How can I shorten a long image URL?
Use URL shortening services like Bitly or TinyURL to create shorter, more manageable links.
10.6. Why is my image URL not working?
Check if the URL is correct, the image is still hosted on the platform, and you have the necessary permissions to access it.
10.7. How do I embed an image URL in an email?
Use the HTML <img> tag in your email’s source code to embed the image using its URL.
10.8. What are the best free image hosting platforms?
Imgur, Google Drive, and Dropbox offer free options for hosting and sharing images.
10.9. How do I track the performance of my image URLs?
Use analytics tools provided by hosting platforms or URL shortening services to track clicks and engagement.
10.10. Can I use image URLs for commercial purposes?
Yes, but ensure you have the necessary licenses and permissions for the images you are using.
Knowing how to turn a picture into a URL is a valuable skill. For quick, personal use, platforms like Imgur and Dropbox are great options. Many image hosting platforms offer free basic accounts with the option for premium upgrades. For scalable, secure, and professional image management, consider Digital Asset Management platforms or direct hosting through a web server.
Ready to elevate your photography skills and share your stunning images with the world? Visit dfphoto.net today to discover a wealth of resources, connect with a vibrant community of photographers, and find the inspiration you need to take your passion to the next level. Don’t wait, start your journey now Address: 1600 St Michael’s Dr, Santa Fe, NM 87505, United States. Phone: +1 (505) 471-6001. Website: dfphoto.net.