Creating visually appealing presentations often involves incorporating images. Whether for professional, educational, or personal slideshows, a photo collage can add dynamism and visual interest. Are you looking to create a stunning photo collage in PowerPoint? This guide from dfphoto.net will walk you through various methods to create captivating photo collages directly within PowerPoint, from simple picture layouts to imaginative designs, ensuring your presentations leave a lasting impression. Let’s dive into turning your photo collection into a visual narrative. Master photo arrangement, presentation design, photo slideshow, and unleash your creative potential.
1. Using the Picture Layout Feature
The built-in Picture Layout feature in PowerPoint offers a structured way to create photo collages, particularly useful when you want to add captions to your images. These layouts come with pre-defined text boxes, making it easy to describe each photo.
Note: This feature is not available in PowerPoint for Mac.
-
Insert and Select Photos: Begin by adding the photos you want to use to your slide. Select them in the order you want them to appear in the layout.
-
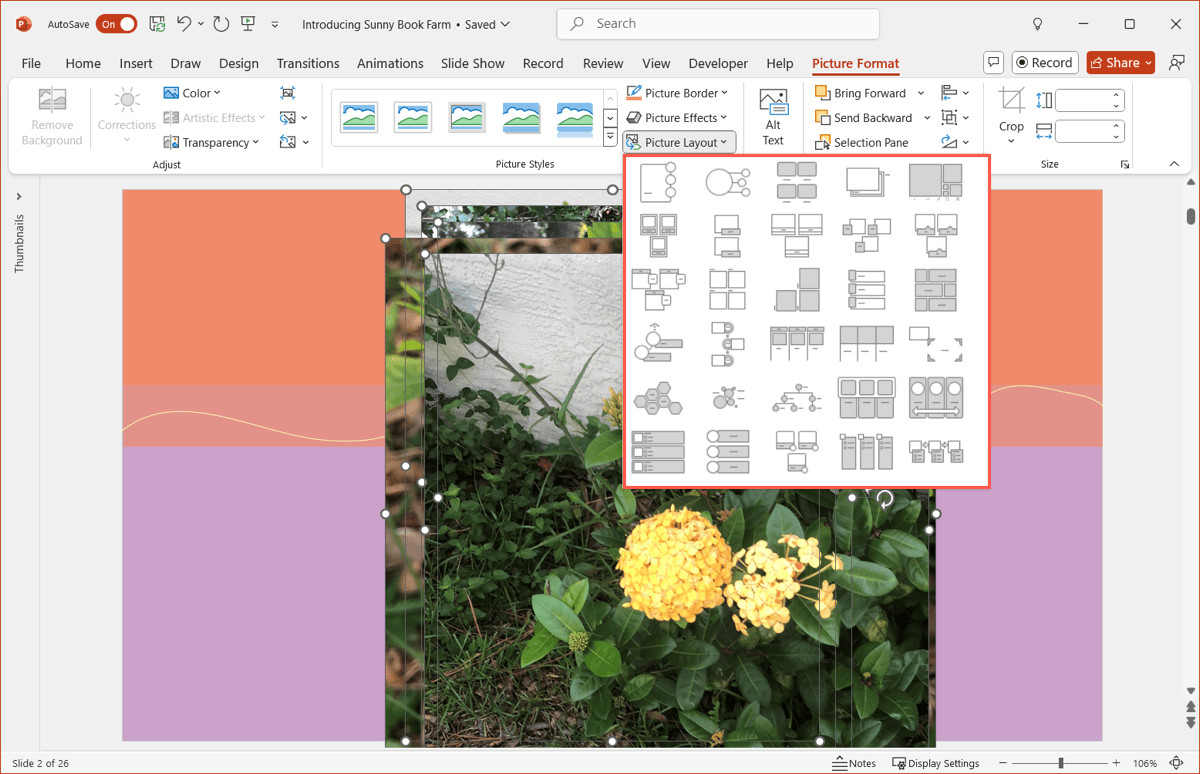
Access Picture Layout: Go to the Picture Format tab and open the Picture Layout menu, located in the Picture Styles section.
 Accessing the Picture Layout menu in PowerPoint's Picture Format tab
 -
Preview and Choose a Layout: Hover over the various layouts to see a preview on your slide, allowing you to choose the one that best fits your needs.
 Previewing different picture layouts in PowerPoint
 -
Apply the Layout: Select your desired layout. In this example, we’ll use the Picture Grid layout.
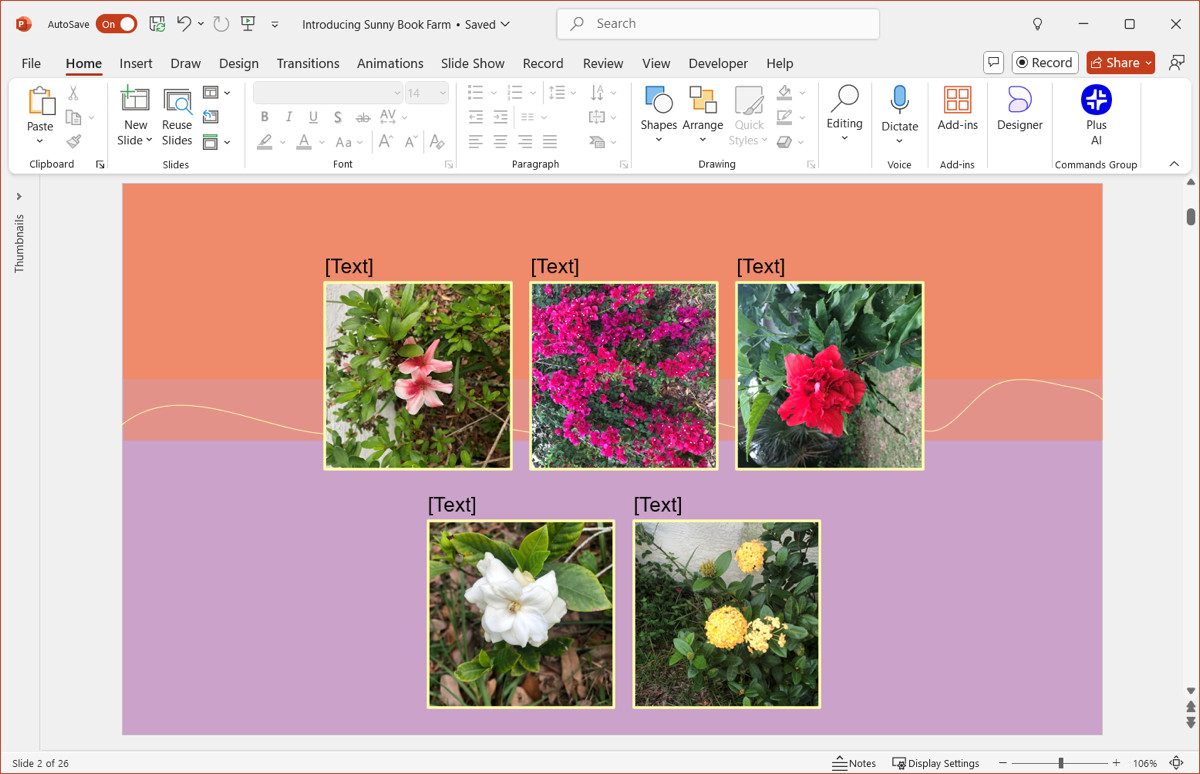 Applying the Picture Grid layout to selected photos in PowerPoint
 -
Add Captions: Type your captions into the provided text boxes. Alternatively, you can select the arrow on the left side of the slide object and enter your text in the box that appears.
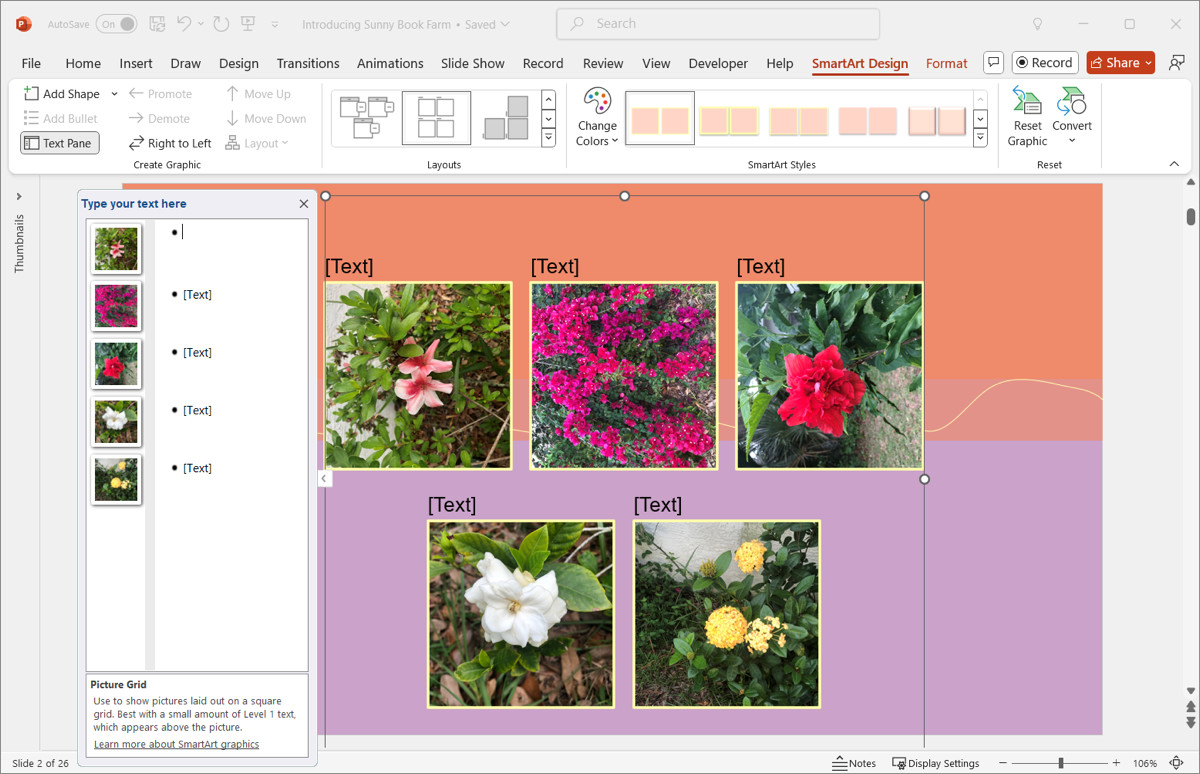 Adding captions to photos within the Picture Grid layout in PowerPoint
Pro Tip: Need to give credit to your image sources? dfphoto.net offers resources on how to properly cite photos in PowerPoint.
2. Leveraging Design Ideas for Instant Collages
Microsoft 365 subscribers can take advantage of PowerPoint’s Designer tool, which suggests various layouts for your photos. This feature automatically generates design options, making it easy to create visually appealing collages.
-
Insert Photos: Add the photos you want to use to your slide. Selecting them beforehand is not necessary.
-
Open Designer: If the Designer panel doesn’t open automatically, go to the Home or Design tab and click Designer in the ribbon.
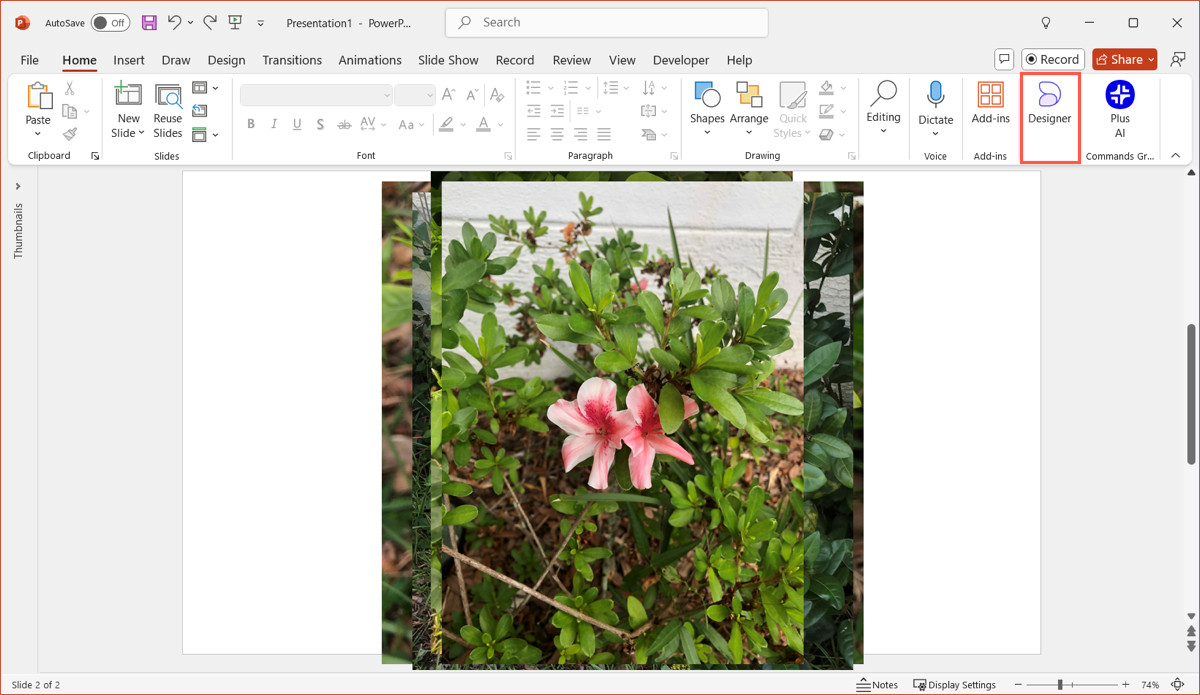 Opening the Designer tool in PowerPoint from the Home tab
 -
Choose a Design: Browse the layouts in the side panel and select one to update your slide with the new design.
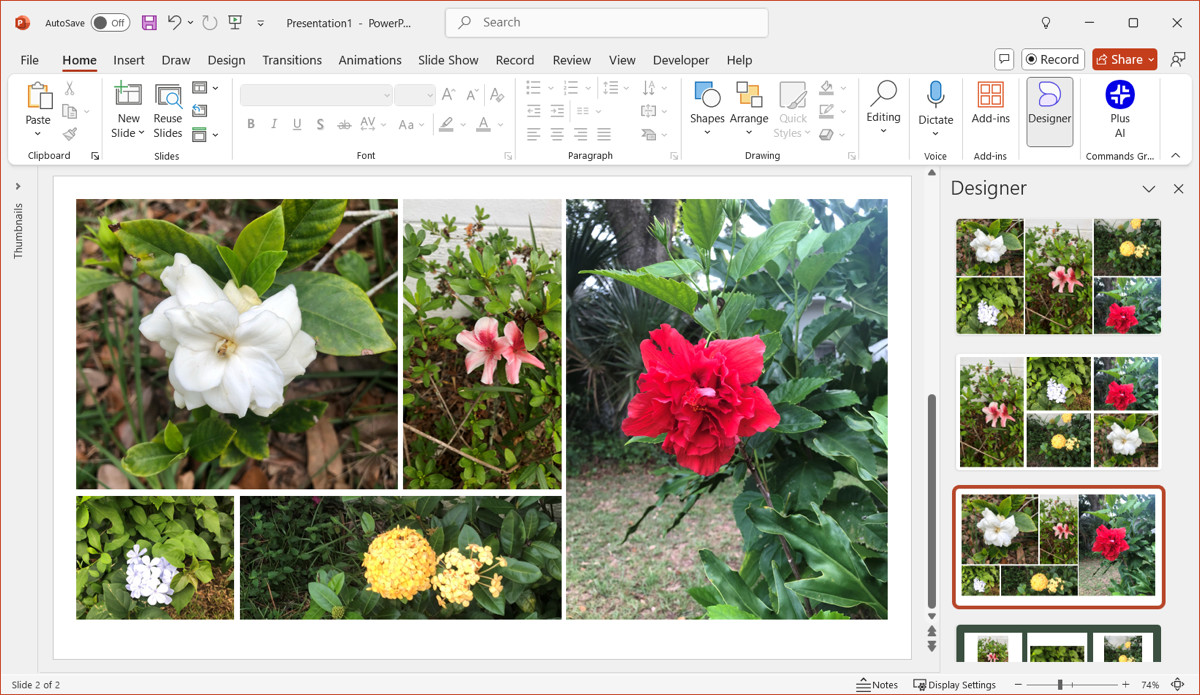 Selecting a design idea from the Designer panel in PowerPoint
If none of the initial designs appeal to you, click See more Design Ideas at the bottom of the sidebar for additional options.
3. Utilizing PowerPoint Photo Templates
For a quick and easy solution, consider using a PowerPoint photo template. These templates offer pre-designed slides perfect for creating photo albums and collages.
-
Access Templates: Go to the File tab and select New.
-
Search for Templates: Enter search terms like “picture album,” “photo collage,” or “photos” in the search box.
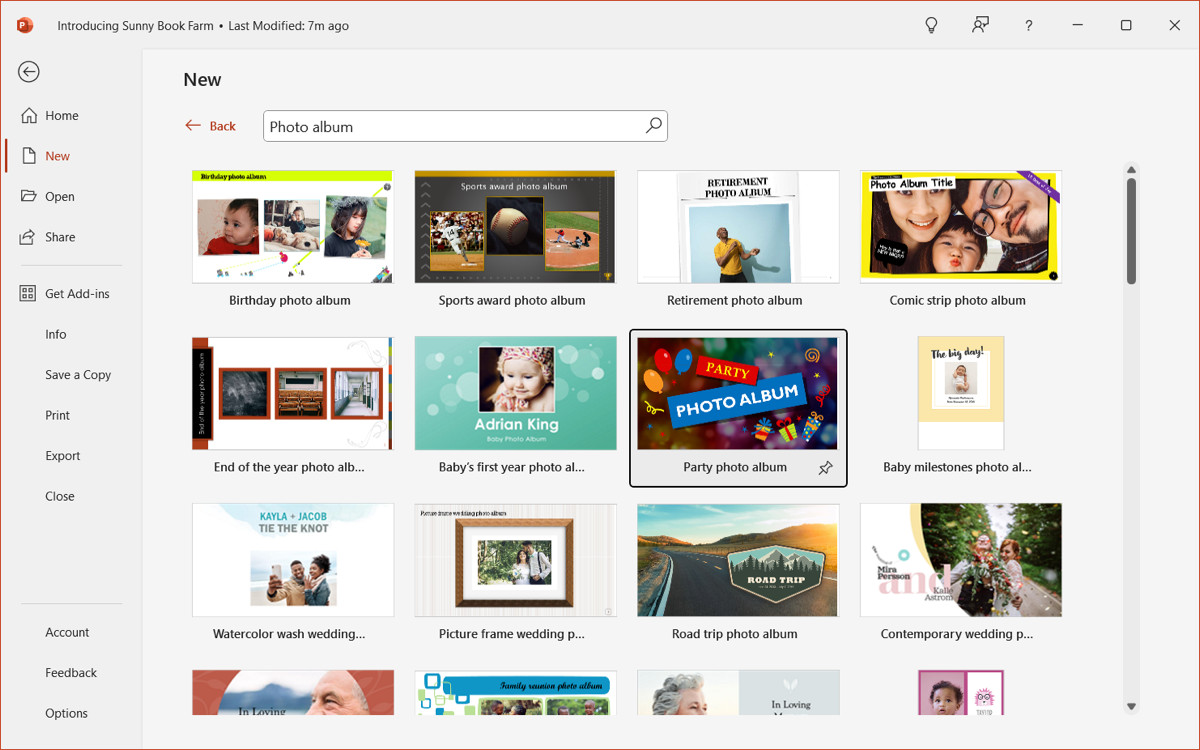 Searching for photo templates in PowerPoint
 -
Choose and Create: Select a template and click Create to use it. The available templates may vary based on your PowerPoint version and Microsoft 365 subscription status.
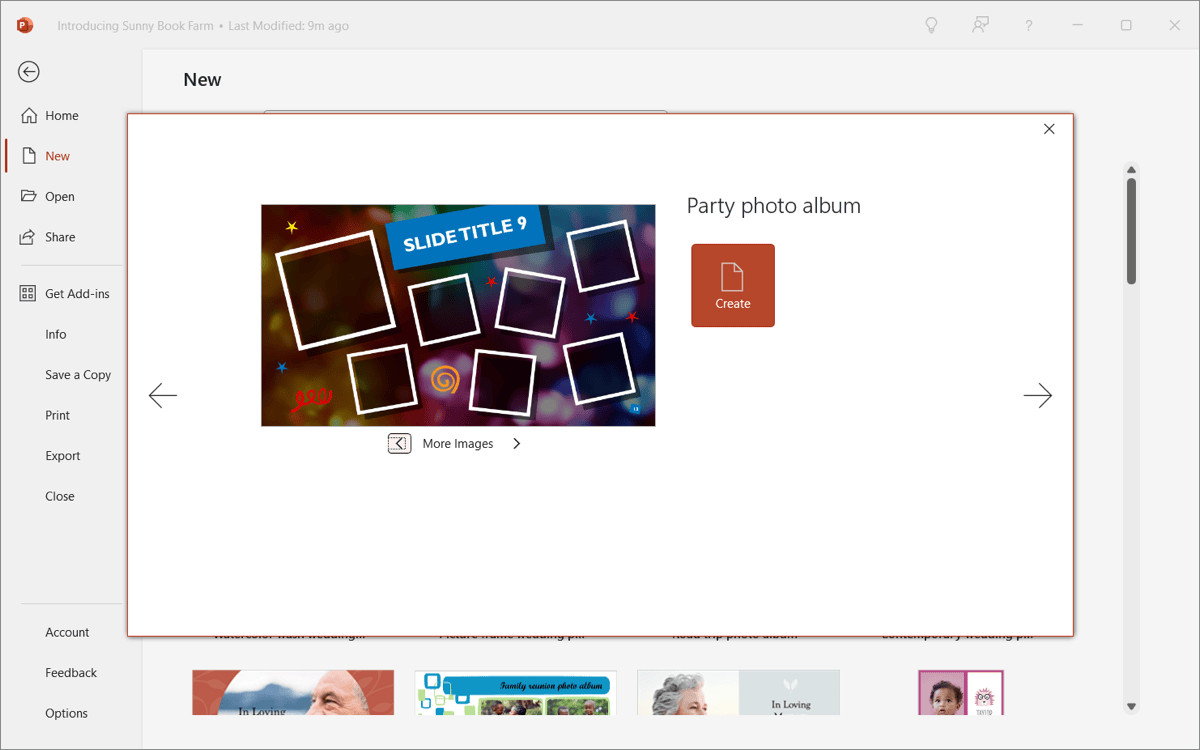 Selecting a Party Photo Album template in PowerPoint
 -
Customize Your Collage: The template will provide slides with designated spots to add your photos and vibrant backgrounds. For example, the Party Photo Album template offers several visually appealing layouts.
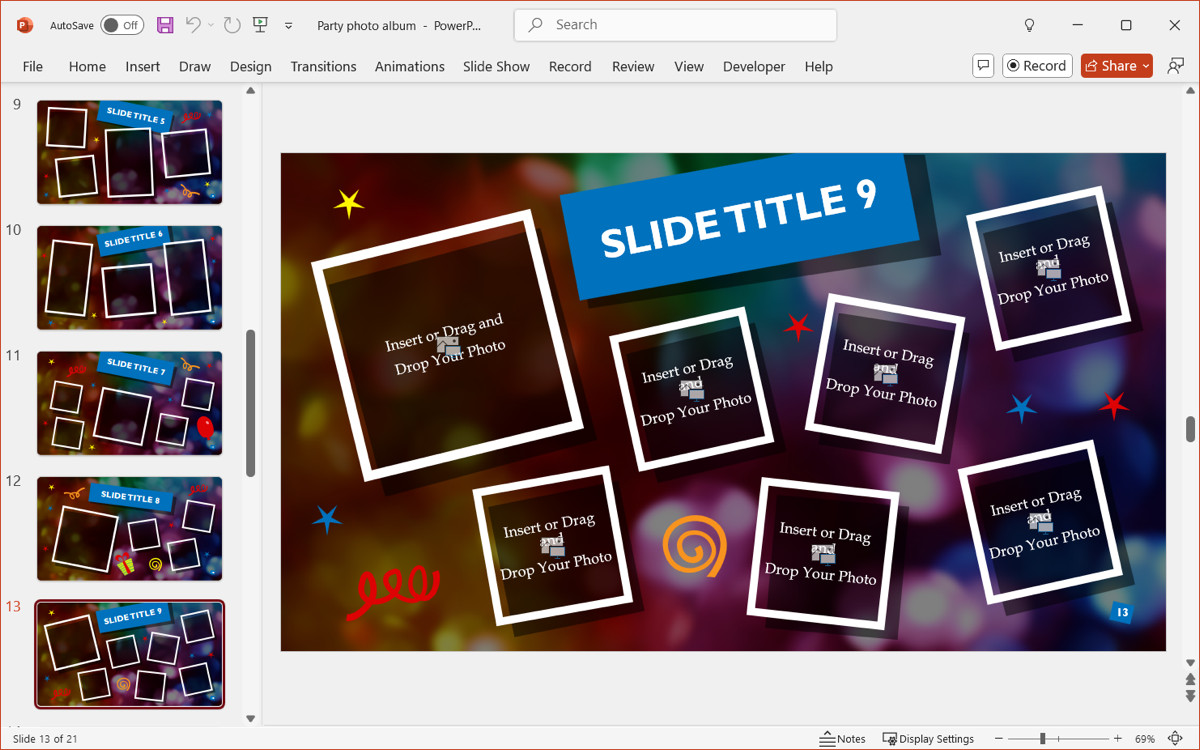 Customizing the Party Photo Album template with personal photos
You can also explore templates online at Microsoft Create, using the same search terms and downloading them for use in PowerPoint on your desktop or web version.
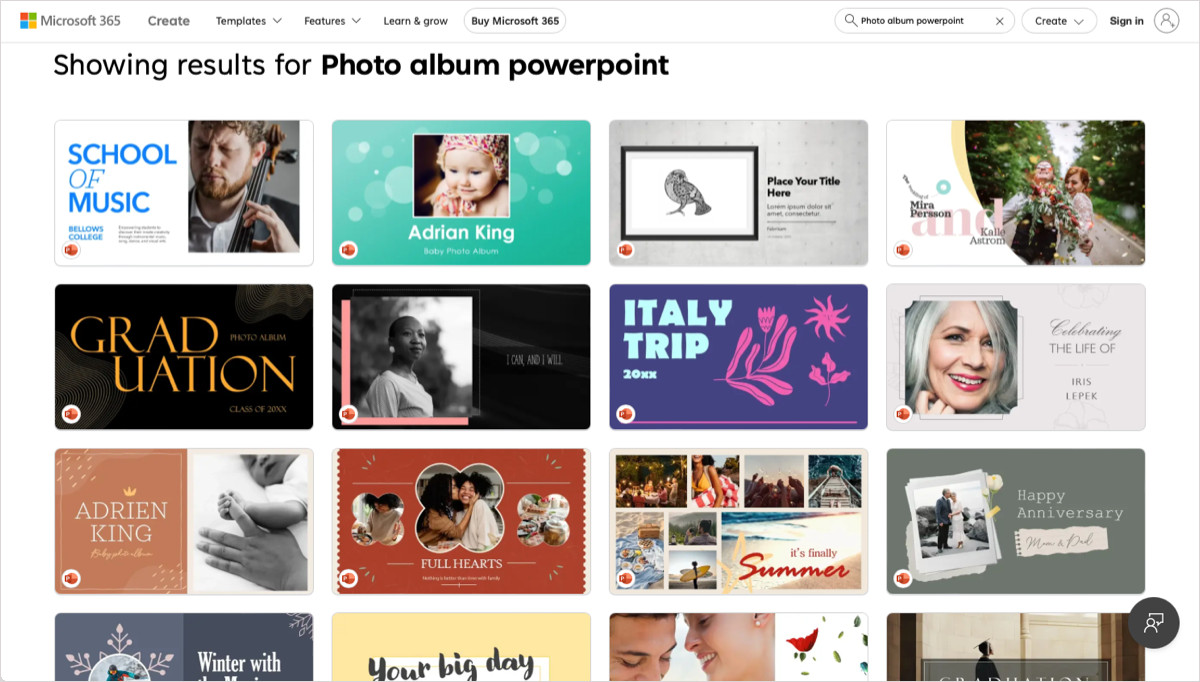 Browsing photo collage templates online at Microsoft Create
4. Creating a Photo Album with PowerPoint’s Built-In Feature
PowerPoint’s Photo Album feature allows you to create a slideshow dedicated to your photos, providing options for layout, captions, and themes.
Note: This feature is also not available in PowerPoint for Mac.
-
Access Photo Album: Go to the Insert tab, open the Photo Album menu in the Images group, and select New Photo Album.
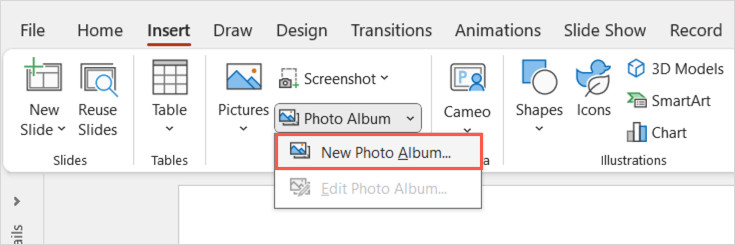 Accessing the New Photo Album feature in PowerPoint
 -
Set Up Your Album: In the pop-up window, use the File/Disk button to select your photos. They will appear in the Pictures in album box in the order you select them.
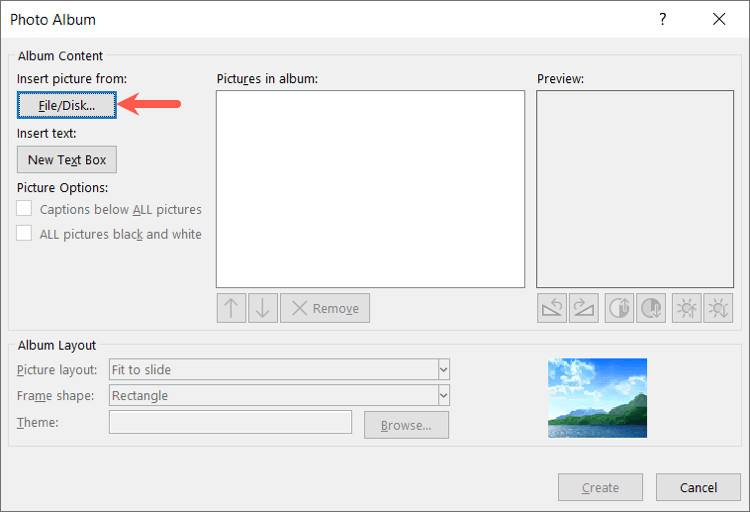 Selecting photos for the Photo Album in PowerPoint
 -
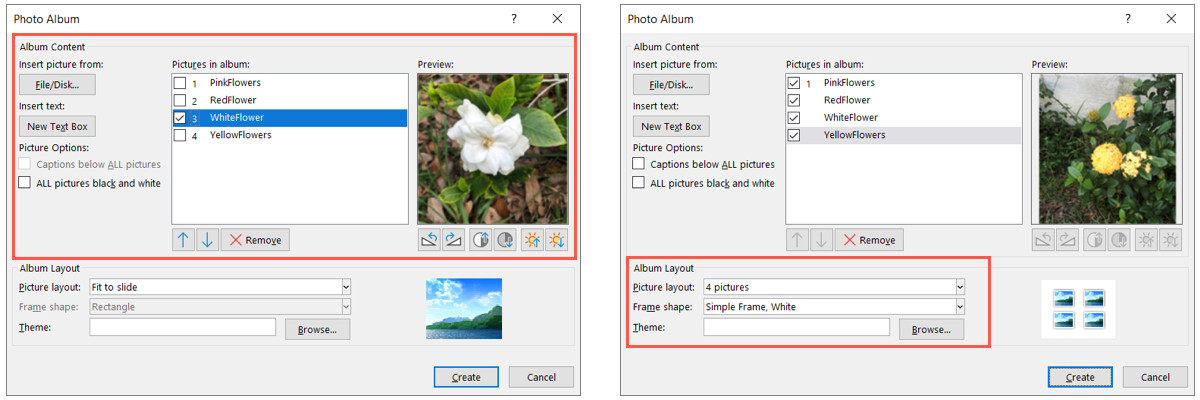
Customize the Album: Use the following options to customize your photo album:
- Add a text box: Select New Text Box to add a slide with text.
- Picture options: Check the boxes to add captions below all pictures or to display all photos in black and white.
- Change the item order: Select a photo or text box and use the up or down arrow to change its position.
- Remove an item: Select a photo or text box and click Remove.
- Rotate or correct a photo: Select the picture and use the buttons to the right below the preview to adjust it.
- Choose a layout: Open the Picture layout menu and select a layout.
- Pick a frame: Open the Frame shape menu and select a style.
- Theme: Click Browse to locate and use a saved theme for your photo album.
 Customizing the layout and theme of the Photo Album in PowerPoint
 -
Create the Album: Once you have finished setting up your album, click Create.
Your photo album will open as a new slideshow, ready for you to add text and fine-tune the appearance.
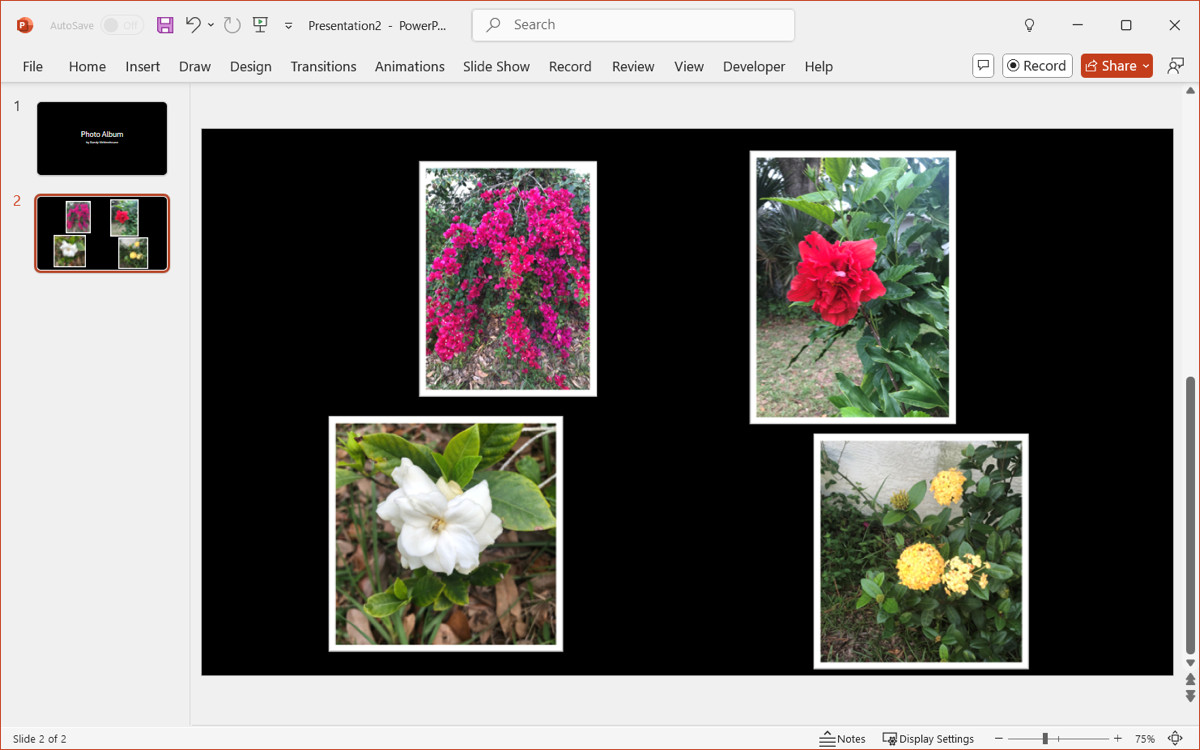 Photo Album created as a new slideshow in PowerPoint
Pro Tip: Want to change the orientation of a photo? dfphoto.net provides guides on how to flip an image in PowerPoint.
5. Unleashing Creativity with PowerPoint’s Tools
For a more personalized approach, use PowerPoint’s built-in tools to create a unique collage design. This method provides creative control and allows you to arrange photos exactly as you envision.
-
Utilize Guides and Gridlines: Go to the View tab and check the boxes for Ruler, Guides, and Gridlines in the Show section. These tools help you align your photos precisely.
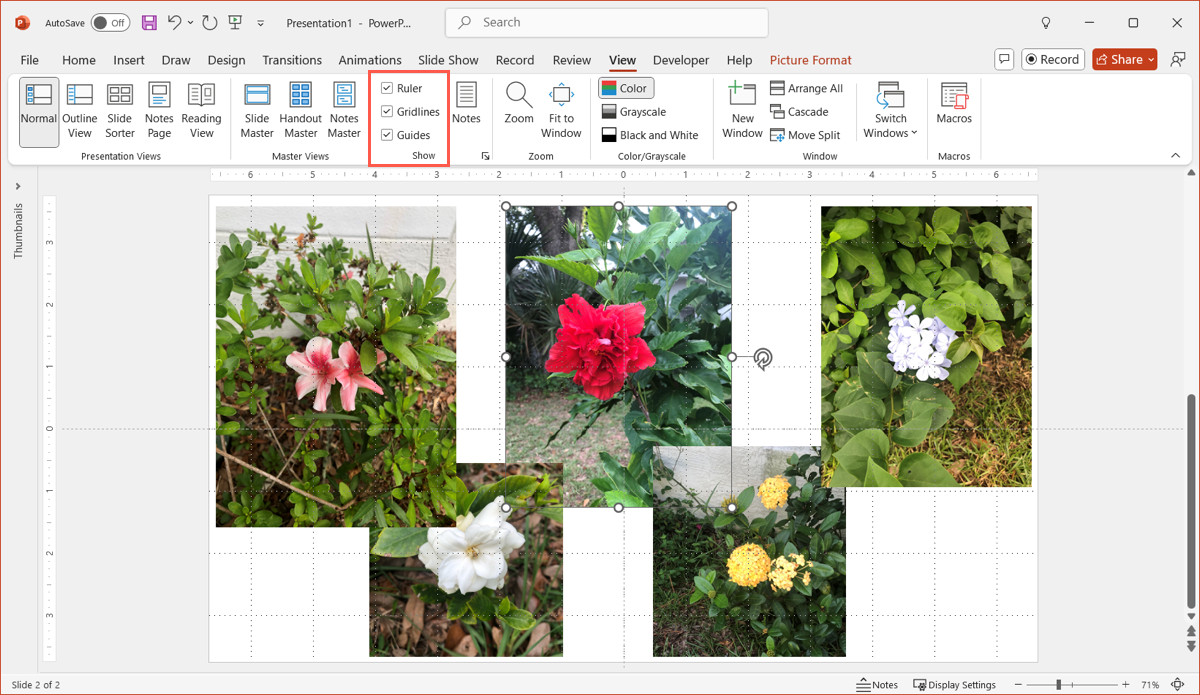 Enabling guides and gridlines for precise photo alignment in PowerPoint
 -
Crop to a Shape: Select a photo, go to the Picture Format tab, open the Crop menu, and choose Crop to Shape. Select a shape to crop your photo into that form.
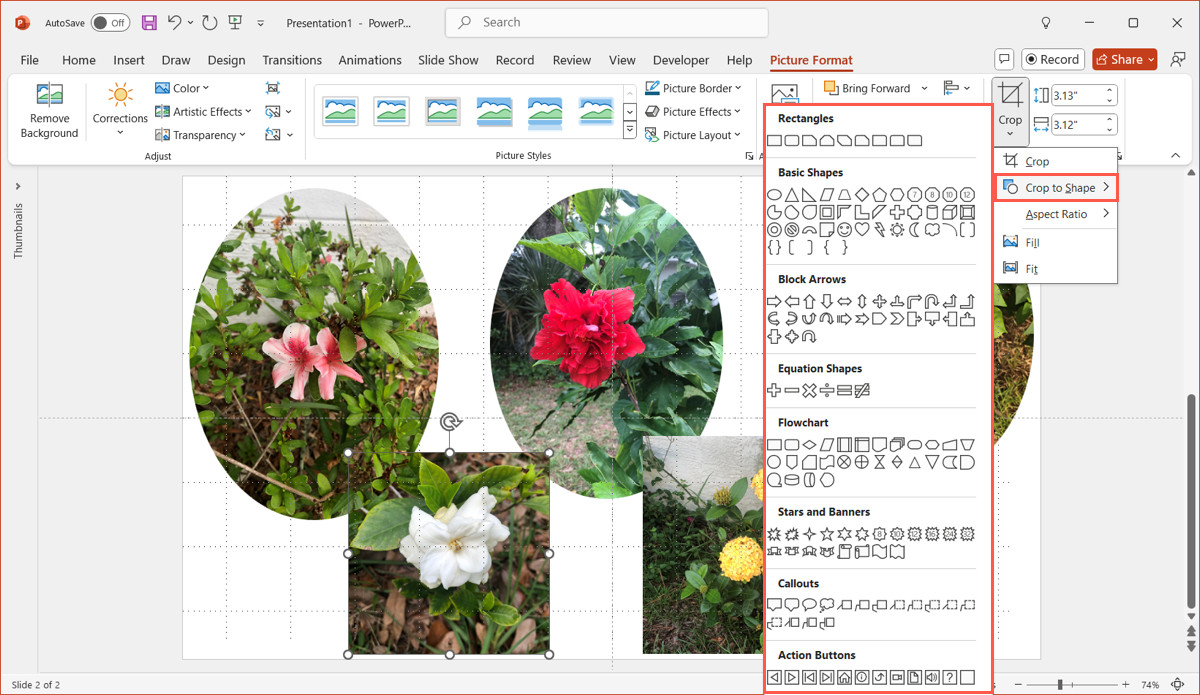 Cropping a photo to a specific shape in PowerPoint
 -
Apply Picture Styles: Select a photo, go to the Picture Format tab, and explore the options in the Picture Styles section. Add frames, shadows, reflections, or soften the edges of your photos.
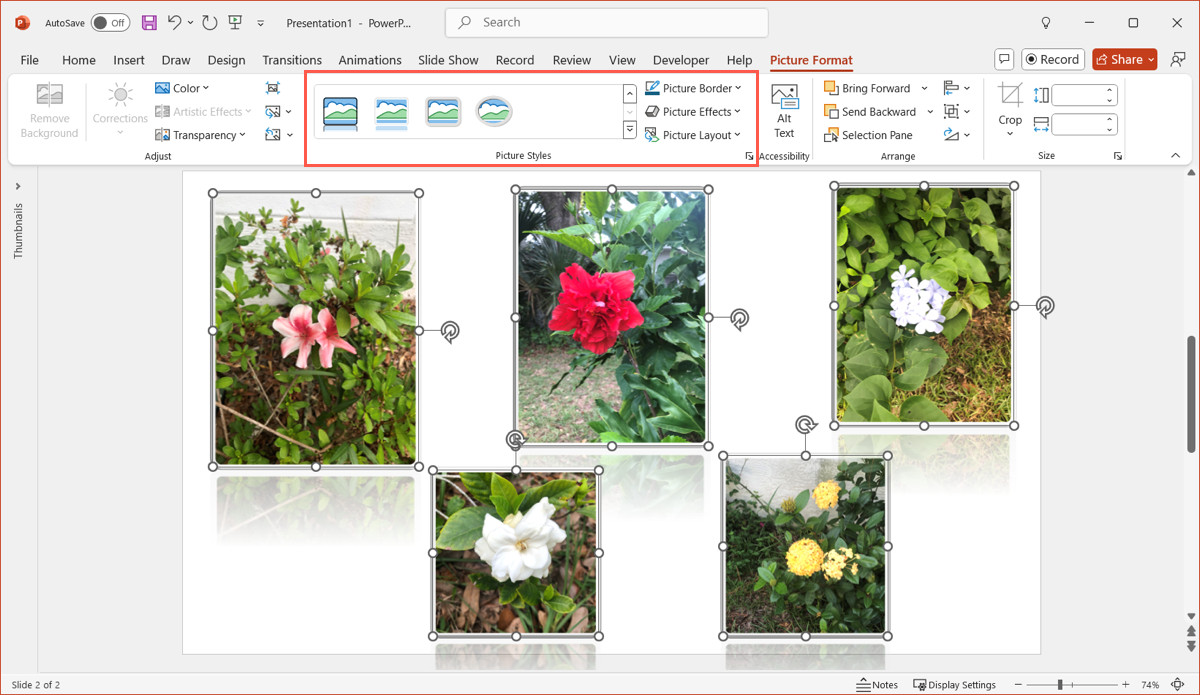 Applying various picture styles to photos in PowerPoint
You can also use the tools on the Picture Format tab to rotate photos, send images backward or forward, and adjust transparency.
Transparency: Adjusting the transparency of an image can add a new layer of creativity to your collage. It allows you to blend images together or create a layered effect. Select the picture, go to the Picture Format tab, and look for the Transparency option. Adjust the slider to achieve the desired effect.
These tools provide structure and flair, giving you the creative control to design a captivating collage.
6. Streamlining Design with Plus AI
Enhance your PowerPoint presentations with Plus AI, a tool that automates slide creation with your specified elements. Plus AI structures slides with text, images, and other visual aids like timelines and charts.
 Slides created with Plus AI showing structured layouts and visual elements
In addition to creating new slideshows, you can edit existing ones to add slides or remix layouts. Plus AI assembles elements based on your layout preferences, streamlining the design process.
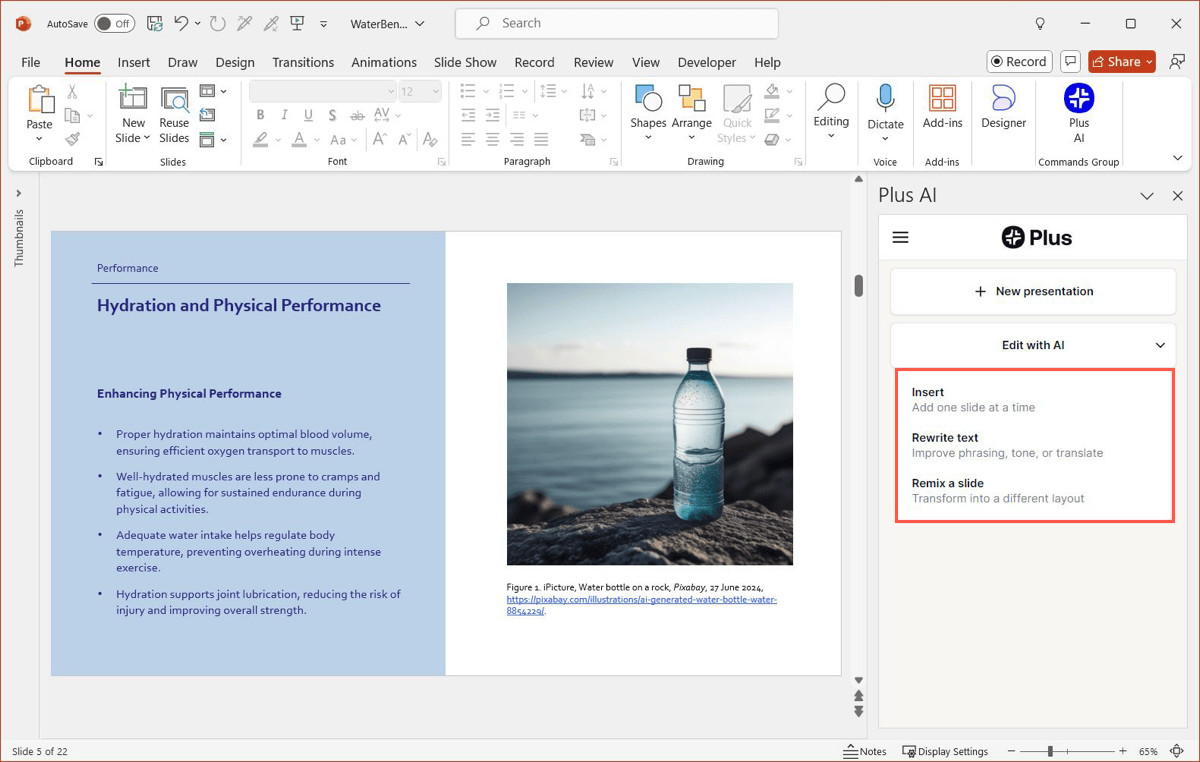 Editing existing slides with Plus AI to remix layouts and add visual elements
Explore the full capabilities of Plus AI by visiting their website, where you can browse features, a template gallery, and example presentations.
FAQ: Common Questions About Photo Collages in PowerPoint
1. How Can I Add Pictures to PowerPoint?
To insert a picture on your slide, navigate to the Insert tab and open the Pictures menu. From there, you can select an image from your device, stock images, or online sources. Choose your desired location, select the image, and click Insert.
2. How Do I Group Photos in PowerPoint?
Grouping photos allows you to treat them as a single object, making it easier to move or format them together. Select the photos you want to group, go to the Picture Format tab, and click Group in the Arrange section of the ribbon.
3. What’s the Best Way to Evenly Distribute Pictures in PowerPoint?
To evenly space your photos, select them, go to the Picture Format tab, and open the Alignment menu in the Arrange section. Choose either Distribute Horizontally or Distribute Vertically to achieve uniform spacing.
4. Can I Add Borders to My Photos in PowerPoint?
Yes, you can add borders to your photos to enhance their visual appeal. Select the photo, go to the Picture Format tab, and find the Picture Border option. From there, you can choose the color, weight, and style of the border.
5. Is It Possible to Animate a Photo Collage in PowerPoint?
Absolutely! PowerPoint allows you to animate your photo collages to make them more engaging. Select the collage or individual photos, go to the Animations tab, and choose an animation effect. You can customize the animation settings to control the timing and direction.
6. How Do I Resize Multiple Photos Simultaneously in PowerPoint?
To resize multiple photos at once, group them as described earlier. Then, select the grouped object and drag one of the corner handles to resize the entire group proportionally. This ensures that all photos maintain their relative sizes and positions.
7. What File Formats Are Best for Inserting Photos into PowerPoint?
PowerPoint supports various image file formats, but the most common and recommended ones are JPEG, PNG, and GIF. JPEG is ideal for photographs due to its efficient compression, while PNG is better for images with text or graphics because it preserves sharpness and detail.
8. How Do I Ensure My Photo Collage Doesn’t Look Cluttered?
To avoid a cluttered look, plan your layout carefully. Use the guides and gridlines to align photos neatly. Limit the number of photos on a single slide and use consistent spacing between them. Consider using a background color that complements the photos without overwhelming them.
9. Can I Add Text Overlays to My Photos in PowerPoint?
Yes, adding text overlays can enhance your collage by providing context or highlighting key points. Insert a text box, type your text, and position it over the desired photo. Adjust the font, size, and color of the text to ensure it is readable and visually appealing.
10. How Do I Save My Photo Collage as a High-Resolution Image?
To save your photo collage as a high-resolution image, go to File > Save As and choose an image format such as JPEG or PNG. Click on Options to adjust the resolution settings before saving. Selecting a higher resolution will result in a larger file size but better image quality.
Creating a photo collage in PowerPoint is a straightforward process with multiple methods to suit your creative needs. Whether you opt for built-in layouts, templates, or manual customization, PowerPoint offers the tools to create visually stunning presentations.
Ready to enhance your presentations with captivating photo collages? Visit dfphoto.net today to explore more photography tips, design inspiration, and connect with a vibrant community of photographers. Elevate your visual storytelling and make every presentation memorable! Located at 1600 St Michael’s Dr, Santa Fe, NM 87505, United States, or give us a call at +1 (505) 471-6001. Discover the art of visual presentation with dfphoto.net.
