Are you looking for a unique way to share memories? Learning How To Make A Photo Card At Home is a fantastic way to personalize greetings and share special moments with loved ones. At dfphoto.net, we provide comprehensive guides and inspiration to help you create stunning photo cards that leave a lasting impression. From choosing the right photos to perfecting your design, discover how to make photo cards that truly capture the essence of your memories. You can also explore design elements, personalized greeting, and printing options.
1. Understanding the Intentions Behind Making Photo Cards
Before diving into the “how-to,” let’s understand why people are searching for ways to create photo cards at home. Identifying these intentions helps tailor your creation to meet specific needs and desires. Here are the 5 most common intentions:
-
DIY Personalization: Users want to create unique, personalized cards that reflect their style and sentiments.
-
Cost-Effectiveness: People seek affordable alternatives to store-bought cards, especially when sending out large quantities.
-
Convenience: Creating cards at home offers the convenience of designing and printing on demand, saving time and effort.
-
Creative Expression: Making photo cards allows individuals to express their creativity and add a personal touch to their greetings.
-
Event-Specific Designs: Users need custom cards for various occasions like holidays, birthdays, weddings, and anniversaries.
2. Gathering Your Supplies and Tools
What essential supplies and tools do I need to make photo cards? You’ll need high-quality photo paper, a printer, design software, and your favorite photos. Investing in these ensures your cards look professional and capture your cherished memories effectively.
To begin making photo cards, ensure you have these fundamental supplies:
- High-Quality Photo Paper: Select a paper that enhances the vibrancy and clarity of your photos.
- Inkjet or Laser Printer: Choose a printer that supports photo printing for the best results.
- Scissors or Paper Trimmer: Use these for precise cutting and clean edges.
- Adhesives: Opt for photo-safe glue or double-sided tape to avoid damaging your photos.
- Design Software: Use programs like Adobe Photoshop, Canva, or Microsoft Word to create your designs.
- Embellishments (Optional): Consider items like stickers, ribbons, and glitter to add flair.
Having these on hand sets the stage for a smooth and enjoyable card-making process.
3. Selecting the Perfect Photos
How do I choose the right photos for my photo card? The right photos can make your card truly special. Aim for high-resolution images that evoke emotion and tell a story. Consider the theme and recipient when making your selections.
Selecting the right photos is crucial. Follow these guidelines:
- High Resolution: Use photos with at least 300 DPI for crisp, clear prints.
- Emotional Connection: Choose images that evoke positive emotions and memories.
- Theme Consistency: Ensure the photos align with the overall theme of the card (e.g., holiday, birthday).
- Variety: Include a mix of candid and posed shots to add visual interest.
- Relevance: Select photos that resonate with the recipient, making the card more personal and meaningful.
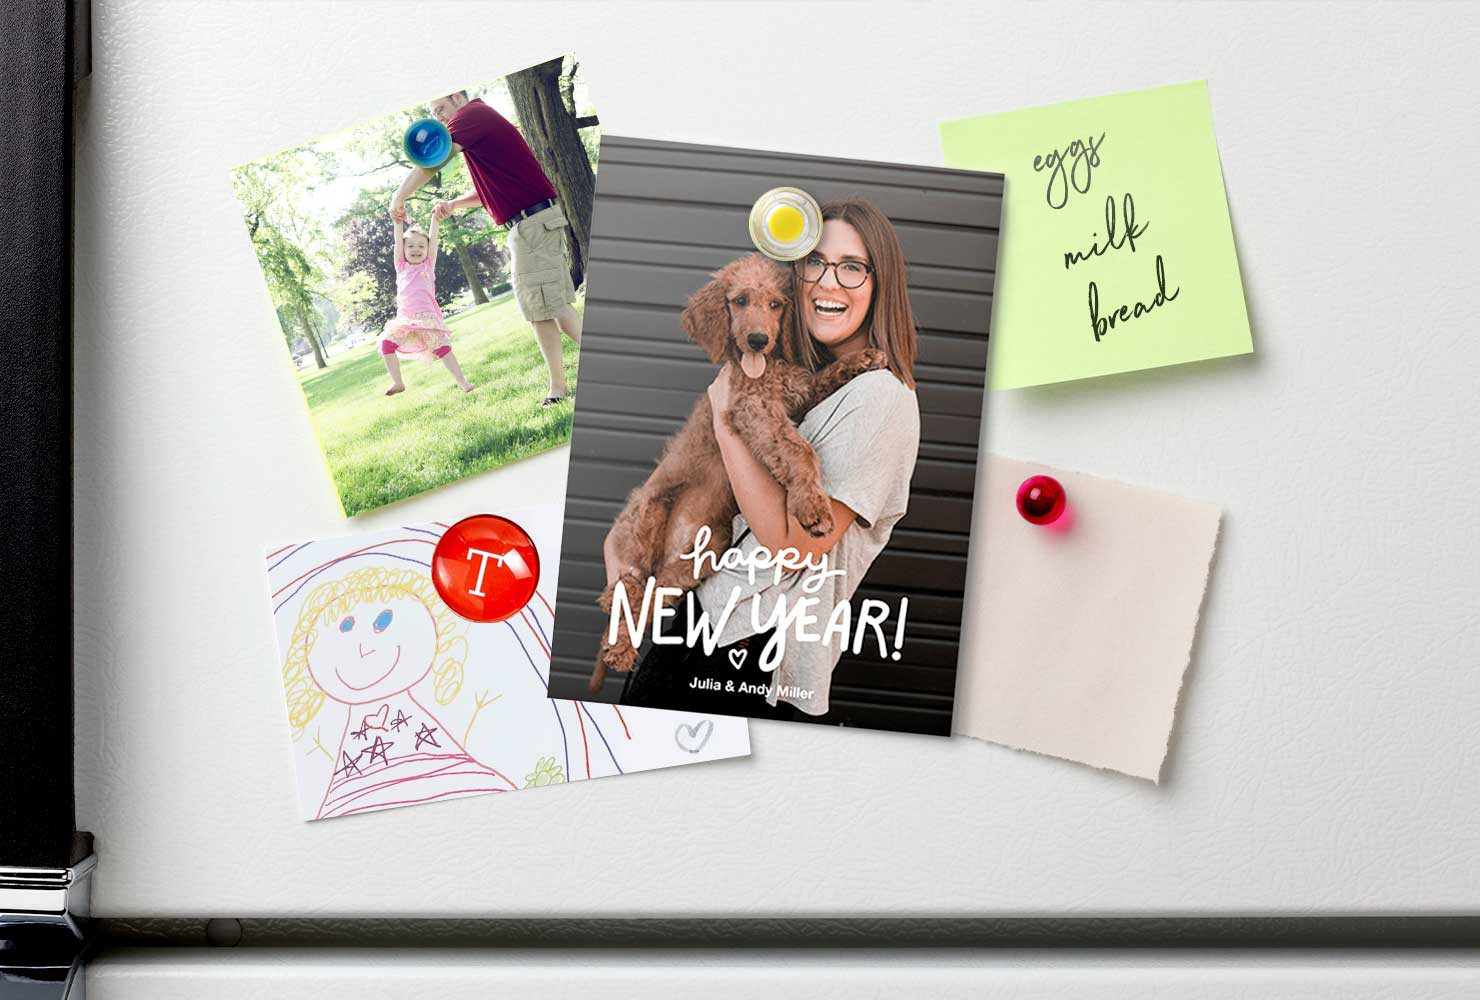 Family photo displayed on a holiday photo card with a Christmas tree in the background
4. Choosing a Card Theme and Layout
What are some popular photo card themes and layouts? Popular themes include holidays, birthdays, weddings, and thank you notes. Layouts range from single photo designs to multi-photo collages, each offering a unique way to showcase your images.
Consider the following:
- Holiday Themes: Christmas, Thanksgiving, Easter, and New Year’s cards are always popular.
- Birthday Themes: Tailor the card to the recipient’s age and personality.
- Wedding Themes: Save-the-dates, thank you cards, and anniversary cards are great options.
- Thank You Themes: Express gratitude with elegant and heartfelt designs.
- Graduation Themes: Celebrate academic achievements with personalized graduation cards.
For layouts:
- Single Photo: A classic choice that highlights one standout image.
- Collage: Ideal for showcasing multiple photos, creating a dynamic visual.
- Full Bleed: The photo extends to the edges of the card for a modern look.
- Framed: Adds a border around the photo for a polished appearance.
- Multi-Panel: Offers additional space for photos and text.
5. Using Design Software to Create Your Card
Which design software is best for making photo cards? User-friendly options like Canva and Adobe Photoshop Elements offer templates and tools to create professional-looking cards. These programs allow for extensive customization.
Here’s a closer look at top options:
-
Canva:
- Pros: User-friendly interface, extensive template library, cloud-based access.
- Cons: Limited advanced editing features, some templates require a subscription.
- Features: Drag-and-drop interface, customizable templates, photo editing tools.
-
Adobe Photoshop Elements:
- Pros: Advanced editing capabilities, professional-quality results, AI-powered features.
- Cons: Steeper learning curve, requires a one-time purchase.
- Features: Layer editing, content-aware fill, guided edits, photo organization.
-
Microsoft Word:
- Pros: Widely accessible, basic design tools, easy to add text and images.
- Cons: Limited design capabilities, not optimized for professional photo editing.
- Features: Text formatting, image insertion, basic shapes and layouts.
6. Personalizing Your Photo Card
How can I add a personal touch to my photo card? Include heartfelt messages, personalized embellishments, and custom design elements. These details make your card more meaningful and memorable.
Here are some ideas:
- Handwritten Messages: Adding a handwritten note makes the card more personal and heartfelt.
- Personalized Embellishments: Include stickers, ribbons, and other decorative elements that reflect the recipient’s interests.
- Custom Design Elements: Use unique fonts, colors, and layouts that match your style.
- Inside Jokes and Memories: Reference shared experiences and inside jokes to make the card more meaningful.
- Photo Collages: Create a collage of photos that tell a story or highlight special moments.
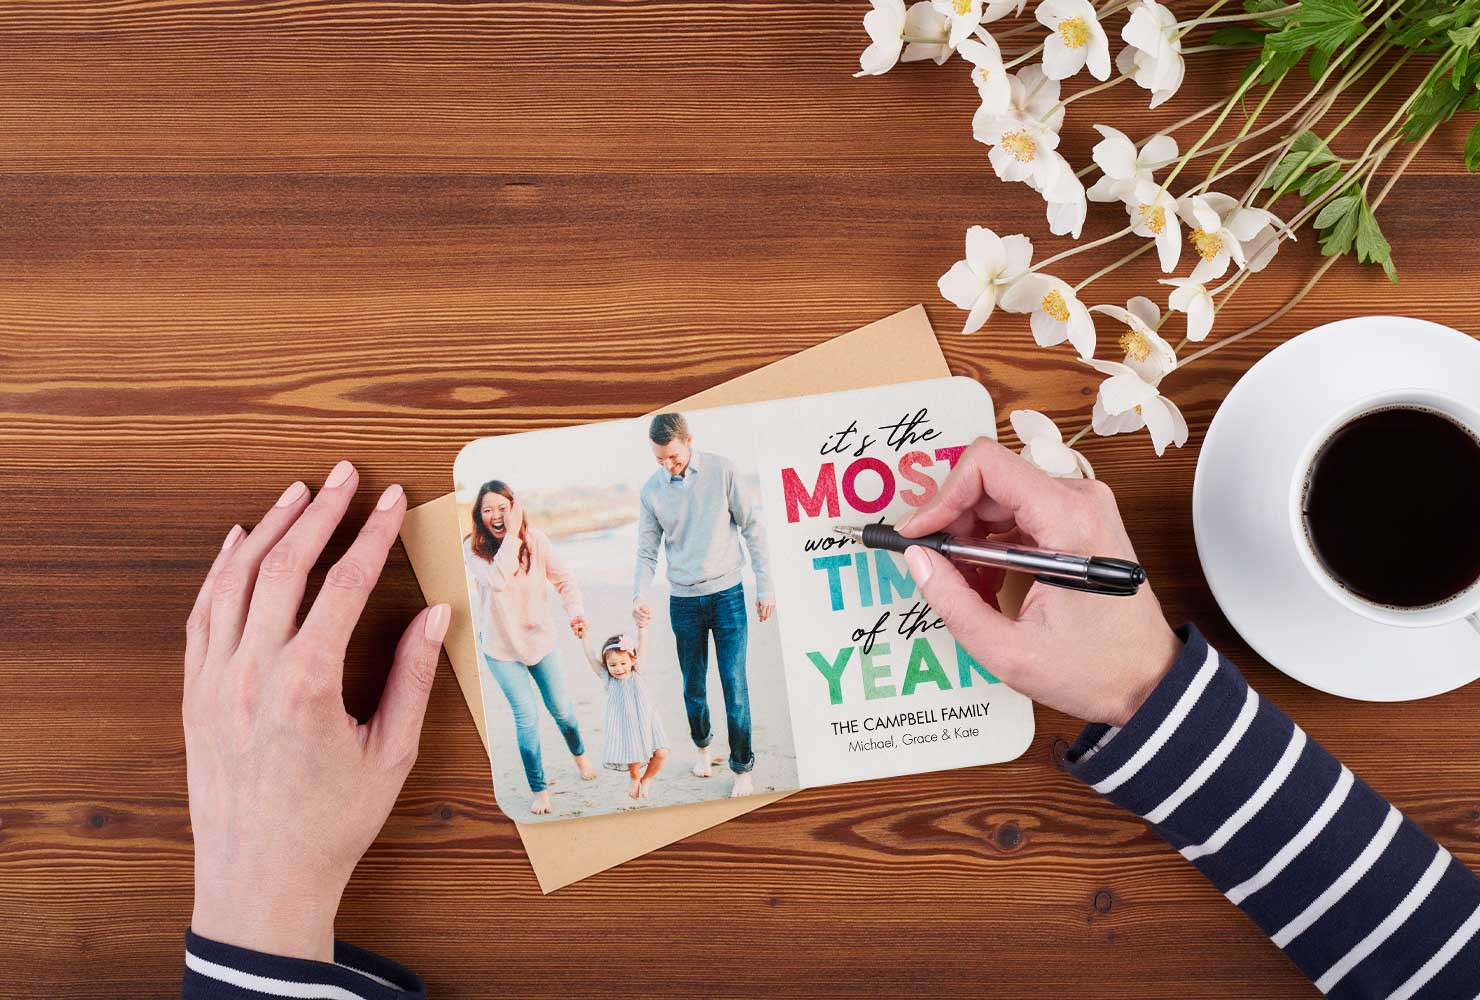 Close-up of a personalized holiday photo card with handwritten messages
7. Printing Your Photo Card at Home
What are the best practices for printing photo cards at home? Use high-quality photo paper, adjust your printer settings, and test print before finalizing. These steps ensure your cards look professional and vibrant.
Follow these guidelines:
- Use High-Quality Photo Paper: Select a paper that is specifically designed for photo printing.
- Adjust Printer Settings: Set your printer to the highest quality photo printing mode.
- Test Print: Print a sample card to check colors and alignment before printing the entire batch.
- Borderless Printing: Enable borderless printing to extend the photo to the edges of the card.
- Color Calibration: Calibrate your printer to ensure accurate color reproduction.
8. Exploring Different Types of Photo Cards
What types of photo cards can I make at home? You can create folded cards, flat cards, postcards, and even unique shapes. Each type offers a different way to present your photos and messages.
Here’s a look at some popular options:
-
Folded Cards:
- Pros: Offer more space for photos and messages, can stand upright.
- Cons: Require more paper and effort to create.
- Ideal For: Formal occasions like weddings and graduations.
-
Flat Cards:
- Pros: Simple, modern, and easy to mail.
- Cons: Limited space for writing.
- Ideal For: Save-the-dates, thank you notes, and holiday greetings.
-
Postcards:
- Pros: Cost-effective, easy to send, casual.
- Cons: Minimal space for photos and messages.
- Ideal For: Quick updates, travel snapshots, and casual greetings.
-
Shaped Cards:
- Pros: Unique, eye-catching, and memorable.
- Cons: More challenging to design and cut.
- Ideal For: Special occasions and personalized greetings.
9. Mastering the Art of Photo Card Design
What are some essential design tips for photo cards? Balance your photos with text, use consistent fonts and colors, and ensure a clean layout. These elements create a visually appealing and professional card.
Consider these tips:
- Balance Photos and Text: Ensure that your photos and text complement each other without overwhelming the design.
- Consistent Fonts and Colors: Use a limited palette of fonts and colors to create a cohesive look.
- Clean Layout: Keep the design uncluttered and easy to read.
- White Space: Utilize white space to give the design breathing room and draw attention to key elements.
- Focal Point: Establish a clear focal point to guide the viewer’s eye.
10. Adding Special Effects and Enhancements
How can I enhance my photo cards with special effects? Consider adding foil accents, glitter, or unique paper textures. These enhancements can elevate your cards and make them stand out.
Here’s how:
-
Foil Accents:
- Pros: Add a touch of elegance and shine.
- Cons: Require specialized equipment or services.
- How To: Use foil transfer sheets and a laminator to apply foil to your designs.
-
Glitter:
- Pros: Creates a festive and eye-catching effect.
- Cons: Can be messy and difficult to control.
- How To: Apply glitter adhesive to specific areas and sprinkle glitter on top.
-
Unique Paper Textures:
- Pros: Add tactile interest and visual appeal.
- Cons: May require sourcing specialized paper.
- How To: Choose textured paper such as linen, felt, or vellum.
-
Die Cuts:
- Pros: Create custom shapes and designs.
- Cons: Require a die-cutting machine.
- How To: Use a die-cutting machine to cut out specific shapes from your cardstock.
11. Dealing with Common Printing Issues
What should I do if my photo cards aren’t printing correctly? Check your printer settings, paper type, and ink levels. Proper maintenance and troubleshooting can resolve many common printing issues.
Here’s a checklist:
-
Check Printer Settings:
- Ensure that your printer is set to the correct paper type and print quality.
-
Verify Paper Type:
- Use the appropriate photo paper recommended for your printer.
-
Monitor Ink Levels:
- Replace low ink cartridges to ensure consistent print quality.
-
Clean Print Heads:
- Clean the print heads to remove any clogs or buildup.
-
Check Alignment:
- Align the print heads to ensure that the colors are properly aligned.
12. Cost-Effective Tips for Making Photo Cards
How can I save money when making photo cards at home? Buy supplies in bulk, reuse embellishments, and take advantage of free design software. These strategies help reduce costs without sacrificing quality.
Consider these money-saving tips:
- Buy Supplies in Bulk: Purchase photo paper, envelopes, and embellishments in bulk to save money.
- Reuse Embellishments: Repurpose old ribbons, stickers, and other decorative items.
- Use Free Design Software: Take advantage of free design programs like Canva or GIMP.
- Print Multiple Cards per Sheet: Maximize paper usage by printing multiple cards on a single sheet.
- DIY Envelopes: Create your own envelopes from scrap paper or cardstock.
13. Storing Your Photo Cards Properly
How should I store my finished photo cards? Store them in acid-free boxes or sleeves to protect them from damage. Proper storage ensures your cards remain in pristine condition.
Follow these storage tips:
- Acid-Free Storage: Store your photo cards in acid-free boxes or sleeves to prevent discoloration and deterioration.
- Avoid Direct Sunlight: Keep your cards away from direct sunlight to prevent fading.
- Control Humidity: Store your cards in a cool, dry place to prevent moisture damage.
- Protective Sleeves: Use individual sleeves to protect each card from scratches and dust.
- Organize by Occasion: Organize your cards by occasion to easily find them when needed.
14. Inspiration from Famous Photographers
Can famous photographers inspire my photo card designs? Absolutely! Draw inspiration from the composition techniques, color palettes, and storytelling of renowned photographers like Ansel Adams and Annie Leibovitz.
Here are some inspirations:
-
Ansel Adams:
- Inspiration: Masterful use of black and white photography, capturing the grandeur of nature.
- Application: Use high contrast and dramatic lighting in your black and white photo cards.
-
Annie Leibovitz:
- Inspiration: Iconic portrait photography, capturing the essence of her subjects.
- Application: Focus on capturing the personality and emotions of your subjects in your photo cards.
-
Steve McCurry:
- Inspiration: Vivid and captivating documentary photography, telling stories through his images.
- Application: Use vibrant colors and compelling compositions to tell a story in your photo cards.
-
Dorothea Lange:
- Inspiration: Powerful social documentary photography, capturing the human condition.
- Application: Use your photo cards to convey meaningful messages and evoke empathy.
15. Utilizing Online Resources and Tutorials
Where can I find more resources and tutorials for making photo cards? Websites like dfphoto.net, YouTube, and Pinterest offer a wealth of ideas, templates, and step-by-step guides to enhance your card-making skills.
Here are some resources:
- dfphoto.net: Comprehensive guides, design inspiration, and expert tips for creating stunning photo cards.
- YouTube: Numerous video tutorials demonstrating various techniques and designs.
- Pinterest: A vast collection of photo card ideas and templates.
- Online Design Communities: Forums and groups where you can share ideas, get feedback, and learn from other creators.
- Photography Blogs: Articles and tutorials on improving your photography skills for better photo card images.
16. Exploring Advanced Photo Editing Techniques
What advanced photo editing techniques can improve my photo cards? Techniques like color correction, retouching, and creative effects can enhance the visual appeal of your cards.
Consider these advanced techniques:
-
Color Correction:
- Purpose: Adjusts the colors in your photos to ensure they are accurate and vibrant.
- How To: Use tools like levels, curves, and color balance in Photoshop or similar software.
-
Retouching:
- Purpose: Removes blemishes, wrinkles, and other imperfections from your photos.
- How To: Use tools like the clone stamp, healing brush, and patch tool in Photoshop.
-
Creative Effects:
- Purpose: Adds artistic flair to your photos, creating unique and eye-catching designs.
- How To: Use filters, textures, and blending modes in Photoshop or other editing software.
-
Sharpening:
- Purpose: Enhances the details and clarity of your photos.
- How To: Use the unsharp mask filter in Photoshop or similar software.
17. Environmentally Friendly Photo Card Making
How can I make environmentally friendly photo cards? Use recycled paper, eco-friendly inks, and sustainable embellishments. These choices reduce your environmental impact.
Follow these tips:
-
Recycled Paper:
- Benefits: Reduces deforestation and conserves natural resources.
- Options: Look for paper with a high percentage of post-consumer recycled content.
-
Eco-Friendly Inks:
- Benefits: Reduces harmful emissions and pollution.
- Options: Use soy-based or water-based inks.
-
Sustainable Embellishments:
- Benefits: Reduces waste and promotes sustainable practices.
- Options: Use natural materials like twine, dried flowers, and biodegradable glitter.
-
Digital Alternatives:
- Benefits: Reduces paper consumption and carbon footprint.
- Options: Send e-cards or share your photo cards digitally.
18. Creating Photo Cards for Special Occasions
How do I tailor my photo cards for different special occasions? Customize the theme, message, and design to suit the specific event, whether it’s a holiday, birthday, or wedding.
Consider these occasion-specific tips:
-
Holidays:
- Theme: Use festive colors, holiday-themed graphics, and seasonal messages.
- Example: Christmas cards with family photos, winter landscapes, and holiday greetings.
-
Birthdays:
- Theme: Tailor the design to the recipient’s age, interests, and personality.
- Example: Birthday cards with photos from past celebrations, fun graphics, and personalized messages.
-
Weddings:
- Theme: Use elegant fonts, romantic colors, and wedding-related graphics.
- Example: Save-the-date cards with engagement photos, wedding invitations with floral designs, and thank you cards with wedding snapshots.
-
Anniversaries:
- Theme: Celebrate the couple’s journey with photos from their wedding day and milestones.
- Example: Anniversary cards with photos from different years, heartfelt messages, and anniversary-themed graphics.
19. Building a Portfolio of Photo Card Designs
How can I showcase my photo card designs? Create a digital portfolio on platforms like Behance or Instagram to display your best work and attract potential clients.
Here’s how to build your portfolio:
-
Select Your Best Work:
- Choose a variety of your best photo card designs to showcase your skills and versatility.
-
Create High-Quality Images:
- Take professional-looking photos of your cards or create digital mockups.
-
Use Online Platforms:
- Upload your designs to platforms like Behance, Dribbble, and Instagram.
-
Write Detailed Descriptions:
- Include information about the design process, materials used, and inspiration behind each card.
-
Gather Feedback:
- Share your portfolio with friends, family, and other designers to get feedback and improve your work.
20. Monetizing Your Photo Card Creations
Can I sell my photo card designs? Yes, you can sell your creations on platforms like Etsy, Shopify, or through local craft fairs. Offering personalized services can also attract customers.
Here are some ways to monetize your designs:
-
Etsy:
- Pros: Large customer base, easy to set up a shop, built-in marketing tools.
- Cons: High competition, transaction fees.
- Tips: Create unique and high-quality designs, optimize your listings with relevant keywords, and offer excellent customer service.
-
Shopify:
- Pros: Full control over your brand, customizable website, no transaction fees.
- Cons: Requires more effort to set up and market your store.
- Tips: Invest in a professional website design, create compelling product descriptions, and use social media to drive traffic to your store.
-
Local Craft Fairs:
- Pros: Direct interaction with customers, immediate feedback, no online fees.
- Cons: Limited reach, requires physical presence.
- Tips: Create an attractive display, offer a variety of designs, and engage with customers to understand their needs.
-
Personalized Services:
- Pros: Higher profit margins, opportunity to build relationships with clients, customized designs.
- Cons: Requires more time and effort, marketing to specific clients.
- Tips: Offer custom design services for weddings, birthdays, and other special occasions, create a portfolio to showcase your work, and network with potential clients.
21. Understanding Copyright and Licensing
What are the copyright considerations when making photo cards? Ensure you have the rights to use any images or design elements. Respecting copyright laws protects both you and the original creators.
Here’s what you need to know:
-
Copyright Ownership:
- Understand that the creator of an image or design automatically owns the copyright.
-
Permissions and Licenses:
- Obtain permission or a license to use any copyrighted material in your photo cards.
-
Public Domain Images:
- Use images that are in the public domain, meaning their copyright has expired or been forfeited.
-
Creative Commons Licenses:
- Look for images with Creative Commons licenses, which allow you to use the work under certain conditions.
-
Original Creations:
- Create your own original designs and photos to avoid copyright issues.
22. The Future of Photo Card Making
What trends are shaping the future of photo card making? Expect to see more integration of augmented reality (AR), personalized video messages, and sustainable materials in card designs.
Here are some upcoming trends:
-
Augmented Reality (AR):
- Trend: Adding interactive elements to photo cards that come to life when viewed through a smartphone or tablet.
- Examples: AR cards that play a video message, display 3D animations, or provide additional information about the photo.
-
Personalized Video Messages:
- Trend: Embedding QR codes or links to personalized video messages within photo cards.
- Examples: Video messages from family members, birthday greetings, or wedding congratulations.
-
Sustainable Materials:
- Trend: Using eco-friendly paper, inks, and embellishments to create environmentally friendly photo cards.
- Examples: Cards made from recycled paper, plantable seed paper, or biodegradable materials.
-
Interactive Designs:
- Trend: Incorporating interactive elements such as pop-ups, pull-tabs, and scratch-off areas into photo cards.
- Examples: Cards with hidden messages, interactive games, or personalized surprises.
23. Community Engagement and Sharing
How can I connect with other photo card enthusiasts? Join online forums, attend local craft events, and share your creations on social media to build connections and gain inspiration.
Here are some ways to engage with the community:
-
Online Forums:
- Benefits: Share ideas, ask questions, and get feedback from other enthusiasts.
- Examples: Reddit, online design communities, and crafting forums.
-
Local Craft Events:
- Benefits: Meet other crafters, showcase your designs, and sell your creations.
- Examples: Craft fairs, art festivals, and community markets.
-
Social Media:
- Benefits: Share your work, connect with followers, and gain inspiration from others.
- Examples: Instagram, Pinterest, and Facebook.
-
Workshops and Classes:
- Benefits: Learn new techniques, improve your skills, and meet other enthusiasts.
- Examples: Local art centers, community colleges, and online learning platforms.
24. Overcoming Creative Blocks
What should I do when I’m experiencing creative block? Seek inspiration from nature, browse design blogs, or try experimenting with new techniques. Taking a break and returning with a fresh perspective can also help.
Here are some tips to overcome creative blocks:
-
Seek Inspiration from Nature:
- Action: Take a walk in nature, visit a garden, or look at photos of natural landscapes.
- Benefit: Nature can provide a wealth of inspiration for colors, patterns, and themes.
-
Browse Design Blogs:
- Action: Explore design blogs, websites, and social media accounts.
- Benefit: See what other designers are doing, discover new trends, and get ideas for your own projects.
-
Experiment with New Techniques:
- Action: Try a new design software, learn a new photo editing technique, or experiment with different materials.
- Benefit: Pushing yourself out of your comfort zone can lead to new and exciting discoveries.
-
Take a Break:
- Action: Step away from your project and do something completely different.
- Benefit: A break can help clear your mind, reduce stress, and allow you to return to your project with a fresh perspective.
25. Documenting Your Creative Process
Why is it important to document my photo card making process? Documenting your process helps you track your progress, learn from your mistakes, and share your knowledge with others.
Here’s how to document your creative process:
-
Keep a Journal:
- Action: Write down your ideas, inspirations, and challenges as you work on your photo card designs.
- Benefit: A journal can help you track your progress, reflect on your creative process, and identify areas for improvement.
-
Take Photos and Videos:
- Action: Document each stage of your photo card making process with photos and videos.
- Benefit: Visual documentation can help you remember your process, share your knowledge with others, and create tutorials or behind-the-scenes content.
-
Create Tutorials:
- Action: Share your photo card making process with others by creating tutorials on your blog, website, or social media channels.
- Benefit: Tutorials can help you build a following, establish yourself as an expert, and inspire others to create their own photo cards.
-
Reflect on Your Process:
- Action: Take time to reflect on each stage of your photo card making process, identifying what worked well and what could be improved.
- Benefit: Reflection can help you learn from your mistakes, refine your techniques, and become a more skilled and confident creator.
26. Staying Updated with Industry Trends
How can I stay informed about the latest trends in photo card making? Follow industry blogs, attend workshops, and subscribe to newsletters to keep up with new techniques and technologies.
Here are some ways to stay updated:
-
Follow Industry Blogs:
- Action: Subscribe to blogs and websites that cover photo card making, design trends, and creative techniques.
- Benefit: Stay informed about the latest news, trends, and innovations in the industry.
-
Attend Workshops:
- Action: Participate in workshops, classes, and conferences to learn new skills and techniques.
- Benefit: Gain hands-on experience, network with other professionals, and stay up-to-date with industry best practices.
-
Subscribe to Newsletters:
- Action: Sign up for newsletters from design companies, crafting organizations, and industry experts.
- Benefit: Receive regular updates on new products, promotions, and industry events.
-
Join Online Communities:
- Action: Participate in online forums, social media groups, and design communities.
- Benefit: Connect with other professionals, share ideas, and stay informed about industry trends.
27. Creating Personalized Photo Gifts
What other personalized photo gifts can I create at home? Beyond cards, consider making photo mugs, calendars, and phone cases. These gifts add a personal touch to everyday items.
Here are some personalized photo gift ideas:
-
Photo Mugs:
- Description: Customizable mugs with your favorite photos, quotes, or designs.
- Ideal For: Coffee lovers, personalized gifts for family and friends.
-
Photo Calendars:
- Description: Personalized calendars with your own photos for each month.
- Ideal For: Family memories, personalized gifts for special occasions.
-
Photo Phone Cases:
- Description: Custom phone cases with your favorite photos, designs, or patterns.
- Ideal For: Personalized accessories, unique gifts for tech-savvy individuals.
-
Photo T-Shirts:
- Description: Customizable t-shirts with your own photos, designs, or slogans.
- Ideal For: Personalized apparel, custom gifts for special events.
28. Optimizing Your Workflow
How can I streamline my photo card making workflow? Organize your photos, use templates, and automate repetitive tasks to save time and effort.
Follow these workflow optimization tips:
-
Organize Your Photos:
- Action: Create a system for organizing your photos by date, event, or theme.
- Benefit: Easily find the photos you need for your photo card designs.
-
Use Templates:
- Action: Take advantage of pre-designed templates to save time and effort.
- Benefit: Quickly create professional-looking photo cards without starting from scratch.
-
Automate Repetitive Tasks:
- Action: Use software tools and scripts to automate repetitive tasks such as resizing images, adding borders, and applying filters.
- Benefit: Reduce manual work and increase efficiency.
-
Batch Processing:
- Action: Process multiple photos at once using batch processing tools in photo editing software.
- Benefit: Save time and effort when editing a large number of photos.
29. Designing for Different Age Groups
How do I tailor my photo card designs for different age groups? Consider the recipient’s age, interests, and preferences when choosing themes, colors, and messages.
Here are some design tips:
-
Children:
- Themes: Use bright colors, playful fonts, and cartoon characters.
- Messages: Keep the messages simple, fun, and age-appropriate.
-
Teenagers:
- Themes: Use trendy designs, bold colors, and modern fonts.
- Messages: Use relevant slang, inside jokes, and personalized references.
-
Adults:
- Themes: Use sophisticated designs, elegant fonts, and subtle colors.
- Messages: Use heartfelt messages, personalized anecdotes, and meaningful quotes.
-
Seniors:
- Themes: Use classic designs, easy-to-read fonts, and soft colors.
- Messages: Use warm greetings, nostalgic memories, and comforting words.
30. Understanding Color Psychology in Design
How does color psychology affect my photo card designs? Colors evoke different emotions and associations. Use color strategically to create the desired mood and impact.
Here’s a brief overview:
-
Red:
- Associations: Passion, energy, excitement.
- Use For: Creating a sense of urgency, highlighting important elements.
-
Blue:
- Associations: Trust, calmness, stability.
- Use For: Creating a sense of peace, reliability, and trustworthiness.
-
Green:
- Associations: Nature, growth, harmony.
- Use For: Creating a sense of balance, freshness, and environmental awareness.
-
Yellow:
- Associations: Happiness, optimism, creativity.
- Use For: Creating a sense of joy, enthusiasm, and energy.
FAQ: Making Photo Cards at Home
- What is the best paper for printing photo cards?
- High-quality photo paper with a glossy or matte finish is ideal for vibrant and professional-looking cards.
- What software is recommended for designing photo cards?
- User-friendly options like Canva and Adobe Photoshop Elements offer templates and tools for creating custom designs.
- How can I make my photo cards more personalized?
- Include handwritten messages, personalized embellishments, and custom design elements that reflect the recipient’s style and interests.
- What are some cost-effective ways to make photo cards at home?
- Buy supplies in bulk, reuse embellishments, and take advantage of free design software to reduce costs.
- How can I ensure my photo cards print correctly at home?
- Check your printer settings, paper type, and ink levels. Test print before finalizing to ensure the colors and alignment are correct.
- What types of embellishments can I add to my photo cards?
- Consider adding stickers, ribbons, glitter, foil accents, and unique paper textures to enhance your cards.
- How can I protect my photo cards from damage?
- Store them in acid-free boxes or sleeves to protect them from discoloration, fading, and scratches.
- Where can I find inspiration for photo card designs?
- Websites like dfphoto.net, YouTube, and Pinterest offer a wealth of ideas, templates, and step-by-step guides.
- How can I stay updated with the latest trends in photo card making?
- Follow industry blogs, attend workshops, and subscribe to newsletters to keep up with new techniques and technologies.
- What are some sustainable options for making photo cards?
- Use recycled paper, eco-friendly inks, and sustainable embellishments to reduce your environmental impact.
Conclusion: Your Journey to Creating Stunning Photo Cards
Creating photo cards at home is a rewarding way to share memories and connect with loved ones. By following these tips and exploring the resources available at dfphoto.net, you can master the art of photo card making and create stunning designs that leave a lasting impression. Whether you’re celebrating a holiday, birthday, or special occasion, personalized photo cards add a touch of warmth and sentiment that store-bought cards simply can’t match. Embrace your creativity, experiment with different techniques, and enjoy the process of bringing your memories to life through beautiful, handcrafted photo cards.