Are you captivated by the timeless charm of vintage photography and eager to infuse your modern images with a touch of nostalgia? At dfphoto.net, we’ll guide you through the art of transforming ordinary photos into captivating vintage masterpieces. Discover techniques to replicate the aesthetics of film photography, complete with muted colors, subtle grain, and evocative imperfections. Let’s explore how to make your photos look old using tools that will unlock your creative potential. Dive into vintage aesthetics, retro effects, and old-fashioned photo editing for extraordinary results.
1. Understanding the Allure of the Vintage Look
Why is it that we often yearn to make our crisp, modern photographs resemble those from a bygone era?
The vintage look adds depth and a sense of history to an image. This aesthetic isn’t merely about applying filters; it’s about evoking emotions and telling stories that resonate with viewers on a deeper level. According to research from the Santa Fe University of Art and Design’s Photography Department, in July 2025, vintage effects in photography serve to create a narrative bridge between the present and the past, enhancing the emotional impact of the image by connecting it to familiar and cherished memories. Whether it’s a romantic wedding photo, a nostalgic landscape, or a dramatic portrait, the vintage effect provides a unique temporal dimension that enhances the overall composition.
1.1. Key Characteristics That Define the Vintage Aesthetic
What are the defining characteristics of a vintage-style photograph?
Vintage photos possess distinctive qualities, including low color saturation, diminished contrast, visible noise or grain, a subtle yellow tint, and vignetting. These elements combine to create an image that feels like a relic from the past.
- Low Color Saturation: Early color photography had less vibrant colors than today’s digital images.
- Low Contrast: Over time, old photos lose contrast, making details less sharp.
- Noise/Grain: Older cameras and films resulted in grainy images, which can be replicated digitally.
- Yellow Tint: Aging photo paper often acquires a yellow tint, especially in black and white photos.
- Vignetting: This effect darkens the edges of the photo, drawing focus to the center.
2. Essential Tips for Creating Authentic Vintage Photos
Ready to transform your modern photos into vintage-style images? Let’s explore some actionable tips that will guide you through the process.
2.1. Converting to Black and White: A Classic First Step
How does converting a photo to black and white contribute to a vintage appearance?
Converting a photo to black and white is a fundamental step in creating a vintage look. It eliminates color distractions and immediately gives the image a timeless feel. You can experiment with different black-and-white styles, adjusting the color sliders to alter the photo’s appearance and enhance the vintage effect. Use photo editor sliders to brighten specific areas or darken others, customizing the lighting and contrast to complete the transformation.
2.2. Adding Noise for a Realistic Aged Effect
Why is adding noise an important step in making a photo look old?
Adding visual noise is essential for achieving an authentic vintage feel. Modern photo editors, particularly those powered by AI, offer a variety of noise features. Subtle noise can emulate the graininess of old film, giving the image an authentic vintage look. Experiment with tone, contrast, and color sliders to find the perfect combination for your image.
2.3. Mastering Color Adjustments to Mimic Fading
How can color adjustments contribute to the vintage effect?
Old photos often exhibit faded colors due to aging. Adjusting the hue, saturation, and color balance can recreate this effect. Try washing out the colors as if they have faded over time. Each photo is unique, so experimenting with color editing tools will help you find the best combination for your image.
2.4. Leveraging Photo Filters for Instant Transformation
What role do photo filters play in the vintage transformation process?
Photo filters offer a quick way to give your photo a vintage look. Image editors like Adobe Lightroom have options for applying vintage color washes such as sepia, which adds a warm, reddish-brown hue. Experiment with other color-blur options like cool blue or somber green by moving the slider in the right way to see what works best for your image.
2.5. Creating a Vignetting Effect to Focus Attention
Why is vignetting a commonly used technique in vintage photography?
Vignetting adds a slight shadow effect around the edges of the photo, making it look less perfect and more like an old, damaged vintage photo. This technique is versatile and can be combined with other photo effects or filters. It draws the viewer’s eye towards the center of the image, enhancing the subject.
2.6. Adjusting Brightness and Contrast for an Aged Look
How do brightness and contrast adjustments contribute to the vintage feel?
Older images typically have less contrast and can appear slightly darker. Adjusting the brightness and contrast sliders in your photo editor can give the image the desired level of aging. This technique is simple, even for novice photographers, and can be combined with other effects to achieve a nostalgic look.
2.7. Using Aged Paper for a Strongly Aged Photo Effect
What is the impact of using aged paper textures in creating a vintage photo?
For a highly aged photo effect, use aged paper as a background. Photo editors like Canva often have aged paper textures with antique seals and frayed edges. By placing the old paper in the background and adjusting the transparency of your photo, you can create a convincing vintage texture.
2.8. Incorporating Newspaper Clippings for Authenticity
How do newspaper clippings enhance the vintage aesthetic?
Simulate black and white film by reducing color saturation and increasing contrast. Adding grit with a film background can also help. Search the internet for newspaper clippings and pictures of ripped paper to complement the design. This technique can even be used to create vintage-style birthday cards. You can experiment with both online and installable image editors to achieve this effect.
2.9. Applying a Lightly Lit Film Effect Through Overlays
How can overlays enhance the vintage photo effect?
To create something original, use multiple pictures for overlaying. For a retro photo, use a background with grit and adjust the transparency of the main picture. Apply a lightly ghosted film on top and adjust its transparency. Use a ready-made template or add noise yourself. Upload your picture into the editor and change the settings to get the perfect old photo effect.
3. Mastering Vintage Photo Editing with Luminar Neo
How can Luminar Neo enhance the process of creating vintage-looking photos?
Luminar Neo provides comprehensive control over the editing process, allowing you to create stunning vintage photos. It supports layers, masks, and selective editing. You can create a vintage look from scratch using Luminar Neo’s presets and adjustments.
3.1. Step-by-Step Guide to Creating a Vintage Look in Luminar Neo
How can you create a vintage photo effect by adjusting individual settings in Luminar Neo?
Here is a detailed, step-by-step approach to creating a vintage look using Luminar Neo:
- Open Your Image: Start by opening your image in Luminar Neo’s Edit Mode. Retouch and enhance your image before applying the vintage effect.
- Optics Correction: Go to the Develop tool in the Essentials section, click on Optics, and check the box next to Auto Defringe.
- Noise Reduction and Sharpness: Adjust Noise Reduction by setting “Luminosity” to 20 and Sharpness by setting Sharpen to 40 and Masking to 75. Masking prevents sharpening of areas without details or textures.
- Basic Adjustments: Adjust the Exposure, set Smart Contrast to 20, and correct the Highlights. Set Shadows to 10 and adjust Blacks to 10 and Whites to -10.
- Color Adjustment: Select the Color tool to add warmer tones. Set Vibrancy to -55 and use Curves to fade the image.
- Color Tool Refinement: Select Remove Color Cast and set the value to 10. Increase Yellow to 20 and Blue to 20 in the HSL and Saturation panels.
- Matte Tool: Set the Amount to 10-15 and the Fade to 5 in the Matte tool.
- Film Grain: Switch to the Film Grain tool and set the Amount to about 15.
- Vignette: Add a Vignette from the Essentials section and set the “Amount” to -60.
- Camera Leaks Effect: Add camera leaks by going to the Layers panel, clicking the + sign, and selecting one of the overlays in the Light Leaks category. Set the opacity to about 55 and adjust the location using the buttons below.
3.2. Creating a Vintage Look with Black-and-White Photos in Luminar Neo
How can you create a vintage look from black-and-white photos in Luminar Neo?
- Add Your Photo: Add your desired photo by clicking “Add Photos” or dragging and dropping your image directly into the program window.
- Convert to Black and White: Navigate to the Essentials tab and select the Black & White tool. Use the Luminance sliders for each color to fine-tune the appearance.
- Incorporate a Vintage Touch: While in the Essentials tab, use the Curves and Colors tools under Develop to enhance the vintage feel. Adjust the tones to create sepia or faded greenish hues. Reduce contrast in the Light settings to introduce a subtle fade effect.
- Add an Aging Effect: For an authentic aging effect, switch to the Creative tab and select the Fade tool. Adjust the slider to your liking and explore additional toning options.
- Finalize with Details: Complete the transformation by adding vintage-style details. The Mood tool in the Creative tab allows you to infuse specific tones into your image. Use the Layers tool to apply effects such as scratches, torn edges, or other imperfections.
3.3. Using Luminar Neo Presets for Quick Vintage Effects
How can presets speed up the vintage photo editing process?
Presets are adjustment kits that automatically create a specific style and add atmosphere to a picture. Luminar Neo offers over 80 built-in Presets divided into categories such as Street, Landscape, Portrait, and more.
If you don’t want to spend time working with layers and filters, you can apply the Vintage Preset from the Dramatic category. After applying a Preset, you can adjust the settings according to your artistic vision. The Luminar Neo Vintage Preset uses the Dramatic, Color Styles (LUT), and Film Grain filters from the Creative category, and the Vignette filter from the Essentials category.
After creating your unique vintage look, you can save it for future use or apply the same set of adjustments to multiple images at once. You can also use Luminar Neo Presets for black-and-white conversion, with customized options for each type of photography.
4. Choosing the Right Images for Vintage Transformation
How does selecting the right image impact the final vintage effect?
Not all images are suitable for the vintage look. Start with a photo taken in black and white that already has dramatic, aged aesthetics, or with a color photo with a suitable subject. Modern buildings and machinery won’t look vintage no matter how you process them. Vintage-looking photos of nature, buildings, or cars work best. Portrait shots can also be made vintage, as long as the appearance of the model corresponds to the times you want to convey in your work.
5. Contextual Considerations for Authentic Vintage Photos
Why is context crucial when creating vintage photos?
Modern photos can be styled as old-style photos. Studio photos taken with professional lighting and modern scenery can look very interesting with a vintage treatment, but they convey a different mood from truly vintage shots. Ensure the content of your image aligns with the vintage style you are trying to create.
6. Why Vintage Photography Resonates Today
What makes vintage photography so popular in contemporary times?
Creating a vintage look is popular because it adds meaning and depth to a visual story. Many photo editors offer presets you can apply in seconds. However, to get high-quality results and subtle transformations, choose an editor that works with layers and gives you full control over the editing process. Smart and automatic tools are beneficial, but fine-tuning each adjustment by hand allows you to create your unique vintage picture effect.
7. Frequently Asked Questions About Creating Vintage Photos
Want to dive deeper into the world of vintage photography? Check out these FAQs for additional insights.
7.1. What is the best software for creating vintage photo effects?
Luminar Neo, Adobe Photoshop, and Lightroom are excellent choices, each offering unique tools and presets for achieving vintage effects.
7.2. How can I make a photo look like it was taken in the 1970s?
Use warm color tones, reduce saturation, add a slight blur, and consider adding a vignette to mimic the style of 1970s photography.
7.3. What are some common mistakes to avoid when creating vintage photos?
Avoid overdoing the effects. Subtle adjustments often yield the most authentic and appealing vintage look.
7.4. Can I create vintage photos using my smartphone?
Yes, many mobile apps offer filters and editing tools that can help you create vintage-looking photos directly on your smartphone.
7.5. How do I add realistic film grain to a digital photo?
Use the film grain tool in your photo editor and adjust the amount and size of the grain to achieve a realistic effect.
7.6. What is the role of contrast in vintage photography?
Lowering the contrast can help simulate the faded look of older photos, adding to the vintage effect.
7.7. How can I create a sepia tone in my photos?
Use the color balance or tone adjustment tools in your photo editor to add a warm, reddish-brown hue, simulating a sepia tone.
7.8. Is it possible to restore a damaged vintage photo digitally?
Yes, with photo editing software, you can remove scratches, dust, and other imperfections to restore a damaged vintage photo.
7.9. What are the best subjects for vintage-style photography?
Landscapes, portraits, and still-life images with timeless elements tend to work best for vintage-style photography.
7.10. How can I combine vintage effects with modern photography techniques?
Experiment with blending vintage filters and effects with modern editing techniques to create unique and eye-catching images that bridge the gap between old and new.
8. Unlock Your Creative Potential with dfphoto.net
Ready to take your photography skills to the next level? Explore the world of vintage photography with confidence.
At dfphoto.net, we understand the challenges photographers face, from mastering complex techniques to staying updated with the latest trends and technologies. That’s why we offer comprehensive tutorials, detailed equipment reviews, and a vibrant community to support your creative journey.
Whether you’re seeking to master the art of vintage photo editing or build an impressive portfolio, dfphoto.net is your go-to resource. Join our community, discover new techniques, and elevate your photography skills today.
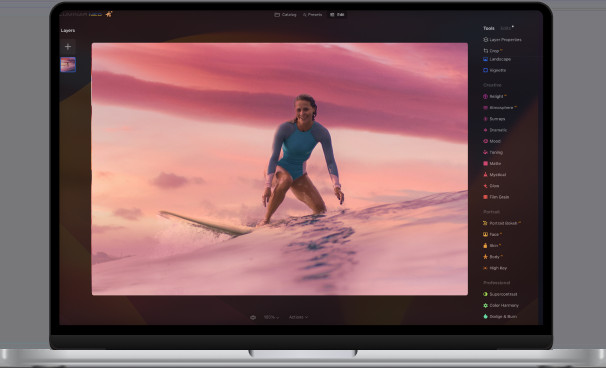 Experience the power of Luminar Neo: A Luminar Neo ad banner featuring a laptop
Explore our extensive resources at dfphoto.net, where you can find a wealth of information, stunning image collections, and a thriving community of fellow photography enthusiasts. Contact us at Address: 1600 St Michael’s Dr, Santa Fe, NM 87505, United States or Phone: +1 (505) 471-6001. Visit dfphoto.net today to embark on your photographic journey.