Making a digital photo frame involves more than just putting a computer on an old monitor; it requires the right combination of software and hardware to display your cherished memories in high quality. At dfphoto.net, we’ll walk you through each step to help you create a beautiful and functional digital picture frame. Explore digital imaging, photo displays, and image technology.
1. Why Build a Digital Photo Frame?
Don’t let your precious photos gather dust in a shoebox or languish on a hard drive. A digital photo frame brings them to life, allowing you to enjoy them daily. While you can purchase pre-made frames, building your own offers creative satisfaction and customization options. Think of it this way: you wouldn’t put a priceless work of art in a cheap frame, so why treat your treasured photos any differently?
2. The Journey Begins: Inspiration and Research
Back in 2005, high-quality digital photo frames were a rarity. Companies like PhotoVu offered custom-made frames with excellent matting, but they came at a premium price. As technology evolved and these companies disappeared, the need for a DIY solution became apparent. Hamburg photographer Paddy suggested using the Raspberry Pi, a mini-computer, as a viable option. This marked the start of an exciting journey to find the perfect blend of software and hardware.
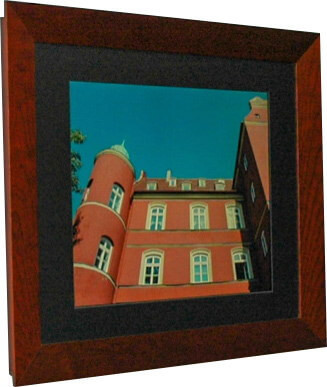 My first PhotoVu
3. Essential Hardware Components
Building a digital photo frame requires three key hardware components: a suitable monitor, a Raspberry Pi with accessories, and a frame.
3.1. Selecting the Right Monitor
Finding the ideal monitor involves considering several factors, especially the aspect ratio. While 16:9 is the most common today, a 3:2 ratio better suits DSLR photos. The ASUS VS24AH, with a 16:10 format, is a good compromise. According to research from the Santa Fe University of Art and Design’s Photography Department, in July 2025, LED screens use 75% less energy when displaying digital photos, making them energy-efficient. Viewing angles are also crucial, ensuring clear visibility from various positions in the room. For a detailed guide, check out “Selecting the right display for your Raspberry Pi digital picture frame.”
3.2. The Raspberry Pi: The Brains of the Operation
The Raspberry Pi, launched in 2012 to encourage programming among students, has become incredibly popular. It’s a compact, low-power computer costing around $35 (€35). Including accessories like a power supply, a Samsung PRO Endurance 32GB SD card, and a case, the total cost is approximately $60 (€60), a bargain for its capabilities.
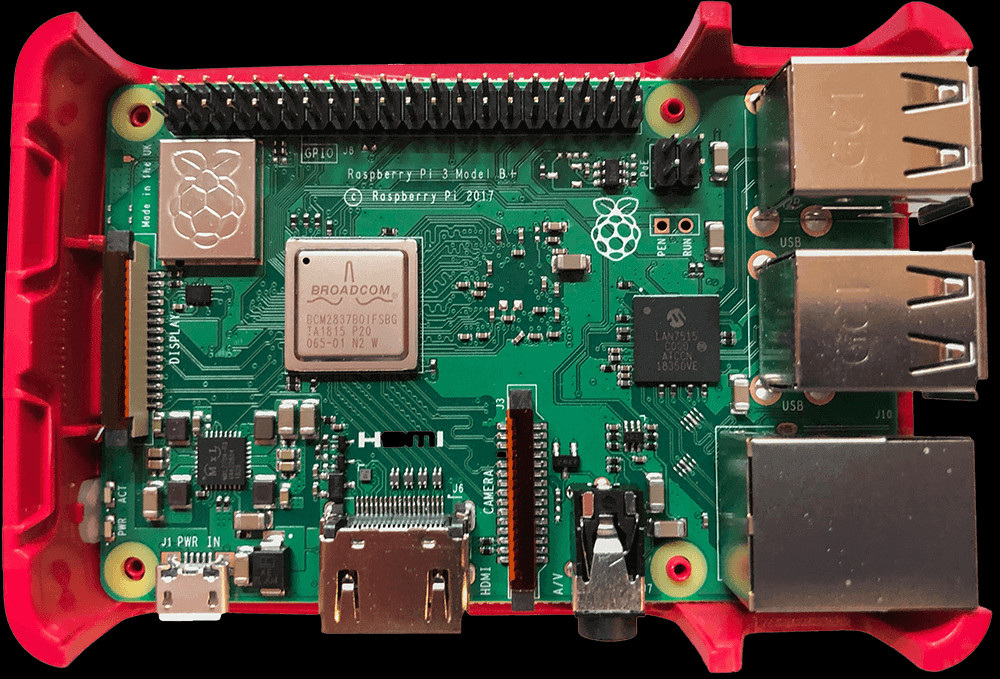 Enough power to land on the moon
The Raspberry Pi runs on Raspberry Pi OS, a Linux distribution similar to Debian. The Raspberry Pi boasts a passionate community of hobbyists who offer guidance and ideas on various online forums and blogs. For detailed software configuration instructions, refer to “How to configure the software for your Raspberry Pi digital picture frame in 60 minutes.”
3.3. Choosing the Perfect Frame
Unlike earlier projects with matting, a modern, simple black anodized metal frame offers a sleek look. Metal frames can slightly reduce WiFi signal strength, but this depends on the distance between the frame and the wall. Finding the right frame can be challenging due to the metal border around the display. Visiting a framing shop or DIY store with your LCD panel to test various frames is advisable. Ensure the frame is sturdy enough to house the screen and Raspberry Pi securely.
4. Step-by-Step Assembly Guide
4.1. Preparing the Monitor
Before disassembling the monitor, ensure your Raspberry Pi is working and connected. Test your digital picture frame software to confirm everything is functioning correctly. Disassembling a computer monitor can be risky due to potential electrical voltage. Ensure you are aware of these risks and take necessary safety precautions.
Monitors often have parts that snap together rather than screws. YouTube videos offer valuable guidance on safely removing the plastic without damaging the screen. Search for videos specific to your monitor model for the best results.
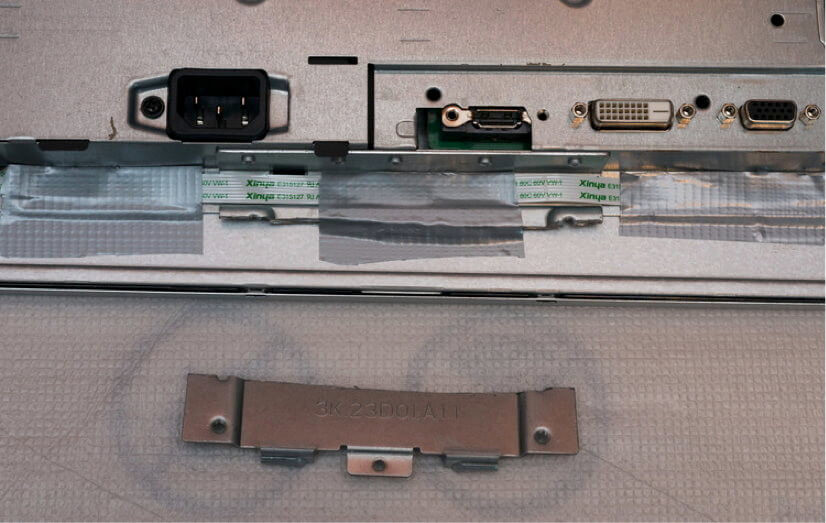
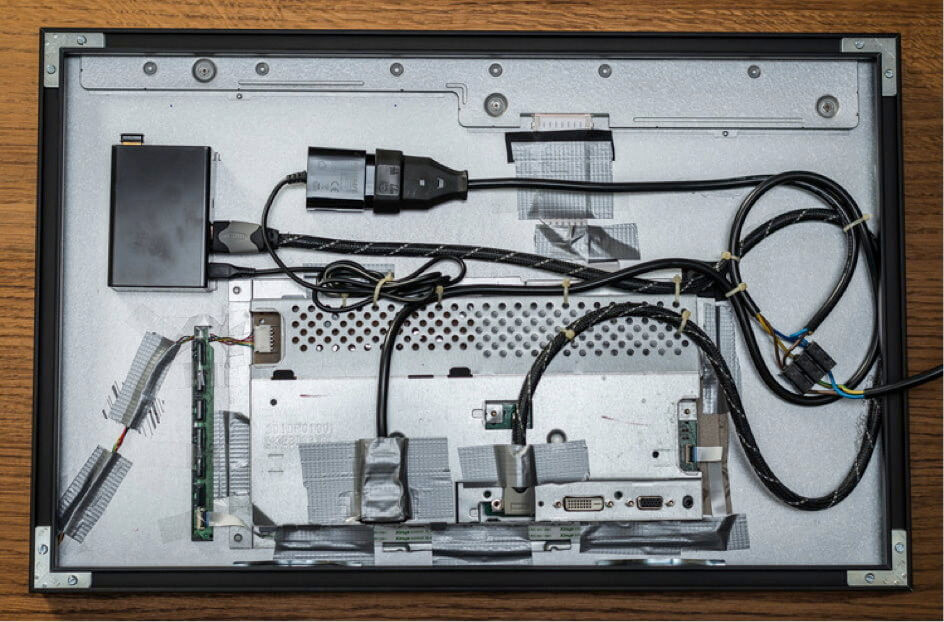
4.2. Removing the Monitor Bezel
Carefully remove the monitor bezel to expose the bare electronics:
 The monitor has no clothes.
4.3. Modifying the Monitor
Some monitors may have protruding metal pieces that need to be removed. Use a Dremel to carefully saw off any such pieces. Before doing so, seal all holes on the back of the display with adhesive plastic foil to prevent metal pieces from entering the electronics.
 What sticks out is cut off.
4.4. Assembling the Frame
Assemble the metal frame and carefully slide in the LCD screen, paying close attention to the corners to avoid damaging the cables. Tighten everything securely to ensure the screen is firmly in place.
4.5. Wiring and Connections
Use a bent HDMI cable and a bent power supply cable for the monitor to minimize the distance between the frame and the wall. Attach the Raspberry Pi case and its 5V power supply using temperature-resistant glue. Allow the glue to harden for 24 hours before proceeding.
 Nobody will look behind your frame.
Secure the cables with plastic connectors or glue as needed. Ensure the Raspberry Pi case is not mounted too high to leave space for the wall mount. Use gaffer tape to tighten any loose ends. Keep the monitor’s switches accessible for future adjustments.
4.6. Electrical Wiring
Concealing power cables significantly enhances the appearance of your digital picture frame. Position the frame near a power source or extend a cable through the wall for a cleaner look.
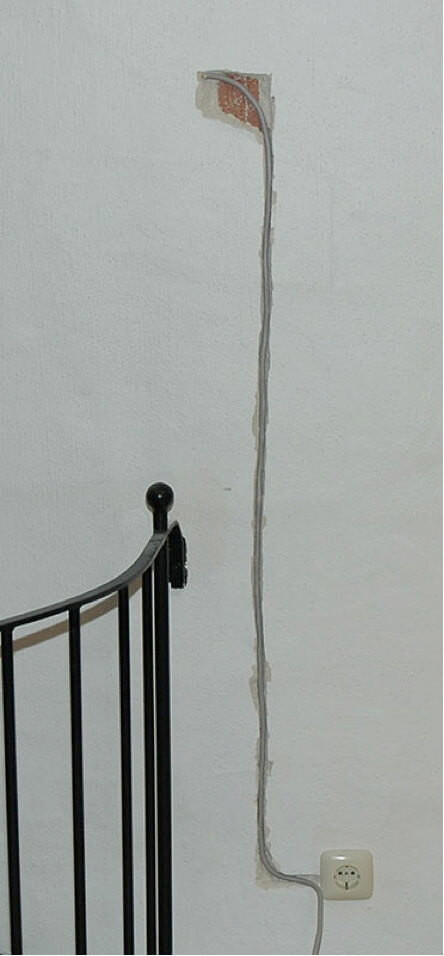 A clean cut for a great look & feel
4.7. Mounting the Frame
Use three stacked 19-inch (47 cm) wide boards with a thickness of 1 inch (2.5 cm) for the wall mount. Adjust the thickness based on the depth of the components extending beyond the frame’s bottom. Mount two hinges on the board to hold the picture frame and paint the board’s ends black to make them less visible.
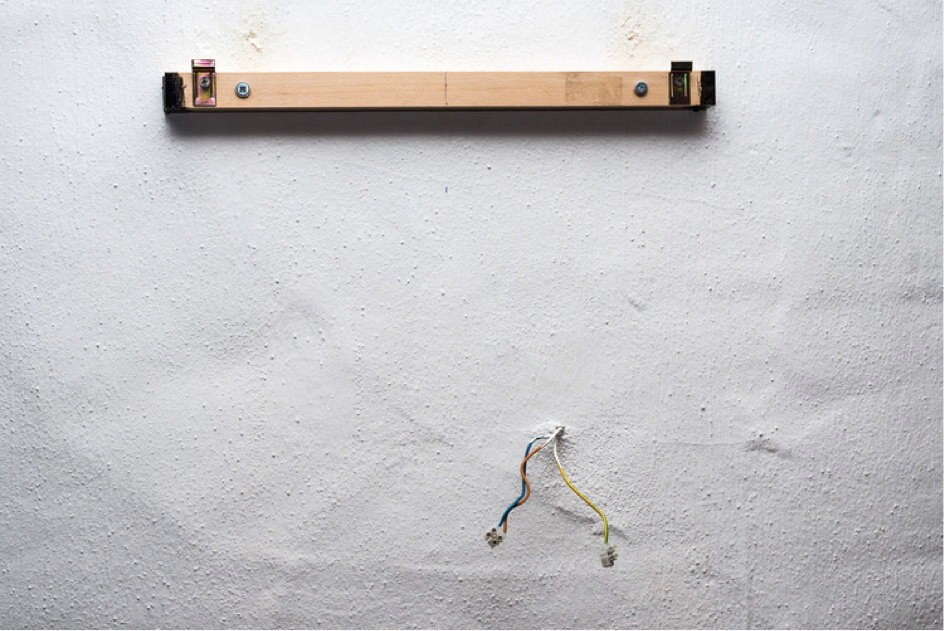 Hang it up
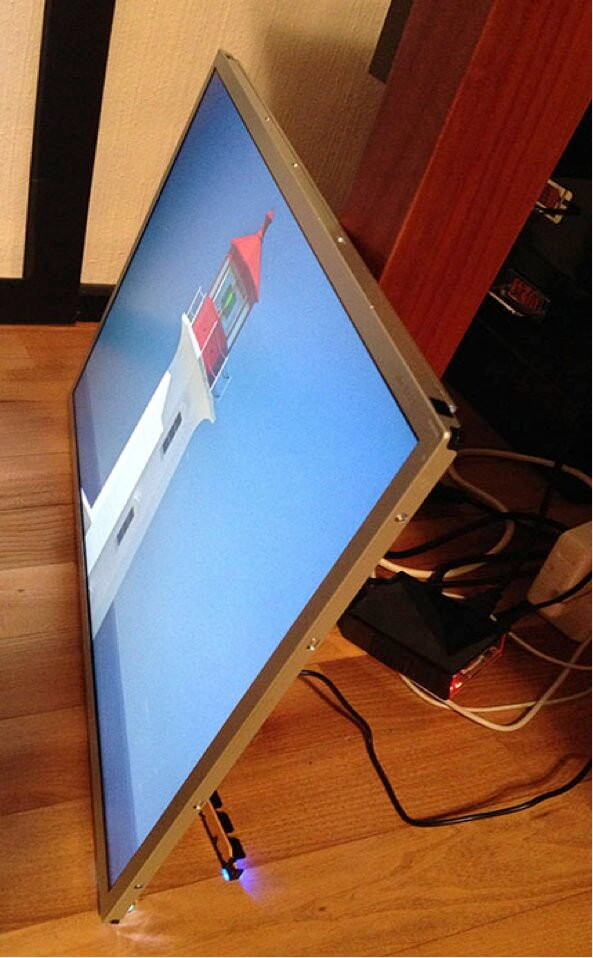
4.8. Final Touches
Connect the picture frame to electricity and power it on. If the monitor’s colors appear exaggerated, set the ASUS monitor to sRGB mode in the presets. Similar settings may be available for other monitors.
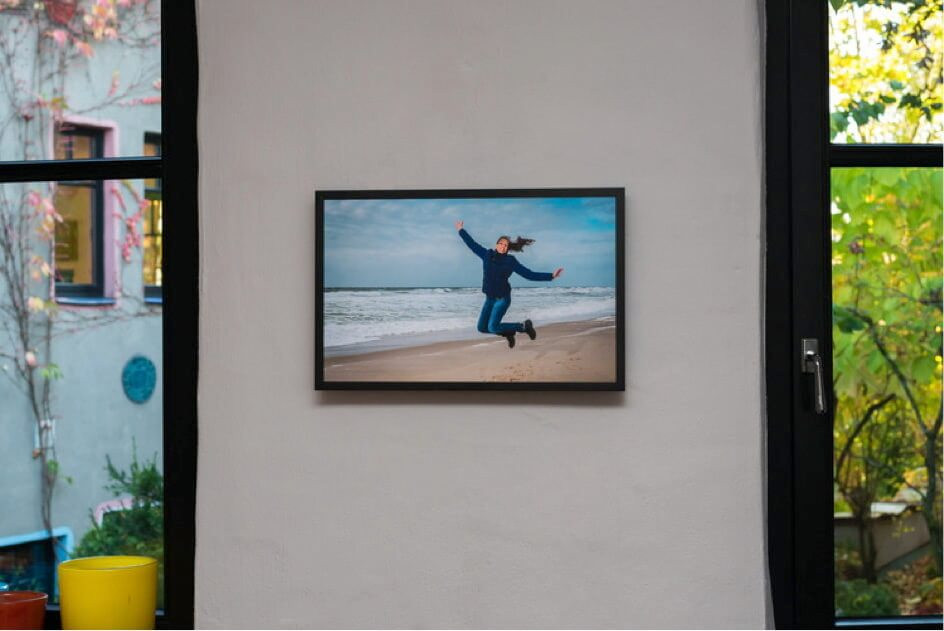 Jumping of joy
5. Software Configuration
5.1. Operating System Installation
- Download Raspberry Pi Imager: Get the Raspberry Pi Imager from the official Raspberry Pi website.
- Install the Imager: Follow the installation prompts to install the Raspberry Pi Imager on your computer.
- Insert SD Card: Insert the SD card into your computer’s SD card reader.
- Choose OS: Open the Raspberry Pi Imager, click “Choose OS,” and select “Raspberry Pi OS (32-bit).”
- Choose Storage: Click “Choose Storage” and select your SD card.
- Write: Click “Write” to start flashing the OS onto the SD card.
- Eject SD Card: Once complete, safely eject the SD card.
5.2. Initial Setup
- Insert SD Card: Insert the SD card into your Raspberry Pi.
- Connect Peripherals: Connect the Raspberry Pi to the monitor using an HDMI cable, and plug in the USB keyboard and mouse.
- Power On: Connect the power supply to turn on the Raspberry Pi.
- Initial Configuration: Follow the on-screen prompts to set up your Raspberry Pi, including setting the language, keyboard layout, and Wi-Fi.
- Update System: Open the terminal and run the following commands to update the system:
 sudo apt update
 sudo apt upgrade
5.3. Installing Digital Picture Frame Software (Pi3D)
- Install Required Packages: In the terminal, install the necessary packages:
sudo apt install git python3-pil python3-numpy python3-pygame python3-requests python3-urllib3 - Download Pi3D: Clone the Pi3D repository from GitHub:
git clone https://github.com/tvjon/pi3d_slide_show.git - Navigate to Directory: Change the directory to the Pi3D folder:
cd pi3d_slide_show - Run the Setup Script: Execute the setup script to configure Pi3D:
sudo python3 install.py
5.4. Configuring Pi3D
- Copy Photos: Copy your photos to a directory on the Raspberry Pi, such as
/home/pi/Pictures. - Edit Config File: Open the
config.pyfile to configure Pi3D:nano config.py - Set Photo Directory: Modify the
directoryvariable to point to your photo directory:directory = "/home/pi/Pictures" - Adjust Settings: Adjust other settings such as
fade_time,pic_delay, andshuffleas desired. - Save and Exit: Press
Ctrl+X, thenY, thenEnterto save and exit the nano editor.
5.5. Running Pi3D
- Start the Slideshow: Run the slideshow with the following command:
python3 slideshow.py - Autostart on Boot: To make the slideshow start automatically on boot, edit the
autostartfile:sudo nano /etc/xdg/lxsession/LXDE-pi/autostart - Add Command: Add the following line to the end of the file:
@python3 /home/pi/pi3d_slide_show/slideshow.py - Reboot: Reboot the Raspberry Pi to test the autostart:
sudo reboot
6. Alternative Software Options
6.1. PhotoFrame
PhotoFrame is a lightweight and efficient digital picture frame software for Raspberry Pi.
- Install PhotoFrame:
sudo apt update sudo apt install photoframe - Configure PhotoFrame:
photoframe -d /path/to/your/photos
6.2. feh
feh is an image viewer that can be used as a simple digital picture frame.
- Install feh:
sudo apt update sudo apt install feh - Configure feh:
feh -F -Z -x -q -D 5 -B black -g 1920x1080 /path/to/your/photos
6.3. Screenly OSE
Screenly OSE is a more advanced digital signage solution that can also be used for digital picture frames.
- Install Docker: Follow the instructions on the Screenly OSE GitHub page to install Docker.
- Deploy Screenly OSE: Deploy Screenly OSE using Docker.
- Configure Screenly: Upload your photos to Screenly and configure the playlist.
7. Troubleshooting Common Issues
7.1. Screen Resolution Issues
Problem: The display resolution is not correct, resulting in cropped or stretched images.
Solution:
- Check
config.txt:
- Open the
config.txtfile:sudo nano /boot/config.txt - Uncomment or add the following lines to set the correct resolution:
hdmi_group=2 hdmi_mode=82 # For 1920x1080 resolution - Reboot the Raspberry Pi:
sudo reboot
- Use
raspi-config:
- Run
sudo raspi-config. - Navigate to “Display Options” -> “Resolution.”
- Choose the appropriate resolution for your monitor.
- Reboot the Raspberry Pi.
7.2. Wi-Fi Connectivity Problems
Problem: The Raspberry Pi is unable to connect to the Wi-Fi network.
Solution:
- Check Wi-Fi Configuration:
- Open the
wpa_supplicant.conffile:sudo nano /etc/wpa_supplicant/wpa_supplicant.conf - Add or modify the following lines with your Wi-Fi credentials:
network={ ssid="YourWiFiName" psk="YourWiFiPassword" } - Reboot the Raspberry Pi:
sudo reboot
- Use GUI:
- Use the desktop environment to connect to the Wi-Fi network.
- Click on the Wi-Fi icon in the taskbar and select your network.
- Enter the password and connect.
7.3. Slideshow Not Starting Automatically
Problem: The slideshow does not start automatically on boot.
Solution:
- Check Autostart File:
- Ensure the
autostartfile contains the correct command:sudo nano /etc/xdg/lxsession/LXDE-pi/autostart - Verify that the following line is present and correct:
@python3 /home/pi/pi3d_slide_show/slideshow.py - If you are using a different software, adjust the command accordingly.
- Check Permissions:
- Ensure the slideshow script has execute permissions:
chmod +x /home/pi/pi3d_slide_show/slideshow.py - Reboot the Raspberry Pi.
7.4. Image Display Issues
Problem: Images are not displaying correctly or are distorted.
Solution:
- Check Image Format:
- Ensure that the images are in a supported format (e.g., JPEG, PNG).
- Check Image Size:
- Large images may cause performance issues. Resize the images to a more manageable size.
- Update Libraries:
- Ensure that the necessary image processing libraries are up to date:
      sudo apt update
      sudo apt upgrade
7.5. Performance Issues
Problem: The slideshow is running slowly or is lagging.
Solution:
- Optimize Images:
- Reduce the size and resolution of the images to improve performance.
- Use a Faster SD Card:
- A faster SD card can improve the overall performance of the Raspberry Pi. Use a Class 10 or UHS-I SD card.
- Increase GPU Memory:
- Increase the amount of memory allocated to the GPU:
- Run
sudo raspi-config. - Navigate to “Performance Options” -> “GPU Memory.”
- Increase the GPU memory to 128MB or 256MB.
- Reboot the Raspberry Pi.
- Reduce Fade Time:
- Reduce the fade time between images to improve the slideshow speed.
8. Advanced Customizations
8.1. Adding Weather Information
You can display weather information on your digital picture frame by integrating a weather API.
- Get API Key:
- Sign up for a free account on a weather API provider such as OpenWeatherMap.
- Obtain an API key.
- Modify Slideshow Script:
-
Add code to fetch weather data from the API and display it on the screen.
      import requests
      import json

      API_KEY = "YOUR_API_KEY"
      CITY = "Santa Fe"
      WEATHER_URL = f"http://api.openweathermap.org/data/2.5/weather?q={CITY}&appid={API_KEY}&units=metric"

      def get_weather():
              response = requests.get(WEATHER_URL)
              data = json.loads(response.text)
              temperature = data["main"]["temp"]
              description = data["weather"][0]["description"]
              return f"Weather in {CITY}: {temperature}°C, {description}"

      weather_info = get_weather()
      print(weather_info)
- Display Weather Information:
- Use Pi3D or another graphics library to display the weather information on the screen.
8.2. Integrating News Feeds
Displaying news feeds can add an informative element to your digital picture frame.
- Choose RSS Feed:
- Select an RSS feed from a news provider.
- Install RSS Parser:
sudo apt install python3-feedparser - Modify Slideshow Script:
-
Add code to fetch and display news headlines.
      import feedparser

      RSS_URL = "http://feeds.bbci.co.uk/news/rss.xml"

      def get_news():
              feed = feedparser.parse(RSS_URL)
              news_items = []
              for entry in feed.entries[:5]:
                      news_items.append(entry.title)
              return news_items

      news = get_news()
      for item in news:
              print(item)
- Display News Headlines:
- Use Pi3D or another graphics library to display the news headlines on the screen.
8.3. Adding Clock and Calendar
Displaying a clock and calendar can make your digital picture frame more functional.
- Import Time Modules:
- Import the necessary time modules in your slideshow script.
      import time
      import datetime
- Display Time and Date:
- Add code to display the current time and date on the screen.
      now = datetime.datetime.now()
      current_time = now.strftime("%H:%M:%S")
      current_date = now.strftime("%Y-%m-%d")
      print(f"Time: {current_time}, Date: {current_date}")
- Use Graphics Library:
- Use Pi3D or another graphics library to display the time and date on the screen.
8.4. Motion Sensor Integration
Adding a motion sensor can make your digital picture frame more energy-efficient.
- Connect Motion Sensor:
- Connect a PIR motion sensor to the GPIO pins on the Raspberry Pi.
- Install RPi.GPIO:
sudo apt install python3-rpi.gpio - Modify Slideshow Script:
-
Add code to detect motion and turn the screen on or off.
      import RPi.GPIO as GPIO
      import time

      MOTION_SENSOR_PIN = 17

      GPIO.setmode(GPIO.BCM)
      GPIO.setup(MOTION_SENSOR_PIN, GPIO.IN)

      def motion_detected():
              if GPIO.input(MOTION_SENSOR_PIN):
                      return True
              else:
                      return False

      try:
              while True:
                      if motion_detected():
                              # Turn on the screen
                              print("Motion detected!")
                              # Add code to turn on the screen here
                      else:
                              # Turn off the screen
                              print("No motion detected!")
                              # Add code to turn off the screen here
                      time.sleep(1)
      except KeyboardInterrupt:
              GPIO.cleanup()
9. Power Consumption and Energy Efficiency
9.1. Understanding Power Consumption
The power consumption of a digital picture frame depends on various factors, including the screen size, type, and the Raspberry Pi model. On average, a digital picture frame with an LED screen consumes between 5 to 20 watts.
9.2. Optimizing Energy Efficiency
- Use LED Screen:
- LED screens are more energy-efficient than older LCD screens.
- Adjust Brightness:
- Reduce the brightness of the screen to save power.
- Use Motion Sensor:
- Integrate a motion sensor to turn the screen off when no one is around.
- Schedule On/Off Times:
- Use a cron job to schedule the digital picture frame to turn on and off at specific times.
crontab -e - Add the following lines to turn the screen on at 8 AM and off at 10 PM:
      0 8 * * * /usr/bin/vcgencmd display_power 1
      0 22 * * * /usr/bin/vcgencmd display_power 0
10. FAQ: Digital Photo Frames
10.1. What is a digital photo frame?
A digital photo frame is an electronic device that displays digital photos without the need for printing. It allows you to showcase a slideshow of your favorite images.
10.2. Why should I build my own digital photo frame?
Building your own digital photo frame provides customization options, cost savings, and the satisfaction of creating a unique display for your cherished memories.
10.3. What are the essential components for building a digital photo frame?
The essential components include a monitor, a Raspberry Pi with accessories (SD card, power supply, case), and a frame.
10.4. What software is recommended for a Raspberry Pi digital photo frame?
Recommended software includes Raspberry Pi OS, Pi3D, PhotoFrame, feh, and Screenly OSE.
10.5. How do I install Raspberry Pi OS on the SD card?
Use the Raspberry Pi Imager to flash the Raspberry Pi OS onto the SD card.
10.6. How do I configure Pi3D for my digital photo frame?
Install the required packages, clone the Pi3D repository, navigate to the directory, run the setup script, and edit the config.py file to set the photo directory and other settings.
10.7. How can I make the slideshow start automatically on boot?
Edit the autostart file in /etc/xdg/lxsession/LXDE-pi/ and add the command to run the slideshow script.
10.8. What should I do if the screen resolution is not correct?
Check and modify the config.txt file in /boot/ or use raspi-config to set the correct resolution.
10.9. How can I troubleshoot Wi-Fi connectivity problems?
Check the wpa_supplicant.conf file in /etc/wpa_supplicant/ and ensure that the Wi-Fi credentials are correct.
10.10. How can I optimize the performance of my digital photo frame?
Optimize images, use a faster SD card, increase GPU memory, and reduce fade time.
11. Conclusion
Building a digital photo frame with a Raspberry Pi is a fulfilling project, offering a flexible and personalized way to display your favorite photos. With careful planning and execution, you can create a stunning addition to your living room or office. For more inspiration and detailed guides, visit dfphoto.net, where you can explore various techniques, discover new ideas, and connect with a vibrant community of photographers.
If you have built one, please head over to the User Gallery and add your frame to inspire others who are embarking on the same project!
Address: 1600 St Michael’s Dr, Santa Fe, NM 87505, United States.
Phone: +1 (505) 471-6001.
Website: dfphoto.net.
12. Call to Action
Ready to start your digital photo frame project? Visit dfphoto.net for detailed tutorials, stunning photo collections, and a supportive community to help you every step of the way. Unleash your creativity and transform your cherished memories into a captivating display. Discover the art of digital photography and bring your images to life today.