Crafting personalized photo cards combines the art of photography with heartfelt messages, creating cherished keepsakes. At dfphoto.net, we believe in capturing and sharing life’s precious moments through beautiful imagery. This guide provides you with various methods and creative ideas to design stunning photo cards, perfect for any occasion. Let’s delve into the art of creating memorable photo cards.
1. Why Make a Card With Photo?
Creating a personalized photo card is an excellent way to add a personal touch to your greetings and celebrations. It allows you to share cherished memories with loved ones, making your message more meaningful and memorable.
1.1. Personal Touch
A photo card adds a personal touch that generic cards simply can’t match. According to a study by the Greeting Card Association, personalized cards have a higher emotional impact on recipients.
1.2. Cherished Memories
Photo cards allow you to share your favorite memories, whether it’s a family vacation, a milestone celebration, or a candid moment. Sharing these memories strengthens bonds and creates lasting impressions.
1.3. Unique and Memorable
Creating a photo card ensures that your greeting stands out. It’s a unique and thoughtful way to show someone you care, making your card a keepsake that will be treasured for years to come.
2. What Are The Key Elements of a Great Photo Card Design?
Designing a great photo card involves several key elements that, when combined, create a visually appealing and emotionally resonant greeting. Let’s explore these essential elements:
2.1. High-Quality Photo
The photo is the heart of your card. Choose an image that is clear, well-lit, and relevant to the occasion. According to photography experts at Santa Fe University of Art and Design, a high-resolution photo ensures that your card looks professional and appealing.
2.2. Appropriate Layout
The layout of your card should complement the photo and message. Consider the orientation (portrait or landscape) and the placement of text and graphics.
2.3. Thoughtful Message
Your message should be heartfelt and sincere. Tailor your words to the recipient and the occasion. Whether it’s a simple “Happy Birthday” or a longer, more personal note, make sure your message reflects your feelings.
2.4. Cohesive Design
Ensure that all elements of your card work together harmoniously. Choose colors, fonts, and graphics that complement the photo and convey the right tone. A cohesive design makes your card look polished and professional.
2.5. Quality Materials
The paper or cardstock you use can significantly impact the overall look and feel of your card. Opt for high-quality materials that are durable and visually appealing. Matte or glossy finishes can enhance the appearance of your photo and text.
3. What Are The Different Occasions To Make a Card With Photo?
Photo cards are versatile and can be customized for various occasions, adding a personal touch to your greetings and celebrations. Here are some popular occasions for creating photo cards:
3.1. Holidays
Christmas, Thanksgiving, Easter, and other holidays are perfect for sending photo cards featuring family portraits, festive decorations, or memorable moments from the year. Holiday photo cards are a great way to share your family’s joy and traditions with friends and relatives.
3.2. Birthdays
Celebrate birthdays with a personalized photo card featuring a picture of the birthday person or a favorite memory you share. Add a heartfelt message to make the card even more special and memorable.
3.3. Anniversaries
Commemorate anniversaries with a photo card showcasing a picture of the happy couple. Include a message expressing your love and best wishes for their continued happiness.
3.4. Thank You Cards
Express your gratitude with a thank-you photo card. Use a picture related to the gift or event you are thanking someone for. A personalized thank-you card shows your appreciation in a thoughtful and unique way.
3.5. Graduation
Celebrate a graduation with a photo card featuring the graduate. Include a congratulatory message and best wishes for their future endeavors.
3.6. New Baby Announcements
Announce the arrival of a new baby with a photo card. Share a picture of the newborn and include details such as the baby’s name, birth date, and weight.
3.7. Wedding Invitations and Save-the-Dates
Create unique wedding invitations and save-the-dates with personalized photo cards. Feature a picture of the couple and include all the essential details about the wedding.
3.8. Thinking of You Cards
Send a thinking-of-you photo card to let someone know you are thinking about them. Use a picture that evokes positive memories or simply brings a smile to their face.
3.9. Get Well Soon Cards
Offer your support and well wishes with a get-well-soon photo card. Include a picture that is comforting and uplifting, along with a message of encouragement.
3.10. Invitations
Create personalized invitations for parties, events, and gatherings with photo cards. Feature a picture that reflects the theme of the event and include all the necessary details.
4. What Software And Tools Are Best For Making Photo Cards?
Creating stunning photo cards requires the right software and tools to bring your vision to life. Here’s a look at some of the best options available:
4.1. Adobe Photoshop
Adobe Photoshop is a professional-grade image editing software that offers extensive tools and features for creating high-quality photo cards.
Pros:
- Advanced Editing: Offers unparalleled control over image editing, allowing for detailed adjustments and enhancements.
- Customization: Provides a wide range of templates and design elements for creating unique photo cards.
- Versatility: Suitable for both beginners and advanced users, with tutorials and resources available for all skill levels.
Cons:
- Cost: Requires a subscription, which can be expensive for casual users.
- Complexity: The vast array of features can be overwhelming for beginners.
4.2. Adobe Spark
Adobe Spark is a user-friendly design tool that is perfect for creating quick and visually appealing photo cards.
Pros:
- Ease of Use: Features an intuitive interface with drag-and-drop functionality.
- Templates: Offers a wide variety of professionally designed templates.
- Accessibility: Available online and as a mobile app, allowing you to create cards on the go.
Cons:
- Limited Features: Lacks the advanced editing capabilities of Photoshop.
- Branding: Free version includes Adobe Spark branding.
4.3. Canva
Canva is a popular online design platform that offers a wide range of templates and tools for creating photo cards.
Pros:
- User-Friendly: Features a drag-and-drop interface that is easy to learn.
- Extensive Library: Provides access to a vast library of design elements, including photos, graphics, and fonts.
- Collaboration: Allows for easy collaboration with others on design projects.
Cons:
- Limited Offline Access: Requires an internet connection to use.
- Paid Elements: Some design elements are only available with a Canva Pro subscription.
4.4. Microsoft Word
Microsoft Word can be used to create simple photo cards using its built-in design tools.
Pros:
- Accessibility: Widely available on most computers.
- Basic Design Tools: Offers basic tools for adding images, text, and shapes to create photo cards.
- Familiar Interface: Easy to use for those familiar with Microsoft Word.
Cons:
- Limited Design Options: Lacks the advanced design features of dedicated graphics software.
- Image Quality: May not produce the highest quality images for professional-looking cards.
4.5. Online Photo Card Services
Several online services specialize in creating and printing photo cards, such as Shutterfly, Minted, and Snapfish.
Pros:
- Convenience: Offers a seamless process from design to printing and shipping.
- Professional Quality: Provides high-quality printing and materials.
- Variety of Options: Offers a wide range of templates, sizes, and finishes.
Cons:
- Cost: Can be more expensive than DIY options.
- Limited Customization: May not offer the same level of customization as designing your own card from scratch.
5. Step-by-Step Guide: How To Make a Card With Photo
Creating a personalized photo card can be a fun and rewarding experience. Here’s a step-by-step guide to help you design and make your own photo cards:
5.1. Choosing Your Photo
Select a high-resolution photo that is clear, well-lit, and relevant to the occasion. Consider the composition, color balance, and overall aesthetic of the photo.
5.2. Selecting a Design Tool
Choose a design tool that suits your skill level and needs. Options include Adobe Photoshop, Adobe Spark, Canva, Microsoft Word, or online photo card services.
5.3. Setting Up Your Document
Open your chosen design tool and create a new document with the correct dimensions for your photo card. Standard sizes include 4×6 inches, 5×7 inches, and A2 (4.25×5.5 inches). Set the resolution to at least 300 dpi for high-quality printing.
5.4. Adding Your Photo
Import your chosen photo into the design tool and place it on the card layout. Adjust the size and position of the photo to fit the design.
5.5. Adding Text and Graphics
Add text to your photo card to convey your message. Choose fonts that are legible and complement the overall design. Include graphics, borders, or other design elements to enhance the visual appeal of the card.
5.6. Customizing the Layout
Customize the layout of your photo card to create a unique design. Experiment with different arrangements of photos, text, and graphics. Consider adding a background color or pattern to enhance the visual appeal.
5.7. Reviewing and Editing
Review your photo card design carefully to ensure that all elements are aligned correctly and that there are no errors in the text. Make any necessary edits to improve the overall design.
5.8. Printing Your Card
Print your photo card on high-quality paper or cardstock. Use a color printer with good resolution for the best results. Alternatively, you can use an online photo card service for professional printing.
5.9. Adding Finishing Touches
Add any finishing touches to your photo card, such as embellishments, ribbons, or envelope liners. These details can enhance the overall presentation of the card and make it even more special.
6. What Are Creative Ideas For Photo Card Layouts?
Creating a visually appealing photo card involves experimenting with different layouts to showcase your photo and message effectively. Here are some creative ideas for photo card layouts:
6.1. Full Photo Layout
Use a single, large photo that covers the entire front of the card. This layout is ideal for showcasing stunning landscape shots or captivating portraits.
6.2. Collage Layout
Create a collage of multiple photos to tell a story or capture a series of moments. Arrange the photos in a grid or a more abstract design.
6.3. Photo and Text Overlay
Overlay text directly onto the photo to create a modern and stylish look. Use a legible font and ensure that the text contrasts with the background for readability.
6.4. Bordered Photo Layout
Frame your photo with a decorative border to draw attention to the image. Choose a border that complements the colors and style of the photo.
6.5. Asymmetrical Layout
Create a dynamic and visually interesting layout by placing the photo off-center. Balance the composition with text and graphic elements on the opposite side of the card.
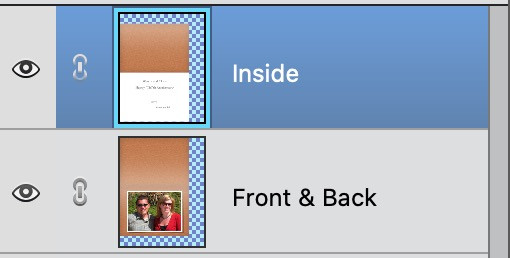
6.6. Folded Card Layout
Design a folded card with the photo on the front panel and the message inside. This layout allows for more space to write a personal note.
6.7. Die-Cut Layout
Use a die-cut shape to create a unique and eye-catching photo card. Cut the photo into a specific shape, such as a heart, star, or custom design.
6.8. Minimalist Layout
Embrace simplicity with a minimalist layout that features a single photo and minimal text. This design emphasizes the beauty of the photo and creates a clean, modern look.
6.9. Themed Layout
Design a photo card with a specific theme that reflects the occasion or the recipient’s interests. Use colors, graphics, and fonts that are consistent with the theme.
6.10. Interactive Layout
Create an interactive photo card with elements that encourage engagement. Add a QR code that links to a video or a personalized message.
7. How To Optimize Your Photos For Card Printing?
Optimizing your photos for card printing ensures that the final product looks professional and visually appealing. Here are some essential tips to help you optimize your photos:
7.1. Use High-Resolution Images
Start with high-resolution images to ensure that your photos are sharp and clear when printed. Aim for a resolution of at least 300 dpi (dots per inch).
7.2. Check the Color Mode
Ensure that your photos are in the correct color mode for printing. Most printers use CMYK (cyan, magenta, yellow, and key/black) color mode. Convert your images from RGB (red, green, blue) to CMYK to ensure accurate color reproduction.
7.3. Adjust Brightness and Contrast
Adjust the brightness and contrast of your photos to ensure that they look their best when printed. Increase the brightness slightly to compensate for the darkening effect of printing. Adjust the contrast to enhance the details and make the colors pop.
7.4. Sharpen Your Images
Sharpen your images to enhance the details and make them look crisper when printed. Use a sharpening filter in your photo editing software, but be careful not to over-sharpen, as this can create unwanted artifacts.
7.5. Crop Your Photos
Crop your photos to fit the dimensions of your photo card. Use a cropping tool in your photo editing software to remove any unwanted areas and focus on the main subject of the photo.
7.6. Remove Blemishes and Distractions
Remove any blemishes or distractions from your photos to create a clean and polished look. Use a spot healing tool or clone stamp tool in your photo editing software to remove any unwanted elements.
7.7. Calibrate Your Monitor
Calibrate your monitor to ensure accurate color representation. Use a monitor calibration tool to adjust the colors on your screen so that they match the colors that will be printed.
7.8. Do a Test Print
Do a test print of your photo card before printing a large batch. This will allow you to check the colors, resolution, and overall quality of the print and make any necessary adjustments.
7.9. Save Your Photos in the Correct Format
Save your photos in the correct format for printing. JPEG is a common format for photos, but for the best quality, consider using TIFF or PNG.
7.10. Check for Print Bleed
Check for print bleed to ensure that your photos extend to the edges of the card without any white borders. Add a bleed area of at least 0.125 inches to all sides of your photo.
8. What Are The Best Photo Card Ideas For Different Occasions?
Creating personalized photo cards for various occasions is a thoughtful way to express your sentiments and share cherished memories. Here are some of the best photo card ideas for different occasions:
8.1. Christmas Photo Cards
- Family Photo: Feature a festive family photo in front of a Christmas tree or a snowy landscape.
- Collage of the Year: Create a collage of memorable moments from the past year.
- Themed Design: Use a themed design with Christmas colors, ornaments, and holiday greetings.
8.2. Birthday Photo Cards
- Birthday Person Photo: Showcase a recent photo of the birthday person.
- Childhood Memory: Include a throwback photo from the birthday person’s childhood.
- Milestone Celebration: Commemorate a milestone birthday with a special photo and message.
8.3. Wedding Anniversary Photo Cards
- Wedding Day Photo: Feature a photo from the couple’s wedding day.
- Then and Now: Include a side-by-side comparison of a wedding photo and a recent photo of the couple.
- Romantic Design: Use a romantic design with hearts, flowers, and anniversary wishes.
8.4. Thank You Photo Cards
- Gift-Related Photo: Include a photo related to the gift or event you are thanking someone for.
- Personalized Message: Add a handwritten or personalized thank-you message.
- Elegant Design: Use an elegant design with sophisticated colors and fonts.
8.5. Graduation Photo Cards
- Graduate Photo: Showcase a photo of the graduate in their cap and gown.
- School Memories: Include a collage of photos from the graduate’s school years.
- Congratulatory Message: Add a congratulatory message and best wishes for the future.
8.6. New Baby Photo Cards
- Newborn Photo: Feature a cute photo of the newborn baby.
- Baby Details: Include details such as the baby’s name, birth date, and weight.
- Sweet Design: Use a sweet design with pastel colors, baby animals, and hearts.
8.7. Thinking of You Photo Cards
- Positive Memory: Include a photo that evokes positive memories or brings a smile to the recipient’s face.
- Scenic View: Showcase a beautiful landscape or scenic view.
- Heartfelt Message: Add a heartfelt message to let the recipient know you are thinking of them.
8.8. Get Well Soon Photo Cards
- Uplifting Photo: Use a photo that is comforting and uplifting, such as a nature scene or a pet.
- Encouraging Message: Add an encouraging message to offer support and well wishes.
- Soothing Design: Use a soothing design with calming colors and soft textures.
9. What Paper Types Are Suitable For Photo Card Printing?
Choosing the right paper type is essential for creating high-quality photo cards that look and feel professional. Here are some suitable paper types for photo card printing:
9.1. Matte Cardstock
Matte cardstock has a smooth, non-glossy finish that is perfect for photo cards. It provides excellent print quality and is ideal for designs with a lot of text. Matte cardstock is also less prone to fingerprints and smudges.
9.2. Glossy Cardstock
Glossy cardstock has a shiny, reflective finish that enhances the colors and details of your photos. It is ideal for photo cards that showcase vibrant images. However, glossy cardstock can be prone to fingerprints and glare.
9.3. Semi-Gloss Cardstock
Semi-gloss cardstock offers a balance between matte and glossy finishes. It provides good print quality with a slight sheen that enhances the colors of your photos without being too reflective.
9.4. Linen Cardstock
Linen cardstock has a subtle, textured finish that adds a touch of elegance to your photo cards. It is perfect for designs that require a sophisticated look.
9.5. Recycled Cardstock
Recycled cardstock is an eco-friendly option for photo card printing. It is made from recycled materials and has a natural, slightly textured finish.
9.6. Pearl Cardstock
Pearl cardstock has a shimmery, iridescent finish that adds a touch of glamour to your photo cards. It is ideal for special occasions such as weddings and anniversaries.
9.7. Felt Cardstock
Felt cardstock has a soft, velvety texture that adds a luxurious feel to your photo cards. It is perfect for designs that require a tactile element.
9.8. Kraft Cardstock
Kraft cardstock has a rustic, natural look that is perfect for photo cards with a vintage or handmade feel. It is ideal for designs with earthy tones and simple graphics.
9.9. Cover Stock
Cover stock is a thicker and more durable option for photo card printing. It provides a premium feel and is ideal for designs that require a sturdy card.
9.10. Double Thick Cardstock
Double thick cardstock is the thickest and most luxurious option for photo card printing. It provides a high-end feel and is ideal for special occasions such as weddings and corporate events.
10. How To Add Text And Graphics To Photo Cards?
Adding text and graphics to photo cards enhances their visual appeal and conveys your message effectively. Here’s how to add text and graphics to your photo cards:
10.1. Choose the Right Fonts
Select fonts that are legible and complement the overall design of your photo card. Use a combination of fonts for headings and body text to create visual interest. Ensure that the font size is appropriate for the size of the card and the amount of text.
10.2. Use Color Wisely
Use color to enhance the text and graphics on your photo card. Choose colors that contrast with the background to make the text and graphics stand out. Use a color palette that is consistent with the overall design.
10.3. Add Graphics and Illustrations
Add graphics and illustrations to your photo card to enhance its visual appeal. Use graphics that are relevant to the occasion or theme of the card. Ensure that the graphics are high-resolution and complement the overall design.
10.4. Create a Layout
Create a layout that balances the text and graphics on your photo card. Use a grid system to align the elements and create a sense of order. Ensure that the text and graphics are not too crowded and that there is enough white space.
10.5. Use Text Effects
Use text effects such as drop shadows, outlines, and gradients to add depth and dimension to the text on your photo card. Use these effects sparingly to avoid overwhelming the design.
10.6. Add Borders and Frames
Add borders and frames to your photo card to enhance the visual appeal and draw attention to the photo. Use borders and frames that complement the overall design and do not distract from the photo.
10.7. Use Overlays
Use overlays to add texture and visual interest to your photo card. Use overlays such as patterns, gradients, and textures that complement the overall design.
10.8. Add Watermarks
Add watermarks to your photo card to protect your images and designs. Use watermarks that are subtle and do not distract from the overall design.
10.9. Use Templates
Use templates to create photo cards quickly and easily. Use templates that are professionally designed and customizable to your needs.
10.10. Experiment with Different Styles
Experiment with different styles to create unique and personalized photo cards. Try different fonts, colors, graphics, and layouts to find the style that best suits your needs.
FAQ: How To Make a Card With Photo
1. What is the best software for making photo cards?
Adobe Photoshop, Adobe Spark, and Canva are excellent choices, each offering different levels of features and ease of use.
2. How do I choose the right photo for my card?
Select a high-resolution photo that is clear, well-lit, and relevant to the occasion.
3. What size should my photo card be?
Standard sizes include 4×6 inches, 5×7 inches, and A2 (4.25×5.5 inches), but you can customize based on your preference.
4. What type of paper is best for photo cards?
Matte, glossy, semi-gloss, and linen cardstock are popular choices, each offering a different look and feel.
5. How can I personalize my photo card?
Add a heartfelt message, use custom graphics, and choose colors and fonts that reflect your style.
6. Can I make photo cards on my phone?
Yes, apps like Adobe Spark and Canva allow you to create photo cards on the go.
7. How do I optimize my photos for printing?
Ensure your photos are high-resolution, in CMYK color mode, and properly adjusted for brightness and contrast.
8. Where can I print my photo cards?
You can print them at home with a color printer or use online photo card services like Shutterfly or Minted.
9. How do I add text to my photo card?
Use a design tool to add text layers, choosing legible fonts and colors that complement your design.
10. What are some creative layout ideas for photo cards?
Consider full photo layouts, collages, photo and text overlays, and asymmetrical designs for a unique look.
At dfphoto.net, we encourage you to explore your creativity and capture life’s beautiful moments. Whether you’re a seasoned photographer or just starting, our platform offers a wealth of resources, inspiration, and a vibrant community to support your photographic journey. Visit dfphoto.net today to discover more and connect with fellow photography enthusiasts.
Address: 1600 St Michael’s Dr, Santa Fe, NM 87505, United States. Phone: +1 (505) 471-6001. Website: dfphoto.net.
 A person using Adobe Photoshop Elements to create a photo card