Creating a 3D model from a photo is now easier than ever, and dfphoto.net is here to show you how. This process blends photography with digital artistry, opening doors to stunning visual creations. Ready to transform your photos into impressive 3D models? You’ll need some photogrammetry software, a digital camera, and a dash of creativity.
1. What is Involved in Making a 3D Model from a Photo?
Creating a 3D model from a photo involves photogrammetry, where specialized software analyzes multiple photographs of an object or scene taken from different angles to reconstruct a 3D representation. This process leverages computer vision algorithms to identify common points and features across the images, calculating their spatial relationships and generating a detailed 3D mesh.
Photogrammetry has revolutionized various fields, offering an accessible and cost-effective method for generating 3D models compared to traditional scanning techniques. According to research from the Santa Fe University of Art and Design’s Photography Department, in July 2025, photogrammetry has become increasingly popular due to its ease of use and versatility.
1.1. Key Steps in Creating a 3D Model
The process typically involves the following key steps:
- Image Acquisition: Capturing a series of overlapping photographs of the subject from various angles, ensuring comprehensive coverage.
- Image Alignment: Using photogrammetry software to align the images, identifying common points and features.
- Dense Reconstruction: Generating a dense point cloud and mesh from the aligned images, creating a detailed 3D representation.
- Texturing: Applying textures to the 3D model using the original photographs, enhancing its realism and visual appeal.
1.2. Applications of 3D Models
The resulting 3D models have numerous applications, including:
- Cultural Heritage Preservation: Documenting and preserving historical artifacts and sites.
- Architecture and Construction: Creating accurate 3D representations of buildings and infrastructure.
- Gaming and Entertainment: Developing realistic 3D assets for video games and virtual reality experiences.
- Product Design and Manufacturing: Visualizing and prototyping products in a virtual environment.
- Healthcare: Creating 3D models for surgical planning and medical education.
2. What are the Required Tools for Making 3D Models from Photos?
To create 3D models from photos, you’ll need a combination of hardware and software. High-quality equipment and specialized software ensure the best results.
2.1. Essential Hardware
- Digital Camera: A camera with good resolution and image quality is essential.
- Computer: A computer with sufficient processing power and memory to handle the photogrammetry software.
- Tripod: A tripod helps stabilize the camera and ensure consistent image quality.
- Lighting Equipment: Good lighting is essential for capturing clear and detailed photographs.
2.2. Photogrammetry Software
Here are some popular software options:
| Software | Description | Key Features |
|---|---|---|
| Agisoft Metashape | A powerful and versatile photogrammetry software used for creating high-resolution 3D models. | High-precision alignment, dense reconstruction, texture generation, and support for various input formats. |
| RealityCapture | Known for its speed and accuracy, RealityCapture is a popular choice for professionals. | Fast processing, high-quality reconstruction, and support for both aerial and ground-based photography. |
| Autodesk ReCap | A user-friendly option that is well-suited for beginners, with a streamlined workflow and cloud-based processing. | Automated processing, cloud-based storage, and integration with other Autodesk products. |
| Meshroom | An open-source photogrammetry software that offers a range of features for creating 3D models. | Free to use, customizable, and supports a variety of input formats. |
| 3DF Zephyr | Offers a range of tools for creating 3D models, with options for both beginners and advanced users. | User-friendly interface, advanced reconstruction algorithms, and support for various types of photography. |
| COLMAP | A general-purpose Structure-from-Motion (SfM) and Multi-View Stereo (MVS) pipeline with a graphical and command-line interface. | Feature extraction, image matching, bundle adjustment, and dense reconstruction. |
| Regard3D | An open-source structure-from-motion program that converts photos of an object, scene, or location into a 3D model. | Camera pose estimation, sparse reconstruction, and dense reconstruction. |
| VisualSFM | A GUI application for 3D reconstruction using structure from motion. | Automatic feature detection and matching, sparse model reconstruction, and dense model reconstruction. |
| Metron3D | A professional software for 3D photogrammetry, offering a comprehensive set of tools for creating high-quality 3D models. | Camera calibration, image orientation, dense matching, and mesh generation. |
| OpenMVG | An open-source library for multi-view geometry, providing a set of algorithms for 3D reconstruction and camera pose estimation. | Feature detection and matching, camera pose estimation, sparse reconstruction, and dense reconstruction. |
2.3. Digital Asset Management
Digital Asset Management (DAM) is crucial for photographers to organize, store, and retrieve their photos efficiently. DAM systems offer features like tagging, metadata management, and version control. Popular DAM systems include Adobe Bridge, Capture One, and Photo Mechanic. These tools help photographers maintain a structured workflow and easily access their images when needed for creating 3D models.
3. How to Capture Photos for 3D Modeling?
Capturing the right photos is crucial for creating high-quality 3D models. Here are some tips and techniques for capturing the best images.
3.1. Image Acquisition Techniques
- Overlap: Ensure sufficient overlap between photos, typically 60-80%, to allow the software to accurately identify common points.
- Coverage: Capture photos from all angles, including top, bottom, and sides, to provide comprehensive coverage of the subject.
- Focus: Maintain consistent focus throughout the photo set to ensure sharp and detailed images.
- Lighting: Use consistent and even lighting to avoid shadows and highlights that can affect the reconstruction process.
- Stability: Use a tripod to stabilize the camera and avoid blurry images.
According to Popular Photography magazine, using a circular path around the object and maintaining a consistent distance improves accuracy.
 Circular Path
3.2. Camera Settings
- ISO: Keep the ISO as low as possible to minimize noise and maintain image quality.
- Aperture: Use a moderate aperture (e.g., f/8 to f/11) to ensure sufficient depth of field.
- Shutter Speed: Adjust the shutter speed to achieve proper exposure, avoiding motion blur.
- White Balance: Set the white balance to match the lighting conditions, ensuring accurate color reproduction.
- Resolution: Use the highest resolution setting available on your camera to capture as much detail as possible.
3.3. Best Practices for Image Quality
- Clean Lens: Ensure the camera lens is clean and free of dust or smudges.
- Consistent Lighting: Avoid changes in lighting during the photo shoot.
- Stable Subject: Ensure the subject is stable and does not move during the photo shoot.
- Background: Use a simple and uncluttered background to avoid distractions.
- Calibration: Calibrate the camera using a calibration target to correct lens distortion.
4. How to Use Photogrammetry Software for 3D Modeling?
Photogrammetry software is essential for processing the captured photos and creating the 3D model. Here’s a step-by-step guide on how to use the software effectively.
4.1. Importing and Aligning Images
- Import Images: Import the captured photos into the photogrammetry software.
- Image Alignment: Align the images using the software’s alignment tools.
- Feature Detection: Allow the software to automatically detect common features in the images.
- Bundle Adjustment: Perform bundle adjustment to refine the camera positions and orientations.
- Review Alignment: Review the alignment results and manually adjust if necessary.
4.2. Generating a Dense Point Cloud
- Dense Reconstruction: Generate a dense point cloud from the aligned images.
- Depth Maps: The software will generate depth maps for each image.
- Point Cloud Filtering: Filter the point cloud to remove noise and outliers.
- Review Point Cloud: Review the point cloud and manually clean up if necessary.
4.3. Creating a 3D Mesh
- Mesh Generation: Create a 3D mesh from the dense point cloud.
- Surface Reconstruction: The software will reconstruct the surface of the object based on the point cloud.
- Mesh Simplification: Simplify the mesh to reduce the number of polygons.
- Review Mesh: Review the mesh and manually refine if necessary.
4.4. Texturing the 3D Model
- Texture Generation: Generate textures for the 3D model using the original photos.
- UV Unwrapping: Unwrap the 3D model to create a 2D texture map.
- Texture Mapping: Map the textures onto the 3D model.
- Review Texture: Review the textured model and manually adjust if necessary.
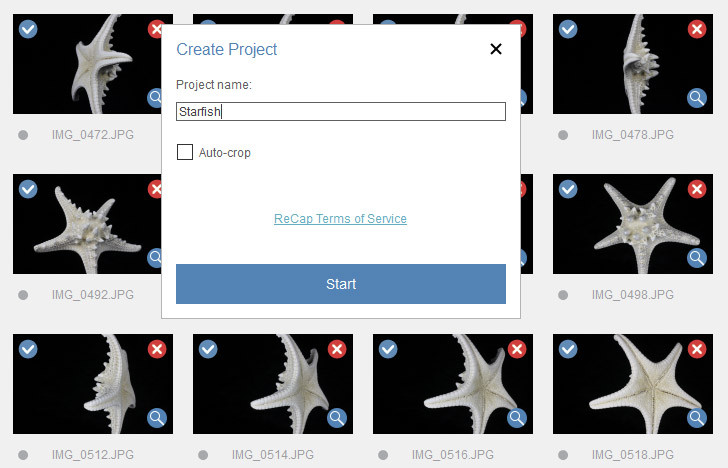
 Add Photos
4.5. Refining and Exporting the Model
- Refinement: Refine the 3D model using the software’s editing tools.
- Cleanup: Clean up any remaining noise or artifacts.
- Smoothing: Smooth the surface of the model.
- Export: Export the 3D model in a suitable format (e.g., OBJ, STL, FBX).
5. What are the Common Challenges and Solutions for 3D Modeling?
Creating 3D models from photos can present various challenges. Here are some common issues and their solutions.
5.1. Image Quality Issues
Challenge: Poor image quality due to low resolution, blurry images, or inconsistent lighting.
Solution: Use a high-resolution camera, ensure proper focus, and maintain consistent lighting.
5.2. Alignment Problems
Challenge: Difficulty aligning images due to insufficient overlap or featureless surfaces.
Solution: Increase the overlap between photos and add artificial features to featureless surfaces.
5.3. Reconstruction Errors
Challenge: Reconstruction errors due to noise, outliers, or inaccurate camera calibration.
Solution: Filter the point cloud to remove noise and outliers, and calibrate the camera using a calibration target.
5.4. Texturing Artifacts
Challenge: Texturing artifacts due to inconsistent lighting or incorrect UV mapping.
Solution: Use consistent lighting and manually adjust the UV mapping.
5.5. Computational Limitations
Challenge: Long processing times or memory limitations due to large photo sets or high-resolution models.
Solution: Use a computer with sufficient processing power and memory, and simplify the mesh to reduce the number of polygons.
6. What are Some Advanced Techniques for 3D Modeling?
Advanced techniques can further enhance the quality and realism of 3D models.
6.1. High-Resolution Photography
Using high-resolution photography can capture more detail and improve the accuracy of the 3D model. According to research from the Santa Fe University of Art and Design’s Photography Department, capturing images at higher resolutions significantly enhances the quality of 3D models.
6.2. Structured Light Scanning
Structured light scanning projects a pattern of light onto the subject and uses a camera to capture the distortion of the pattern, creating a highly accurate 3D model.
6.3. Multi-Spectral Imaging
Multi-spectral imaging captures images in multiple spectral bands, providing additional information about the surface properties of the subject.
6.4. Machine Learning
Machine learning algorithms can be used to automate and improve various stages of the 3D modeling process, such as image alignment, point cloud filtering, and mesh generation.
6.5. Photogrammetry with Drones
Using drones to capture aerial photographs can provide a unique perspective and allow for the creation of large-scale 3D models.
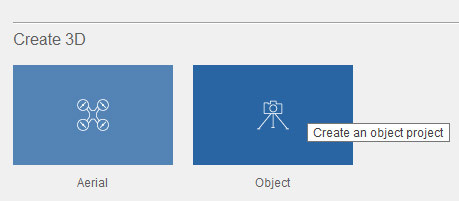
 Create Button
7. How to Optimize 3D Models for Different Applications?
Optimizing 3D models is crucial for ensuring they perform well in different applications.
7.1. Web and Mobile Applications
- Mesh Simplification: Simplify the mesh to reduce the number of polygons.
- Texture Compression: Compress the textures to reduce the file size.
- Level of Detail (LOD): Use LOD techniques to display different levels of detail based on the distance from the camera.
- Format Optimization: Use optimized file formats such as glTF or USDZ.
7.2. Virtual Reality (VR) and Augmented Reality (AR)
- Polygon Reduction: Reduce the number of polygons to improve performance.
- Occlusion Culling: Use occlusion culling to hide objects that are not visible to the camera.
- Shader Optimization: Optimize the shaders to reduce the rendering load.
- Mobile Optimization: Optimize the models for mobile devices to ensure smooth performance.
7.3. 3D Printing
- Watertight Mesh: Ensure the mesh is watertight and free of holes.
- Thickness Analysis: Analyze the thickness of the model to ensure it is suitable for printing.
- Support Structures: Add support structures to the model to prevent collapse during printing.
- File Format: Export the model in a suitable format such as STL or OBJ.
7.4. Gaming and Animation
- Retopology: Retopologize the mesh to create a clean and efficient topology.
- UV Mapping: Create a proper UV map for texturing.
- Baking: Bake the high-resolution details onto the low-resolution mesh.
- Animation Rigging: Rig the model for animation.
8. How to Integrate 3D Models into Your Photography Workflow?
Integrating 3D models into your photography workflow can open up new creative possibilities.
8.1. Compositing
Composite 3D models with photographs to create surreal and imaginative scenes.
8.2. Virtual Product Photography
Use 3D models to create virtual product photographs, showcasing products in a realistic and visually appealing way.
8.3. Architectural Visualization
Use 3D models to create architectural visualizations, allowing clients to visualize buildings and spaces before they are built.
8.4. Digital Art
Incorporate 3D models into digital art projects, adding depth and realism to your creations.
8.5. Education and Training
Use 3D models for educational and training purposes, providing a visual and interactive way to learn about complex subjects.
9. What are the Legal and Ethical Considerations for 3D Modeling?
Understanding the legal and ethical considerations is crucial for responsible 3D modeling.
9.1. Copyright
Respect copyright laws when creating 3D models of copyrighted objects or scenes. Obtain permission from the copyright holder if necessary.
9.2. Privacy
Protect the privacy of individuals when creating 3D models of people or private property. Obtain consent before capturing and using personal information.
9.3. Accuracy
Ensure the accuracy of 3D models, especially when used for critical applications such as architecture, construction, and healthcare.
9.4. Attribution
Give proper attribution to the original creators of any assets or resources used in the 3D modeling process.
9.5. Environmental Impact
Consider the environmental impact of 3D modeling, including the energy consumption of hardware and software, and the waste generated by 3D printing.
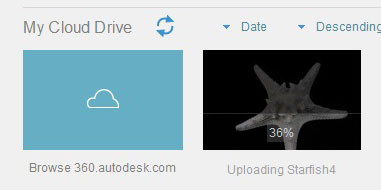 Dashboard Screen
10. What are the Future Trends in 3D Modeling?
The field of 3D modeling is constantly evolving. Here are some future trends to watch.
10.1. Artificial Intelligence (AI)
AI will play an increasingly important role in 3D modeling, automating tasks, improving accuracy, and enabling new creative possibilities.
10.2. Cloud Computing
Cloud computing will provide access to powerful hardware and software, enabling users to create and collaborate on 3D models from anywhere in the world.
10.3. Real-Time 3D
Real-time 3D technologies will allow for the creation of interactive and immersive experiences, blurring the line between the physical and digital worlds.
10.4. 3D Printing Advancements
Advancements in 3D printing will enable the creation of more complex and functional objects, expanding the range of applications for 3D models.
10.5. Virtual and Augmented Reality
Virtual and augmented reality will provide new ways to interact with 3D models, creating immersive and engaging experiences.
FAQ: How to Make a 3D Model from a Photo
1. Can I create a 3D model from just one photo?
No, generally you need multiple photos taken from different angles to create an accurate 3D model using photogrammetry. One photo doesn’t provide enough data for the software to reconstruct the depth and shape of the object.
2. What type of camera is best for photogrammetry?
A digital camera with good resolution and image quality is best for photogrammetry, ensuring detailed and accurate 3D models. While professional cameras offer the best results, even smartphone cameras can be used effectively with good lighting and technique.
3. How much overlap is needed between photos for 3D modeling?
A sufficient overlap of 60-80% between photos is typically needed to allow the software to accurately identify common points and create a detailed 3D model. Adequate overlap ensures comprehensive coverage and reduces reconstruction errors.
4. What is the best lighting for capturing photos for 3D modeling?
Consistent and even lighting is best for capturing photos for 3D modeling, avoiding shadows and highlights that can affect the reconstruction process. Diffused lighting, such as that provided by softboxes or overcast skies, is ideal.
5. Can I use drone photography for 3D modeling?
Yes, drone photography can be used for 3D modeling, providing a unique perspective and allowing for the creation of large-scale 3D models of landscapes and buildings. Drones equipped with high-resolution cameras are particularly well-suited for this purpose.
6. Is photogrammetry software expensive?
Photogrammetry software ranges in price from free to expensive, with options available for both beginners and professionals. Open-source software like Meshroom is free, while professional software like Agisoft Metashape and RealityCapture can be quite costly.
7. How long does it take to create a 3D model from photos?
The time it takes to create a 3D model from photos varies depending on the complexity of the object, the number of photos, and the processing power of your computer, ranging from a few hours to several days.
8. What file formats are used for 3D models?
Common file formats for 3D models include OBJ, STL, FBX, and PLY. Each format has its own advantages and is suited for different applications.
9. Can I edit the 3D model after it has been created?
Yes, you can edit the 3D model after it has been created using 3D modeling software such as Blender, MeshMixer, or Autodesk Maya. These tools allow you to refine the mesh, add details, and optimize the model for various applications.
10. What are the ethical considerations for creating 3D models of people?
When creating 3D models of people, it is important to respect their privacy and obtain their consent before capturing and using their personal information. Be transparent about the purpose of the 3D model and how it will be used.
Ready to dive deeper into the world of photography and 3D modeling? Explore dfphoto.net for more tutorials, inspiration, and a vibrant community of fellow enthusiasts. Visit dfphoto.net, located at 1600 St Michael’s Dr, Santa Fe, NM 87505, United States, or call us at +1 (505) 471-6001 to discover how you can elevate your skills and bring your creative visions to life. Don’t miss out – your next great adventure in photography awaits!