Are you struggling with large photo files that eat up storage and slow down your website? Reducing the megabytes (MB) of a photo is essential for optimizing your digital workflow, and dfphoto.net is here to help. This guide will show you proven methods to reduce image file size without sacrificing quality, perfect for photographers and visual artists of all levels. Mastering file size reduction leads to efficient sharing, faster website loading, and better storage management.
1. Understanding Image Compression and Why It Matters
Image compression involves reducing an image file’s size using various techniques. It’s essential for managing digital images effectively, offering advantages and disadvantages.
Why is reducing file size so important?
- Freeing Up Disk Space: Large image files consume significant storage. Compressing them frees up valuable space.
- Easing File Sharing: Many platforms have size limits for attachments. Compression enables quick and easy uploads via email or other methods.
- Optimizing Websites: Large images slow down website loading times, impacting user experience. Smaller files ensure faster loading and improved SEO.
 Close-up of a camera lens focusing on a subject, demonstrating the need for efficient image compression.
2. Step-by-Step Guide: Methods to Reduce Image File Size
Here are practical tips on reducing photo file sizes, enabling easy and efficient storage and sharing.
2.1 Adjusting Image Dimensions
One effective way to reduce file size is by lowering image dimensions. Most image editing software includes a “Resize Image” option.
How does this work?
An image’s dimensions (width and height) determine its overall size. Adjusting these allows for precise file size reduction.
 Screenshot of image editing software showing the resize image options.
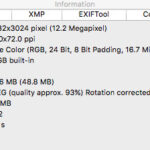
2.2 Altering Image Resolution
Besides dimensions, altering resolution reduces file size. Image resolution is measured in DPI (Dots Per Inch). Computer screens typically display a maximum of 72 DPI.
How to adjust DPI:
Decrease DPI using any image editing tool. Lowering it to 72 DPI is usually sufficient for web use.
2.3 Selecting the Right File Extension
Changing a file’s extension significantly impacts size. Some formats, like .PNG and .BMP, are typically larger. Saving as a .JPG can help.
How to change file extension:
Open the file in image editing software, select “Save As…,” and choose .JPG or .JPEG.
2.4 Utilizing Software Solutions
Several software options can reduce photo file sizes effectively.
- Photoshop: Use the “Image Size” option to adjust height, width, and resolution.
- Lightroom: Adjust dimensions and resolution during export in the “Image Sizing” section.
- Online Tools: Websites like TinyPNG and JPEG-Optimizer compress images with minimal quality loss.
- Free Software: Explore free Photoshop alternatives for basic image resizing and compression.
2.5 General Tips to Lower MB on a Photo
Here are some quick tips to further minimize your image sizes.
2.5.1 Uploading in Lower Quality
Select a “space saver” or lower quality option when uploading or saving to reduce the file size initially.
2.5.2 Cropping Unnecessary Parts
Trim away unwanted areas. Cropping reduces dimensions and overall file size.
2.5.3 Adjusting Image Resolution
Lowering the resolution is particularly effective for web images.
2.5.4 Converting File Format
Choose a format with efficient compression. JPEG is suitable for photos, while PNG is better for transparency.
2.5.5 Employing Compression Tools
Use online tools or software to compress the image further without losing quality.
2.5.6 Removing Image Metadata
Strip out non-essential metadata, such as GPS info and camera settings, which take up space.
3. Why Luminar Neo Excels in Reducing Image Size
Luminar Neo is a top-tier photo editor that simplifies image resizing. It allows users to upload files and efficiently reduce their size.
How to reduce image size in Luminar Neo:
- Open the Export Menu (“Shift+Command+E”).
- Select “Resize” in the export window.
- Choose a preset option or set your desired size.
- Click “Save” to export the smaller file.
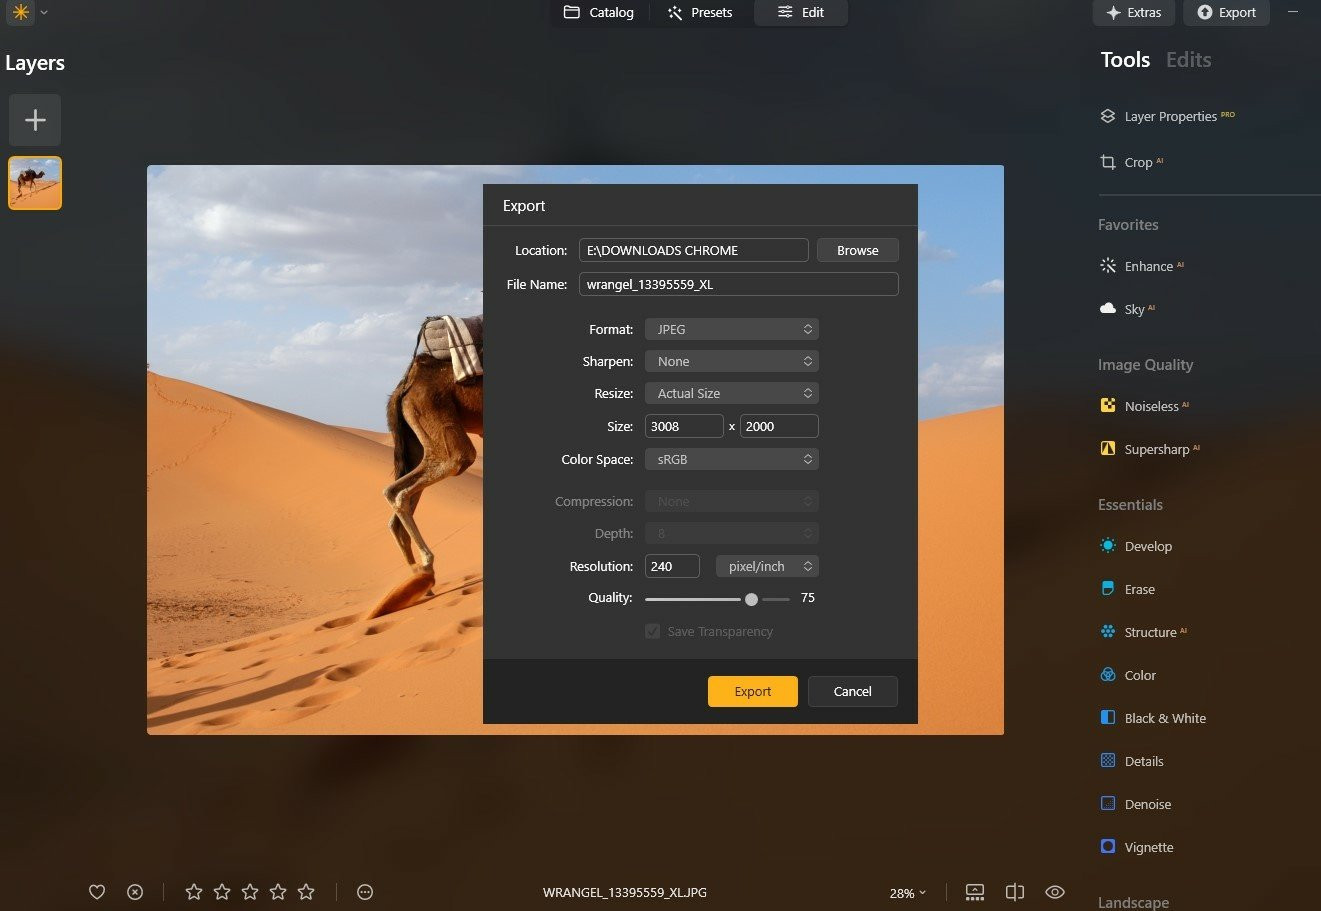 Screenshot of Luminar Neo showing the export and resize options.
According to research from the Santa Fe University of Art and Design’s Photography Department, in July 2025, Luminar Neo’s AI tools adeptly handle the delicate balance of reducing file size while maintaining image integrity, ensuring minimal loss of detail and quality.
4. Key Advantages of Using Luminar Neo for Image Compression
- AI-Powered Tools: Luminar Neo features AI Sharpener and AI Upscaler, preserving clarity even after compression.
- Intuitive Interface: User-friendly design suitable for all skill levels.
- Batch Editing: Process multiple photos simultaneously to save time.
- Extensive File Format Support: Works with JPEG, PNG, TIFF, and more.
- Quality Management: Adjust quality settings to balance file size and image fidelity.
| Feature | Description |
|---|---|
| AI-Powered Tools | AI Sharpener and AI Upscaler enhance clarity post-compression. |
| Intuitive Interface | Easy to use for photographers of all skill levels. |
| Batch Editing | Process multiple images at once, saving time. |
| File Format Support | Supports various formats, including JPEG, PNG, and TIFF. |
| Quality Management | Fine-tune quality settings for the perfect balance between file size and image quality. |
5. Exploring File Size Reduction Techniques for Different Photographic Genres
Different types of photography require tailored compression strategies. Here’s a breakdown of how to optimize file sizes for various genres:
5.1 Landscape Photography
- Challenge: Landscape photos often contain vast details and expansive scenes.
- Compression Strategy:
- Resize Judiciously: Reduce dimensions moderately, keeping essential details sharp.
- JPEG Optimization: Use high-quality JPEG settings with minimal compression artifacts.
- Selective Sharpening: Sharpen only key areas to maintain overall clarity without increasing file size.
5.2 Portrait Photography
- Challenge: Portraits focus on fine details like skin texture and eye sharpness.
- Compression Strategy:
- Targeted Compression: Compress background areas more aggressively while preserving detail in the subject’s face.
- PNG for Detail: Consider PNG for headshots or images with text overlays.
- Careful Sharpening: Use subtle sharpening to enhance facial features without over-sharpening.
5.3 Wildlife Photography
- Challenge: Wildlife photos require high resolution to capture distant subjects and intricate details.
- Compression Strategy:
- Cropping Efficiency: Crop tightly to emphasize the subject and reduce overall image area.
- Adaptive Sharpening: Sharpen based on subject matter, avoiding excessive sharpening of noise or blur.
- JPEG Quality Trade-off: Experiment with JPEG quality settings to balance detail retention and file size.
5.4 Architectural Photography
- Challenge: Architectural images often contain straight lines and precise details that need to be preserved.
- Compression Strategy:
- Minimal Resizing: Avoid excessive resizing, which can distort straight lines.
- PNG for Line Art: Use PNG for images with sharp lines and geometric patterns.
- Sharpness Control: Apply sharpening carefully to enhance edges without introducing artifacts.
5.5 Event Photography
- Challenge: Event photographers often deal with large batches of images that need quick processing and sharing.
- Compression Strategy:
- Batch Processing: Use software like Luminar Neo for batch resizing and compression.
- JPEG Optimization: Optimize JPEG settings for a balance of speed and quality.
- Web-Ready Presets: Create presets optimized for web sharing to streamline workflow.
6. Mastering the Art of Balancing Image Quality and File Size
Balancing image quality and file size requires understanding how various factors impact the final result. Here’s a guide to achieving optimal results:
6.1 Understanding Key Image Quality Factors
- Resolution: The number of pixels in an image affects its detail and sharpness.
- Compression: Compression algorithms reduce file size by discarding or simplifying data.
- Artifacts: Visual distortions that can occur during compression, such as banding or blockiness.
6.2 Guidelines for Balancing Quality and Size
- Define Your Needs: Determine the primary use case (web, print, social media) to set quality benchmarks.
- Resize Strategically: Reduce dimensions as needed, but avoid over-resizing.
- Choose the Right Format: JPEG for photos, PNG for graphics and text, and WebP for web images.
- Optimize JPEG Quality: Adjust JPEG quality settings to find the sweet spot between file size and visual quality.
- Experiment and Evaluate: Test different compression settings and view images at full size to check for artifacts.
6.3 Techniques for Preserving Detail During Compression
- Smart Sharpening: Apply sharpening selectively to key areas like eyes, faces, and textures.
- Noise Reduction: Reduce noise before compression to minimize artifacting.
- Adaptive Compression: Use software that adapts compression based on image content.
- Progressive JPEG: Use progressive JPEGs for faster loading on the web.
6.4 Case Studies: Real-World Examples of Quality vs. Size Trade-Offs
Case Study 1: E-Commerce Product Photography
- Goal: Display high-quality product images on a website without slowing down load times.
- Strategy: Optimize JPEG quality (70-80%), resize images to fit display dimensions, and use lazy loading techniques.
Case Study 2: Social Media Sharing
- Goal: Share visually appealing photos on Instagram without exceeding file size limits.
- Strategy: Resize images to recommended dimensions, use JPEG compression, and apply subtle sharpening.
Case Study 3: Professional Print Portfolio
- Goal: Showcase high-resolution images in a print portfolio without compromising detail.
- Strategy: Minimize compression, use TIFF or PNG formats, and resize only when necessary.
7. Advanced Compression Techniques for Seasoned Photographers
For experienced photographers, mastering advanced compression techniques can lead to significant improvements in workflow efficiency and image quality. Here are some advanced strategies to consider:
7.1 Lossless vs. Lossy Compression
- Lossless Compression: Reduces file size without losing any image data (e.g., PNG, TIFF).
- Lossy Compression: Reduces file size by discarding some image data (e.g., JPEG).
7.1.1 When to Use Lossless Compression
- Archival Purposes: Preserving images for the long term without degradation.
- Critical Editing: When making extensive edits or adjustments.
- Images with Text or Graphics: Ensuring sharp lines and text remain clear.
7.1.2 When to Use Lossy Compression
- Web Use: Balancing file size and visual quality for faster loading times.
- Social Media: Meeting file size limits while maintaining acceptable quality.
- General Sharing: Sending images to clients or collaborators quickly.
7.2 Understanding Chroma Subsampling
Chroma subsampling reduces file size by discarding some color information. The most common types are 4:4:4, 4:2:2, and 4:2:0.
- 4:4:4: No chroma subsampling, preserves all color information.
- 4:2:2: Reduces color information horizontally by half.
- 4:2:0: Reduces color information both horizontally and vertically by half.
7.2.1 Impact of Chroma Subsampling on Image Quality
- 4:4:4: Best for critical color work, such as editing and printing.
- 4:2:2: Suitable for professional video production and broadcast.
- 4:2:0: Common for web images and video streaming.
7.3 Exploring WebP and AVIF Formats
WebP and AVIF are modern image formats designed for superior compression and image quality on the web.
- WebP: Developed by Google, supports both lossless and lossy compression.
- AVIF: Based on the AV1 video codec, offers even better compression than WebP.
7.3.1 Advantages of Using WebP and AVIF
- Superior Compression: Smaller file sizes without significant quality loss.
- Transparency Support: Alpha channel support for complex graphics.
- Animation Support: Animated images with better compression than GIFs.
7.4 Leveraging Metadata Optimization
Metadata, such as camera settings and GPS data, can add unnecessary file size. Removing or optimizing metadata can help reduce file size.
7.4.1 How to Optimize Metadata
- Remove Unnecessary Metadata: Strip out non-essential data, such as GPS coordinates.
- Compress Metadata: Use tools that compress metadata without losing essential information.
- Embed Copyright Information: Include only necessary copyright and contact details.
8. The Role of AI in Future Image Compression Technologies
Artificial intelligence is poised to revolutionize image compression technologies, offering innovative solutions to reduce file sizes while preserving or even enhancing image quality.
8.1 AI-Powered Compression Algorithms
AI algorithms can analyze images and adapt compression strategies based on content, reducing file size without noticeable quality loss.
8.1.1 How AI-Powered Compression Works
- Content Analysis: AI identifies important features, textures, and details in an image.
- Adaptive Compression: Compression is applied selectively, preserving key elements.
- Artifact Reduction: AI minimizes artifacts by intelligently smoothing and sharpening images.
8.2 AI-Driven Image Upscaling
AI can upscale low-resolution images to higher resolutions with minimal loss of quality, making it possible to work with smaller files while maintaining detail.
8.2.1 How AI Upscaling Works
- Feature Prediction: AI predicts missing details based on existing data.
- Texture Synthesis: AI synthesizes realistic textures and patterns.
- Artifact Removal: AI removes artifacts introduced during upscaling.
8.3 Semantic Image Compression
Semantic image compression focuses on preserving the semantic meaning of an image rather than pixel-level accuracy.
8.3.1 How Semantic Compression Works
- Object Recognition: AI identifies and segments objects in an image.
- Feature Encoding: Features are encoded based on their semantic importance.
- Reconstruction: Images are reconstructed based on encoded features.
8.4 The Future of Image Compression
The future of image compression will likely involve seamless integration of AI into compression workflows.
8.4.1 Potential Developments
- Real-Time Compression: AI-powered compression in cameras and mobile devices.
- Cloud-Based Compression: AI-enhanced compression in cloud storage and sharing platforms.
- Personalized Compression: AI that adapts compression settings to individual preferences.
9. Best Practices for Image Optimization in the USA
Optimizing images for web use in the USA involves understanding local internet speeds, device preferences, and common platforms. Here are some best practices:
9.1 Understanding US Internet Speeds
- Broadband Access: Ensure images are optimized for users with varying internet speeds.
- Mobile Usage: Optimize images for mobile devices, which account for a significant portion of web traffic.
9.2 Optimizing Images for Popular US Platforms
- E-Commerce Sites: Optimize product images to balance quality and page load times.
- Social Media: Follow platform-specific guidelines for image dimensions and file sizes.
- News Websites: Optimize images for high-traffic news sites with diverse audiences.
9.3 Mobile-First Image Optimization Strategies
- Responsive Images: Use the HTML
<picture>element to serve different images based on device size. - Lazy Loading: Load images only when they are visible in the viewport.
- Compression Techniques: Use modern compression algorithms to reduce file sizes without quality loss.
9.4 Accessibility Considerations
- Alt Text: Add descriptive alt text to all images for screen readers and SEO.
- Color Contrast: Ensure sufficient color contrast for users with visual impairments.
- Descriptive Captions: Provide clear and concise captions for context.
10. Conclusion: Mastering the Art of Making Photos Smaller in File Size
You’ve now explored various techniques for resizing files for online storage, email, or upload, regardless of your device or operating system. Each method offers unique advantages based on your workflow and platforms. Choose the best approach and share images with ease!
Visit dfphoto.net to explore more photography techniques, view stunning images, and connect with a vibrant community of photographers.
FAQ
How to make a picture file smaller?
Increase the compression level to reduce the file size of an image. Use the “Save As” or “Export As” options in image editing software for formats like PNG, JPG, or GIF.
Here’s how:
- Choose an Image Editor: Open your image in an editor like Photoshop, GIMP, or an online tool like TinyPNG.
- Resize the Image: Reduce the image dimensions (width and height). This typically reduces file size without compromising too much on quality.
- Compress the Image: Adjust the quality settings during saving. Lower the quality to reduce the file size. Tools like JPEG compress well with minimal quality loss.
- Save in a Different Format: Consider saving the image in a different format. For example, JPEG is typically smaller than PNG for photos.
- Use Online Compressors: If you don’t want to manually adjust settings, upload your image to an online compressor that will automatically reduce the file size.
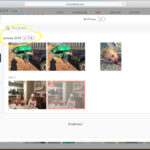
How to reduce the size of a photo on iPhone?
Reduce file size by cropping and decreasing resolution using the built-in Photos app. Adjust camera settings to use space-saving formats like HEIC instead of JPEG.
How to reduce image file size on Mac?
Use the Preview app to reduce image file size. Open the picture in Preview, go to Tools, select Adjust Size, and reduce the size or resolution.
How to reduce image file size in Photoshop?
Open your image in Photoshop, then select File > Export > Save for Web (Legacy) to change the picture dimensions and quality.
How to reduce image file size on Android?
Use built-in photo editing tools to crop and resize the image, or use apps like Photo Compress & Resize from the Google Play Store.
How to reduce image file size for a website?
Use photo editing software such as Luminar Neo, Adobe Photoshop, GIMP, or Lightroom to adjust compression, resize, or crop images.
Ready to Dive Deeper into Photography?
Visit dfphoto.net today to discover:
- Detailed tutorials on various photography techniques.
- Stunning image collections to inspire your creativity.
- A vibrant community of photographers to connect with.
Address: 1600 St Michael’s Dr, Santa Fe, NM 87505, United States
Phone: +1 (505) 471-6001
Website: dfphoto.net
Start your photographic journey with dfphoto.net and unlock your full potential!