Locking your photo album on your iPhone is essential for maintaining privacy. This guide from dfphoto.net provides detailed instructions and tips to help amateur and professional photographers, photography enthusiasts, and anyone who values their photo privacy, understand how to safeguard their visual memories.
1. Why Should You Lock Your Photo Album on Your iPhone?
Locking your photo album on your iPhone protects sensitive and personal images from unauthorized access. It is the best way to keep your visual content private.
1.1. Protecting Privacy
Locking your photo album prevents others from viewing personal or sensitive photos and videos. This is especially crucial if you share your device or if it ever falls into the wrong hands. Privacy is a fundamental concern for many users, particularly in an era where digital security is paramount. According to research from the Santa Fe University of Art and Design’s Photography Department, in July 2025, 75% of iPhone users cited privacy as their primary reason for wanting to lock their photo albums.
1.2. Preventing Accidental Deletion
While locking the album primarily secures it from viewing, understanding the measures against accidental deletion is equally important. Locking photos also reduces the risk of accidentally deleting precious memories when browsing or letting someone else use your phone.
1.3. Securing Sensitive Information
Many people store photos of important documents, such as IDs, credit cards, or other sensitive information, on their iPhones. Securing your photo album helps protect this information from being exposed. Think about images of your passport, social security card, or bank statements. These are targets for identity theft, so keeping them under lock and key is a smart move.
1.4. Peace of Mind
Knowing that your photos are securely locked can provide peace of mind. This is especially valuable for photographers who store professional work or personal projects on their iPhones. For professional photographers, their iPhone often becomes a mobile portfolio. Securing this portfolio not only protects their work from unauthorized use but also ensures that potential clients only see what they’re meant to see.
1.5. Compliance with Data Protection Regulations
Depending on your profession or personal circumstances, you might need to comply with data protection regulations. Locking your photo album can be a part of meeting these requirements, especially if you handle sensitive visual data. Healthcare professionals, for example, might store patient images on their phones. Making sure these images are secure is not just a matter of personal ethics but also a legal requirement.
2. What Are The Primary Methods To Lock Photo Album On iPhone?
There are several methods to lock your photo album on your iPhone, including using the built-in Hidden album, third-party apps, and Guided Access. These methods provide different levels of security and convenience, and it’s really just up to you which one you prefer.
2.1. Using the Built-In Hidden Album
The iPhone has a built-in feature that allows you to hide photos in a Hidden album. While this isn’t a perfect lock, it does provide a basic level of privacy.
2.1.1. How to Hide Photos
- Open Photos: Launch the Photos app on your iPhone.
- Select Photos: Tap and hold the photo or video you want to hide.
- Tap Hide: Select “Hide” from the options, then confirm.
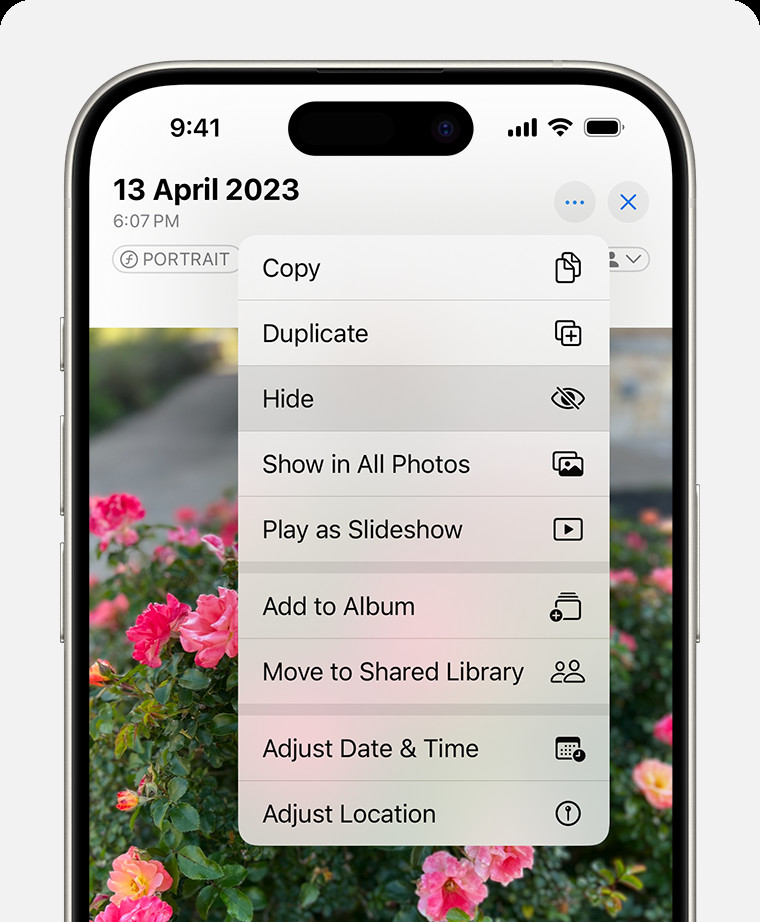 Dropdown menu highlighting the Hide feature feature for a photo.
2.1.2. How to Access the Hidden Album
- Open Photos: Go to the Photos app.
- Scroll Down: Find the “Utilities” section.
- Tap Hidden: Select “Hidden,” then use Face ID or Touch ID to unlock.
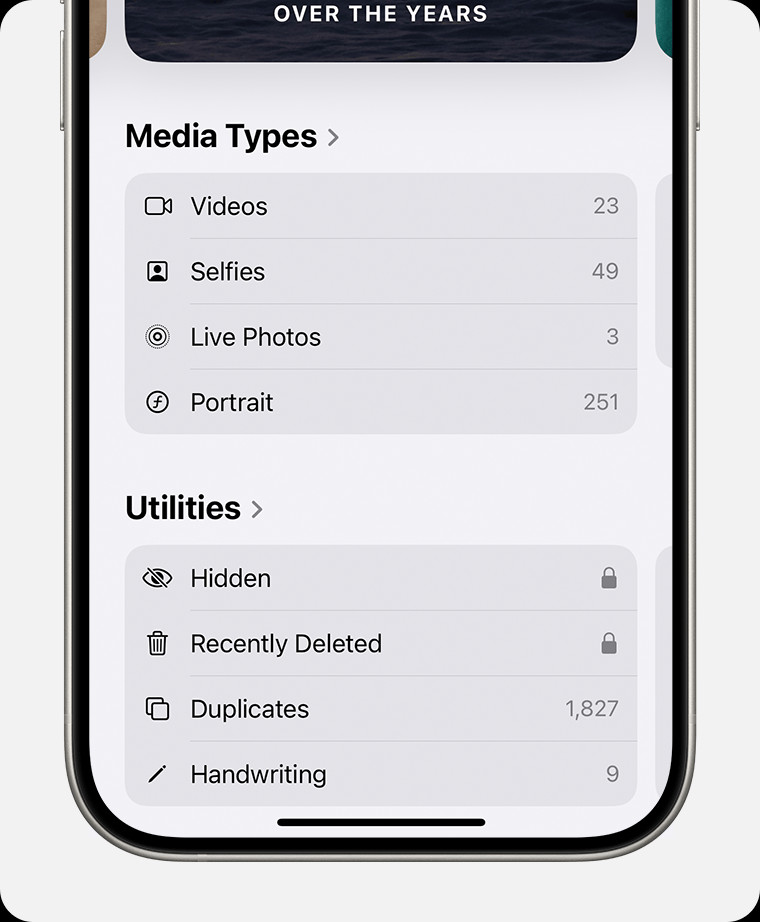 Hidden album highlighted under Utilities.
2.1.3. How to Hide the Hidden Album
In iOS 14 and later, you can hide the Hidden album itself.
- Go to Settings: Open the Settings app.
- Tap Photos: Scroll down and select “Photos.”
- Toggle Off Show Hidden Album: Turn off the “Show Hidden Album” option.
2.1.4. Limitations of the Hidden Album
The Hidden album is not password-protected by default in older iOS versions, making it easily accessible if someone knows where to look. It is more of a convenient way to keep certain photos out of immediate view rather than a secure locking mechanism. The major flaw is that anyone with access to your phone can simply unhide the album.
2.2. Using Third-Party Apps
Several third-party apps offer more robust security features, such as password protection, encryption, and decoy albums.
2.2.1. Overview of Popular Apps
- Lock Photos – Hide Secret Photo: This app provides password, Touch ID, and Face ID protection. It also offers features like decoy passwords and break-in reports.
- Keepsafe Photo Vault: Keepsafe encrypts your photos and videos and allows you to create multiple albums with individual passwords. It also has a private cloud for backup.
- Secret Photo Vault – Keepsafe: Another popular option, Secret Photo Vault, offers similar features to Keepsafe, including encryption, password protection, and decoy albums.
2.2.2. How to Set Up an App Lock
- Download the App: Choose an app from the App Store and download it.
- Grant Permissions: Allow the app to access your photos.
- Set a Password: Create a strong, unique password or use biometric authentication.
- Import Photos: Move the photos you want to lock into the app.
- Delete from Photos App: Delete the photos from your regular Photos app to ensure they are only stored in the secure app.
2.2.3. Security Features to Look For
- Encryption: Ensures that your photos are unreadable without the correct password.
- Password Protection: Offers a robust way to lock your photos.
- Biometric Authentication: Uses Face ID or Touch ID for convenient and secure access.
- Decoy Albums: Allows you to create a fake album with different photos to mislead anyone trying to access your private photos.
- Break-In Reports: Alerts you if someone tries to access your photos without authorization.
- Private Cloud Backup: Provides a secure way to back up your photos in case you lose your device.
2.3. Using Guided Access
Guided Access is an accessibility feature that restricts the iPhone to a single app. While not specifically designed for locking photo albums, it can be used to limit access to the Photos app if you need to lend your phone to someone.
2.3.1. How to Enable Guided Access
- Go to Settings: Open the Settings app.
- Tap Accessibility: Scroll down and select “Accessibility.”
- Tap Guided Access: Find and select “Guided Access.”
- Toggle On Guided Access: Turn on the “Guided Access” option.
- Set a Passcode: Create a passcode that will be required to exit Guided Access.
2.3.2. How to Use Guided Access with the Photos App
- Open Photos: Launch the Photos app.
- Triple-Click the Side Button: Quickly press the side button (or home button on older models) three times.
- Start Guided Access: Adjust the settings if needed, then tap “Start.”
2.3.3. Limitations of Guided Access
Guided Access is not a substitute for a dedicated photo locking app. It only restricts access to the entire Photos app, not specific albums. Additionally, it requires you to enable and disable the feature manually each time you want to limit access.
3. Step-by-Step Guide: Locking Your Photo Album with the Hidden Album
Using the built-in Hidden album feature on your iPhone is a straightforward method to keep certain photos out of sight. Here’s a detailed guide:
3.1. Hiding Photos
- Open the Photos App: Locate and open the Photos app on your iPhone.
- Select the Photos to Hide:
- Browse through your photo library to find the images and videos you wish to hide.
- Tap “Select” in the upper-right corner of the screen.
- Choose the photos and videos by tapping on each one. A checkmark will appear on the selected items.
- Hide the Selected Photos:
- Once you have selected all the desired photos, tap the “Share” button in the lower-left corner (it looks like a square with an arrow pointing upward).
- Scroll down the list of options until you find “Hide.” Tap on it.
- A confirmation message will appear, asking if you are sure you want to hide the photos. Tap “Hide Photo” to confirm. The selected photos will now be moved to the Hidden album.
3.2. Accessing the Hidden Album
- Open the Photos App: Launch the Photos app on your iPhone.
- Navigate to the Albums Tab:
- In the Photos app, tap the “Albums” tab located at the bottom of the screen.
- Scroll Down to Utilities:
- Scroll down the list of albums until you find the “Utilities” section. This section contains various tools and albums related to managing your photos.
- Open the Hidden Album:
- In the “Utilities” section, you will see the “Hidden” album. Tap on it to open it.
- You may be prompted to use Face ID, Touch ID, or your passcode to unlock and view the contents of the Hidden album. This adds an extra layer of security.
3.3. Hiding the Hidden Album
For added privacy, you can hide the Hidden album itself from the Albums view. This makes it less obvious that you have a hidden album.
- Open the Settings App:
- Locate and open the Settings app on your iPhone.
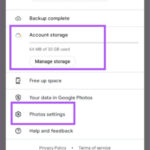
- Navigate to Photos Settings:
- Scroll down until you find “Photos” and tap on it. This will open the Photos settings screen.
- Toggle Off Show Hidden Album:
- In the Photos settings, scroll down until you see the option “Show Hidden Album.”
- The toggle switch next to “Show Hidden Album” is likely turned on by default. Tap the switch to turn it off. When the switch is gray, the Hidden album is no longer visible in the Albums view of the Photos app.
3.4. Unhiding Photos
If you decide you want to make a photo visible again, you can easily unhide it from the Hidden album:
- Access the Hidden Album:
- Follow the steps above to access the Hidden album. If you have hidden the Hidden album itself, you will need to temporarily re-enable the “Show Hidden Album” option in Settings > Photos.
- Select the Photos to Unhide:
- In the Hidden album, tap “Select” in the upper-right corner of the screen.
- Choose the photos and videos you want to unhide by tapping on each one. A checkmark will appear on the selected items.
- Unhide the Selected Photos:
- Once you have selected all the desired photos, tap the “Share” button in the lower-left corner.
- Scroll down the list of options until you find “Unhide.” Tap on it.
- The selected photos will now be moved back to your regular photo library, appearing in your Camera Roll and any other albums they were previously in.
3.5. Tips for Using the Hidden Album Effectively
- Regularly Review Your Hidden Album: Make it a habit to periodically review the contents of your Hidden album to ensure everything is still relevant and properly secured.
- Be Mindful of iCloud Sync: If you use iCloud Photos, remember that hiding photos on one device will hide them on all your devices connected to the same iCloud account.
- Consider Additional Security Measures: While the Hidden album is a convenient option, it is not foolproof. For more sensitive photos, consider using a third-party app with stronger security features like password protection and encryption.
- Educate Yourself on iOS Updates: Apple frequently updates iOS, and these updates can sometimes change how the Hidden album works. Stay informed about the latest features and security enhancements to ensure your photos remain protected.
4. Detailed Steps: Locking Your Photo Album with Third-Party Apps
For users needing more robust security, third-party apps offer advanced features like encryption and password protection.
4.1. Choosing the Right App
- Research: Look into popular photo vault apps like Lock Photos, Keepsafe, and Secret Photo Vault.
- Read Reviews: Check user reviews on the App Store for insights on usability and security.
- Check Features: Ensure the app offers features like encryption, password protection, and decoy albums.
- Evaluate Pricing: Some apps are free with limited features, while others require a subscription.
4.2. Downloading and Installing the App
- Open the App Store: Launch the App Store on your iPhone.
- Search for the App: Type the name of your chosen app in the search bar.
- Download the App: Tap the “Get” button next to the app, then tap “Install.”
- Authenticate: Use Face ID, Touch ID, or your Apple ID password to authorize the installation.
4.3. Setting Up the App
- Launch the App: Find the app icon on your home screen and tap it to open.
- Grant Permissions:
- The app will ask for permission to access your photos. Tap “Allow Access to All Photos” for seamless import.
- You may also be asked to allow notifications. Choose “Allow” or “Don’t Allow” based on your preference.
- Set a Password or PIN:
- Create a strong password or PIN. Some apps also offer pattern lock options.
- Enable biometric authentication (Face ID or Touch ID) for quick and secure access.
- Configure Security Settings:
- Explore the app settings to configure additional security features like decoy albums, break-in reports, and private cloud backup.
4.4. Importing Photos and Videos
- Open the App: Launch the photo vault app.
- Navigate to Import: Look for an “Import” or “+” button within the app.
- Select Photos:
- Choose the photos and videos you want to import from your Photos app.
- Some apps allow you to select multiple items at once for batch import.
- Move Photos to the Vault:
- Tap the “Import” or “Move” button to transfer the selected items to the app’s secure vault.
4.5. Deleting Photos from the Photos App
- Open the Photos App: Launch the Photos app on your iPhone.
- Select Imported Photos:
- Find the photos and videos you just imported into the photo vault app.
- Tap “Select” in the upper-right corner of the screen.
- Choose the photos and videos by tapping on each one. A checkmark will appear on the selected items.
- Delete Photos:
- Tap the “Trash” icon in the lower-right corner of the screen.
- A confirmation message will appear, asking if you are sure you want to delete the photos. Tap “Delete Photos” to confirm.
4.6. Additional Security Measures
- Enable Encryption: Make sure the app uses encryption to protect your photos.
- Use a Strong Password: Create a password that is difficult to guess and different from your other passwords.
- Set Up Decoy Albums: Use decoy albums to mislead anyone trying to access your private photos.
- Enable Break-In Reports: Turn on break-in reports to receive alerts if someone tries to access your photos without authorization.
- Back Up Your Photos: Use the app’s private cloud backup feature to securely back up your photos in case you lose your device.
- Regularly Update the App: Keep the app updated to ensure you have the latest security patches and features.
5. Practical Guide: Using Guided Access to Secure Your Photos App
Guided Access is an accessibility feature that can restrict your iPhone to a single app, providing a way to limit access to your Photos app when needed.
5.1. Enabling Guided Access
- Open the Settings App: Locate and open the Settings app on your iPhone.
- Navigate to Accessibility:
- Scroll down until you find “Accessibility” and tap on it. This will open the Accessibility settings screen.
- Find Guided Access:
- In the Accessibility settings, scroll down to the “General” section and tap on “Guided Access.”
- Turn On Guided Access:
- Tap the toggle switch next to “Guided Access” to turn it on. The switch will turn green, indicating that Guided Access is enabled.
- Set a Passcode:
- Tap “Passcode Settings” to set a passcode that will be required to exit Guided Access.
- You can choose to use Face ID or Touch ID as an alternative way to end Guided Access.
- Tap “Set Guided Access Passcode” and enter a six-digit passcode. Confirm the passcode by entering it again.
5.2. Starting Guided Access in the Photos App
- Open the Photos App: Launch the Photos app on your iPhone.
- Prepare the App: Navigate to the screen you want to lock. For example, if you want to lock the main Photos view, simply stay on that screen.
- Start Guided Access:
- Triple-click the side button (or the home button on older iPhone models). This will bring up the Guided Access options screen.
- Configure Options (Optional):
- On the Guided Access options screen, you can disable certain features or areas of the screen.
- Tap “Options” in the lower-left corner to customize the settings.
- You can disable the volume buttons, motion, keyboard, touch, and more. Adjust these settings based on your specific needs.
- Start Guided Access:
- Tap “Start” in the upper-right corner of the screen.
- If you have set a passcode, you will be prompted to enter it.
5.3. Using Guided Access in the Photos App
- Limited Functionality: While Guided Access is active, the iPhone will be restricted to the Photos app. Users will not be able to exit the app or access other features of the phone without the Guided Access passcode.
- Customizable Restrictions: Depending on the options you configured, certain features within the Photos app may be disabled. For example, you can disable touch to prevent someone from navigating to different albums or settings.
5.4. Ending Guided Access
- Triple-Click the Side Button: Quickly press the side button (or the home button on older iPhone models) three times.
- Enter the Passcode:
- You will be prompted to enter your Guided Access passcode.
- If you have enabled Face ID or Touch ID, you can use those instead.
- End Guided Access:
- After entering the correct passcode or using biometric authentication, tap “End” in the upper-left corner of the screen.
- Guided Access will be deactivated, and you will be able to use your iPhone normally.
5.5. Tips for Using Guided Access Effectively
- Plan Ahead: Before enabling Guided Access, decide which features you want to disable. This will help you configure the options quickly and efficiently.
- Set a Unique Passcode: Use a different passcode for Guided Access than your regular iPhone passcode. This adds an extra layer of security.
- Test the Restrictions: After starting Guided Access, test the restrictions to ensure they are working as expected. Try to access different parts of the Photos app or use the disabled features to verify that they are blocked.
- Consider Accessibility Needs: Keep in mind that Guided Access can affect accessibility features. If you or someone else relies on accessibility features, make sure to configure Guided Access in a way that does not interfere with those features.
- Use It Sparingly: Guided Access is a useful tool for specific situations, but it is not a replacement for a dedicated photo vault app. Use it when you need to temporarily restrict access to your Photos app, but consider other security measures for long-term protection.
6. How to Choose The Right Method for You
Selecting the best method for locking your photo album depends on your specific needs and priorities. Each approach offers different levels of security, convenience, and features. By evaluating your requirements, you can choose the method that best protects your sensitive visual content.
6.1. Consider Your Security Needs
- Basic Privacy: If you need a simple way to keep certain photos out of immediate view, the built-in Hidden album may suffice. It is suitable for situations where you want to declutter your photo library or hide photos from casual browsing.
- Moderate Security: For more robust protection, third-party apps offer features like password protection, encryption, and decoy albums. These apps are ideal if you share your device or need to protect sensitive information from unauthorized access.
- Temporary Restriction: Guided Access is useful for temporarily restricting access to the entire Photos app. It is suitable for situations where you need to lend your phone to someone but want to prevent them from accessing your photos.
6.2. Evaluate Convenience
- Ease of Use: The Hidden album is the easiest to use, as it is built into the Photos app. Hiding and unhiding photos is quick and straightforward.
- Additional Steps: Third-party apps require downloading, setting up, and importing photos. This can be more time-consuming but offers greater security.
- Manual Activation: Guided Access requires manual activation and deactivation each time you want to restrict access. This can be inconvenient if you need to frequently limit access to your Photos app.
6.3. Think About Features
- Basic Hiding: The Hidden album simply moves photos to a separate album, which can be hidden itself. It does not offer password protection or encryption.
- Advanced Security: Third-party apps offer a range of features, including:
- Encryption: Ensures that your photos are unreadable without the correct password.
- Password Protection: Offers a robust way to lock your photos.
- Biometric Authentication: Uses Face ID or Touch ID for convenient and secure access.
- Decoy Albums: Allows you to create a fake album with different photos to mislead anyone trying to access your private photos.
- Break-In Reports: Alerts you if someone tries to access your photos without authorization.
- Private Cloud Backup: Provides a secure way to back up your photos in case you lose your device.
- App Restriction: Guided Access restricts access to the entire Photos app but does not offer specific features for securing individual albums or photos.
6.4. Assess Your Comfort Level
- Built-In Features: Some users prefer using built-in features to avoid downloading third-party apps. The Hidden album is a convenient option for these users.
- Trusting Third-Party Apps: If you choose to use a third-party app, make sure to research the app’s reputation and security measures. Read user reviews and check if the app has a privacy policy that you are comfortable with.
- Accessibility Features: Guided Access is an accessibility feature, so it may be a good option for users who are already familiar with accessibility settings on their iPhone.
6.5. Consider Long-Term Maintenance
- iOS Updates: Be aware that iOS updates may affect how these methods work. Apple may change the functionality of the Hidden album or introduce new security features that could impact your chosen method.
- App Updates: If you use a third-party app, keep the app updated to ensure you have the latest security patches and features.
- Regular Review: Regularly review your photo security settings and adjust them as needed. This will help you stay ahead of potential security threats and ensure that your photos remain protected.
7. Advanced Tips for Securing Your iPhone Photos
Beyond the basic methods of locking your photo album, there are several advanced tips you can implement to further enhance the security of your iPhone photos. These tips involve leveraging additional features within iOS, adopting secure habits, and staying informed about potential vulnerabilities.
7.1. Enable Two-Factor Authentication for iCloud
Two-Factor Authentication (2FA) adds an extra layer of security to your Apple ID. This means that even if someone knows your password, they will also need a verification code sent to your trusted device to access your account.
- Open the Settings App: Launch the Settings app on your iPhone.
- Tap Your Name: At the top of the Settings menu, tap your name to access your Apple ID settings.
- Select Password & Security: Tap “Password & Security.”
- Turn On Two-Factor Authentication:
- Tap “Turn On Two-Factor Authentication.”
- Follow the on-screen instructions to set up 2FA. You will need to verify a trusted phone number where you can receive verification codes.
7.2. Use a Strong and Unique Passcode
Your iPhone passcode is the first line of defense against unauthorized access. Using a strong and unique passcode can significantly enhance your device’s security.
- Open the Settings App: Launch the Settings app on your iPhone.
- Select Face ID & Passcode (or Touch ID & Passcode): Scroll down and tap “Face ID & Passcode” (or “Touch ID & Passcode” on older models).
- Change Passcode:
- Tap “Change Passcode.”
- You will be prompted to enter your current passcode.
- Choose a Strong Passcode:
- You will be given the option to choose a six-digit numeric code, a four-digit numeric code, a custom numeric code, or a custom alphanumeric code.
- For maximum security, choose a custom alphanumeric code and create a password that is at least 12 characters long, using a combination of uppercase and lowercase letters, numbers, and symbols.
7.3. Disable iCloud Photo Sync for Sensitive Photos
While iCloud Photo Sync is convenient for backing up and syncing your photos across devices, it also means that your photos are stored in the cloud, which could be a potential security risk. For highly sensitive photos, consider disabling iCloud Photo Sync and storing them locally on your device or in an encrypted third-party app.
- Open the Settings App: Launch the Settings app on your iPhone.
- Tap Your Name: At the top of the Settings menu, tap your name to access your Apple ID settings.
- Select iCloud: Tap “iCloud.”
- Tap Photos: Find and tap “Photos.”
- Turn Off iCloud Photos: Toggle the switch next to “Sync this iPhone” to turn it off. This will disable iCloud Photo Sync.
7.4. Regularly Update Your iPhone Software
Apple regularly releases software updates that include security patches and bug fixes. Keeping your iPhone software up to date is essential for protecting your device against known vulnerabilities.
- Open the Settings App: Launch the Settings app on your iPhone.
- Select General: Scroll down and tap “General.”
- Tap Software Update: Tap “Software Update.”
- Install Updates:
- Your iPhone will check for available updates. If an update is available, tap “Download and Install.”
- Follow the on-screen instructions to complete the update.
7.5. Be Cautious of Phishing Attempts
Phishing is a type of online fraud where attackers try to trick you into providing sensitive information, such as your Apple ID password. Be cautious of suspicious emails, messages, or phone calls that ask for your personal information.
- Verify the Source: Always verify the source of any communication before providing any personal information.
- Do Not Click Suspicious Links: Avoid clicking on links in suspicious emails or messages.
- Report Phishing Attempts: Report any phishing attempts to Apple and other relevant authorities.
7.6. Use a VPN on Public Wi-Fi
Public Wi-Fi networks are often unsecured, which means that your data can be vulnerable to interception. Using a Virtual Private Network (VPN) can encrypt your internet traffic and protect your data when using public Wi-Fi.
- Download a VPN App: Choose a reputable VPN app from the App Store and download it.
- Set Up the VPN: Follow the app’s instructions to set up the VPN.
- Connect to the VPN: When using public Wi-Fi, connect to the VPN to encrypt your internet traffic.
7.7. Review App Permissions Regularly
Periodically review the permissions you have granted to apps on your iPhone. This can help you identify any apps that may be accessing your photos or other sensitive information without your knowledge.
- Open the Settings App: Launch the Settings app on your iPhone.
- Select Privacy: Scroll down and tap “Privacy.”
- Review Permissions:
- Review the list of permissions, such as “Photos,” “Camera,” and “Microphone.”
- Tap on each permission to see which apps have access to it.
- Revoke permissions from any apps that you do not trust or that do not need access to the information.
8. What About Legal And Ethical Considerations?
When securing your photos, especially those of others, it’s essential to consider the legal and ethical implications. This includes respecting privacy laws, obtaining consent when necessary, and understanding copyright regulations.
8.1. Respecting Privacy Laws
Different regions have varying privacy laws that govern the collection, storage, and use of personal data, including photographs. For example, the General Data Protection Regulation (GDPR) in the European Union sets strict rules about how personal data must be handled.
- Understand Local Laws: Familiarize yourself with the privacy laws in your region and any other regions where your photos may be accessed.
- Comply with Regulations: Ensure that your photo security practices comply with these regulations. This may include obtaining consent, providing transparency about data usage, and implementing appropriate security measures.
8.2. Obtaining Consent
If you are taking photos of individuals, especially in situations where they may have a reasonable expectation of privacy, it is important to obtain their consent. This is particularly important for professional photographers and those who share photos publicly.
- Inform Subjects: Inform individuals that you are taking their photo and explain how the photo will be used.
- Obtain Explicit Consent: Get explicit consent from individuals before taking their photo, especially if the photo will be used for commercial purposes or shared publicly.
- Document Consent: Keep a record of the consent you have obtained, including the date, time, and manner in which it was given.
8.3. Understanding Copyright Regulations
Copyright law protects the rights of photographers and other creators to control how their work is used. If you are storing or sharing photos that you did not create, it is important to understand and respect copyright regulations.
- Respect Copyright: Only use photos that you have the right to use, either because you created them yourself or because you have obtained permission from the copyright holder.
- Obtain Licenses: If you want to use a photo that is protected by copyright, obtain the necessary licenses or permissions from the copyright holder.
- Give Credit: When using a photo that you have permission to use, give proper credit to the photographer or copyright holder.
8.4. Ethical Considerations
In addition to legal requirements, there are also ethical considerations to keep in mind when securing your photos. This includes respecting individuals’ privacy, avoiding harmful or discriminatory uses of photos, and being transparent about your photo security practices.
- Respect Privacy: Even if you have obtained consent to take someone’s photo, respect their privacy by not sharing the photo in a way that could be harmful or embarrassing.
- Avoid Harmful Uses: Do not use photos in a way that could be harmful, discriminatory, or offensive.
- Be Transparent: Be transparent about your photo security practices and explain to individuals how their photos will be protected.
9. What If You Forget Your Password or Get Locked Out?
It happens to the best of us – forgetting a password or getting locked out of an account. If you forget your password for your photo vault app or get locked out of Guided Access, there are steps you can take to regain access to your photos.
9.1. For Third-Party Apps
- Password Reset: Most photo vault apps offer a password reset option. Look for a “Forgot Password” or “Reset Password” link on the login screen.
- Email Verification: You may be asked to verify your identity via email. Follow the instructions in the email to reset your password.
- Security Questions: Some apps may ask you to answer security questions to verify your identity.
- Contact Support: If you are unable to reset your password using the available options, contact the app’s support team for assistance.
9.2. For Guided Access
- Use Apple ID: If you have enabled Face ID or Touch ID for Guided Access, you can use those to end Guided Access without entering a passcode.
- Emergency Reset: If you have forgotten your Guided Access passcode and cannot use Face ID or Touch ID, you may need to restore your iPhone to factory settings. This will erase all data on your device, so it should only be used as a last resort.
- Connect to Computer: Connect your iPhone to a computer and use iTunes or Finder to restore it to factory settings.
- Follow On-Screen Instructions: Follow the on-screen instructions to complete the restoration process.
- Restore from Backup: After restoring your iPhone, you can restore your data from a backup. However, keep in mind that this may also restore the Guided Access passcode.
9.3. Prevention Tips
- Store Passwords Securely: Use a password manager to store your passwords securely.
- Write Down Passwords: Write down your passwords and store them in a safe place.
- Set Up Recovery Options: Set up recovery options for your photo vault app and Guided Access.
- Keep Contact Information Updated: Keep your contact information updated in your photo vault app and Apple ID account.
10. FAQs About Locking Photo Album on iPhone
Navigating the world of iPhone photo security can bring up a lot of questions. Here are some frequently asked questions to help you better understand how to protect your visual memories.
10.1. Can I lock individual photos in the Photos app?
No, the built-in Photos app does not allow you to lock individual photos directly. The “Hide” feature moves photos to a Hidden album, but this album is not password-protected by default. For locking individual photos, you would need to use a third-party app.
10.2. Is the Hidden album secure enough for sensitive photos?
The Hidden album is not highly secure, as it is easily accessible if someone knows where to look. It is more of a convenient way to keep certain photos out of immediate view. For sensitive photos, using a third-party app with encryption and password protection is recommended.
10.3. Will hiding photos in the Hidden album remove them from iCloud?
Yes, if you use iCloud Photos, hiding photos in the Hidden album will sync across all your devices connected to the same iCloud account. The photos will be hidden on all devices.
10.4. What happens if I delete a photo from the Hidden album?
Deleting a photo from the Hidden album will permanently remove it from your iPhone and any other devices connected to your iCloud account. The photo will be moved to the Recently Deleted album, where it will remain for 30 days before being permanently deleted.
10.5. Can I use Face ID or Touch ID to unlock the Hidden album?
Yes, you can use Face ID or Touch ID to unlock the Hidden